Networks - Blocked Locations

You can block the device access to specific network locations, regardless of the subject category or risk level of the device. In addition, you can also set the severity level for the events generated when Mobile Security blocks access to these network locations and configure whether to show the event notification in the Mobile Security Protect app.
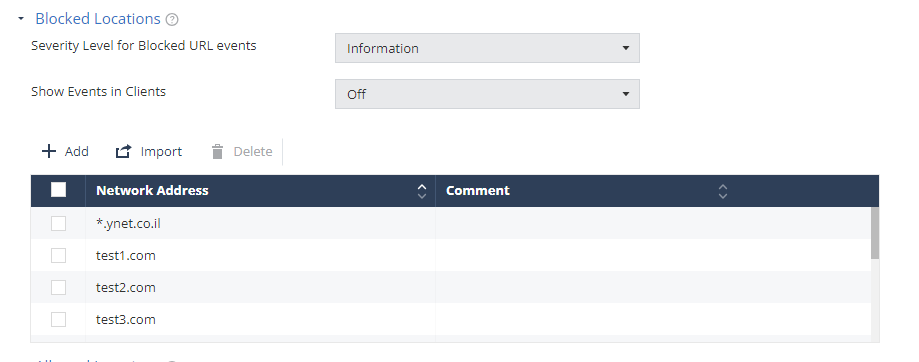
  1. Go to Policy and select a policy profile.
  2. Click Network > Content Inspection > Blocked Locations.
  3. Click Add.

    A pop-up window appears.

  4. In the Location field, enter the network location in one of these formats (IPv4, IPv6, Domain Name (DN), DN/URL, + Wildcards).
  5. (Optional) Add your comments.
  6. Click Add.
  7. To import a list of network locations, click Import and upload the .CSV file with the locations list.

    Note:

    The uploaded list replaces the existing list. This allows you to import a list of locations from other systems, such as Firewall and Gateway, into Mobile Security On-device Network Protection policy settings.

  8. From the Severity Level for Blocked URL events drop-down list, select the severity level.
  9. From the Show Events in Clients drop-down list, select one of these:
    • Off (Default) - The end-user does not receive the event notification in the Mobile Security Protect app, when Mobile Security blocks access to the network location.

    • On - The end-user receives an event notification in the Mobile Security Protect app, when Mobile Security blocks access to the network location.

  10. To remove a network location from the list, select it and click Delete.
  11. To save the policy changes, click Save.
    Note:
    • You can add up to 100 entries to the Blocked Locations list.
    • If a domain in the blocked location is still accessible by the device, then the domain is in the default allowed list. Collect the device logs (see sk179614) and contact Check Point Support.