
HTTPS Settings
-
Click Network Protection > HTTPS Settings.

-
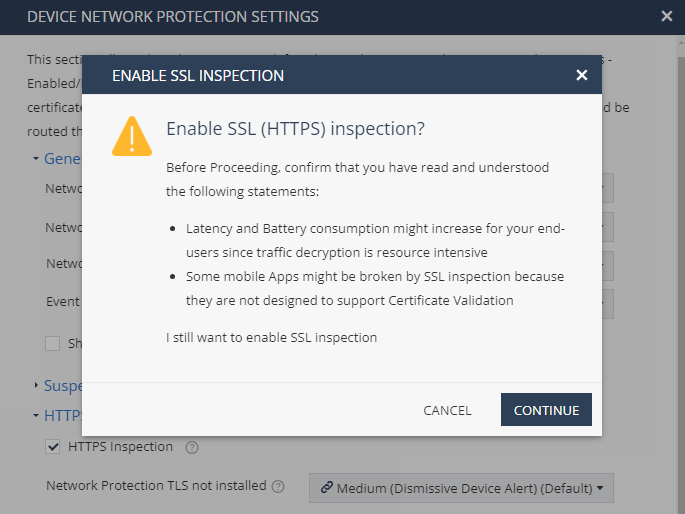
To enable SSL inspection, select the HTTPS Inspection checkbox.
The Enable SSL Inspection window appears.
 Note:
Note:-
For Mobile Security/ONP to decrypt the HTTPS traffic, the mobile apps and browsers must support users' CA certificate.
-
The browsers that support SSL inspection on Android are:
Brave Browser
com.brave.browser
Bromite Browser
org.bromite.bromite
Chrome Beta
com.chrome.beta
Chrome Canary
com.chrome.canary
Chrome Dev
com.chrome.dev
Chromer
arun.com.chromer
Ecosia Browser
com.ecosia.android
Google Chrome
com.android.chrome
Huawei Browser
com.huawei.browser
Kiwi Browser
com.kiwibrowser.browser
Microsoft Edge
com.microsoft.emmx
Naked Browser
com.fevdev.nakedbrowser
Naked Browser LTS (Light)
com.fevdev.nakedbrowserlts
Opera Browser
com.opera.browser
Samsung Internet Browser
com.sec.android.app.sbrowser
Samsung Internet Browser Beta
com.sec.android.app.sbrowser.beta
Vivaldi Browser
com.vivaldi.browser
Yandex Browser
com.yandex.browser
-
-
In the Inspection CA section, select the CA certificate that ONP will use to inspect HTTPS traffic on the end-user device.
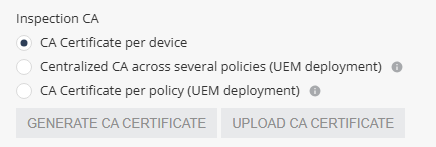
Select one of these:
-
CA Certificate per device - Allows you to generate a unique certificate for each device. The user must manually install the certificate on the device when installing the Mobile Security Protect app.
-
Centralized CA across several policies - Allows you to use the centralized CA certificate across several policies. To generate the centralized CA certificate, go to Settings > Generating a Centralized Root CA Certificate.
Note:If you initially chose to use a centralized CA certificate but later changed to a different CA certificate option:
-
The current policy will no longer use the centralized certificate.
-
The centralized CA certificate remains active and continues to be associated with all other policies in your account.
-
-
CA Certificate per policy - If your organization uses a UEM, you can generate a new CA certificate for each policy, download and deploy it on the end-user device through UEM.
-
To generate a CA certificate issued by Check Point, click Generate CA Certificate. The new certificate is valid for one year from the current date, as shown in Expiration date.
-
To use a self-signed or a third-party CA certificate, click Upload CA Certificate.
For the Transport Layer Security (TLS) certificate to be valid:
-
The certificate must have a lifecycle of at least 30 days and not longer than 390 days.
-
The certificate must be valid for more than 30 days from the time it is uploaded to the Mobile Security Administrator Portal.
-
Note:Check Point recommends you renew the CA certificate at least two weeks before the expiration date. To renew the CA certificate, see Appendix E - Renewing a CA Certificate.
-
-