
Generating a Centralized Root CA Certificate
- Go to Settings > Privacy/Security.
-
In the Central HTTPS Inspection Root CA section, click Generate Certificate.
-
Do one of these:
- To generate a CA certificate issued by Check Point, click Generate CA Certificate.The system generates a certificate valid for one year from the generation date, as shown in Expiration date.Note:
Check Point recommends you renew the CA certificate at least two weeks before the expiration date. To renew the CA certificate, see Appendix E - Renewing a CA Certificate.
- To use a self-signed or a third-party CA certificate, click Upload CA
Certificate.
- In the pop-up window, upload the certificate.Note:
For the Transport Layer Security (TLS) certificate to be valid:
-
The certificate must have a lifecycle of at least 30 days and not longer than 390 days.
-
The certificate must be valid for more than 30 days from the time it is uploaded to the Mobile Security Administrator Portal.
-
- Enter the certificate password.
- Click Verify.
- If there are no errors, click Add.
- In the pop-up window, upload the certificate.
- To generate a CA certificate issued by Check Point, click Generate CA Certificate.
-
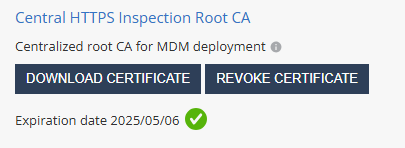
If you have generated a CA certificate by Check Point, click Download Certificate.
The system downloads the certificate to your computer.
-
Upload the new certificate to the UEM.
For more information, see CA Certificate Deployment Using the UEM section for the relevant UEM in Mobile Security Integration Guide.
-
To revoke the certificate, click Revoke Certificate.
Important:
Revoking the centralized certificate will remove it from all policies that use it.
To apply the centralized CA certificate to multiple policies in your tenant, go to HTTPS Settings in Network Protection settings.