
Block Page
The Block Page setting allows you to customize the content displayed on the block page that appears when a user accesses a web page blocked by the organization's security policy.

To customize, go to Settings > Customization > Block Page.

To prevent Cross-Site Scripting (XSS) attacks, the text on the Block Page is always sanitized. Any hyperlinks or URLs added to this page are displayed as plain text on mobile devices.
-
To add the main logo, in the Main company logo section, click Upload and upload the image for the main logo. Check Point logo is the default.
Note:
The height of the logo must be less than 79 pixels. Supported file types are .png and .jpeg, with a maximum size of 150KB.


-
To add the secondary logo, in the Secondary company logo section, click Upload and upload the image for the secondary logo.
Note:
The height of the logo must be less than 96 pixels. Supported file types are .png and .jpeg, with a maximum size of 150KB.

-
In the Page texts section, select the language of text to be displayed on the block page and click Save.
The default language is English.
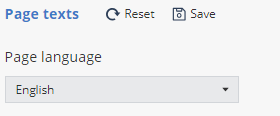
To reset to default language, click Reset and then Save.
Note:If the mobile OS is configured in an unsupported language, the block page is displayed in English.
-
Expand any of these:
-
URL Filtering, Blocked Locations and Conditional Access
-
Zero Phishing
-
MiTM
-
File download blocked
-
File scan (Threat Emulation)

- In the Title field, enter the title for the block page.
- In the Description field, enter the reason for blocking the page.
- To preview the changes, click Preview.
- To reset the values to default, click Reset.
-
- To save the page text in the current language, in the Page texts section, click Save.