Step 5 - Connectors

  • Inbound connector - For all modes.

  • Journaling Outbound - For Detect modes.

These connectors send traffic to and receive traffic from the cloud.

Note:

Note - These connectors are used for Detect modes. For information on the configuration for Protect (Inline) mode, see Step 7 - Protect (Inline) Protection Mode Policy Configuration on Avanan.

To configure the Avanan Inbound connector:

  1. In the Exchange admin center, from the left navigation pane, click Mail flow > Connectors.
  2. To create a new connector, click Add a connector.
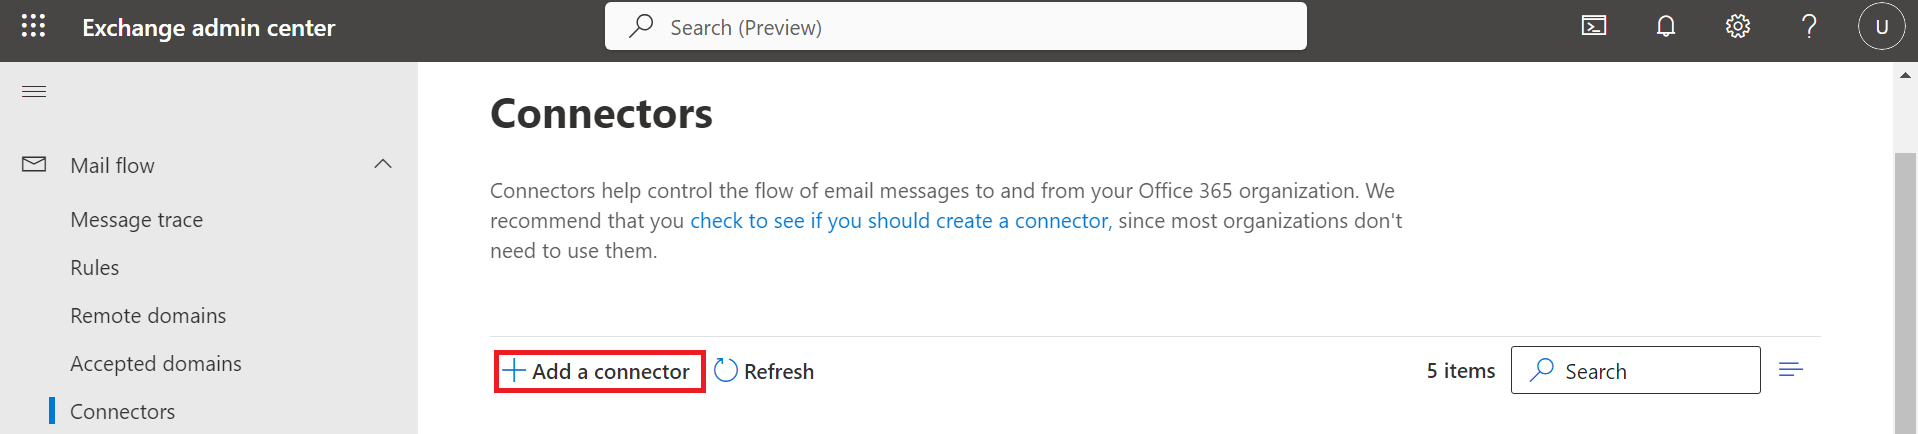
  3. For From, select Partner organization.
  4. For To, select Office 365.
  5. Click Next.
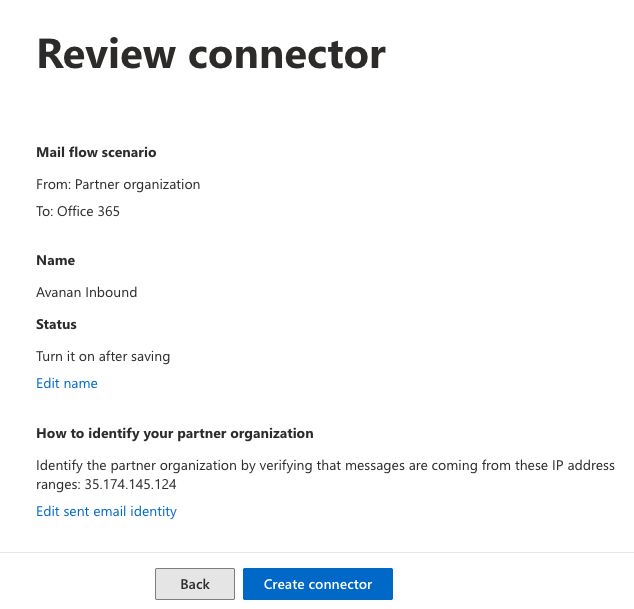
  6. For Name, enter Avanan Inbound.
  7. For Description, enter Avanan Inbound Connector.
  8. For What do you want to do after the connector is saved?, select Turn it on.
  9. Click Next.
  10. For How do you want to identify the partner organization, select By verifying that the IP address of the sending server matches one of the following IP addresses, which belong to your organization address.
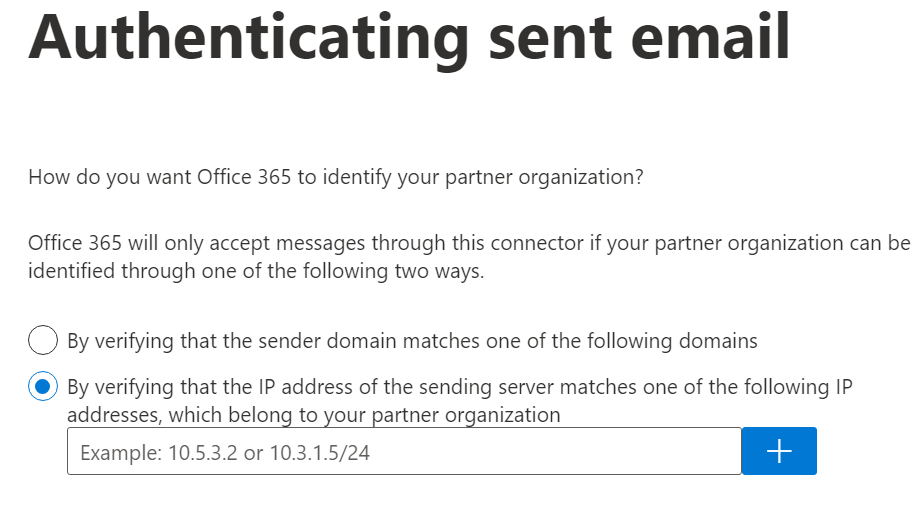
  11. Enter the IP address relevant to your region and click +.
    • If your data residency is in the United States, enter this IP address:

      • 18.97.17.224/28

      • 35.174.145.124

    • If your data residency is in Europe, enter this IP address:

      • 3.40.131.0/28

      • 52.212.19.177

    • If your data residency is in Australia, enter this IP address:

      • 13.211.69.231

      • 18.98.196.176/28

    • If your data residency is in Canada, enter this IP address:

      • 15.222.110.90

      • 18.99.4.64/28

    • If your data residency is in India, enter this IP address:

      • 3.109.187.96

      • 18.96.227.0/28

    • If your data residency is in United Kingdom, enter this IP address:

      • 3.41.0.160/28

      • 13.42.61.32

    • If your data residency is in United Arab Emirates, enter this IP address:

      • 3.29.194.128

      • 18.96.97.192/28

    • If your data residency is in Singapore, enter this IP address:

      • 3.44.1.224/28

      • 18.99.40.64

  12. Click Next.
  13. For What security restrictions do you want to apply?, select Reject email messages if they are not sent over TLS.
  14. Click Next.
  15. In the Review connector window, verify the settings and click Create connector.
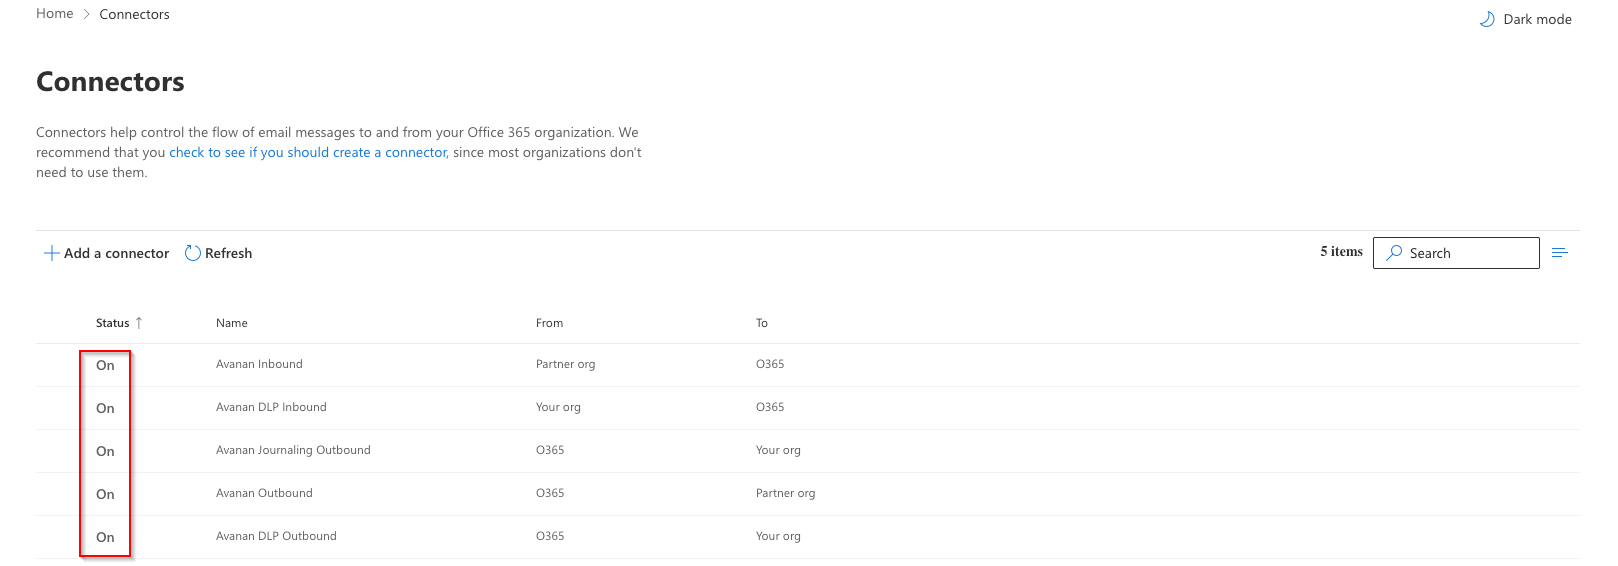
  16. Verify that the status of connectors is On.
Configure the AvananDLP Inbound Connector

  1. In the Exchange admin center, from the left navigation pane, click Mail flow > Connectors.
  2. To create a new connector, click Add a connector.
  3. For From, select Your organization.
  4. For To, select Office 365.
  5. Click Next.
  6. For Name, enter Avanan DLP Inbound.
  7. For Description, enter Avanan DLP Inbound Connector.
  8. For What do you want to do after the connector is saved?, select Turn it on.
  9. Click Next.
  10. For How do you want to identify your organization, select By verifying that the IP address of the sending server matches one of the following IP addresses, which belong to your organization address.
  11. Enter the IP address relevant to your region and click +.
    • If your data residency is in the United States, enter this IP address:

      • 18.97.17.224/28

      • 35.174.145.124

    • If your data residency is in Europe, enter this IP address:

      • 3.40.131.0/28

      • 52.212.19.177

    • If your data residency is in Australia, enter this IP address:

      • 13.211.69.231

      • 18.98.196.176/28

    • If your data residency is in Canada, enter this IP address:

      • 15.222.110.90

      • 18.99.4.64/28

    • If your data residency is in India, enter this IP address:

      • 3.109.187.96

      • 18.96.227.0/28

    • If your data residency is in United Kingdom, enter this IP address:

      • 3.41.0.160/28

      • 13.42.61.32

    • If your data residency is in United Arab Emirates, enter this IP address:

      • 3.29.194.128

      • 18.96.97.192/28

    • If your data residency is in Singapore, enter this IP address:

      • 3.44.1.224/28

      • 18.99.40.64

  12. Click Next.
  13. For What security restrictions do you want to apply?, select Reject email messages if they are not sent over TLS.
  14. Click Next.
  15. In the Review connector window, verify the settings and click Create connector.
  16. Verify that the status of connectors is On.

Configure the Journaling Outbound Connector

  1. In the Exchange admin center, from the left navigation pane, click Mail flow > Connectors.
  2. To create a new connector, click Add a connector.
  3. For From, select Office 365.
  4. For To, select Partner organization.
  5. Click Next.
  6. For Name, enter:

    Avanan Journaling Outbound

  7. For Description (Optional), enter:

    Avanan Journaling Outbound connector

  8. For What do you want to do after connector is saved?, select Turn it on.
  9. Click Next.
  10. For Specify when do you want to use this connector?, select Only when email messages are sent to these domains.
  11. Add the new domain: {portal}@{portal}-mail.avanan.net (replace "{portal}" with your portal name) and then click +.
  12. Click Next.
  13. For How do you want to route email messages?, select Route email through these smart hosts.
  14. Enter the host domain name: {portal}-mail.avanan.net (replace "{portal}" with your portal name) and then click +.
  15. Click Save and then Next.
  16. For How should Office 365 connect to your partner organization's email server?, select Always use Transport Layer Security (TLS) to secure the connection.
  17. For Connect only if the recipient's email server certificate matches this criteria, select Any digital certificate, including self-signed certificates.
  18. Click Next.
  19. Check your settings before validation and click Next.
  20. Click the + icon and Enter this email address: manual-{portal}@{portal}-mail.avanan.net (replace "{portal}" with your portal name) and click +.
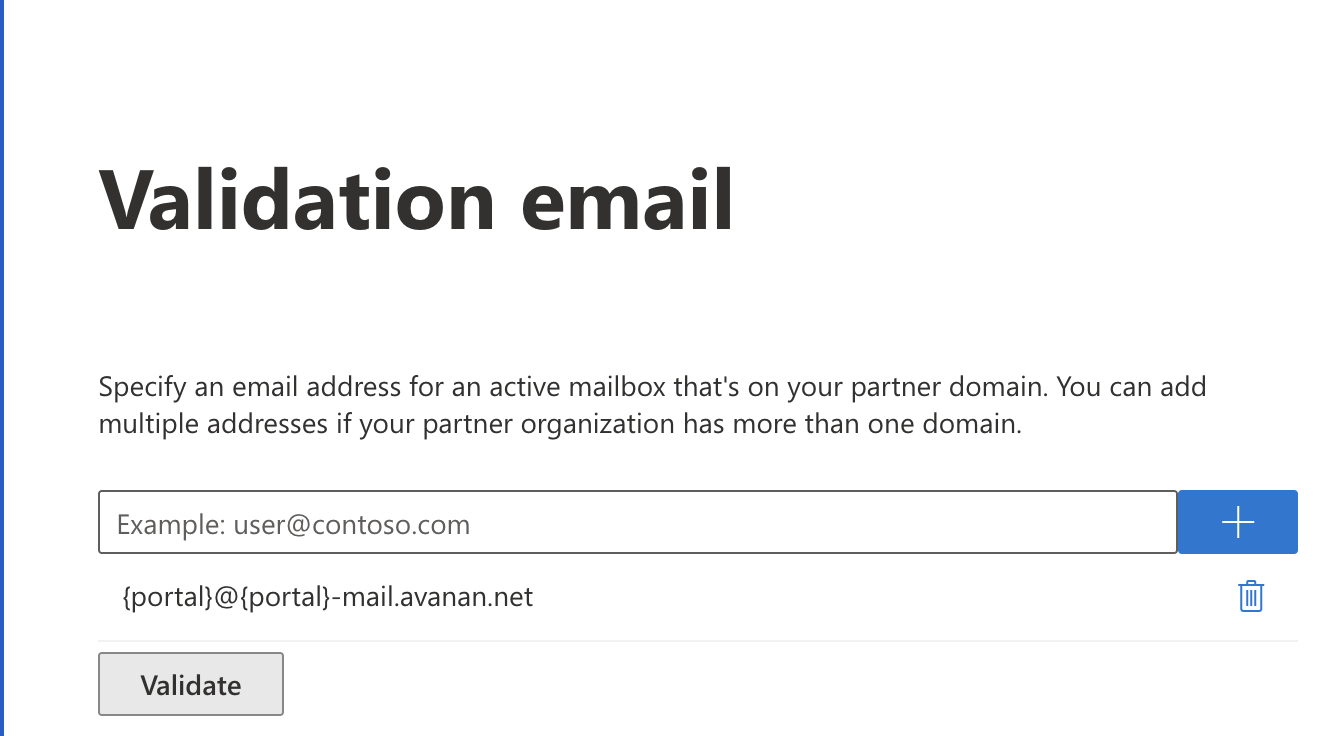
  21. Click Validate.
  22. In the Review connector window, verify the settings and click Create connector.
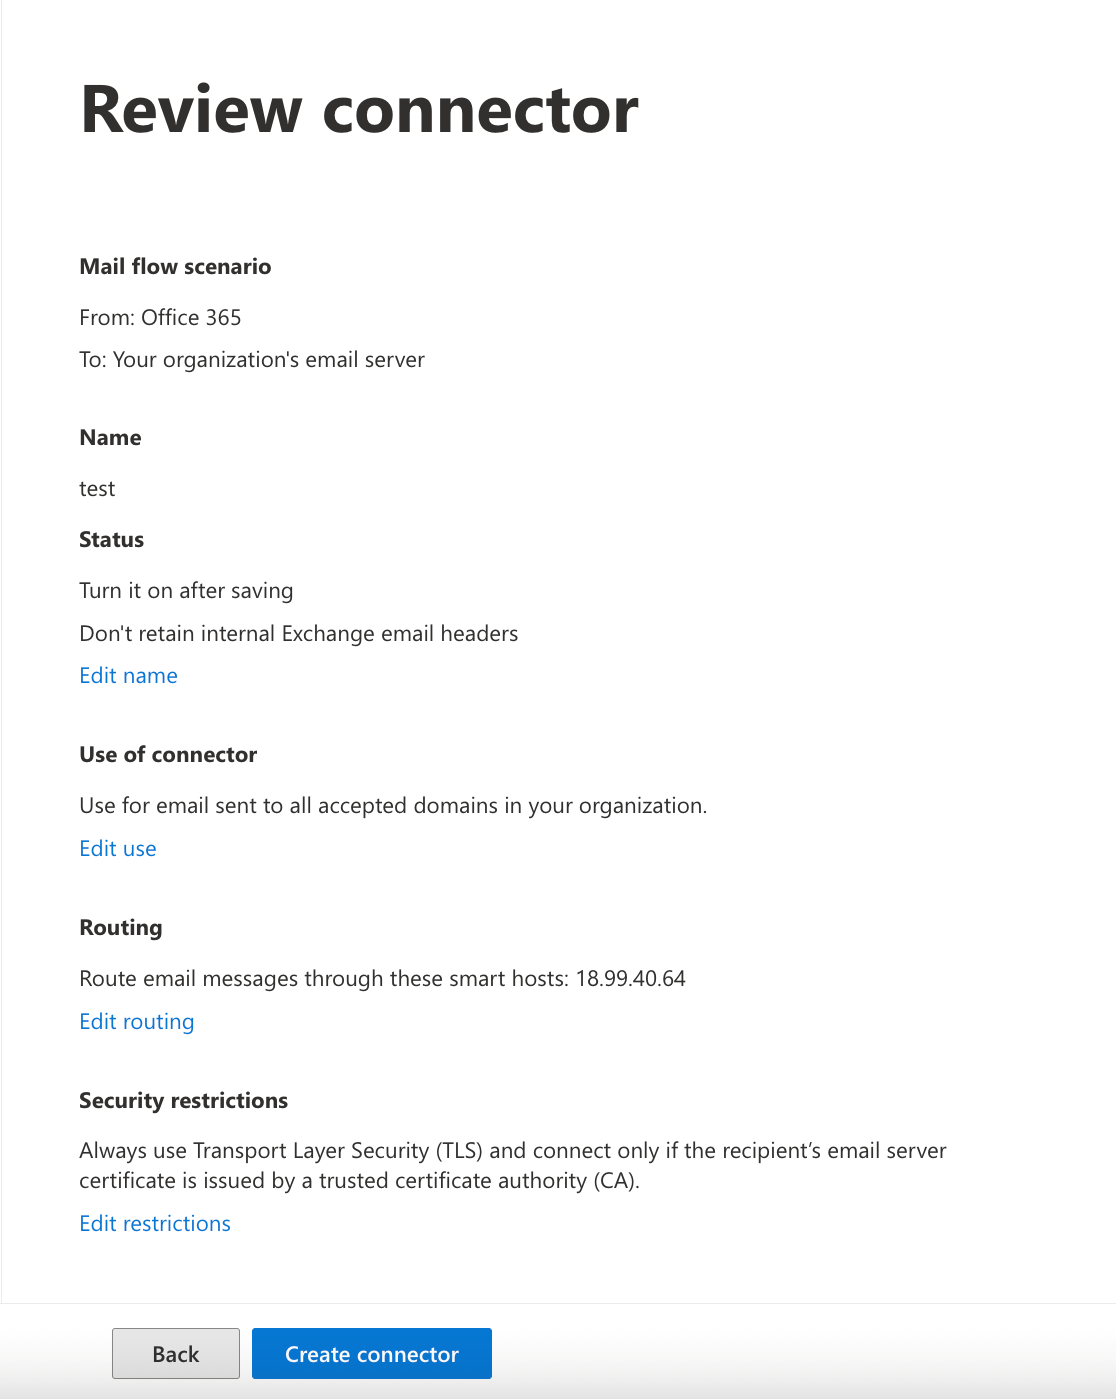
  23. Verify that the status of connectors is On.