Appendix A - Creating a User with Specific Roles in ServiceNow

This task describes how to create a ServiceNow user and assign specific roles for use with Playblocks. It includes login steps, user creation, password setup, and role configuration.

To create a user with specific roles in ServiceNow:

  1. Log in to your ServiceNow account.

    https://<instance>.service-now.com

  2. In the left pane, go to User Administration > Users.
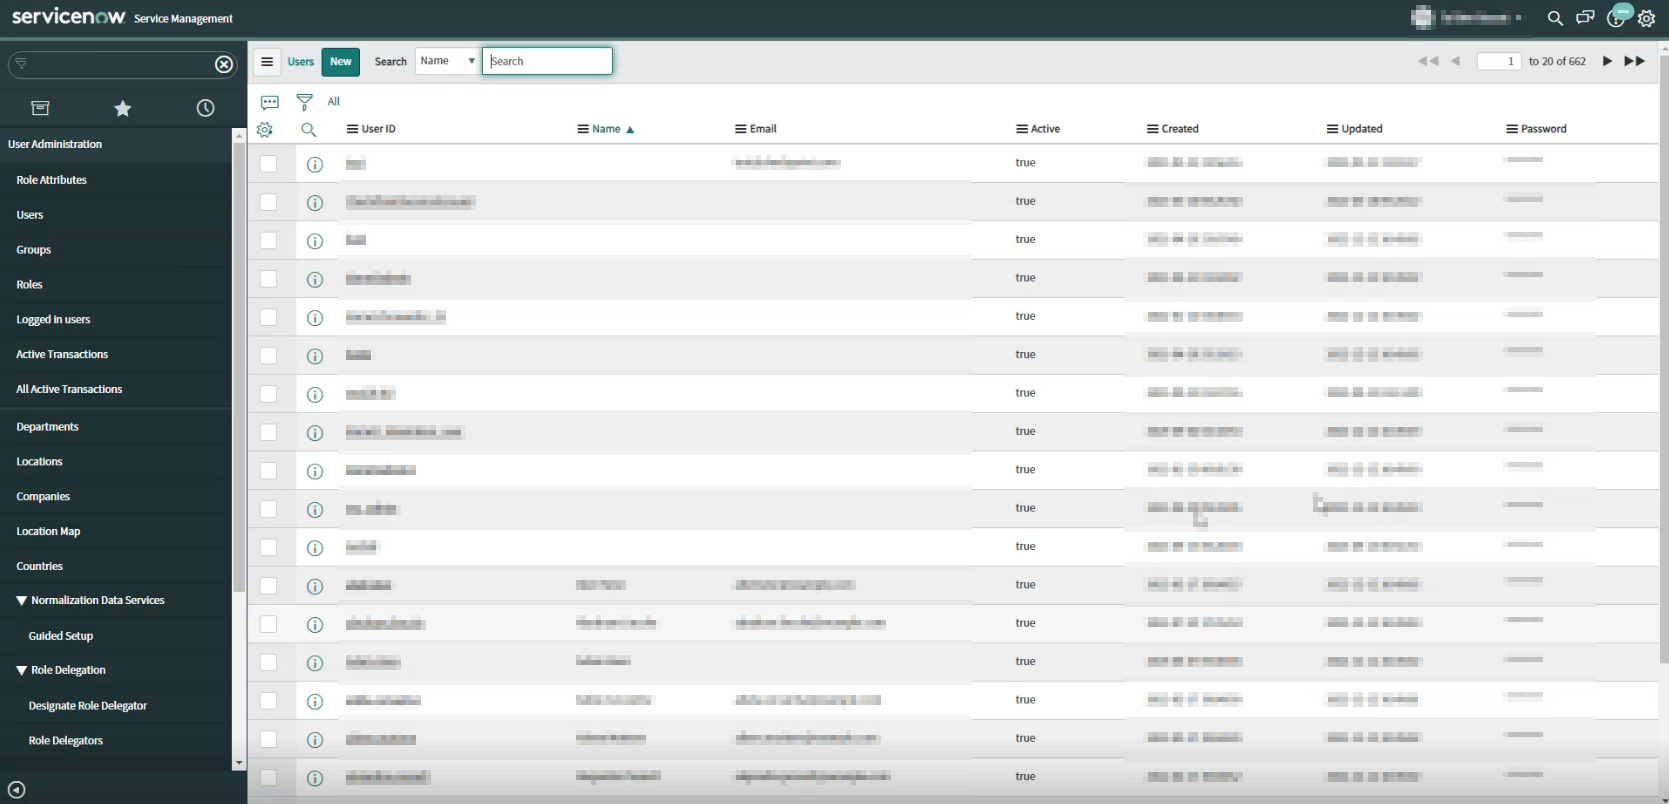
  3. Click New.
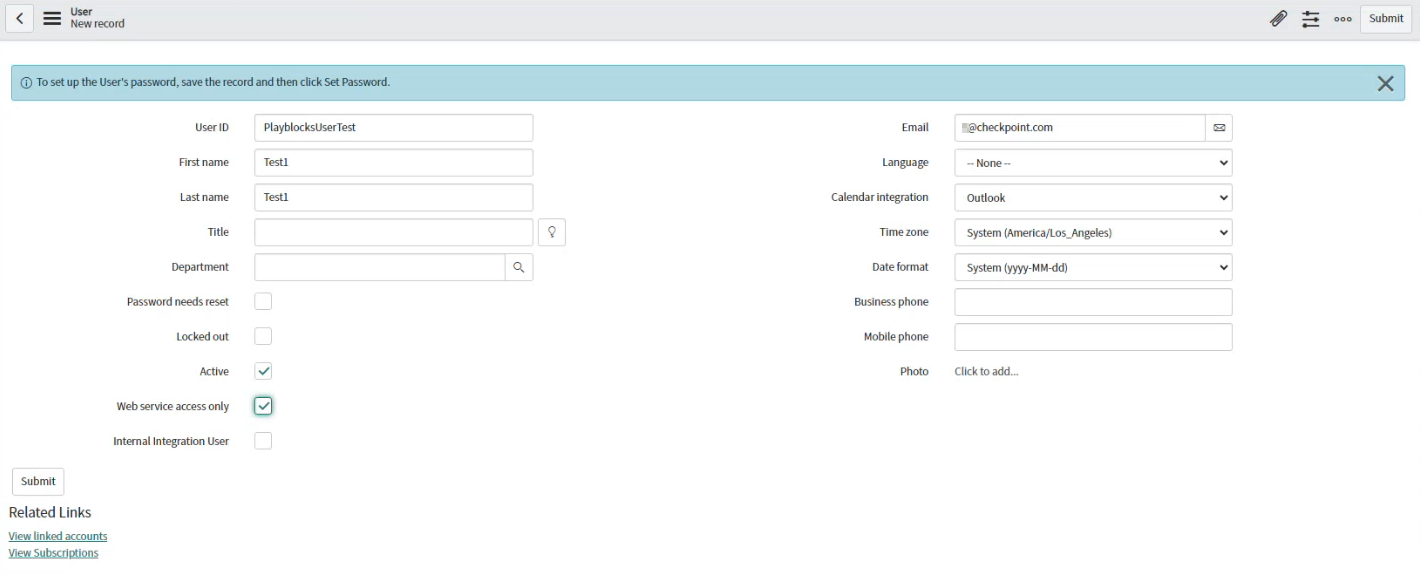
  4. Enter the user details and select the Active and Web service access only checkboxes.
    Note:

    User ID is the Username specified when you configure the ServiceNow ticketing connector.

  5. Click Submit.

    The system creates the user.

  6. In the Search list, select Name and search for the user ID you created.
  7. From the search results, click the user ID.
  8. Click Set Password.

    The Set Password window appears.

  9. Click Generate.

    The system generates a password.

  10. To copy the password, click the copy icon.

    1ServiceNowCopyPassword.png

  11. To save the password, click Save Password.
    Note:

    Make a note of this password. It is required to configure the ServiceNow ticketing connector.

  12. To give permissions to the user:
    1. Go to the Roles tab at the bottom of the page.
    2. Click Edit.
    3. In the Collection search box, search for these roles and click the arrow.
      • rest_api_explorer

      • snc_platform_rest_api_access

      • itil

      The selected roles are added to the Role List.

    4. Click Save.