Creating a SCEP Certificate Profile

Make sure you have uploaded the CA certificate to Microsoft Intune. See Uploading the CA Certificate to Microsoft Intune.

This section describes how to create a SCEP certificate profile in Microsoft Intune Admin Center for iOS devices.

  1. Log in to Microsoft Intune Admin Center.
  2. Go to Devices > Apple mobile.
  3. Go to Manage devices > Configuration.
  4. Click Create > New Policy.

    The Create a profile window appears.

  5. Select Platform as iOS/iPadOS.
  6. From the Profile type list, select Templates and then select SCEP certificate.
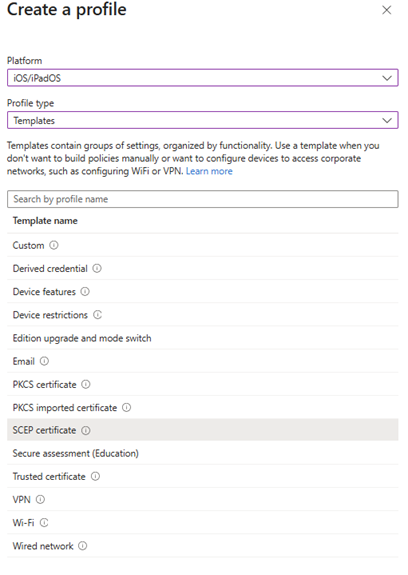
  7. Click Create.
  8. In the Basic tab, enter a name for the profile.

  9. Click Next.
  10. In the Configuration settings tab:
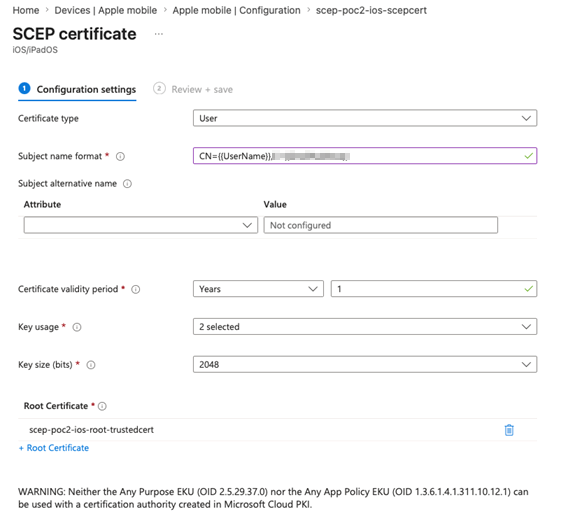
    1. Select Certificate type as User.
    2. In the Subject name format field, enter the user attribute you used (Common Name or email address) while uploading the CA certificate in Netskope.

      Format:

      CN={{UserName}} or E={{EmailAddress}}

    3. In the Certificate validity period field, select the validity for the certificate.
    4. From the Key usage list, select these options:
      • Digital signature

      • Key encipherment

    5. From the Key size (bits) list, select the number of bits in the key.
    6. In the Root Certificate field, upload the CA certificate you uploaded to Netskope.
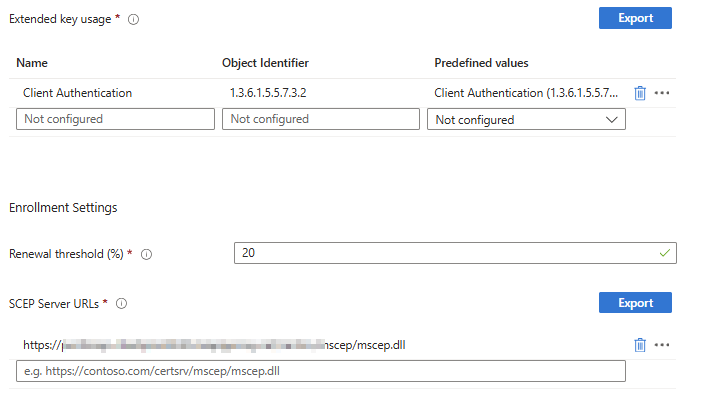
    7. In the Extended key usage section, select Client Authentication.
    8. In the SCEP Server URLs field, enter the URL of the SCEP server.
  11. Click Next.
  12. Go to the Assignments tab and in the Included groups section, click Add groups.
  13. Search and select the groups that you want to include.
  14. Click Next.
  15. Review the details and click Create.

Continue with Creating a VPN Profile.