This section describes how to create a SCEP certificate profile for Android devices in Microsoft Intune Admin Center.
-
Log in to Microsoft Intune Admin Center.
-
Go to Devices >Android.
-
Go to Manage devices >
Configuration.
-
Click Create > New Policy.
The Create a profile window appears.
-
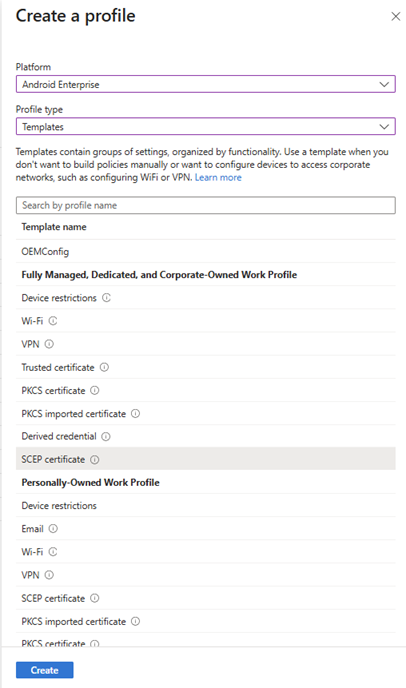
Select Platform as Android Enterprise.
-
From the Profile type list, select Templates and then select SCEP certificate.
-
Click Create.
-
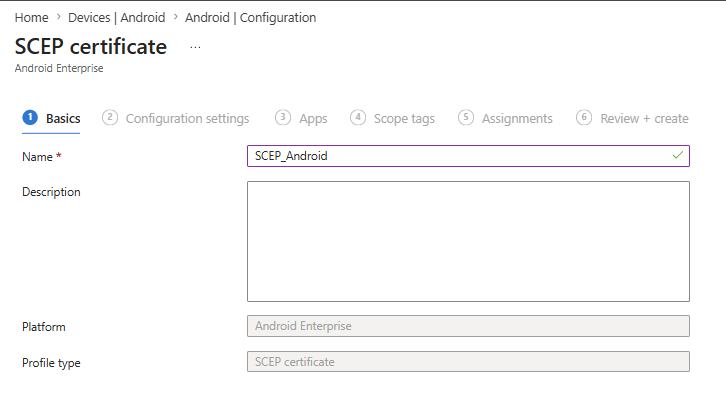
In the Basic tab, enter a name for the profile.
-
Click Next.
-
In the Configuration settings tab:
-
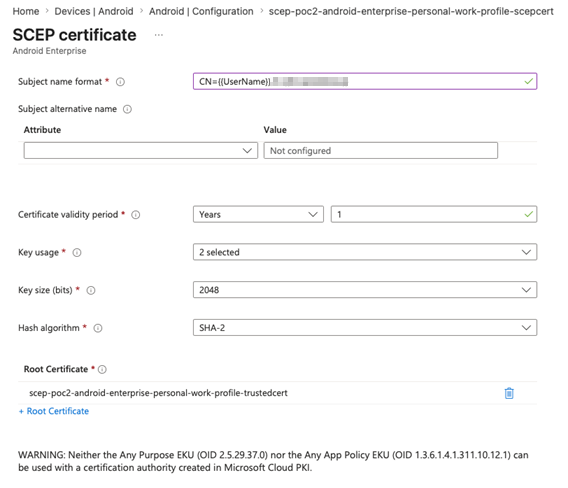
Select Certificate type as User.
-
In the Subject name format field, enter the user attribute you used (Common Name or email address) while uploading the CA certificate in Netskope.
Format:
CN={{User Name}} or E={{EmailAddress}}
-
In the Certificate validity period field, select the validity for the certificate.
-
From the Key usage list, select both the options:
-
Digital signature
-
Key encipherment
-
From the Key size (bits) list, select the number of bits in the key.
-
From the Hash algorithm list, select SHA-2.
-
In the Root Certificate field, upload the CA certificate you uploaded to Netskope.
-
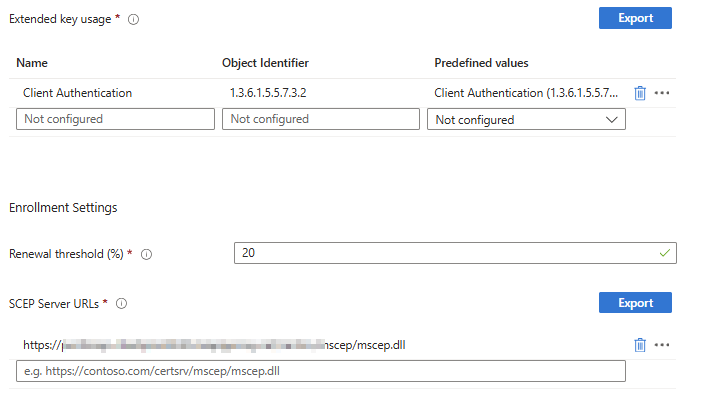
In the Extended key usage section, select Client Authentication.
-
In the SCEP Server URLs field, enter the URL of the SCEP server.
-
Click Next.
-
Go to the Assignments tab and in the Included groups section, click Add groups.
-
Search and select the groups that you want to include.
-
Click Next.
-
Review the details and click Create.