
Acting on Quarantined Files and Applications
Administrators can take these actions on the quarantined files and applications:
Fetching (download) a quarantined file
The Quarantine Management page allows you to download quarantined files for further analysis or inspection and ensure secure handling.
You can fetch only one file at a time.
To fetch a quarantined file:
-
Choose the quarantined file to download.
-
Select where you want to upload the file.
-
To upload the file to AWS S3:
-
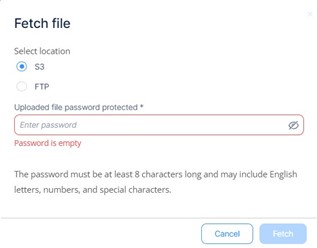
Select S3.
-
In the Uploaded file password protected field, enter a password.
You need this password to open the file in AWS S3.
-
Click Fetch.
Note:-
To upload a file to S3, the file size must not exceed 25 MB.
-
The file is retained only for 30 days in S3.
-
You can archive up to 100 MB of files.
-
-
To upload the file to your corporate FTP server:
-
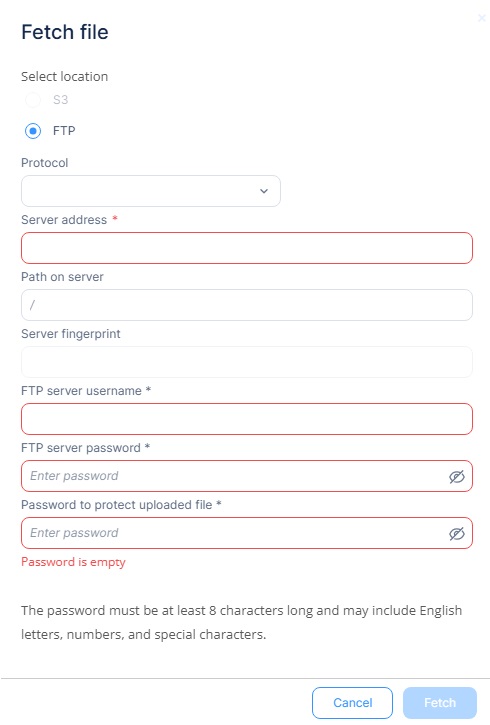
Select FTP.
-
Enter your FTP server details.
-
In the Password to protect uploaded file field, enter the password.
You need this password to open the file in the FTP server.
-
Click Fetch.
-
-
Restoring a quarantined file
Restoring a quarantined file allows an administrator to recover a file that was incorrectly identified as malicious.
-
Restore a quarantined file if it was wrongly flagged (a false positive), and only after confirming that the file is safe.
-
To prevent the restored file from being quarantined again, you need to create a global exclusion.
To restore or exclude a quarantined file:
-
Choose the file to restore using the multi-select checkboxes.
-
Click Restore.
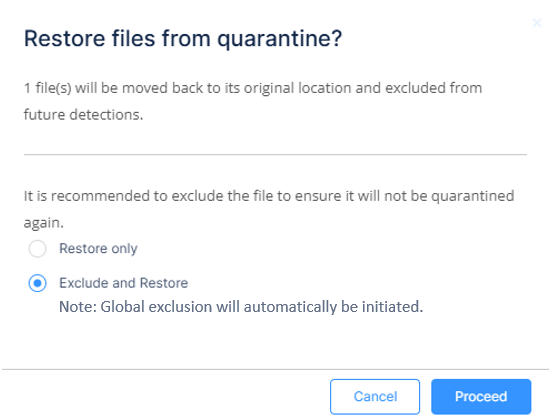
- Select one of these options:
-
To restore a file from quarantine, select Restore only.
Note:-
The system restores the file to the same location from where it was quarantined.
-
If Endpoint Security detects the same file as malicious in any other endpoint, it quarantines the file again.
-
-
To restore a file and also exclude it from quarantine in the future, select Exclude and Restore.
The system adds an exclusion to the Global Exclusions which affects all endpoints on the network, ensuring that the file is not flagged as malicious again.
-
- Click Proceed to complete the restoration.
The system sends a push operation to the relevant device.
Deleting a quarantined file
Deleting a quarantined file permanently removes it from the system, ensuring it cannot be restored or executed again. This action is typically used for files identified as confirmed threats, such as malware or spyware.
-
Go to the Quarantine Management page.
-
Using multi-select checkboxes, select the file you want to delete permanently.
-
Click Delete.
In the confirmation pop-up that appears, click OK.
Note:Once a file is deleted, it cannot be restored.