
Managing Microsoft Sensitivity Labels for DLP
Endpoint SecurityBrowser - Classic allows you to integrate Sensitivity labels from Microsoft Purview Information Protection into your DLP system, providing an additional layer of data protection based on predefined sensitivity classifications.
Step 1 - Copy the Microsoft Sensitivity label names and their UUIDs from Microsoft Purview
-
Log in to Microsoft Purview Portal: https://purview.microsoft.com/
-
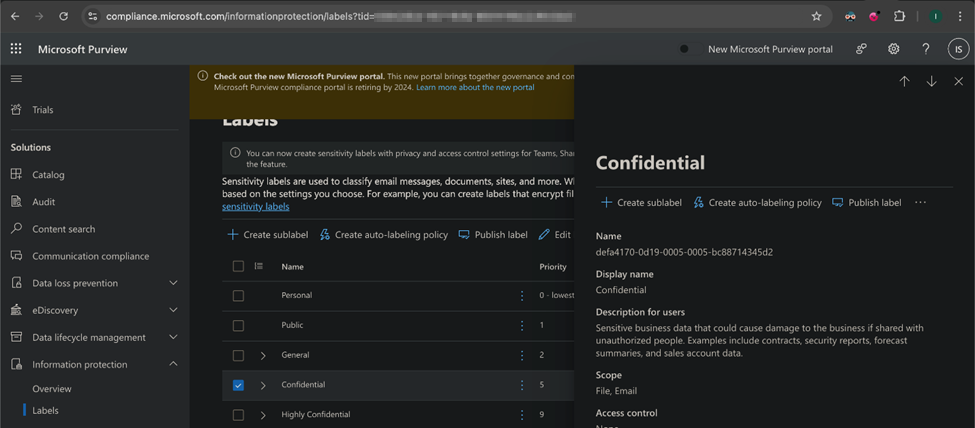
Go to Solutions > Information protection > Labels.
-
Click the label name for which you want to find the UUID.
-
Copy the UUID in the Label ID or GUID section.
-
Install the Exchange Online Management Module
The Microsoft Purview Security & Compliance PowerShell uses the Exchange Online Management Module for connection.
-
Open PowerShell as an Vars_Other.tp_admin.
-
Run the following command:
Install-Module -Name ExchangeOnlineManagement -Force -
If the system prompts to install
NuGetor trust the repository, enterYand press Enter.
-
-
Connect to the Microsoft Purview Security & Compliance Center.
-
Run the following command to create a session:
Connect-IPPSSession -
In the Microsoft login page that appears, authenticate with the Vars_CloudGuard.tp_Microsoft365 Vars_Other.tp_admin credentials.
Note:The Vars_Other.tp_admin must have Compliance Administrator or Information Protection Administrator roles.
-
If your Microsoft Purview portal has Vars_Other.tp_mfa_full (Vars_Other.tp_mfa_short), complete the Vars_Other.tp_mfa_short process.
Once authenticated, the session connects to the Microsoft Purview Security & Compliance Center.
Now, you can run Microsoft Purview Security & Compliance PowerShell commands, such as managing labels, policies, or settings.
-
-
To view the UUID of the labels, run the following commands:
Get-Label | Select-Object DisplayName, Name, Guid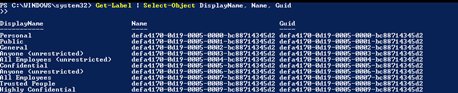
-
Copy the UUID of the labels.
-
To disconnect the session, run the following command:
Disconnect-ExchangeOnline
Step 2 - Creating Microsoft Sensitivity Labels in Endpoint SecurityBrowser - Classic
-
Log in to Check Point Portal and access the Endpoint SecurityBrowser - Classic Administrator Portal.
-
Go to Policy > Data Loss Prevention and click DLP Data Type Manager.
-
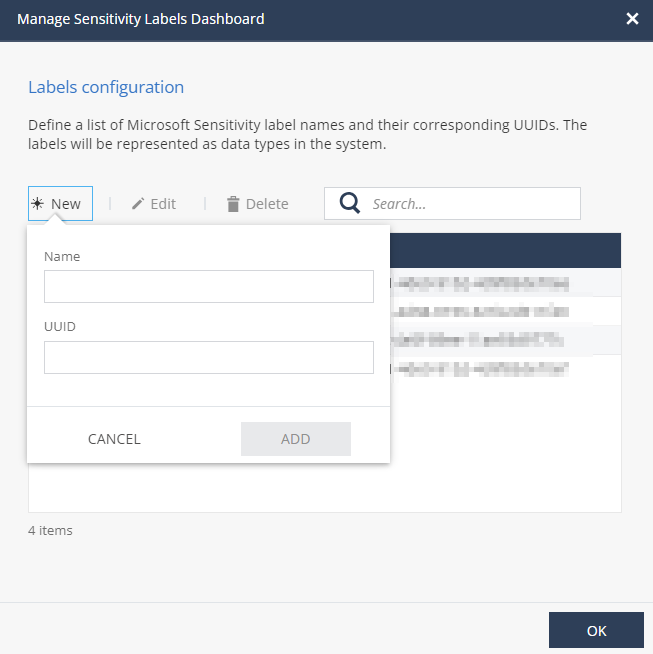
Click Manage Labels.
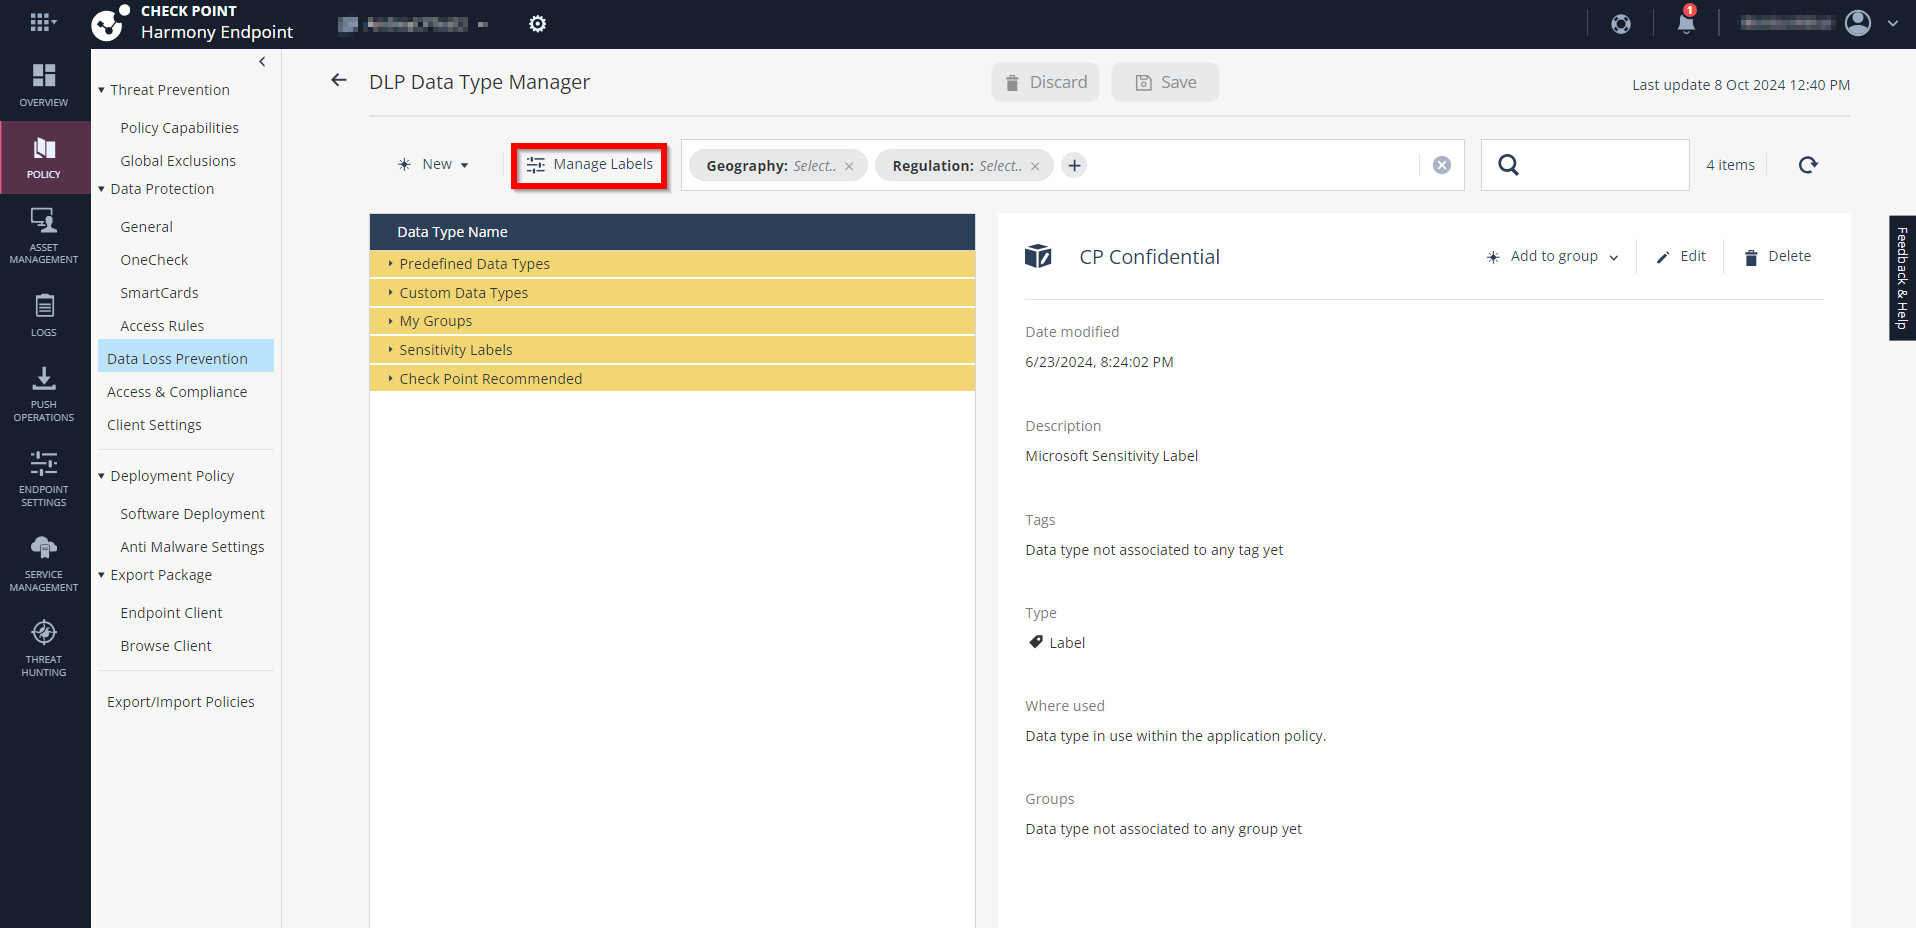
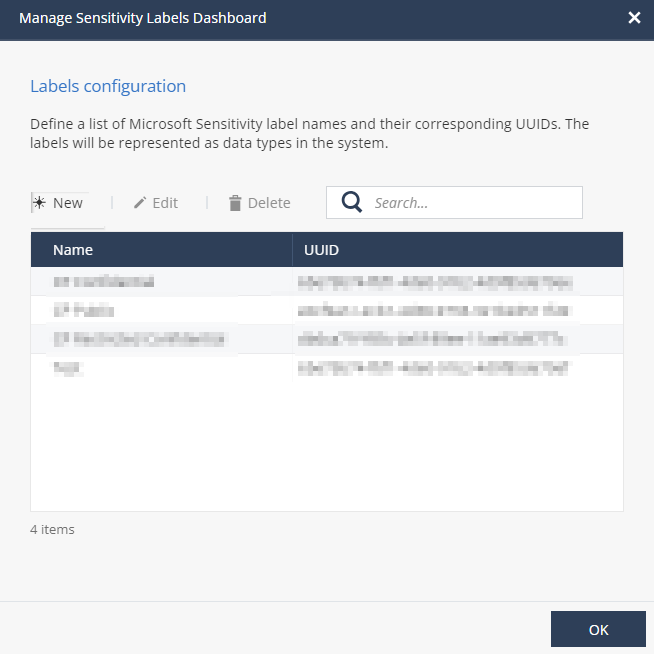
The Manage Sensitivity Labels Dashboard window appears.
-
Click New.
-
In the Name field, enter a name for the label. For example, MIP_EXAMPLE.
-
In the UUID field, enter the label UUID.
For more information, see Step 1 - Copy the Microsoft Sensitivity label names and their UUIDs from Microsoft Purview.
-
Click Add.
-
Click OK.
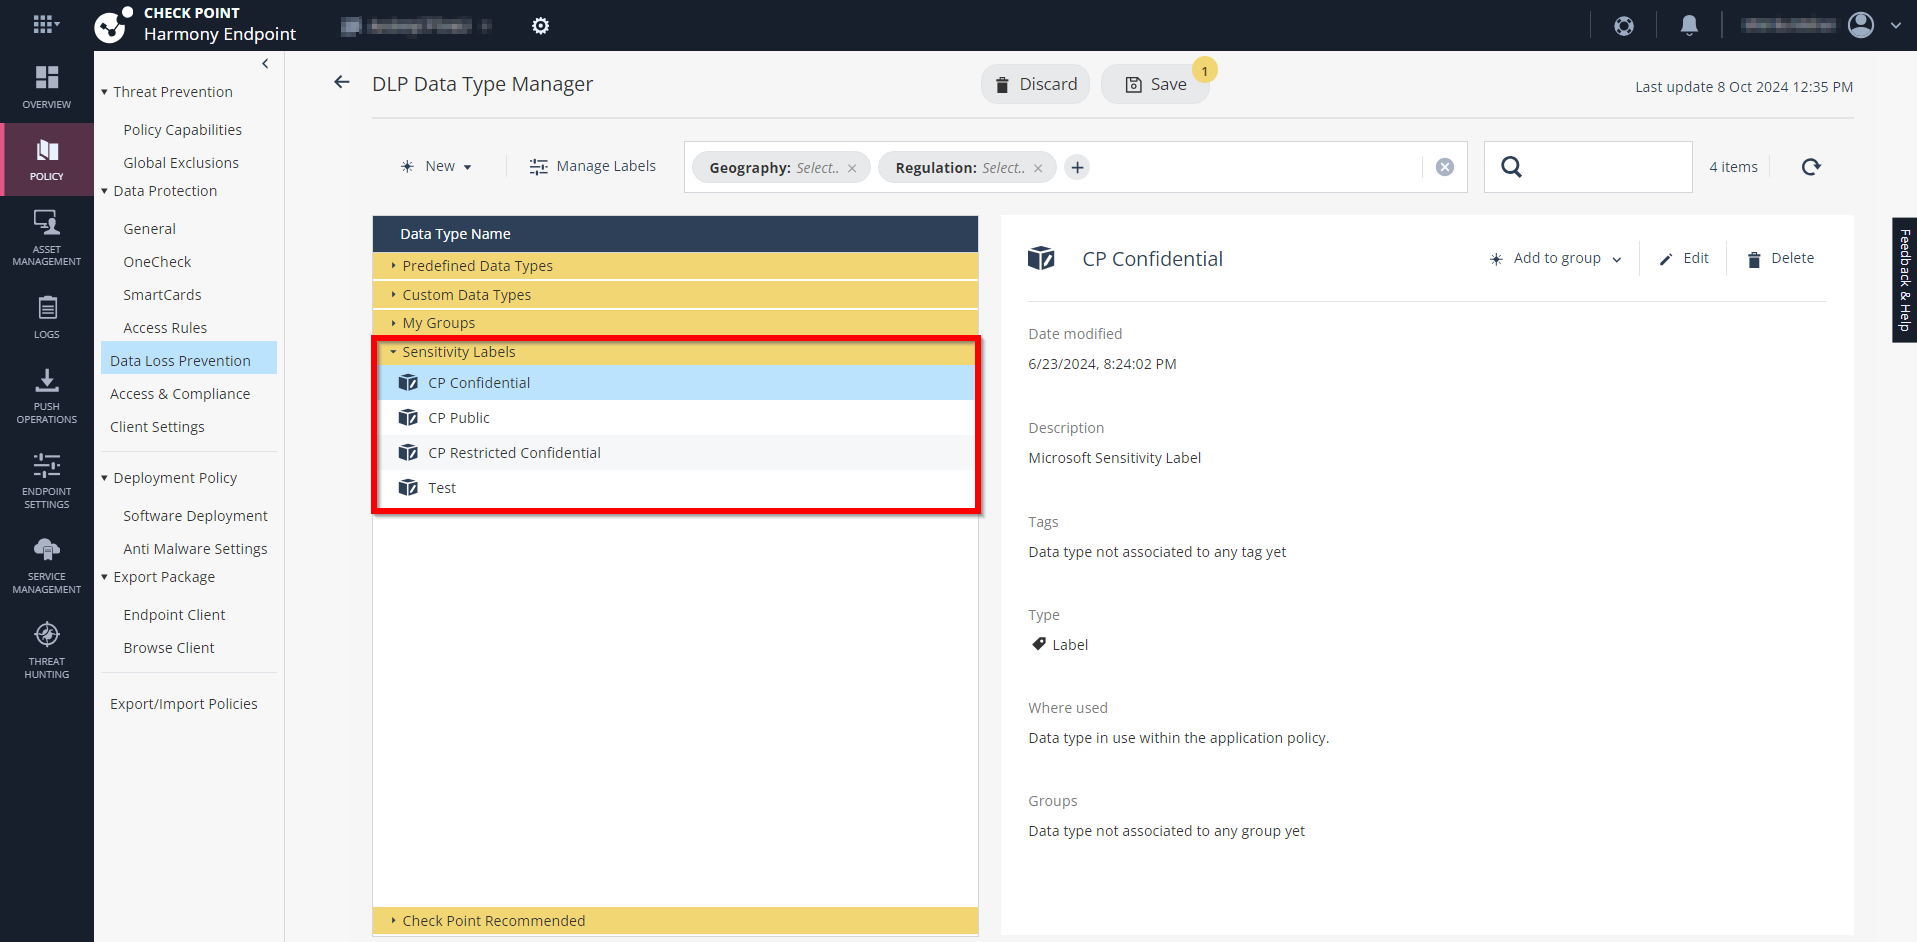
Note:The newly created label is now listed in Sensitivity Labels under Data Type Name section.
It also shows the label details:
-
Date modified
-
Description
-
Tags - Shows tags assigned, if any, for further categorization
-
Where used - Shows the DLP rule name that uses this label to enforce protection.
-
Groups - Shows if the label is part of any group.
You can use Tags and Groups to better organize and manage the sensitivity labels.
-
-
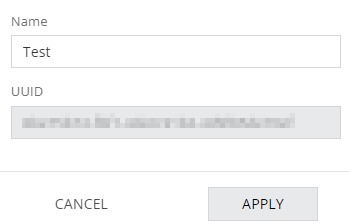
To edit a label, select the label you want to edit, click Edit, update the field and then click Apply.
-
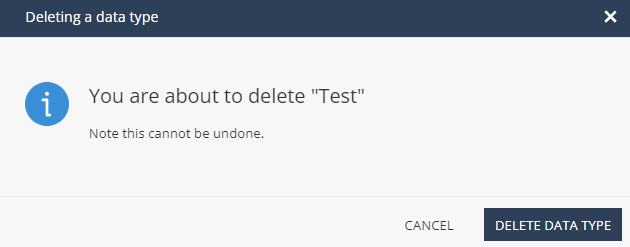
To delete a label, select the label you want to delete, click Delete and then click Delete Data Type.
-
Click Save.
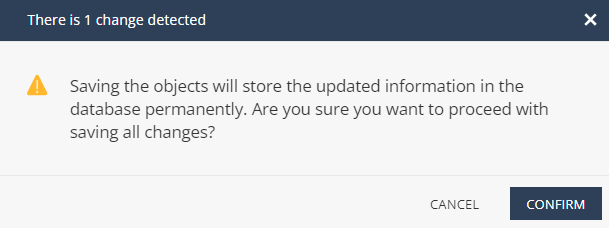
-
Click Confirm.
Step 3 - Assign Sensitivity Labels to DLP Rules
After creating Sensitivity labels in Endpoint Security, you must assign them to the DLP rules to enforce data protection based on these sensitivity labels.
To assign sensitivity labels to a DLP rule, see Creating a DLP Rule and Associating with an Event.