Activate Cloud Email Relay
To activate a cloud email relay:
-
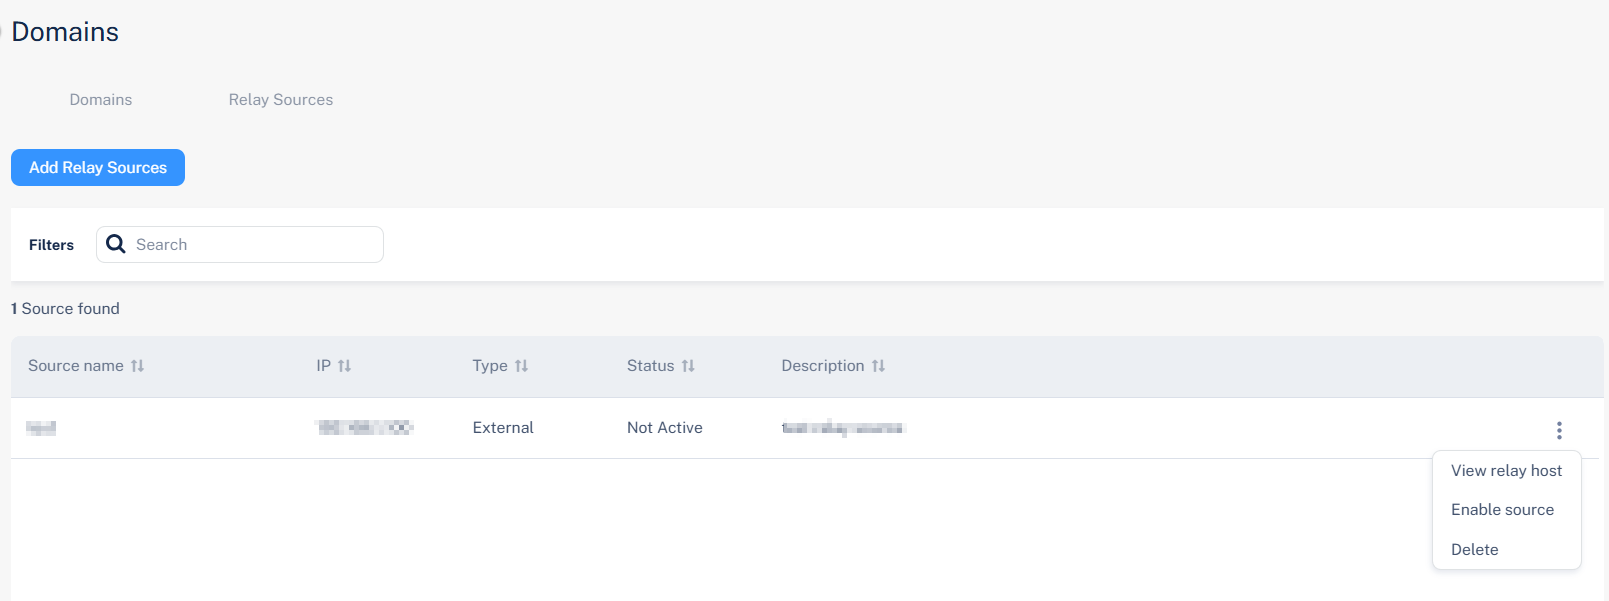
Click the
 icon next to the relay source you want to activate.
-
Click Enable source.
The Activate Cloud Email Relay confirmation pop-up displays the relay host details:
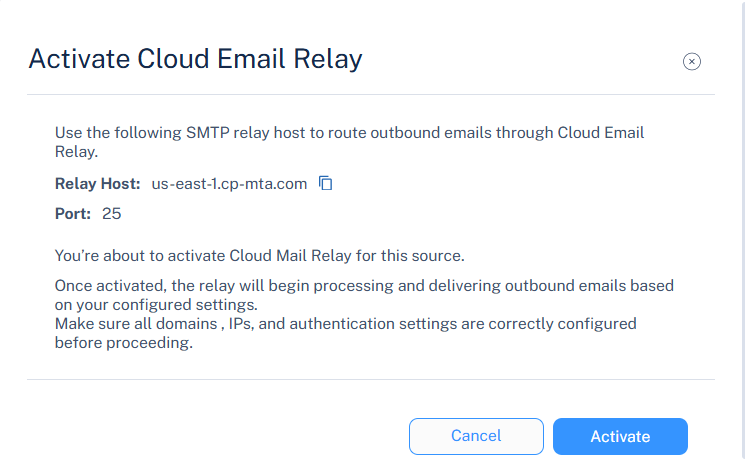
Entry Value Relay host The hostname of the Avanan Cloud SMTP relay server used to send outbound emails. See Supported Regions.
Port The port number used for SMTP transmission.
Default: 25 (supports STARTTLS)
STARTTLS ensures secure encryption for outgoing messages.
Note:-
Review the displayed relay host and port configuration.
-
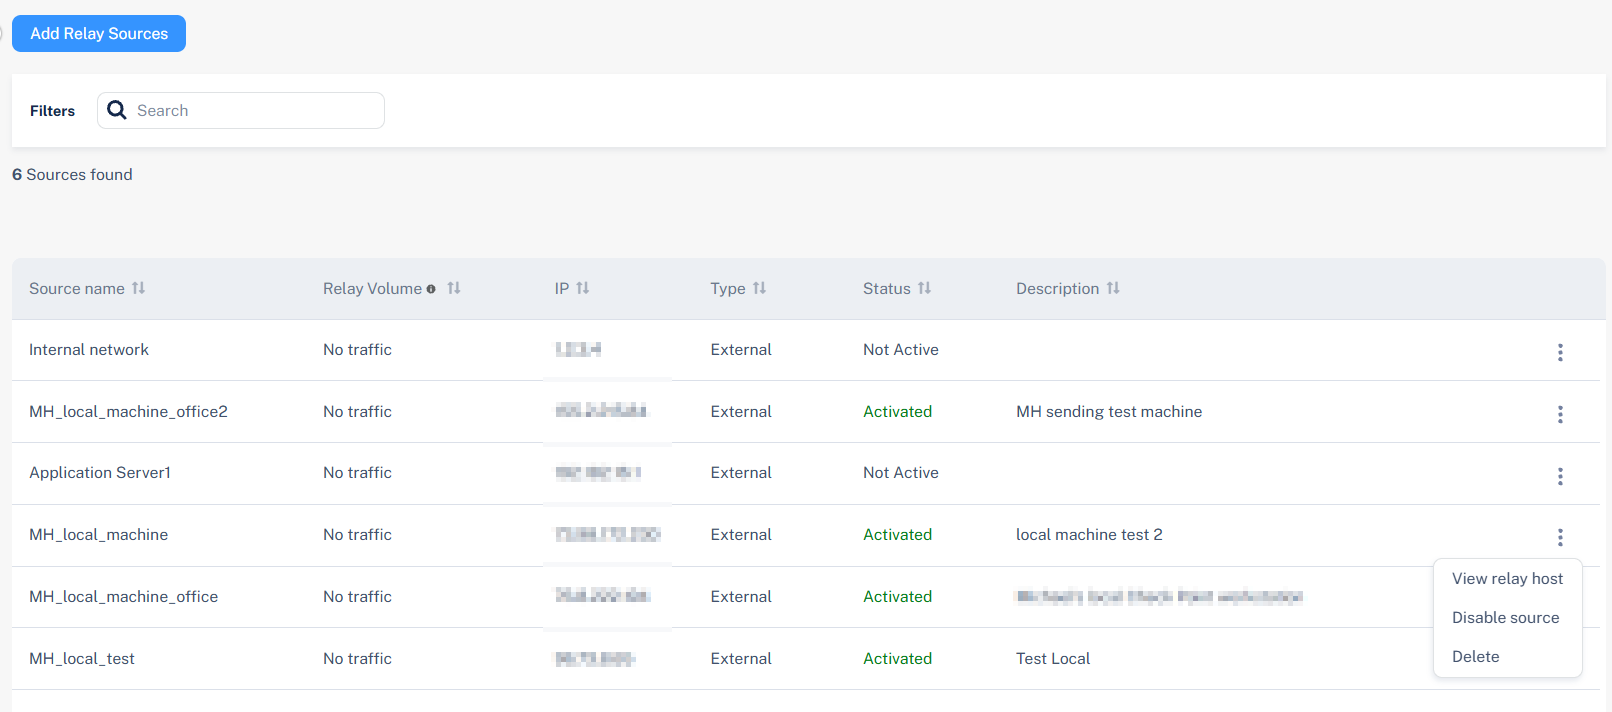
Go to Domains > Relay Sources and verify that your domain and sending IP addresses are properly configured.
-
Ensure that SPF, DKIM, and authentication records align with the relay configuration.
-
When Cloud SMTP Relay is activated, it begins processing and delivering outbound emails from the configured relay sources through Avanan's Cloud SMTP infrastructure. All emails are scanned for spam and malware based on your configured domain, IP, and authentication settings before delivery to recipients.
Activating a Cloud Email Relay finalizes the SMTP relay configuration, allowing trusted mail servers or applications to use the Avanan Cloud Relay for outbound delivery, and it ensures authenticated, encrypted transmission and centralized email control.
Before activating a Cloud Email Relay, ensure all domains, IP addresses, and authentication settings are correctly configured before proceeding.