Step 5: Create a Compliance Rule
-
Scroll-down and click Compliance.
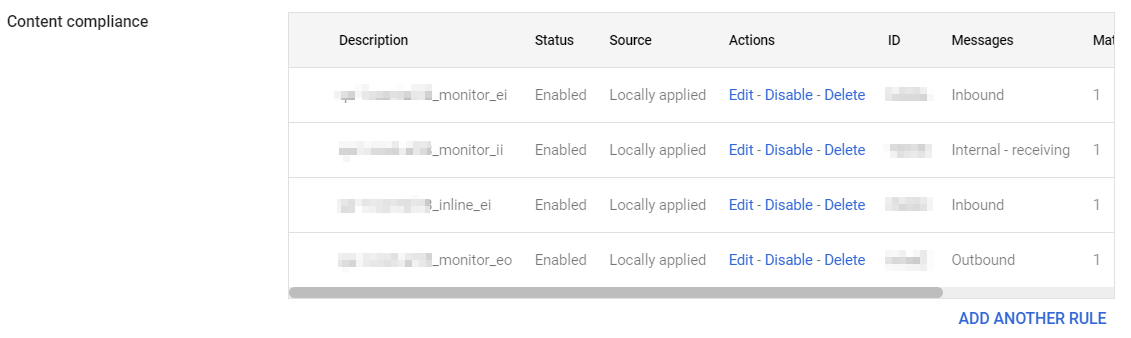
By default, the system shows these rules in Content compliance:
[portal identifier]_monitor_ei
[portal identifier]_monitor_ii
[portal identifier]_monitor_eo
[portal identifier]_inline_ei
To find the portal identifier, see Portal Identifier of Avanan Tenant.
-
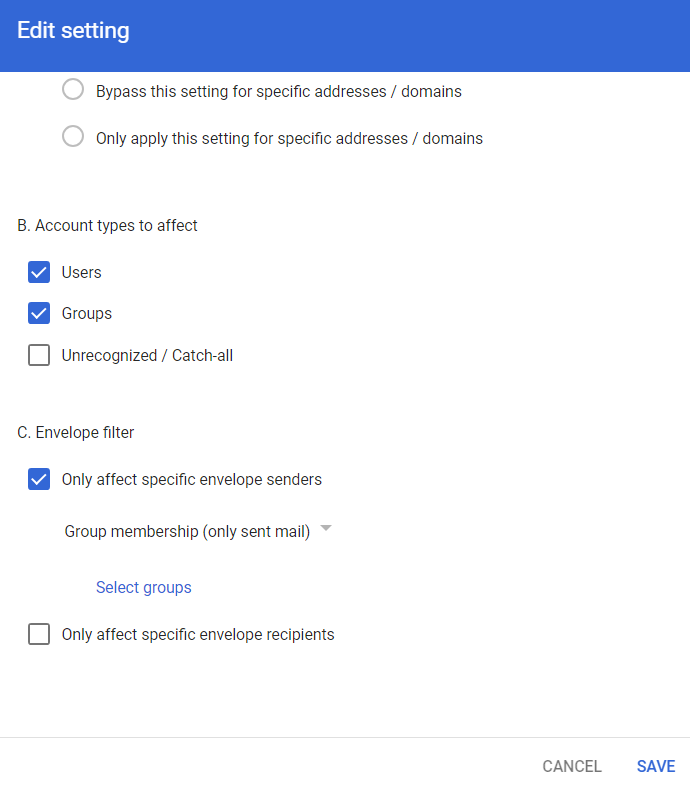
Update the settings for [portal identifier]_monitor_eo rule.
-
Under Envelope filter, select the Only affect specific envelope senders checkbox.
-
Under Envelope filter, select the Only affect specific envelope senders checkbox.
-
Create the [portal identifier]_inline_eo rule with these settings.
-
From the Content compliance rules, click Add Another Rule.
-
Enter the Content compliance rule name as [portal identifier]_inline_eo.
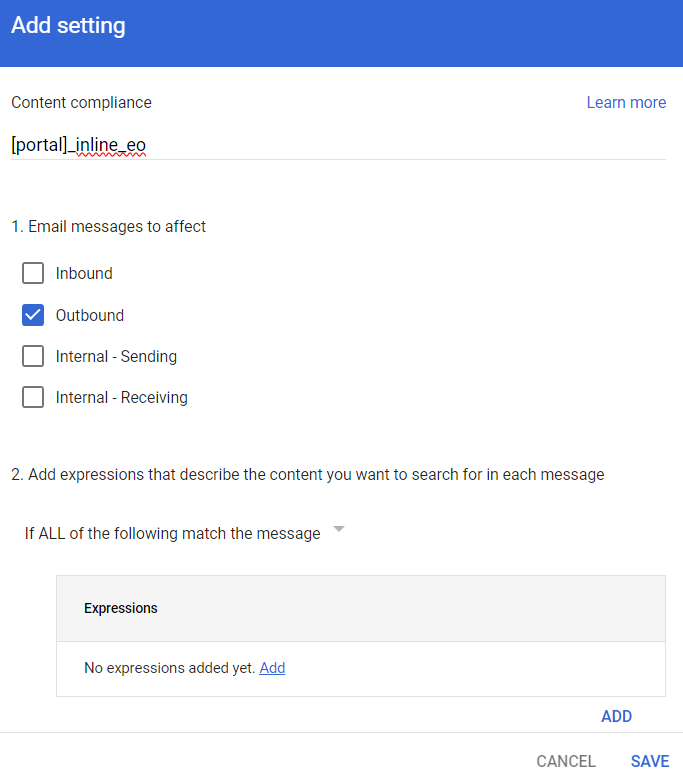
To find the portal identifier, see Portal Identifier of Avanan Tenant.
-
Under Email messages to affect, do these:
- Select Outbound checkbox.
- In Add expressions that describe the content you want to search for in each message, select If ALL of the following match the message.
- Click Add.
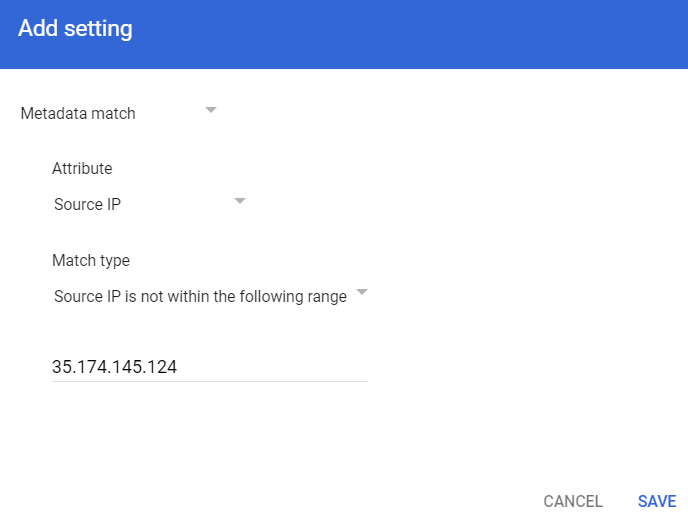
- In the Add setting pop-up, select Metadata match.
- Under Attribute, select Source IP.
- Under Match type, select Source IP is not within the following range.
- Enter all the IP addresses relevant to your data region.
For the list of supported IP addresses, see IP Addresses Supported Per Region.
- Click Save.
-
Under If the above expressions match, do the following, do these:
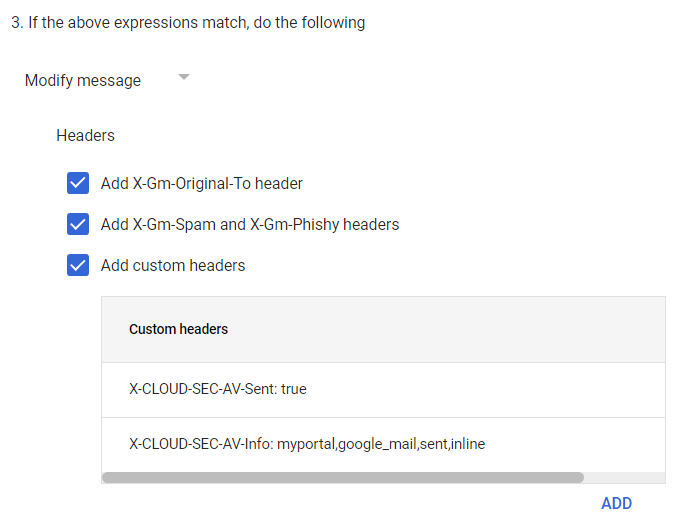
- Select Modify message.
- Under Headers, do these:
- Select Add X-Gm-Original-To header checkbox.
- Select Add X-Gm-Spam and X-Gm-Phishy headers checkbox.
- Select Add custom headers checkbox and add custom headers with these values.
Header Key
Header Value
X-CLOUD-SEC-AV-Sent
true
X-CLOUD-SEC-AV-Info
[portal],google_mail,sent,inline
To add a custom header:
- Click Add.
- In Header key, enter the header key.
- In Header value, enter the header value.
- Click Save.
- Under Route, do these:
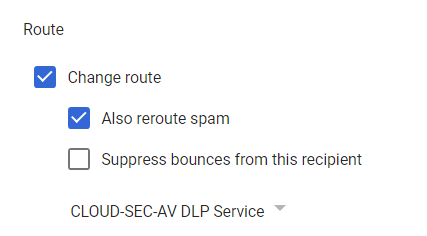
- Select the Change route checkbox.
- Select the Also reroute spam checkbox.
- In the list, select CLOUD-SEC-AV DLP Service.
-
Under Envelope filter, do these:

- Select the Only affect specific envelope senders checkbox.
- From the list, select Group membership (only sent mail).
- Click Select groups and select avanan_inline_outgoing_policy.
- Click Save.
-
From the Content compliance rules, click Add Another Rule.