Incidents - Overview
The Overview page shows the details of the incident and allows you to perform these actions:
-
Managing Assets and Indicators
-
Copying an asset, indicator or artifact name to the clipboard
-
Viewing forensic details related to the chosen asset
-
Viewing intelligence for asset, indicator or an artifact
-
Searching for an asset, indicator or an artifact in an incident
-
-
Execute prevention actions. See Prevention
To view the Overview page:
-
Access XDR
 Extended Detection & Response and click Incidents > Incidents.
 -
Click the incident title or hover over the incident and click >.

Incident Summary
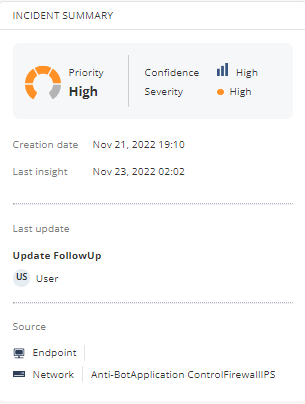
The Incident Summary widget shows:
-
Priority of the incident:
-
Critical
-
High
-
Medium
-
Low
-
Informational
-
-
Confidence level of the detection:
-
High
-
Medium
-
Low
-
-
Severity of the incident:
-
Critical
-
High
-
Medium
-
Low
-
Informational
-
-
Creation date - Date and time when incident was created.
-
Last insight - Date and time when the last insight was added to the incident.
-
Last update on the incident
-
The source of the events correlated into the incident.
-
Endpoint (Endpoint Security)
-
Gateway (Quantum Security Gateway
Dedicated Check Point server that runs Check Point software to inspect traffic and enforce Security Policies for connected network resources. and/or Cloud Firewall) -
Email (Email Security)
-
Mobile (Mobile Security)
-
Defender (Microsoft Defender)
-
Identity Service
-
Incident Description
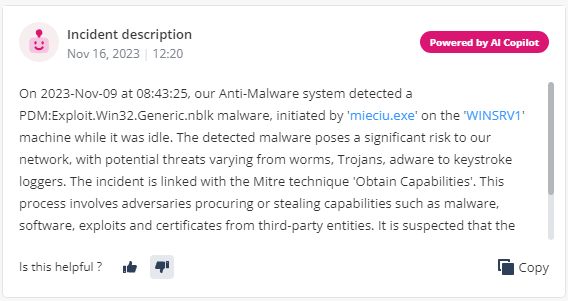
The Incident Description widget shows the AI generated description of the incident.
To provide feedback on the description, click ![]() or
or ![]() , enter a description and click Save.
, enter a description and click Save.
MITRE

MITRE ATT&CK tactics and techniques involved in the incident. The numbers represent the number of insights related to each tactic.
Click Open MITRE Tab to open the Incidents - MITRE page.
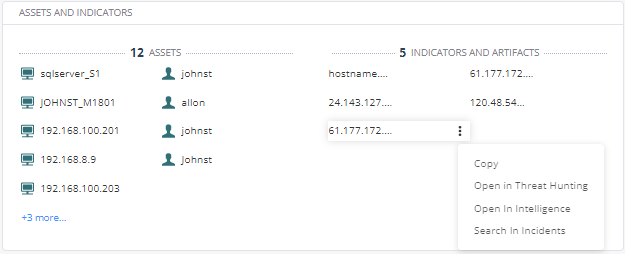
Assets and Indicators
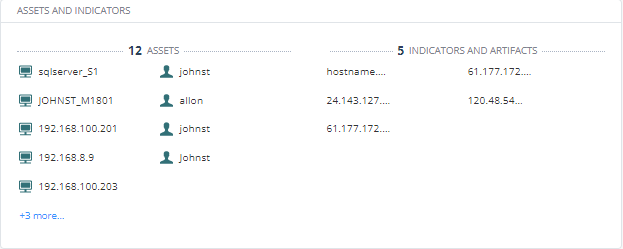
The Assets and Indicators widget shows:
-
Assets involved in the incident.
-
Indicators and artifacts involved in the incident.
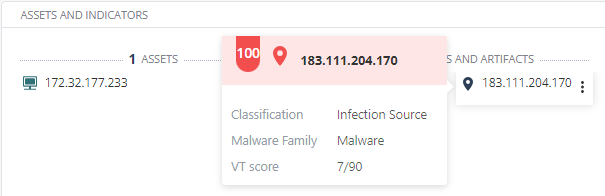
Hover over the indicator or artifact to view the risk level score (for example, 34), Classification, Malware Family and the VT score.
Managing Assets and Indicators
-
Click Incidents:
-
Click the incident title.
-
Hover over the incident and click >.
-
-
In the Assets and Indicators widget, hover over the asset, indicator or an artifact.
-
Hover over
 .
. -
To copy an asset, indicator or artifact name to the clipboard, click Copy.
XDR copies the name of the asset, indicator or the artifact to the clipboard.
-
To view forensic details related to the chosen asset, click Open in Threat Hunting.
XDR opens the Threat Hunting page and shows the data for the asset, indicator or the artifact for the last seven days.

Note - This option is not available for Mobile assets.
-
To view intelligence for an indicator or artifact, click Open in Intelligence.
XDR opens the Intelligence page and shows the available intelligence for the asset, indicator or the artifact.
Note - This option is not available for Mobile assets.
-
To search for asset, indicator or artifact in incidents, click Search in Incidents.
XDR opens theIncidents page and shows the incidents with the searched asset, indicator or the artifact.
Note - This option is not available for Mobile assets.
Prevention
The Prevention widget shows preventive actions taken automatically or manually and that are recommended to remediate the incident:
Prevention
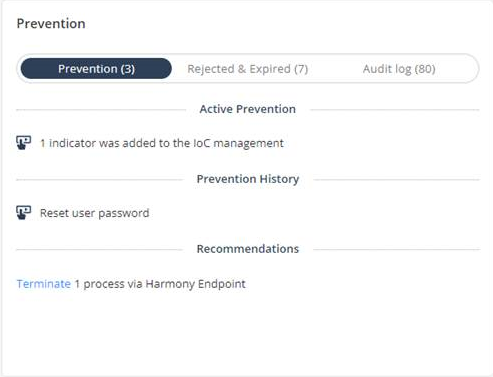
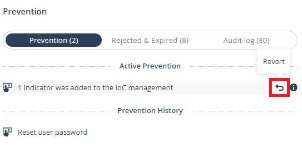
-
Active Prevention - Preventive actions activated either manually or automatically. To revert the preventive action, click
 .
.
-
Prevention History - Automatic (
 ) and manual (
 ) preventive actions taken.
Note - For more information on preventive actions that you can automate, see Automations.
-
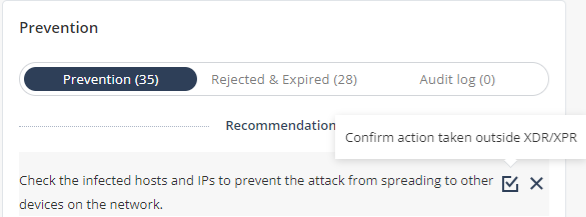
Recommendations - Preventive actions recommended by XDR to mitigate the incident. The available preventive actions include:
-
Enable IoCs in the IoC Management
-
Reset user password and revoke session in:
-
Okta
-
-
Isolate a machine in:
-
Endpoint Security
-
Microsoft 365 Defender for Endpoint
-
CrowdStrike Falcon
-
Trend Vision One for Endpoint
-
Singularity Endpoint
-
-
Quarantine a file in Endpoint Security and in Microsoft 365 Defender for Endpoint
-
Terminate a process in Endpoint Security.
For more information, see Push Operations in the Endpoint Security EPMaaS Administration Guide.
-
Isolate IP addresses (hosts) in the Quantum Security Gateway.
This is implemented using Check Point Playblocks. For more information, see Infinity Playblocks Administration Guide.
To enforce a preventive action, click the action. For example, click Terminate.
To reject a preventive action, click X. Rejected preventive actions are listed under Rejected & Expired.
A preventive action can also be an instruction that you should manually execute outside of XDR. After you execute the preventive action, click the checkbox across to indicate that the preventive action was executed.
A failed preventive action is indicated by
 .
. 
To troubleshoot:
-
For Endpoint Security, check whether the :
-
Endpoint Management Server
Check Point Single-Domain Security Management Server or a Multi-Domain Security Management Server. is up and running. -
Endpoint device is reachable.
-
-
For Quantum Security Gateway, check whether the gateway is up and running.
Notes:
-
Recommendations that are enforced will expire:
Preventive action
Expiry Duration
Related to IoC types URL and File 7 days All other preventive actions 24 hours -
Expired preventive actions are moved to the Rejected & Expired tab and are available for you to enforce the action.
-
If the incident's reported activity continues and a new recommended preventive action is generated and if the same action already exists, then the expiry duration is extended by further 7 days or 24 hours based on the preventive action.
-
Rejected & Expired
-
Expired Recommendations - Recommended preventive actions that are expired.
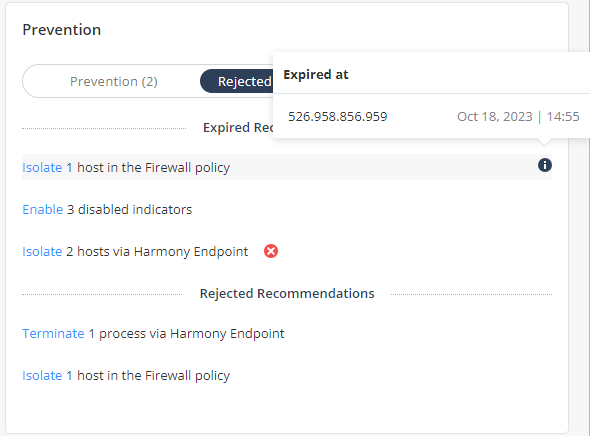
-
To know the expiration date and time, hover over the action.
-
To enforce the preventive action, click the action. For example, click Isolate. Enforced actions are moved either to the Prevention, Active Prevention or the Prevention History tab depending on the action type.
-
-
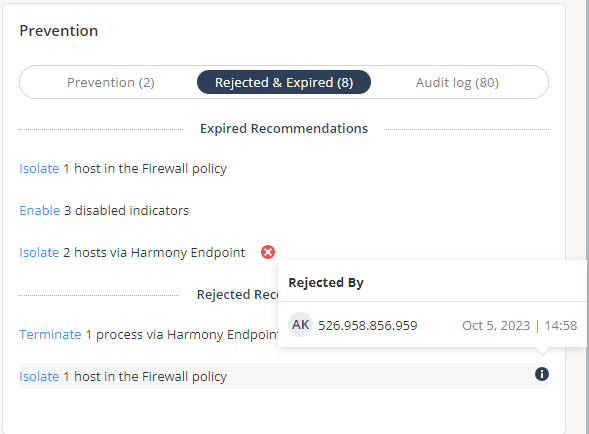
Rejected Recommendations - Recommended preventive actions that are rejected by you.
-
To know the user that rejected the action, hover over the action.
-
To enforce the preventive action, click the action. For example, click Terminate. Enforced actions are moved either to the Prevention, Active Prevention or the Prevention History tab depending on the action type.
-
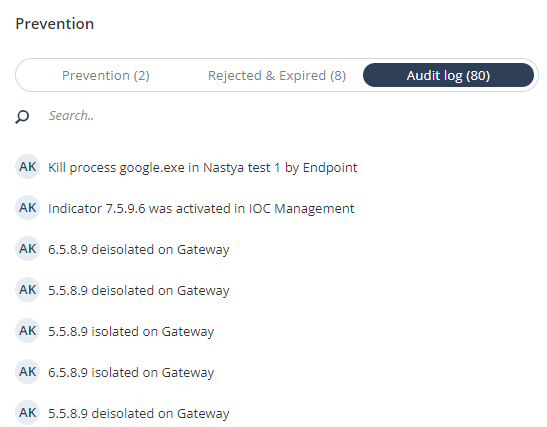
Audit Log
Shows the audit log of all the activities related to preventive actions.
Insights Timeline
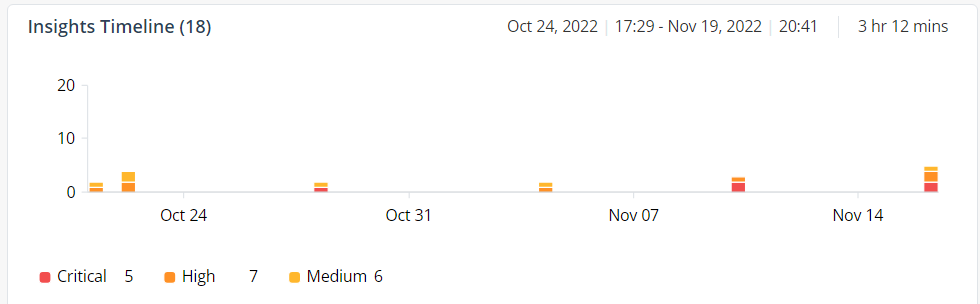
The Insights Timeline widget shows the:
-
Timeline of insights color-coded according to their severity.
-
Date and time when the first and last insight was created.
-
Duration between the first and last insight.
Comments
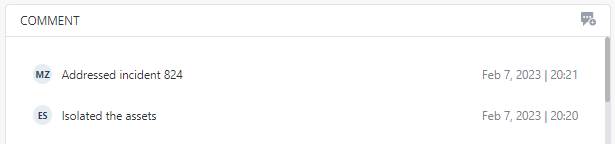
The Comments widget shows the comments added by the SOC analysts to the incident.
Adding a Comment
-
Click Incidents:
-
Click the incident title.
-
Hover over the incident and click >.
-
-
In the Comments widget, click
 .
. -
Enter a comment (maximum 150 characters) and click Save.
Creating Advanced Exclusions from an Incident
You can create advanced exclusions from incidents. XDR creates separate exclusions for each standalone![]() Configuration in which the Security Gateway and the Security Management Server products are installed and configured on the same server. insight.
Configuration in which the Security Gateway and the Security Management Server products are installed and configured on the same server. insight.
|
|
Note - A standalone insight is a single, isolated security event detected only once by XDR. |
To create an advanced exclusion for a standalone insight from an incident:
-
Go to Incidents page.
-
To create an advanced exclusion:
-
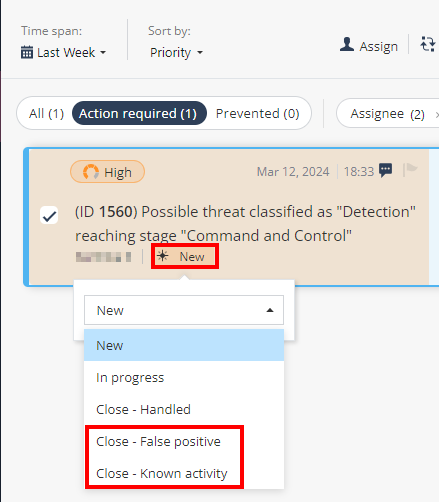
When you close the incident:
-
Select the incident you want to close and set the Status as one of these:
-
Close - False positive
-
Close - Known Activity
-
-
Add a comment and click Save.
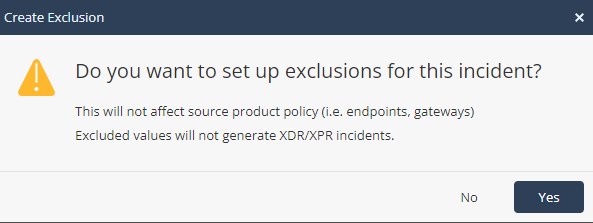
The Create Exclusion pop-up window appears.
-
Click Yes.
The Exclusions selection form window appears. It shows the fields of all the standalone insights for this incident. By default, all fields are selected.

-
-
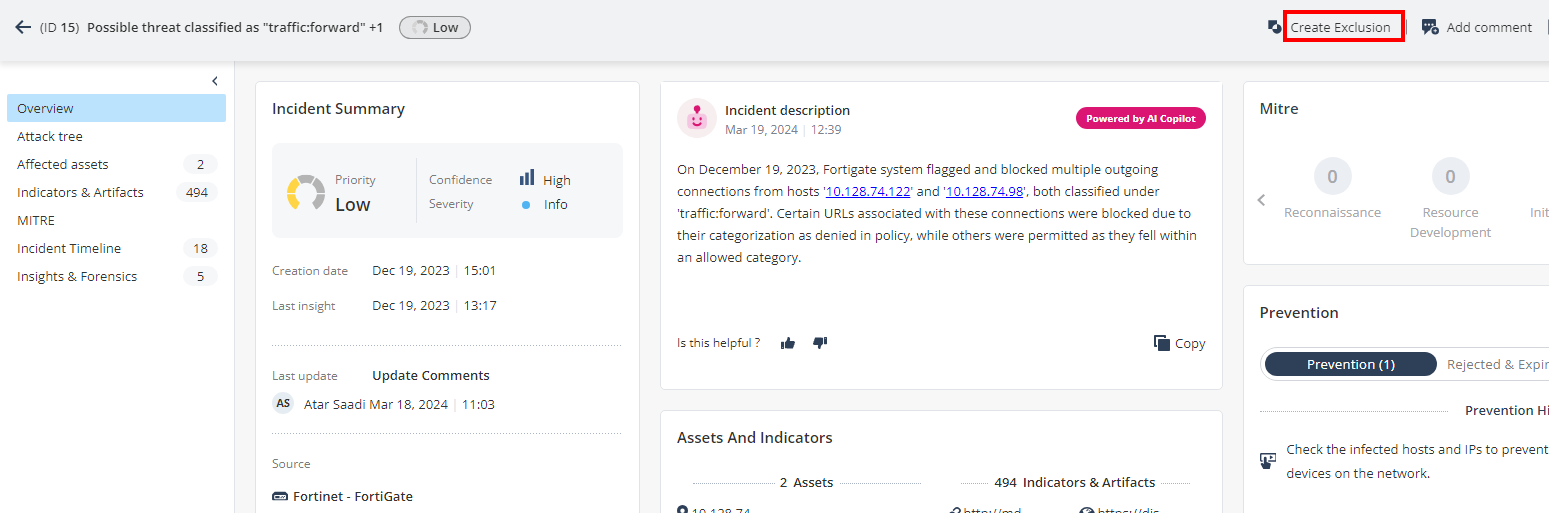
From the Overview page, click Create Exclusion. The Exclusions selection form window appears.
-
-
In the Exclusion section, select the standalone insight fields to be excluded.
-
To edit a field, hover over it and click
 .
.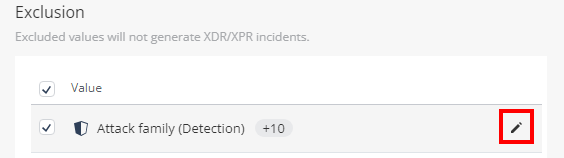
The Edit Exclusion window appears.
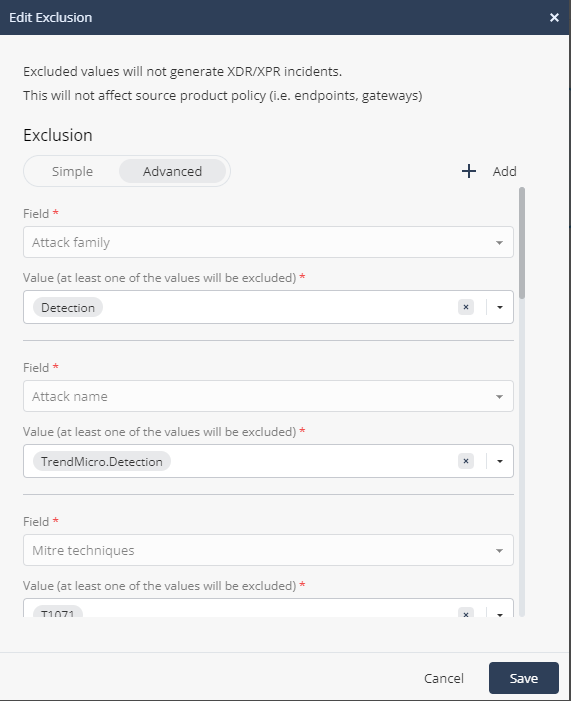
-
For each Field, edit the values as required. XDR applies this exclusion on insights that contain all the above fields and any of these values.
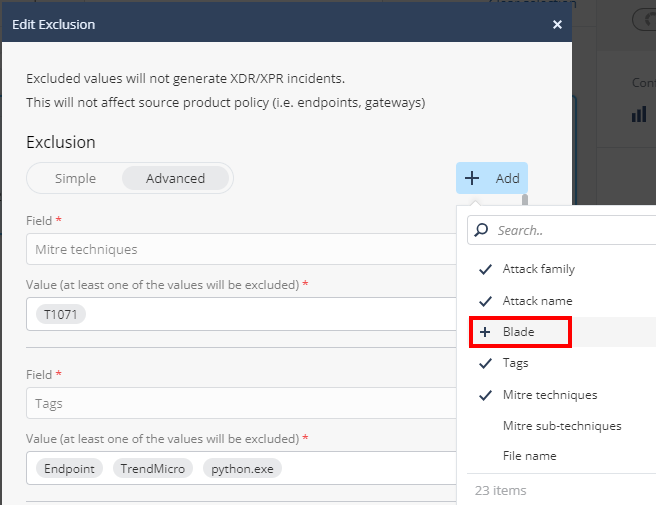
-
To add or remove a Field, click + Add. The fields already selected are marked with
 .
.-
To add, hover over the field name and click +.
-
To remove a field, click the field name.
-
-
Click Save.
-
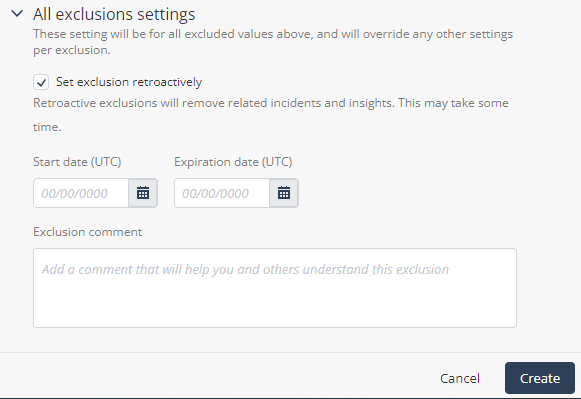
In the All exclusion settings section:
Note - The values set in the All exclusion settings section is applied to all the above standalone insights' fields and overrides the values set for each insight field.
-
(Optional) To exclude the incidents already generated based on this insight:
-
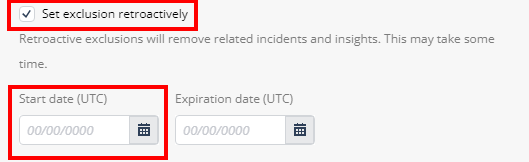
Select the Set exclusion retroactively checkbox.
-
In the Start date (UTC) field, select a date within the last 90 days. XDR excludes all the incidents that were generated from this date based on this insight. To revert the exclusion, see Reverting a Retroactive Exclusion.
-
-
(Optional) In the Expiration date (UTC) field, select an expiration date for the exclusion. After this date, XDR generates incidents for this insight. By default, there is no expiry date for an exclusion.
-
(Optional) In the Exclusion comment section, enter a description about the exclusion.
-
-
Click Create.
The exclusion is added to the Exclusions table in Policy > Exclusions. See Advanced Exclusions.