Exclusions
Exclusions allow you to exclude assets, artifacts and insights from generating incidents.
|
|
Note - These exclusions affect only the creation of incidents in Check Point XDR |

Simple Exclusions
Simple exclusions allow you to exclude assets and artifacts, so that XDR excludes them from both current and future incidents. For example, an asset that represents an approved network scanner.
To create a Simple exclusion for the XDR incidents:
-
Go to Policy > Exclusions.
-
Click New.
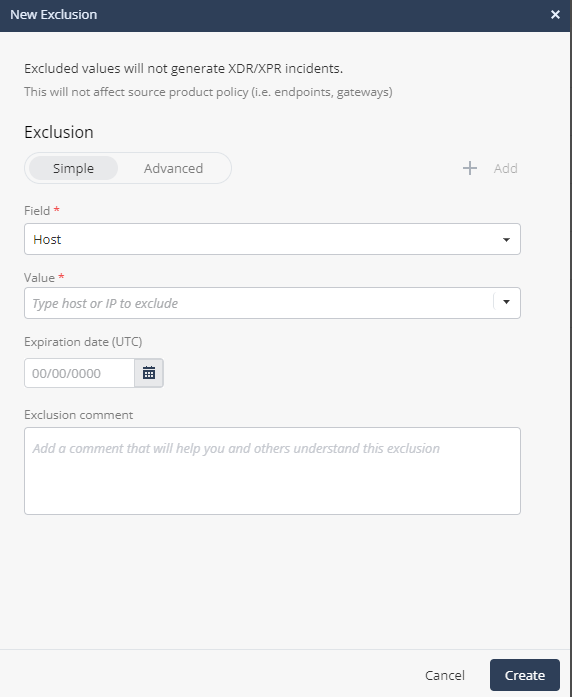
The New Exclusion window appears. The Simple exclusion tab is displayed by default.
-
From the Field list, select the type of asset / artifact:
-
To add an exclusion for a machine:
-
Select Host.
-
In the Value field, enter the host name or the IP address.
-
-
To add an exclusion for an email address, select Email address and enter the email address.
-
To add an exclusion for a URL, select URL, and enter the URL.
-
To add an exclusion for a file MD5 key, select File MD5, and enter the file MD5 key.
-
To add an exclusion for IP address:
-
Select IPv4.
-
In the Value section:
-
To add single IP address, select Single and enter the IP address.
-
To add a range of IP address, select Range and enter the From and To IP address.
-
To add the IP address in CIDR, select CIDR and enter the Subnet and Prefix.
-
-
-
-
(Optional) In the Expiration date (UTC) field, select an expiration date for the exclusion. After this date, XDR starts creating incidents for this asset/artifact. By default, there is no expiry date for an exclusion.
-
(Optional) In the Exclusion comment section, enter a description about the exclusion.
-
Click Create.
Advanced Exclusions
Advanced exclusions allow you to exclude insights so that XDR excludes them from generating future incidents. Optionally, you can also exclude insights generated in the past. If all the standalone![]() Configuration in which the Security Gateway and the Security Management Server products are installed and configured on the same server. insights of an incident are excluded, then the incident is also excluded.
Configuration in which the Security Gateway and the Security Management Server products are installed and configured on the same server. insights of an incident are excluded, then the incident is also excluded.
|
|
Note - You can also create Advanced Exclusions from the:
|
To create an Advanced Exclusion:
-
Go to Policy > Exclusions.
-
Click New.
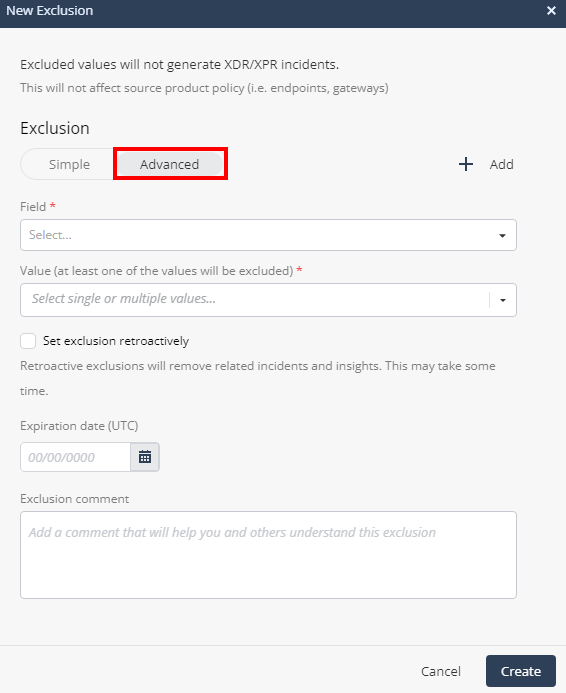
The New Exclusion window appears.
-
Click the Advanced tab.
-
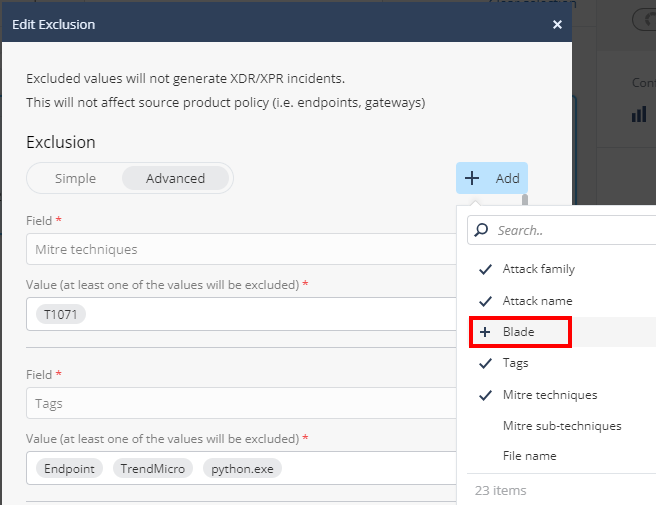
From the Field list, select the insight field(s) to be excluded. Fields are the column names in the Insights & Forensics page.
-
To add or remove a field, click + Add. The fields already selected are marked with
 .
.-
To add, hover over the field name and click +.
-
To remove an already selected field, click the field name.
-
-
In the Value field, enter the field values to be excluded. XDR applies this exclusion on insights that contain all the above fields and any of these values.
-
Repeat steps 5 and 6 to add another field and value.
-
(Optional) To exclude the incidents already generated based on this insight:
-
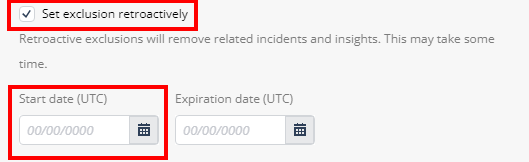
Select the Set exclusion retroactively checkbox.
-
In the Start date (UTC) field, select a date within the last 90 days. XDR excludes all the incidents that were generated from this date based on this insight. To revert the exclusion, see Reverting a Retroactive Exclusion.
-
-
(Optional) In the Expiration date (UTC) field, select an expiration date for the exclusion. After this date, XDR generates incidents for this insight. By default, there is no expiry date for an exclusion.
-
(Optional) In the Exclusion comment section, enter a description about the exclusion.
-
Click Create.
The exclusion is added to the Exclusions table.
![]() in the Start Date column indicates that the system has successfully executed the retroactive exclusion.
in the Start Date column indicates that the system has successfully executed the retroactive exclusion. ![]() indicates that the system failed to execute the retroactive exclusion.
indicates that the system failed to execute the retroactive exclusion.

Reverting a Retroactive Exclusion
You can revert a retroactive exclusion to restore the incidents excluded by this exclusion.
To revert a retroactive exclusion:
- Go to Policy > Exclusions.
-
In the Exclusions table, for the exclusion you want to revert, hover over the Start Date, click
 and then click Revert retroactive exclusion.
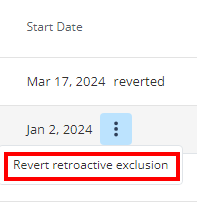
If the revert is successful, reverted message appears in the Start Date column.
If revert fails, revert failed message appears.

Editing an Exclusion
To edit an exclusion:
-
Go to Policy > Exclusions.
-
Select the exclusion and click Edit.
The Edit Exclusion window appears.
-
Make the necessary changes for the exclusion and click Submit.
|
|
Note - You cannot edit an exclusion for which retroactive or revert operation is in progress. |
Exporting Exclusions
To export the exclusions:
-
Go to Policy > Exclusions.
-
Click Export All (CSV).
The system downloads the report in the CSV format.