Getting Started Walkthrough Wizard
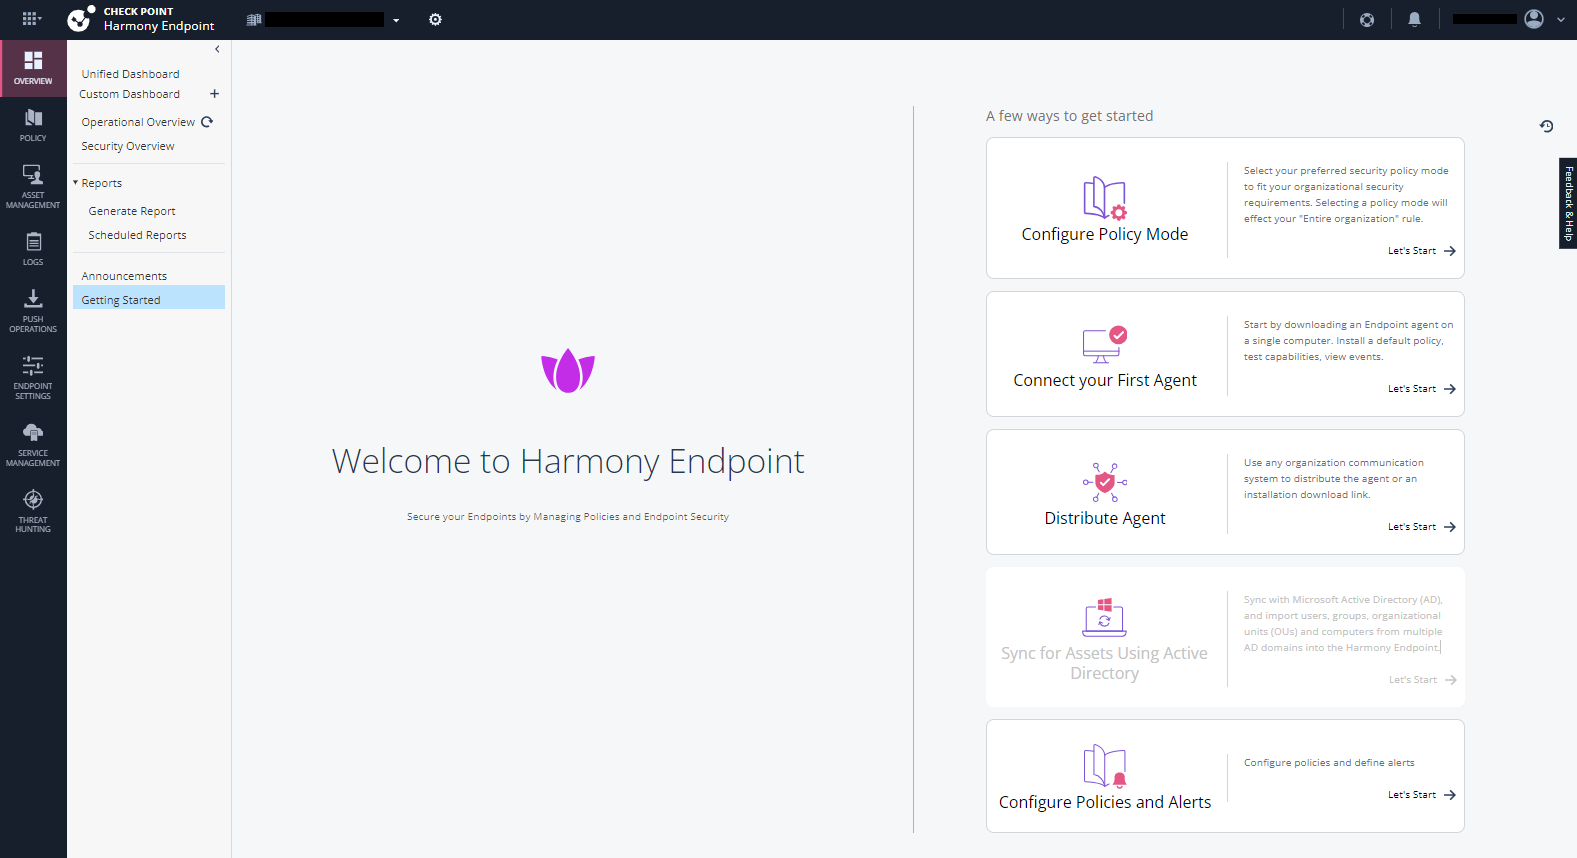
The Getting Started Walkthrough Wizard provides an overview of common operations for administrators on the Harmony Endpoint EPMaaS Administrator portal, simplifying the on-boarding process.
After you successfully deploy a service, go to Overview > Getting Started.
The list of widgets in the getting started page of Harmony Endpoint EPMaaS Administrator portal is as follows:
-
 Configure Policy Mode
To configure the Threat Prevention policy mode, click Let's Start in the Configure Policy Mode widget.
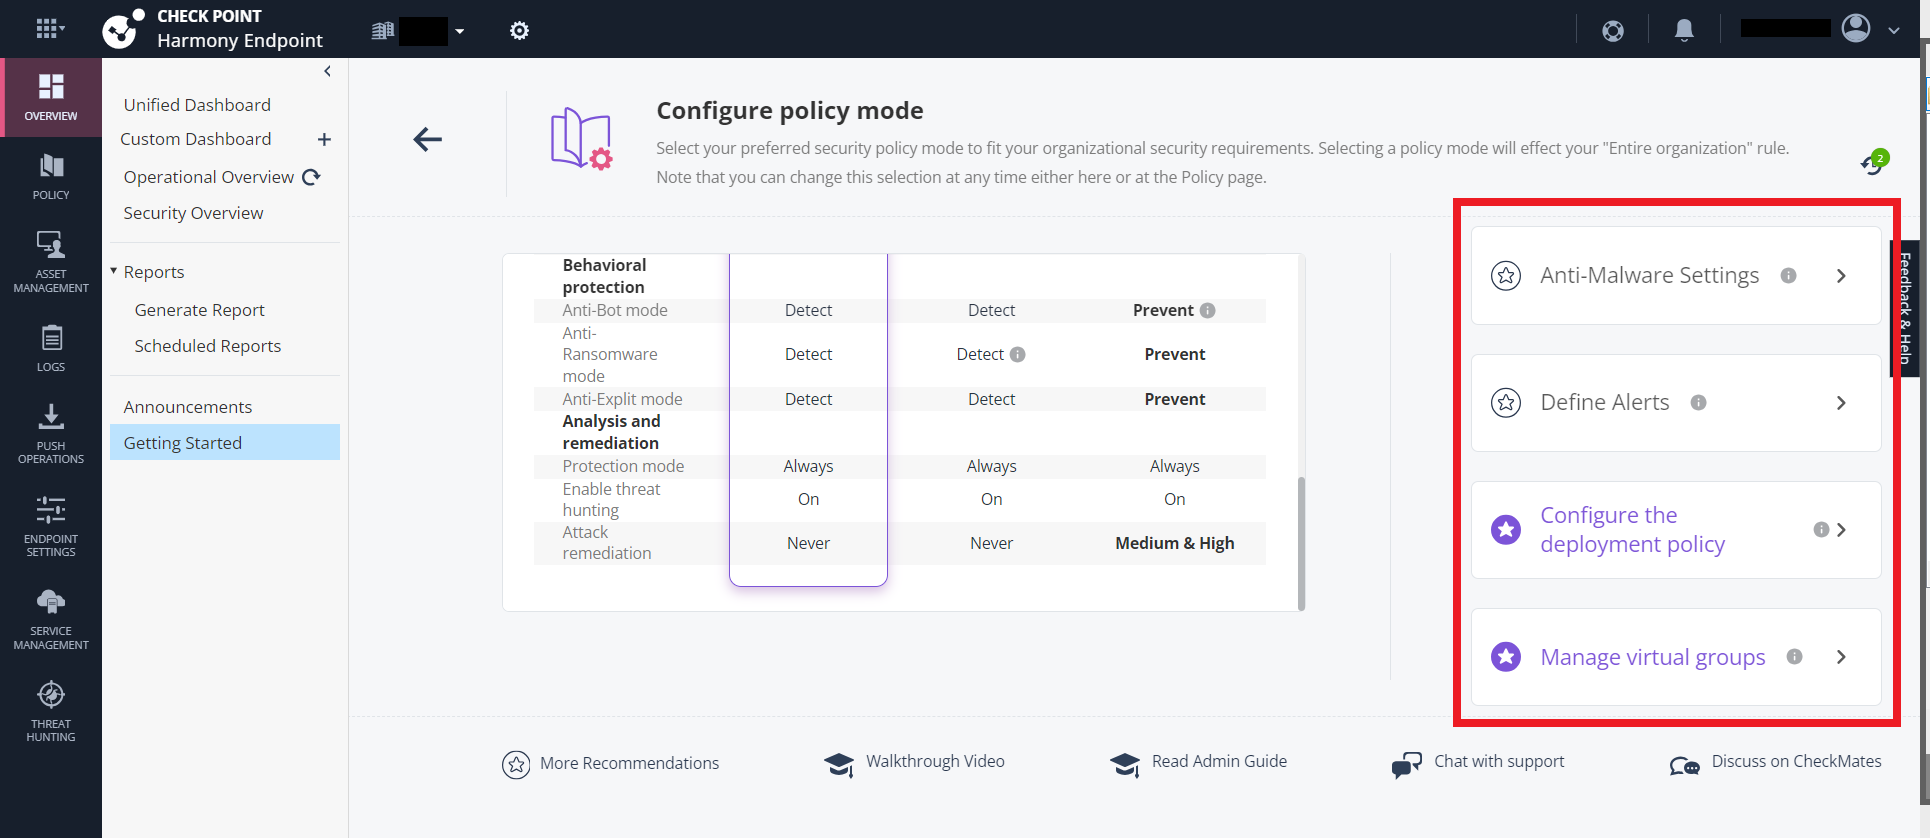
The Configure policy mode page appears.
To select the required policy mode and install the policy:
-
Select the best suitable policy mode and click the Install button provided for the respective policy mode. The predefined configurations available are:
-
Detect - This configuration provides basic protection and is recommended for the users on-boarding for the first time for a few days.

Note - Detect mode can help optimize your work during the on-boarding process, but it is not recommended to remain in detect mode.
-
Tuning - This configuration provides more protection than the detect only configuration.
-
Optimized - This is a production recommended configuration which provides enhanced protection.
For more information, see Policy Mode.
Note - The policy will be applied to the default rule
 Set of traffic parameters and other conditions in a Rule Base (Security Policy) that cause specified actions to be taken for a communication session. (usually to Entire Organization).
 -
-
Click Continue to proceed with the installation.
-
-
 Connect your First Agent
To download and connect with the Endpoint agent, click Let's Start in the Connect your First Agent widget.
The Connect your First Agent page appears with the following widgets:
-
Download & Install Endpoint agent - To download the Endpoint agent, click Download and select the suitable option. The available options are as follows:
-
Online Install - Download and install the Harmony Endpoint security client using a tiny install agent on the endpoints. For more information, see Automatic Deployment using the Tiny Agent.
-
Offline Install - Download the Harmony Endpoint security client and export the same to the endpoints for offline installation. For more information, see Manual Deployment using the Offline Installation.
-
Copy installation link - Download and install the Harmony Endpoint security client using the installation link via third party installation agent. For more information, see Automatic Deployment using the Vanilla client.
-
-
Change Uninstall Password - The uninstall password will be required when an endpoint user is uninstalling the Security Client. To configure the uninstall password:
-
Click Setup.
-
Enter the password in the Password and Confirm Password field.
-
Click Save.
For more information, see Agent Uninstall Password.
-
-
Monitoring- To monitor the connected devices, click Overview. For more information, see Viewing-Operational-and-Security-Overview.htm.
-
-
 Distribute Agent
To download and distribute the Endpoint agent, click Let's Start in the Distribute Agent widget.
The Distribute Agent page appears with the following widgets:.
-
Distribute Agent Manually - To download the Endpoint agent, click Download and select the suitable option. The available options are as follows:
-
Online Install - Download and install the Harmony Endpoint security client using a tiny install agent on the endpoints. For more information, see Automatic Deployment using the Tiny Agent.
-
Offline Install - Download the Harmony Endpoint security client and export the same to the endpoints for offline installation. For more information, see Manual Deployment using the Offline Installation.
-
Copy installation link - Download and install the Harmony Endpoint security client using the installation link via third party installation agent. For more information, see Automatic Deployment using the Vanilla client.
-
-
Distribute Agent via 3rd Party App - To view the procedure to distribute the Endpoint agent using 3rd party applications for Windows, click Setup. For information about macOS application, see Harmony Endpoint Security for macOS MDM Deployment Guide.
-
Remote Installation - To view the procedure for remote installation of the client, click Overview.
-
-
 Sync for Assets Using Active Directory
To configure Active Directory scanners, click Let's Start.
The Sync for Assets Using Active Directory page appears with the following widgets:
-
Full Active Directory Scanner - In the Full Active Directory Sync, one Endpoint client is defined as the Active Directory scanner, it collects the information and sends it to the Security Management Server
 Dedicated Check Point server that runs Check Point software to manage the objects and policies in a Check Point environment within a single management Domain. Synonym: Single-Domain Security Management Server.. To configure and enable or disable Active Directory Default Scanner, click Enable/Disable. For more information, see Full Active Directory Sync.
Note - If your organization uses Microsoft Activity Directory (AD), you can import users, groups, organizational units and computers from multiple AD domains into the Harmony Endpoint.
-
Organization Distributed Scan - In this method, only devices with Harmony Endpoint installed report their paths. Other devices do not report any information. To enable or disable Organization Distributed Scan, click Enable/Disable. For more information, see Organization Distributed Scan.
-
-
 Configure Policies and Alerts
To configure Policies and Alerts, click Let's Start in the Configure Policies and Alerts widget.
The Configure Policies and Alerts page appears with the following widgets:
-
Manage virtual groups - To configure the virtual groups, click Manage. For more information, see Managing Virtual Groups.

Note - You can also configure the virtual groups outside the Active Directory.
-
Set Pre-Defined Policies - To configure the security policies
 Collection of rules that control network traffic and enforce organization guidelines for data protection and access to resources with packet inspection., click Set Policy. For more information, see Configuring the Threat Prevention Policy.
 -
Define Alerts - To configure the notifications and alerts, click Define. For more information, see Configuring Alerts.
-
Each section also contains a few general options, which are listed in the following table:
|
Element |
Description |
|---|---|
| Define Alerts | To configure the alerts and notifications. For more information, see Configuring Alerts. |
| Configure the security policy | To configure the Endpoint security policies. For more information, see Configuring the Threat Prevention Policy. |
| Configure the deployment policy |
To configure the software deployment. For more information, see Automatic Deployment of Endpoint Clients. |
| Manage virtual groups | To configure the virtual groups. For more information, see Managing Virtual Groups. |


