Managing Active Directory Scanners
Endpoint Security can scan and import users, groups, Organizational units (OUs) and computers from multiple supported directory domains. After the objects are imported, you can assign policies.
|
|
Notes:
|
Supported Directory
-
Microsoft Active Directory
-
Microsoft Entra ID
Prerequisites
Endpoint Security requires permissions to scan the directory. Ensure that the directory account has the following permissions for each directory scanner:
-
The Active Directory root
-
Child containers and objects
-
Deleted objects container - Deleted objects in directory are stored in the Deleted objects temporarily. Endpoint Security compares the objects in the directory with the Deleted objects container to know the objects that have changed since the last scan.
Managing Microsoft Active Directory Scanner
Organization Distributed Scan
Organization Distributed Scan is enabled by default. You can see its configured settings in the Endpoint Settings view > Default Scanner.
Each Endpoint client sends its path to the Security Management Server![]() Dedicated Check Point server that runs Check Point software to manage the objects and policies in a Check Point environment within a single management Domain. Synonym: Single-Domain Security Management Server..
Dedicated Check Point server that runs Check Point software to manage the objects and policies in a Check Point environment within a single management Domain. Synonym: Single-Domain Security Management Server..
By default, each Endpoint client sends its path every 120 minutes. In this method, only devices with Endpoint Security installed report their paths, other devices with do not report their information.
Full Active Directory Sync
In the Full Active Directory Sync, one Endpoint client is defined as the Active Directory scanner, it collects the information and sends it to the Security Management Server![]() Check Point Single-Domain Security Management Server or a Multi-Domain Security Management Server..
Check Point Single-Domain Security Management Server or a Multi-Domain Security Management Server..
To configure the AD scanner:
-
From the left navigation panel, click Asset Management.
-
In the left pane, click Computers.
-
From the top toolbar, click
 (General Actions) and click Directory Scanner.
The Scanner window opens.
-
Fill in this information:
Section
Required Information
Connect from computer
-
Computer name - Select a computer as your AD scanner.
AD Login details
-
User name (AD) - Enter the user name to access the Active Directory.
-
Domain name - Enter the domain of the Active Directory.
-
Password (AD) - Enter the password to access the Active Directory.
AD Connection
-
Domain controller - Enter the name of the Domain controller.
-
Port - Enter the number of the listening port on the Domain controller.
-
Use SSL communication (recommended) - Select this checkbox if you want the connection between the AD scanner to the Domain Controller to be over SSL.
-
LDAP Path - The address of the scanned directory server.
-
Search filter - If required, enter search criteria to selectively sync only matching entries from the directory server. For more information, see LDAP syntax.
-
Sync AD every - Specify the time interval in minutes for the system to initiate the scan. Supported range is 5 (min) to 240 (max) minutes.

Notes -
-
If you set a value outside the supported range (for example 4 or 241), the system resets the value to the closest threshold value.
-
The recommended time interval is 120 minutes.
-
-
When you create a new AD scanner, the organization directory scan is automatically disabled.
To see information on your activated AD scanners, go to the Endpoint Settings view.
|
|
Note - You can also open the AD scanner configuration pop-up from Endpoint Settings > AD Scanners > Default Scanner > Setup full Active Directory sync. |
Managing Microsoft Entra ID Scanners
Endpoint Security can scan and import users, groups, administrative units and computers from multiple Microsoft Entra ID into the Endpoint Security. After the objects are imported, you can assign policies.
|
|
Note - Endpoint Security does not scan groups of the type Distribution in Microsoft Entra ID. |
Limitations
-
The Microsoft Entra ID scanner supports Windows only. For macOS devices, use Microsoft Intune.
-
User SmartCard is not supported.
-
Hybrid mode is not supported.
-
The user, device or group can be member of only one Administrative unit.
-
The maximum characters supported for Display Name is 45.
-
Microsoft Entra ID scanner sync stops if the Endpoint Security server is down for a duration of 30 days and above. To restart, contact Check Point Support.
-
Microsoft Entra ID does not work if Full Disk Encryption security blade is enabled.
-
If Full Disk Encryption is enabled and the user changes their password, the user must lock and unlock the device for the new password to take effect.
-
Supported only with Endpoint Security Client version E88.50 and higher.
-
The Domain Controller (DC) must have sufficient permissions to query LDAP.
-
Passwords cannot contain the following special characters:
, > & ' " \ / -
To view deleted objects, enable the Recycle Bin in AD Admin.
-
Querying a Load Balancer is not supported. The query must be sent directly to the DC. For more information, see SK184794.
Configuring the Settings in the Microsoft Entra ID Portal
Before you can add Microsoft Entra ID to Endpoint Security, it is necessary to create the Microsoft Entra ID credentials.
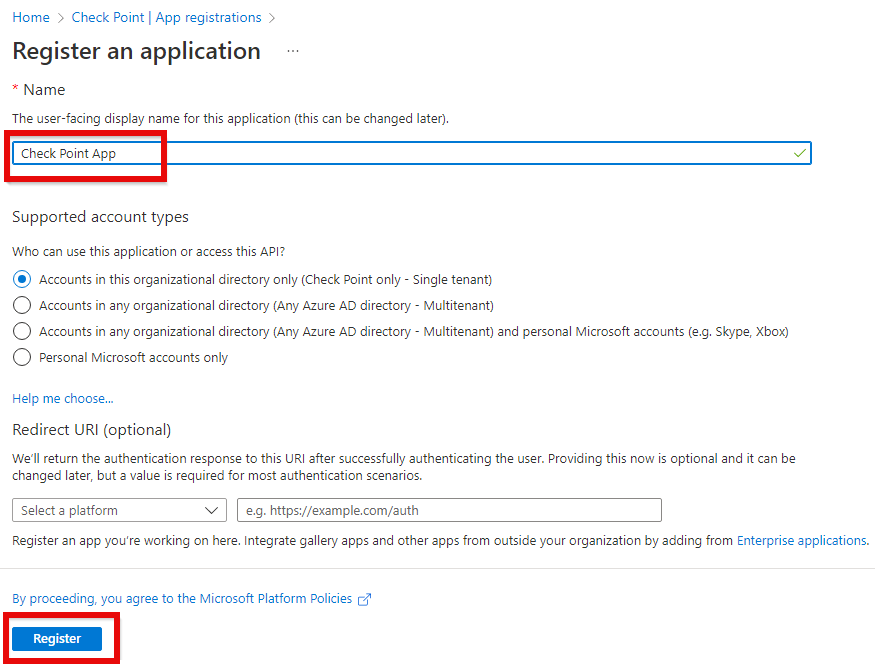
Step 1: Register the Application
-
Log in to the Microsoft Entra ID.
-
From the toolbar select Azure Active Directory.
-
Select App registrations > click New Registration.
-
Below the Owned applications tab, enter the application's Name > select an Account type > click Register.
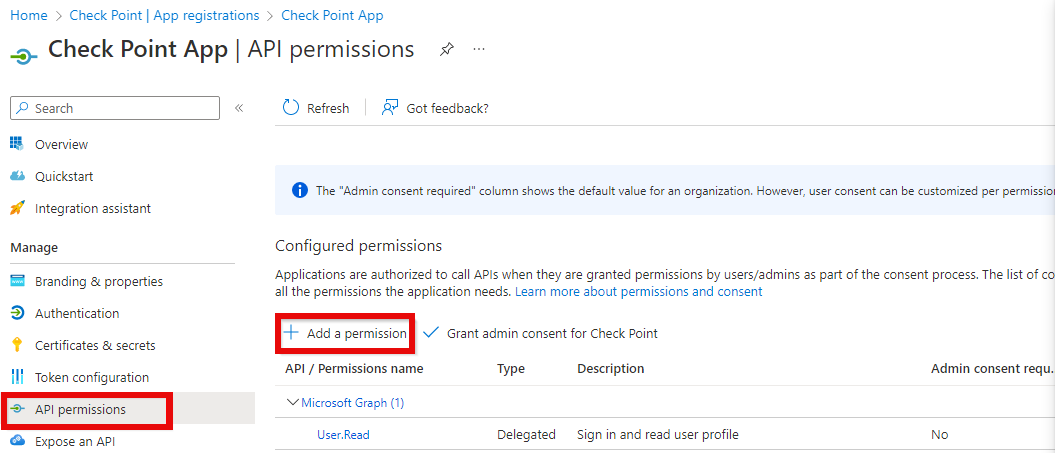
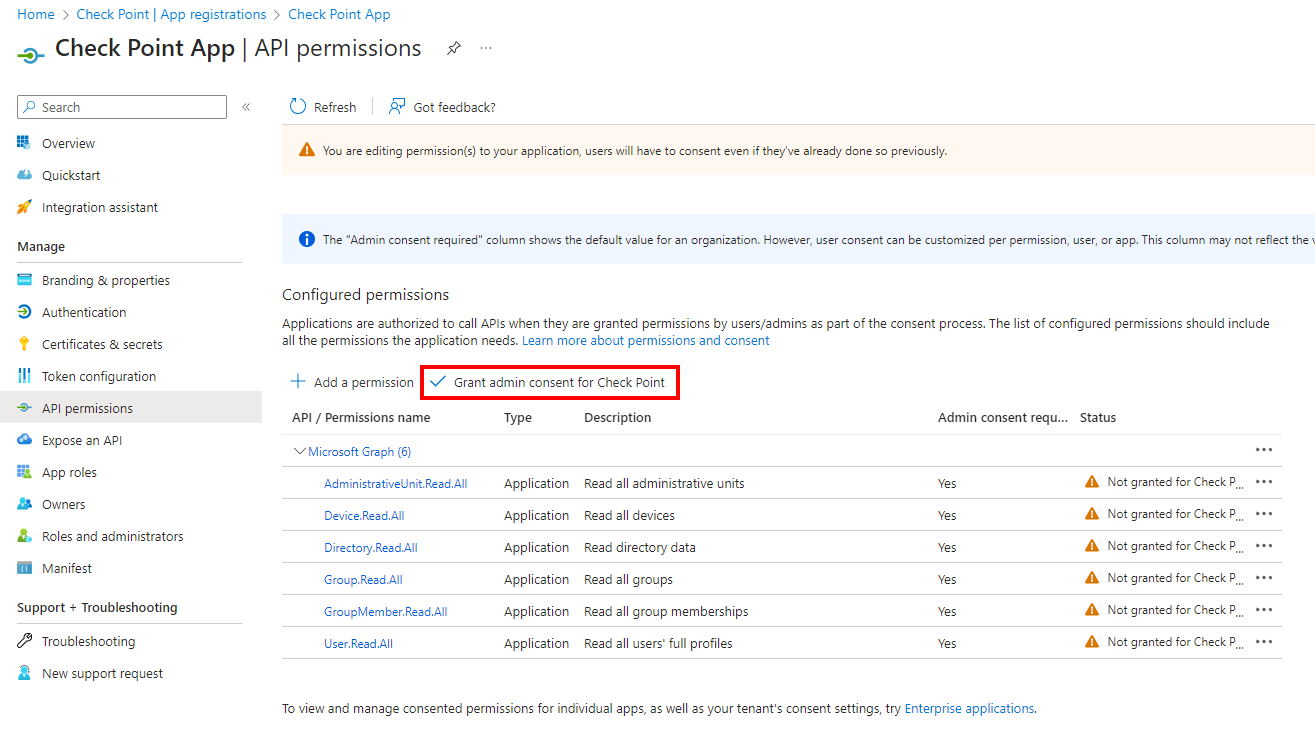
Step 2: Add Permissions to the Application
-
Add the necessary permissions to the application.
-
Go to the API permissions section and click Add a permission.
-
In the window that opens, select Microsoft Graph > Application permissions.

-
-
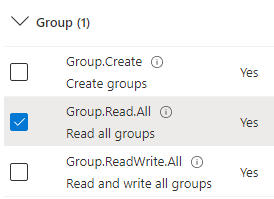
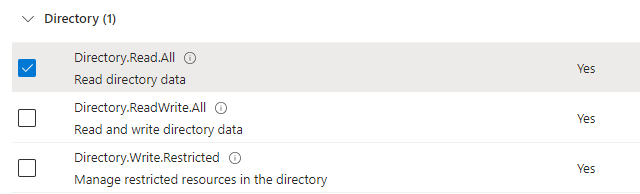
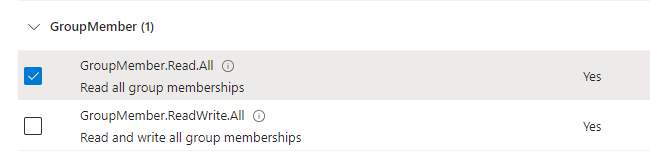
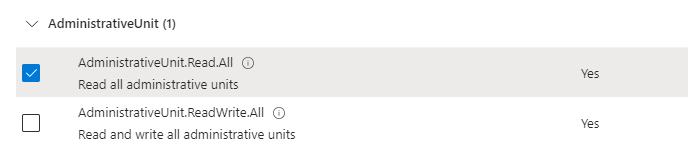
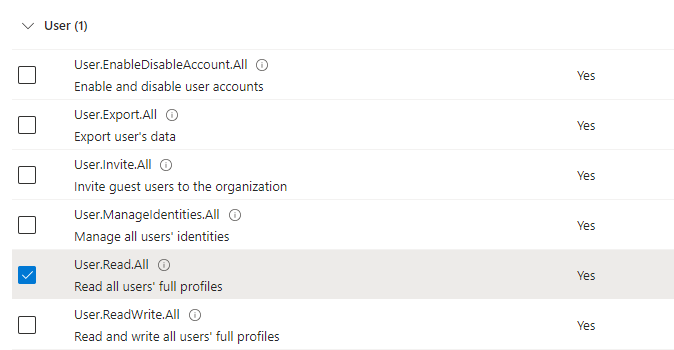
Select these permissions:
-
Groups.Read.All
-
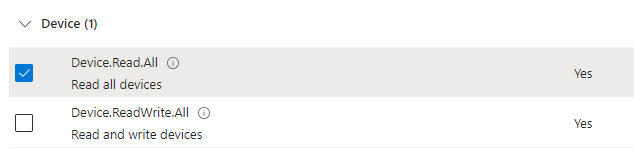
API Permissions:
-
Device.Read.All
-
Directory.Read.All
-
GroupMember.Read.All
-
AdministrativeUnit.Read.All
-
User.Read.All
-
-
-
Give admin consent to the selected permissions.
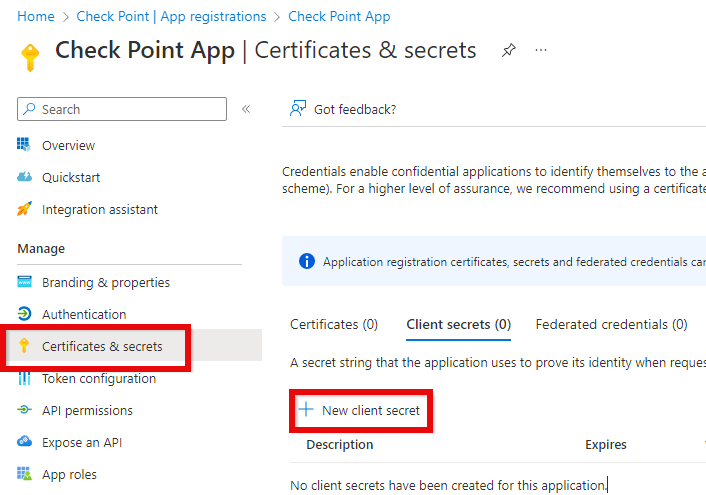
Step 3: Finish Configuration in Microsoft Entra ID:
-
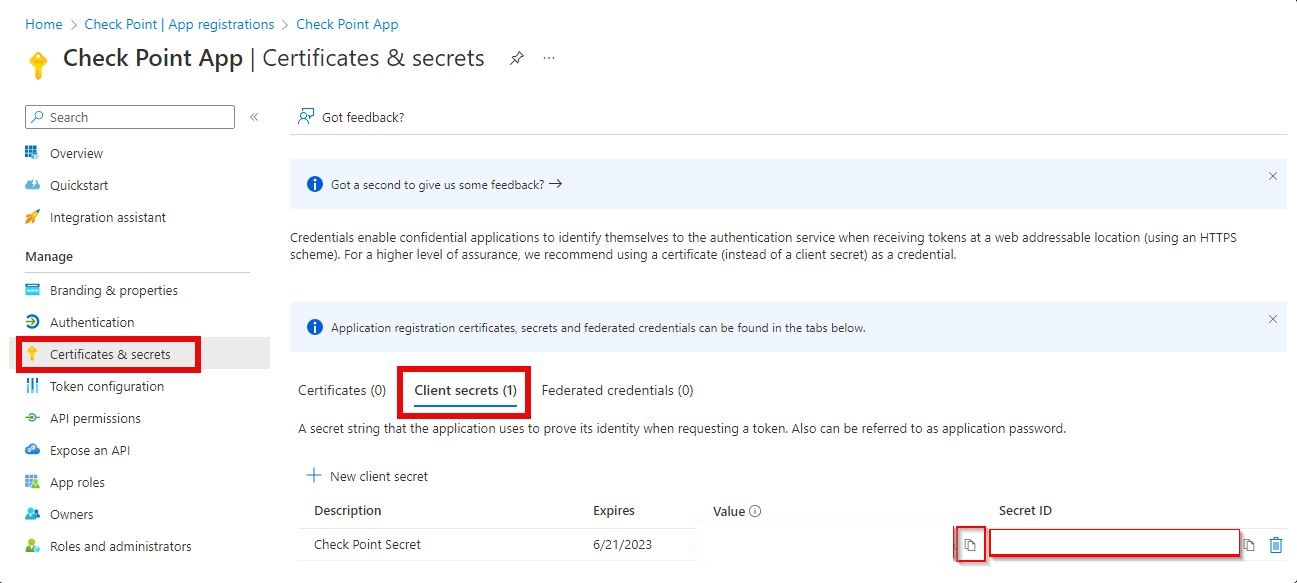
Create a secret key for the application.
-
Go to the section Certificates & secrets > click New client secret.
-
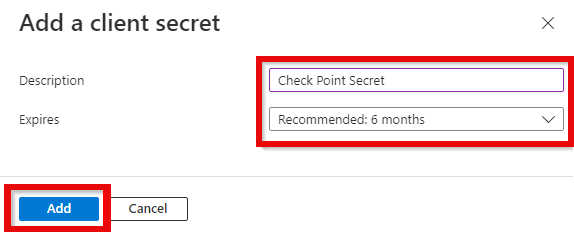
In the Add a client secret window, enter a Description and the date it Expires > click Add.
-
-
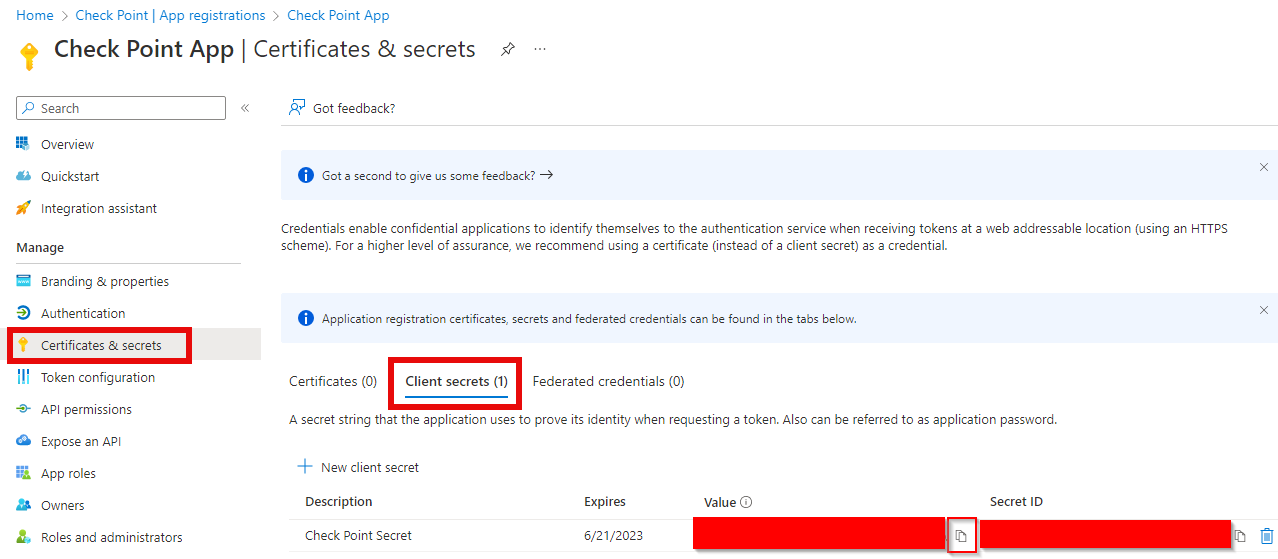
Copy the value of the secret key and keep it in a secure place. This key is necessary for the Endpoint Security portal integration with Microsoft Entra ID.
-
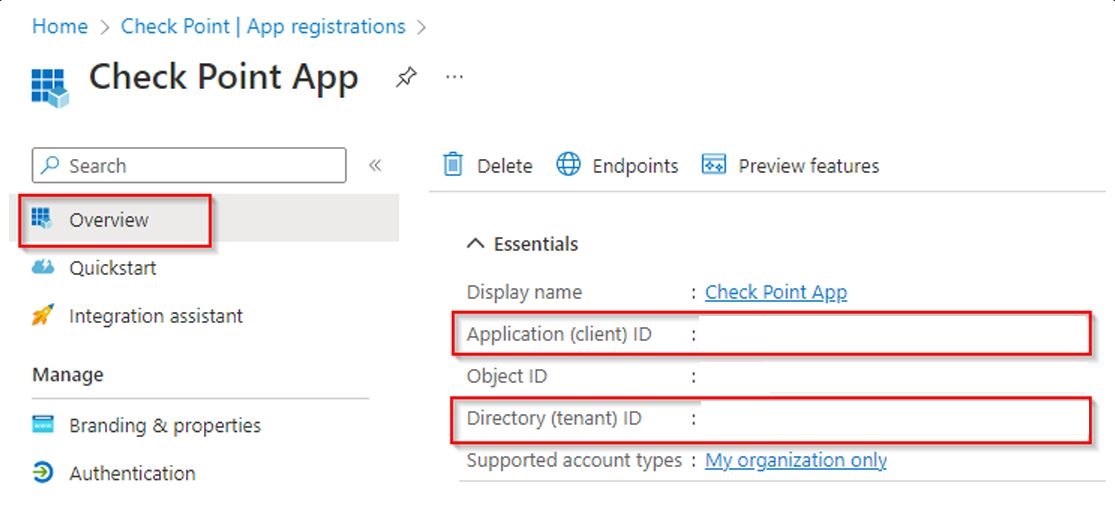
Go to the Overview section, copy these two values, and keep them in a secure place.
-
Application (client) ID
-
Directory (tenant) ID
-
Importing Objects from Microsoft Entra ID
To import objects from Microsoft Entra ID:
-
Go to Endpoint Settings.
-
Expand AD Scanner and click Entra ID Scanners.
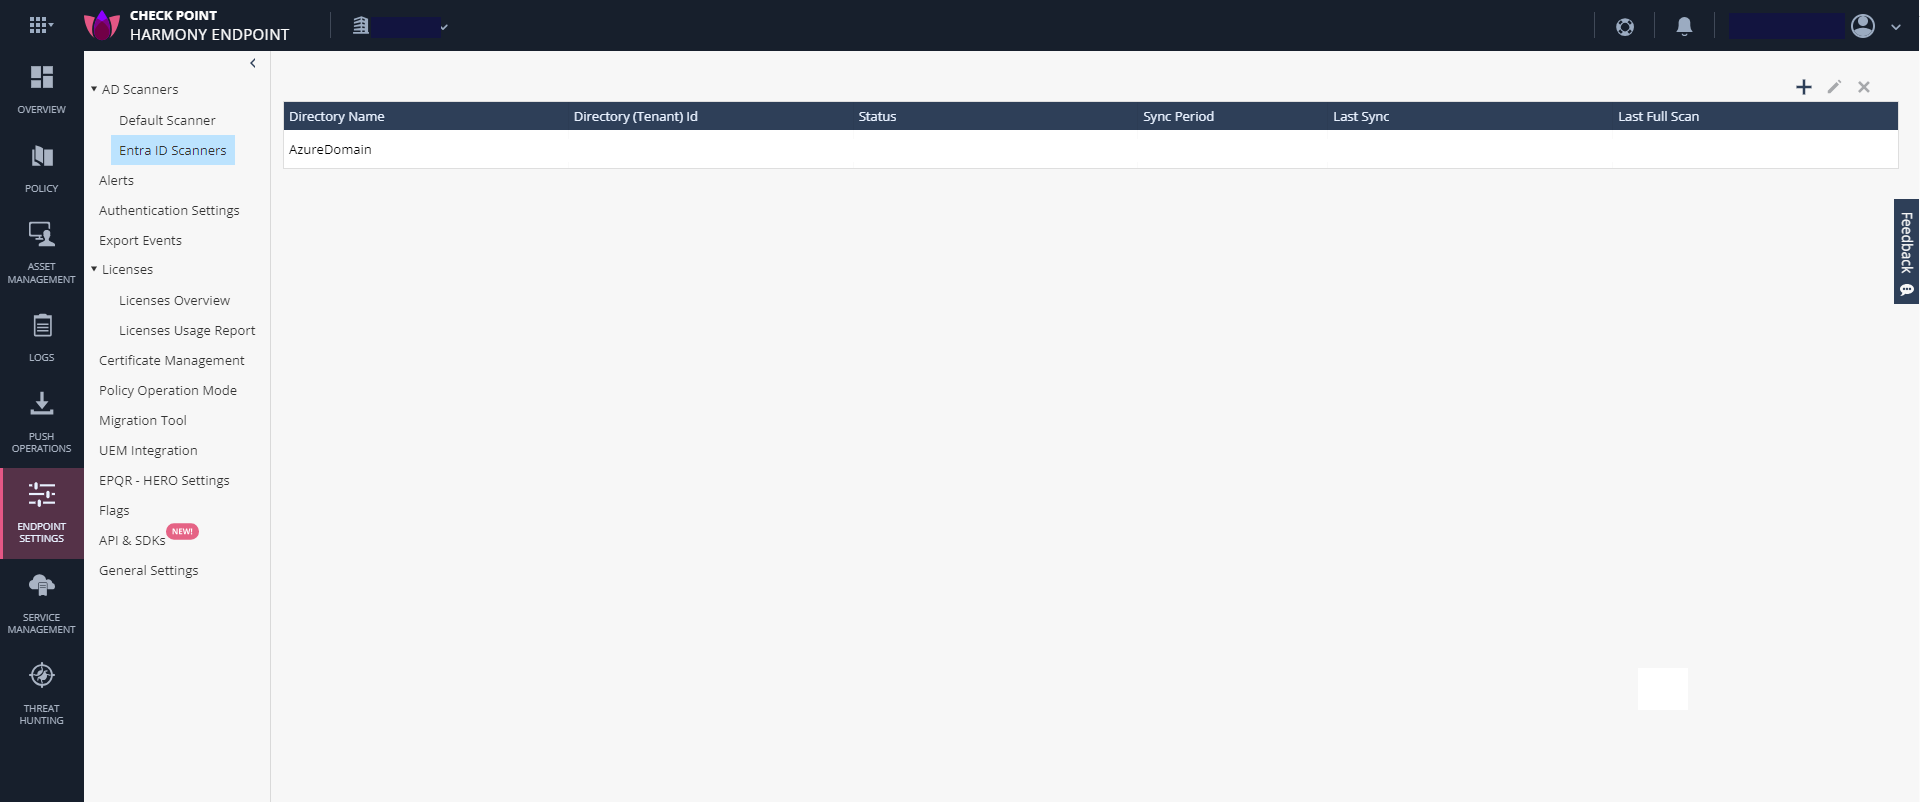
Section
Description
Directory Name Name of the directory. Directory (Tenant) ID Tenant ID from your Microsoft Entra ID portal. Status Status of the Microsoft Entra ID directory scan. Sync Period
Frequency at which Endpoint Security initiates the scan to fetch the data from Microsoft Entra ID.
Last Sync
Date and time when Endpoint Security last synced with Microsoft Entra ID.
Last Full Scan
Date and time of the last full scan of the Microsoft Entra ID.
-
In the top right corner, click
 .
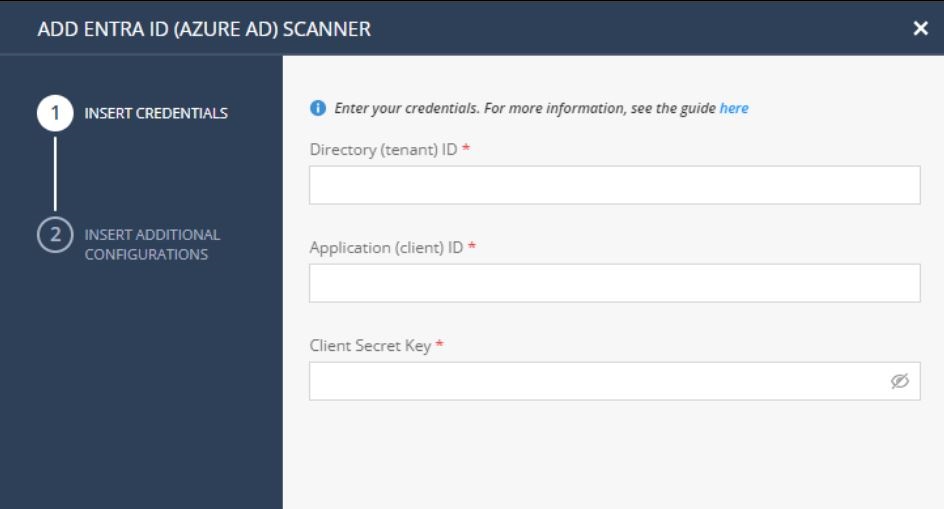
.The Add Entra ID Scanner window appears.
-
Enter these:
-
Directory (Tenant) ID
-
Application Client ID
You can obtain these from your Microsoft Entra ID portal.
-
Secret ID
You can obtain the Secret ID from your Microsoft Entra ID portal.
-
-
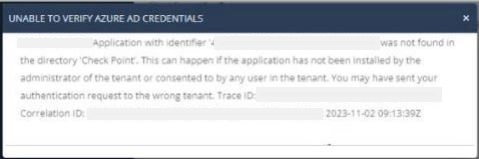
Click Verify.
Note - Make sure that the information you copy from the Microsoft Entra ID portal are entered accurately. If the verification fails, the following dialog box appears:
-
Click Next.
-
In the Root Name field, enter a name for the root directory.
-
In the Sync Interval field, specify the interval (in minutes) for the sync between Endpoint Security and Microsoft Entra ID.
-
Click Add.
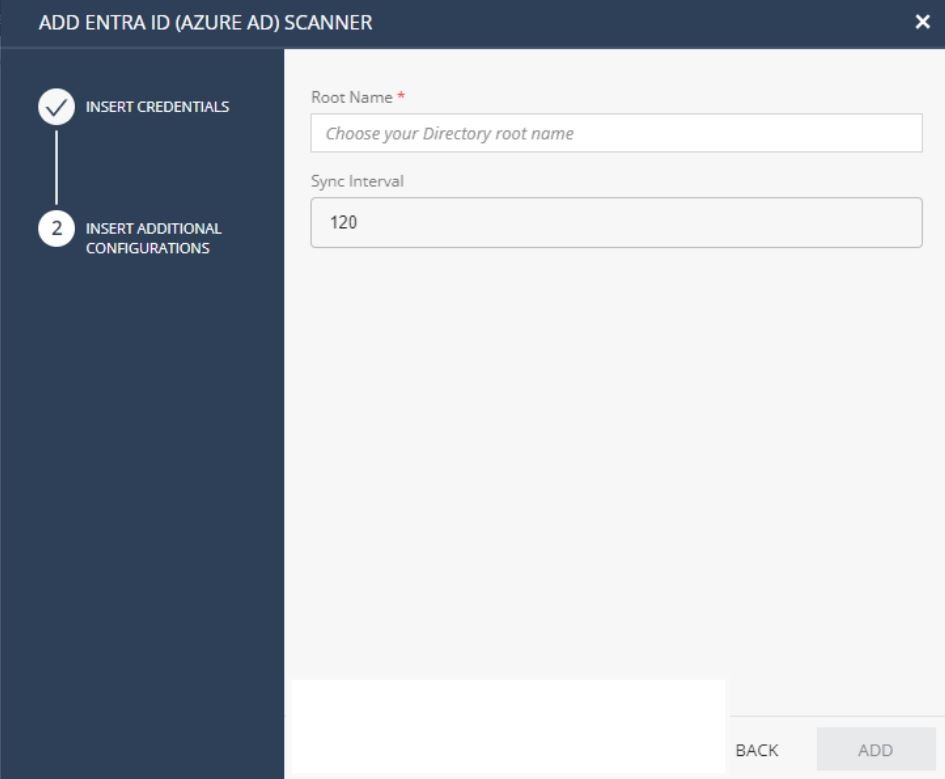
The Microsoft Entra ID directory is added to the table.
-
To edit a directory, select the directory and at the top right pane, click
 .
. -
To delete a directory, select the directory and at the top right pane, click
 .
. -
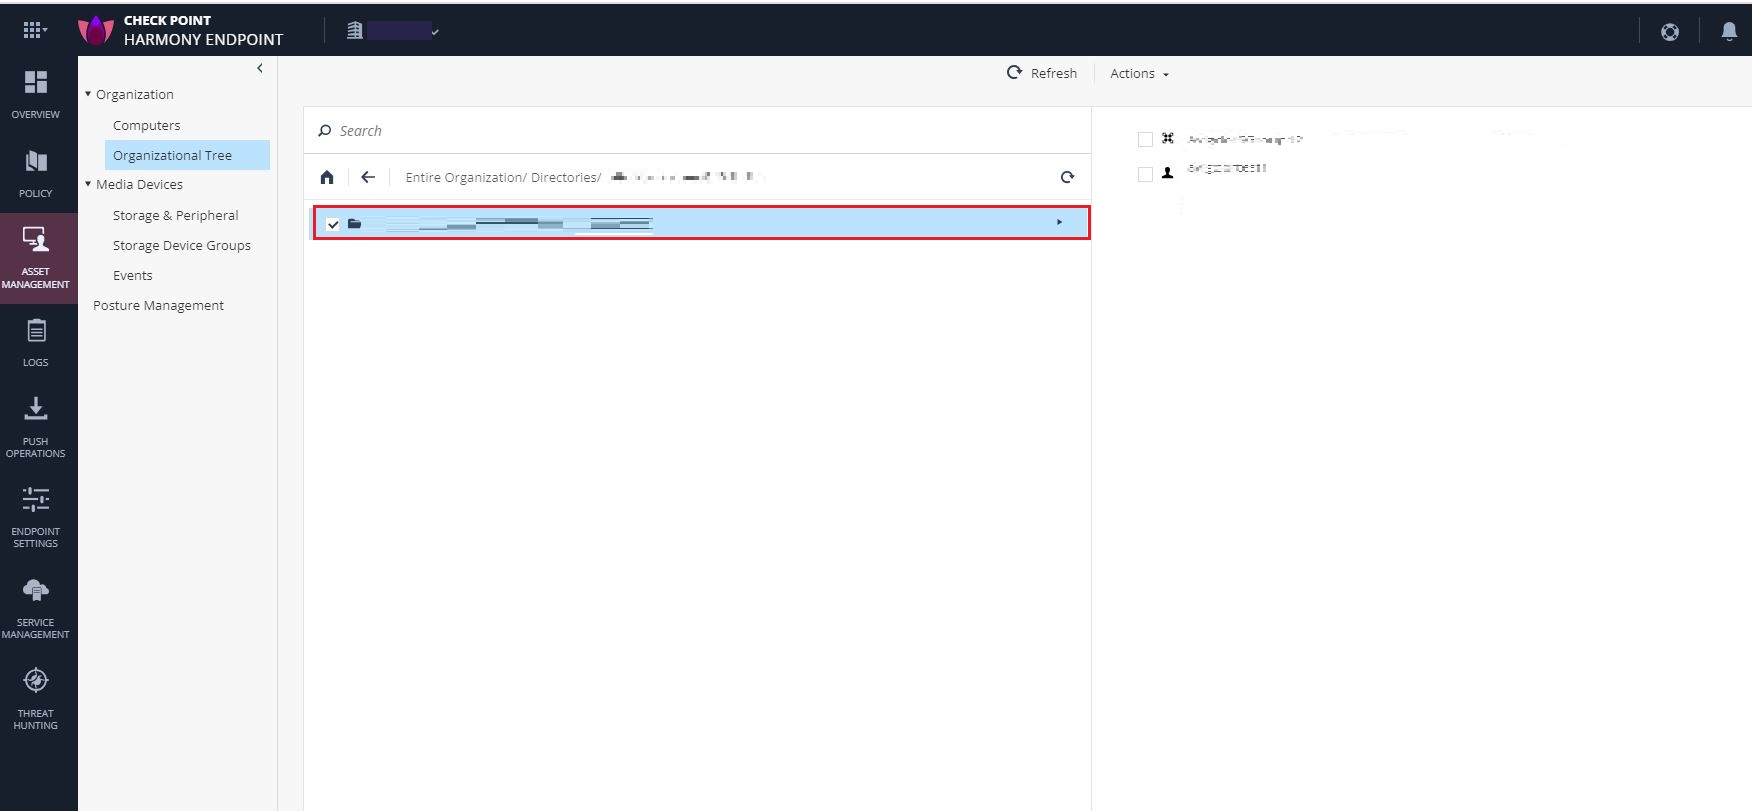
To verify whether the Microsoft Entra ID is successfully imported:
-
Go to Asset Management.
-
Expand Organization> Organizational Tree > Directories.
The root Microsoft Entra ID should be listed in the table.
-