Setting up the Integration in the Google Admin Console
To add the Mobile Security service as API client:
-
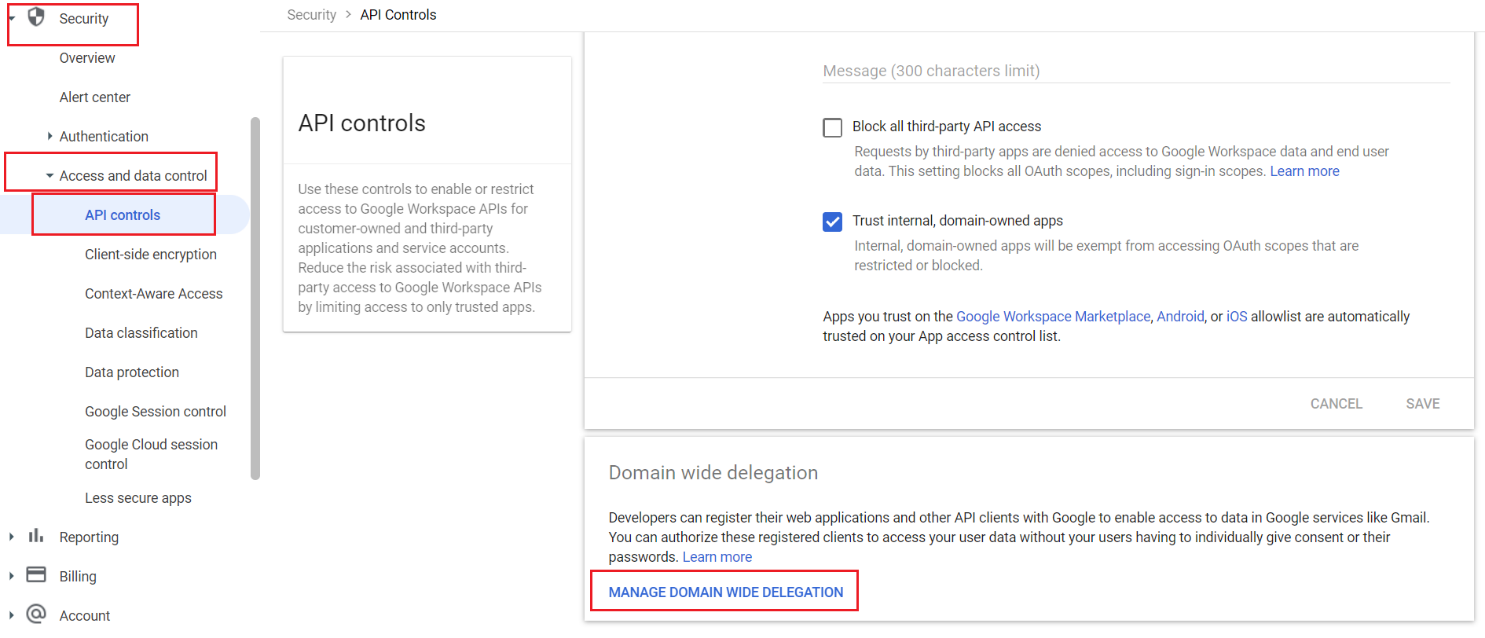
Log in to your Google Admin console.
-
Go to Security > Access and data control > API controls and select Manage Domain Wide Delegation.
-
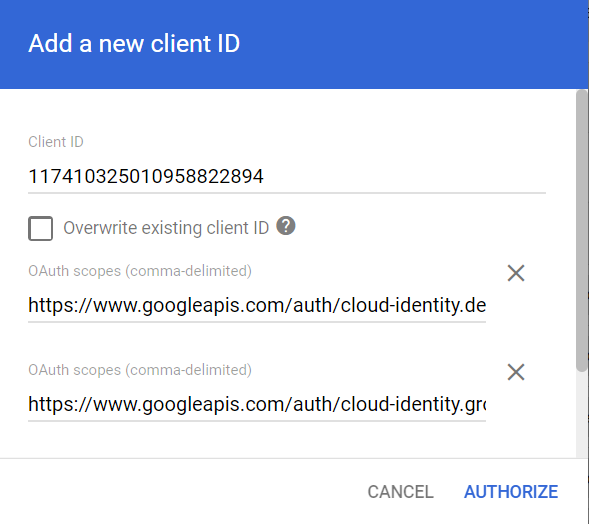
To add a new API client, select Add new.
-
In the Add a new client ID window, enter these details:
-
Client ID – Enter the Unique ID value you created in the Google Cloud project > IAM and admin > Service accounts.
-
OAuth scopes – Add these two URLs and click Authorize.
-
To add Mobile Security as a third-party integration:
-
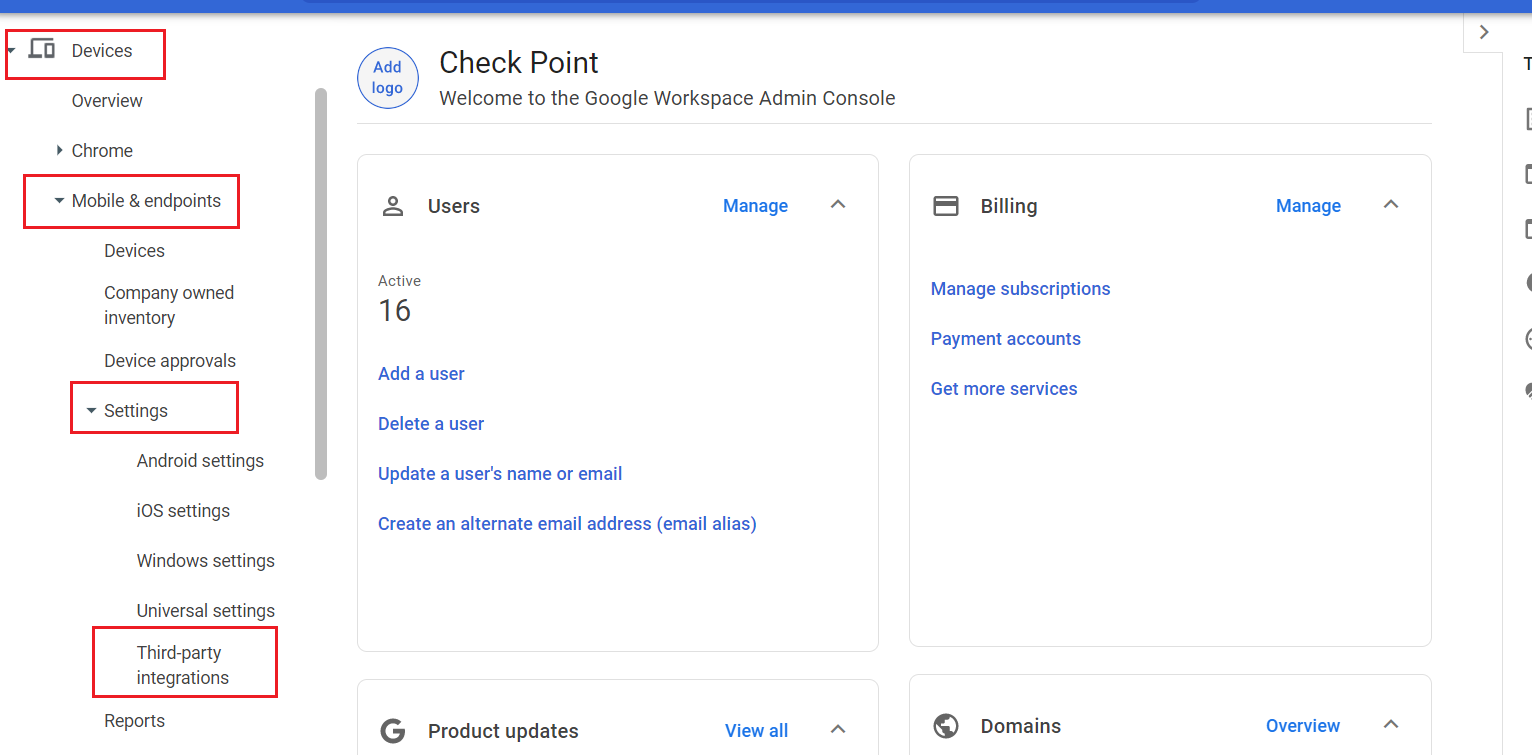
Log in to your Google Admin console.
-
Go to Devices > Mobile & endpoints > Settings > Third-party integrations.
-
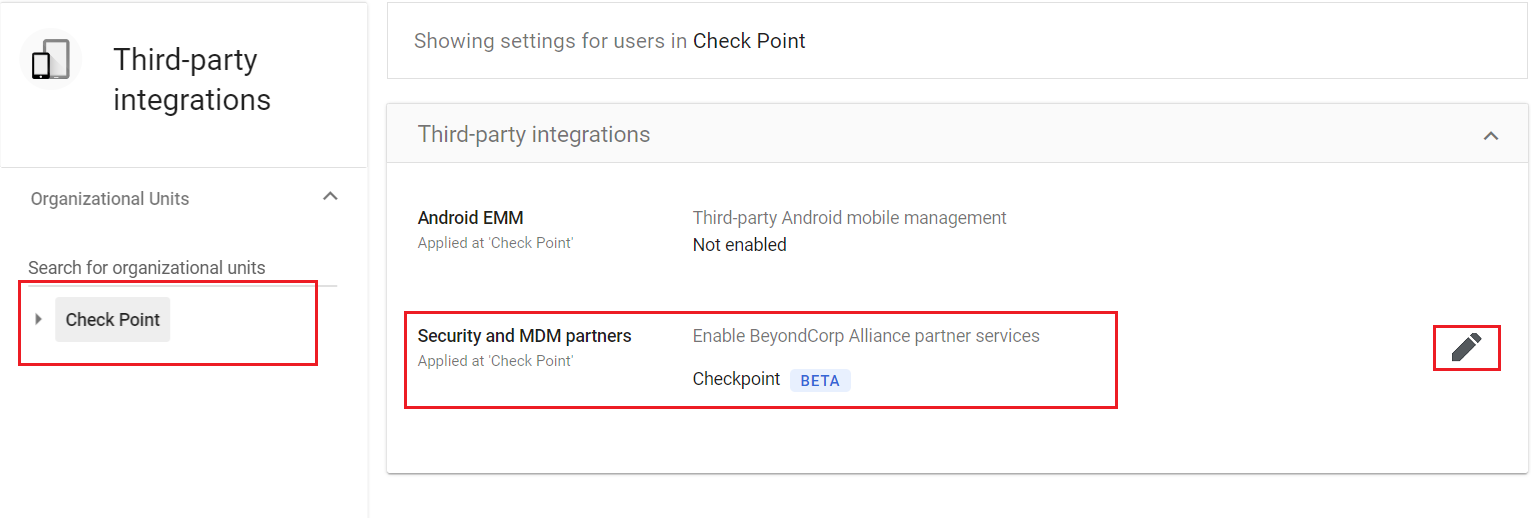
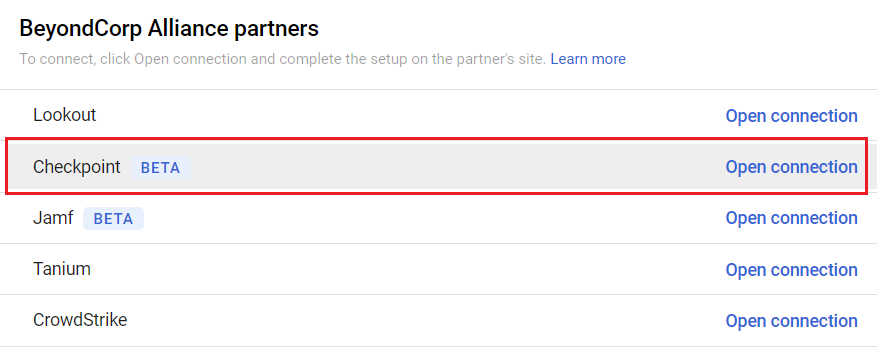
In Third-party integrations, select Check Point and click the edit icon for Security and UEM partners.
-
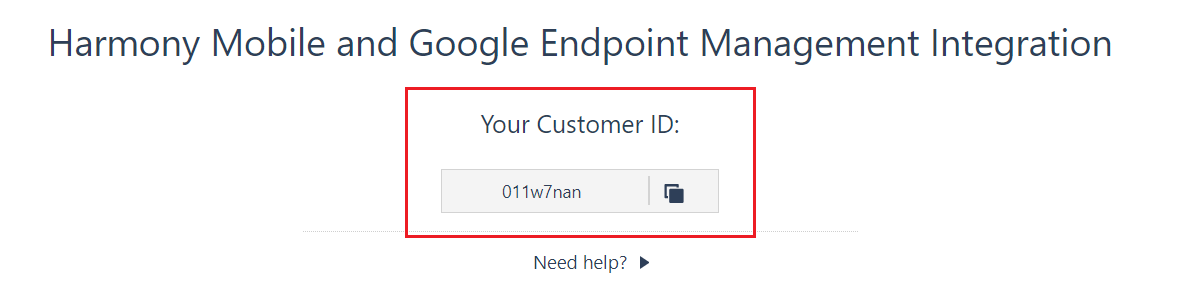
Select Manage and then click Open connection.
A new browser tab opens with the Check Point Mobile Security Customer ID. Copy and save it for later use.
-
Enable Advanced management to deploy Harmony Mobile Protect app with managed configurations:
-
Go to Devices > Mobile & endpoints > Settings > Universal.
-
In the General tab, select Advanced.

-
Click Save.
-
-
For company-owned iOS devices to register in Harmony Mobile Protect app using the Sign in with Google option:
- Go to Devices > Mobile & endpoints > Settings > iOS.
-
Turn on these Safari browser settings:
-
Allow Safari
-
JavaScript
-
Cookies

-
This completes the integration setup in the Google Admin console. You can now add users and enroll devices into the Google UEM![]() Unified Endpoint Management. An architecture and approach that controls different types of devices such as computers, smartphones and IoT devices from a centralized command point.. For more information, see Enrolling Devices with Google UEM and Activating Mobile Security.
Unified Endpoint Management. An architecture and approach that controls different types of devices such as computers, smartphones and IoT devices from a centralized command point.. For more information, see Enrolling Devices with Google UEM and Activating Mobile Security.
Defining Access Levels for the Mitigation Process
To mitigate the device risk detected by the Mobile Security, you can set access levels for different applications to control their access to the organization resources.
To set an access level:
-
Log in to the Google Cloud platform - console.cloud.google.com.
-
Go to Security > Access Context Manager.
-
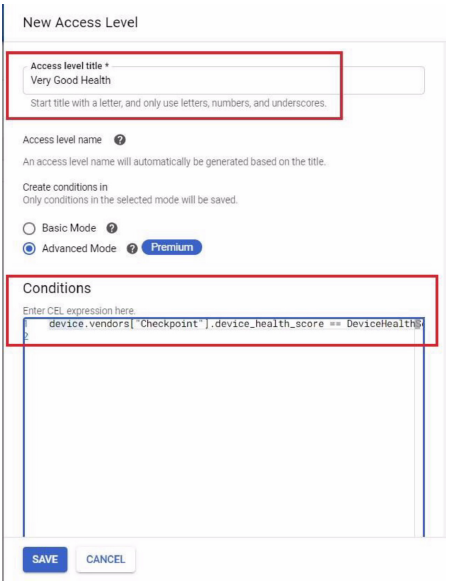
Select New Access Level and enter these details:
-
Access level title - Enter a title for the access level.
-
Under Create conditions in, select Advanced Mode.
-
In the Conditions section, add a CEL expression.
Create these access levels:
-
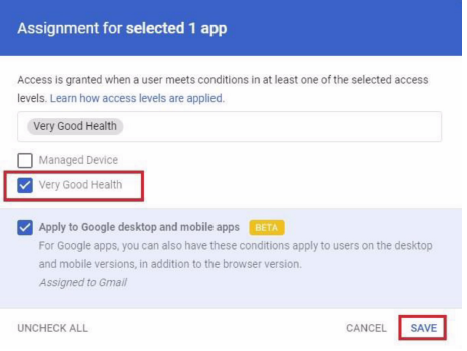
Access level title: Very Good Health
Conditions (CEL Expression): device.vendors["Checkpoint"].device_health_score == DeviceHealthScore.VERY_GOOD
-
Access level title: Managed Device
Conditions (CEL Expression): device.vendors["Checkpoint"].is_managed_device == true
-
-
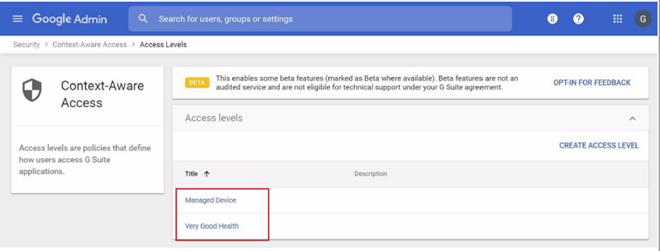
Log in to your Google Admin console, and select Security > Context Aware Access > Access Levels.
Verify that the predefined access levels defined in step 3 appear there.
-
In the Context Aware Access section, select Assign Access Levels.
-
Select the applications that you want to apply the access levels rules to, and click Assign.
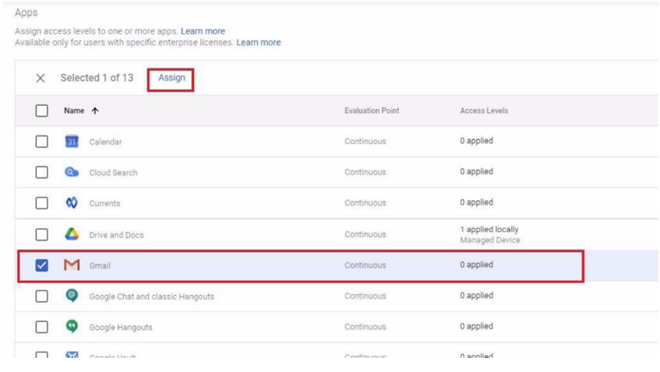
-
Select the required access level(s) and click Save.
Continue with Setting up the Integration in Mobile Security Dashboard.
Adding the Harmony Mobile Protect app to your App Catalog for Android Devices
-
Log in to your Google Admin console.
-
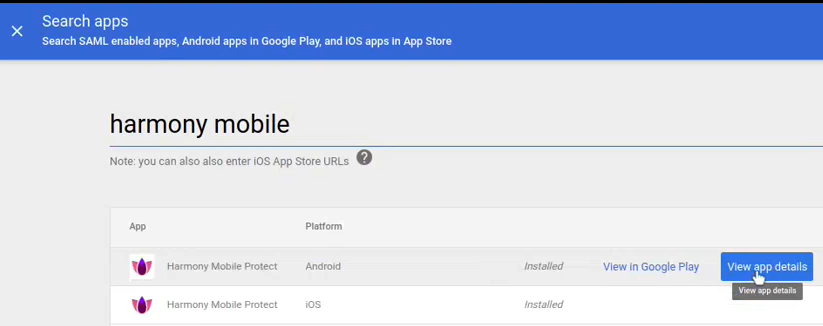
Go to Apps > Web and mobile apps > Add app and click Search for apps.

-
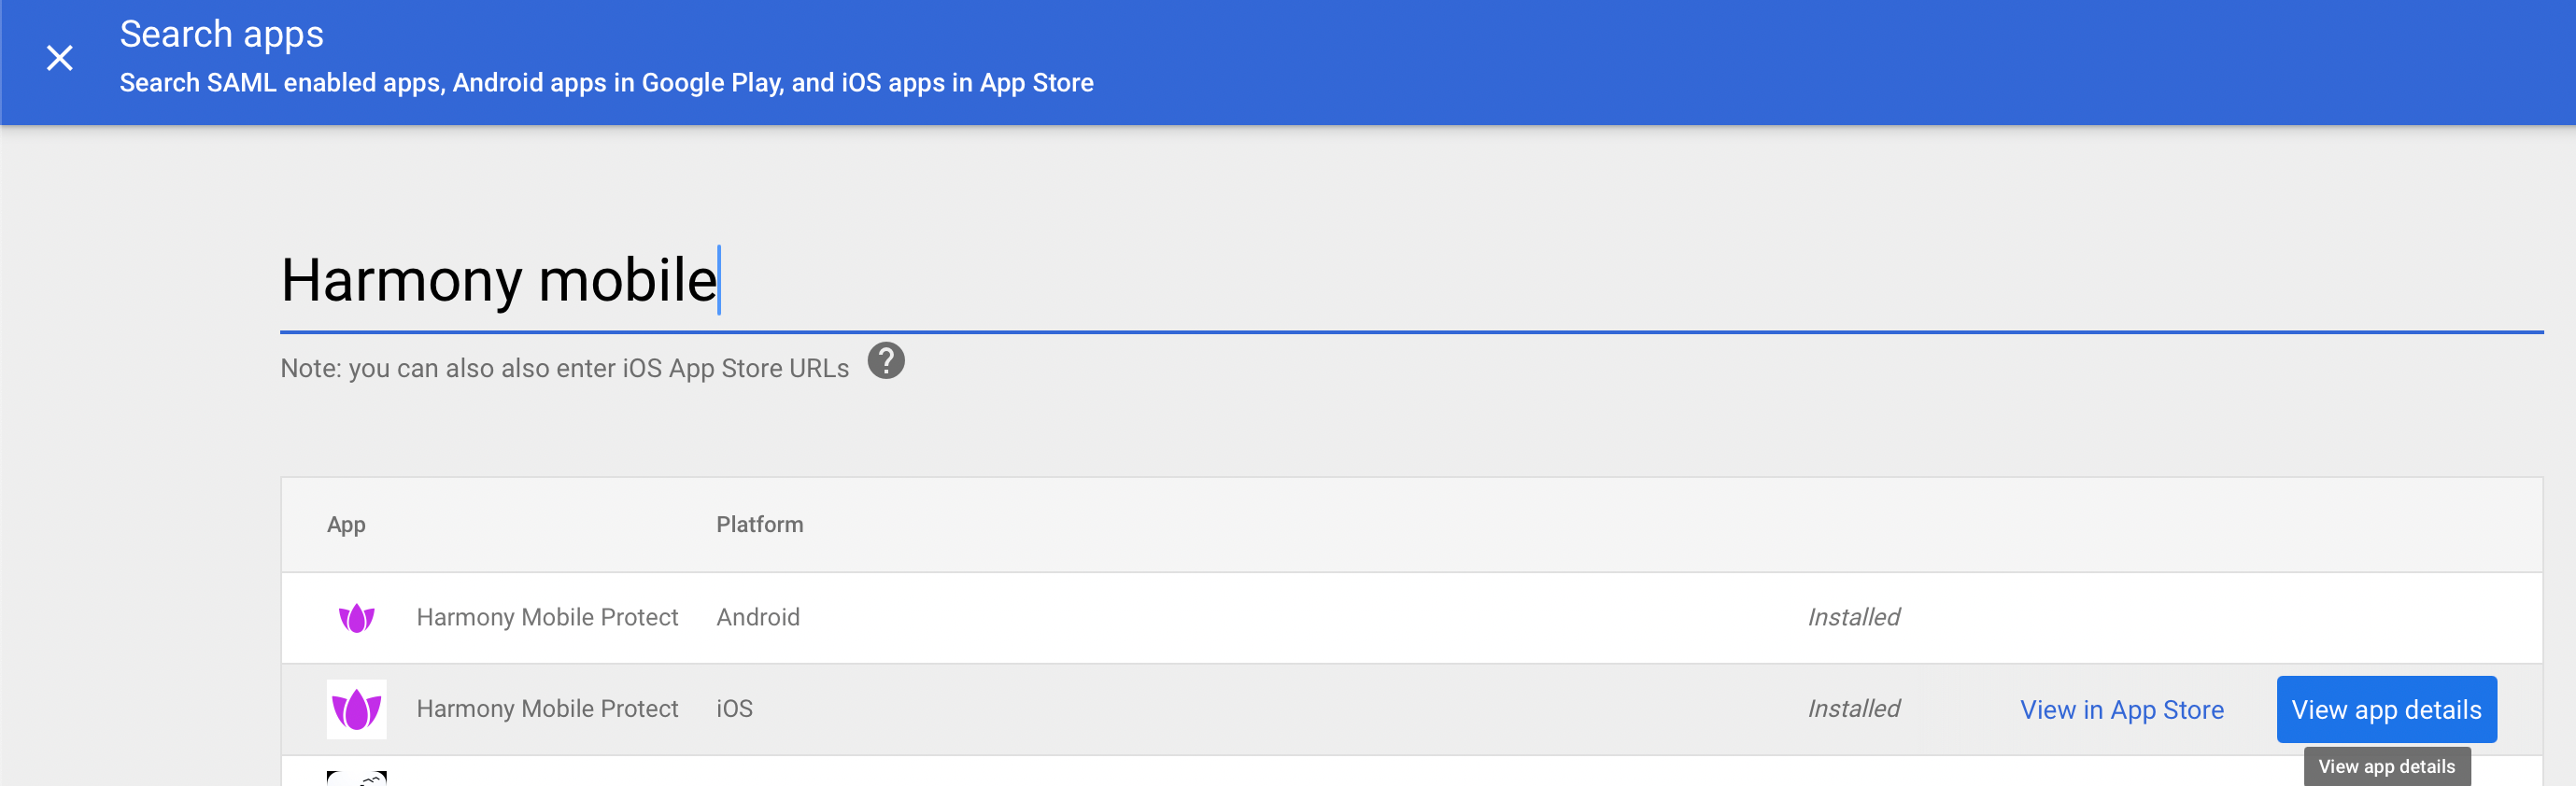
In the Search apps window, enter Harmony Mobile.
-
In Harmony Mobile Protect Android, click View app details.
-
In the User access section, enter the user access information and click Continue.

-
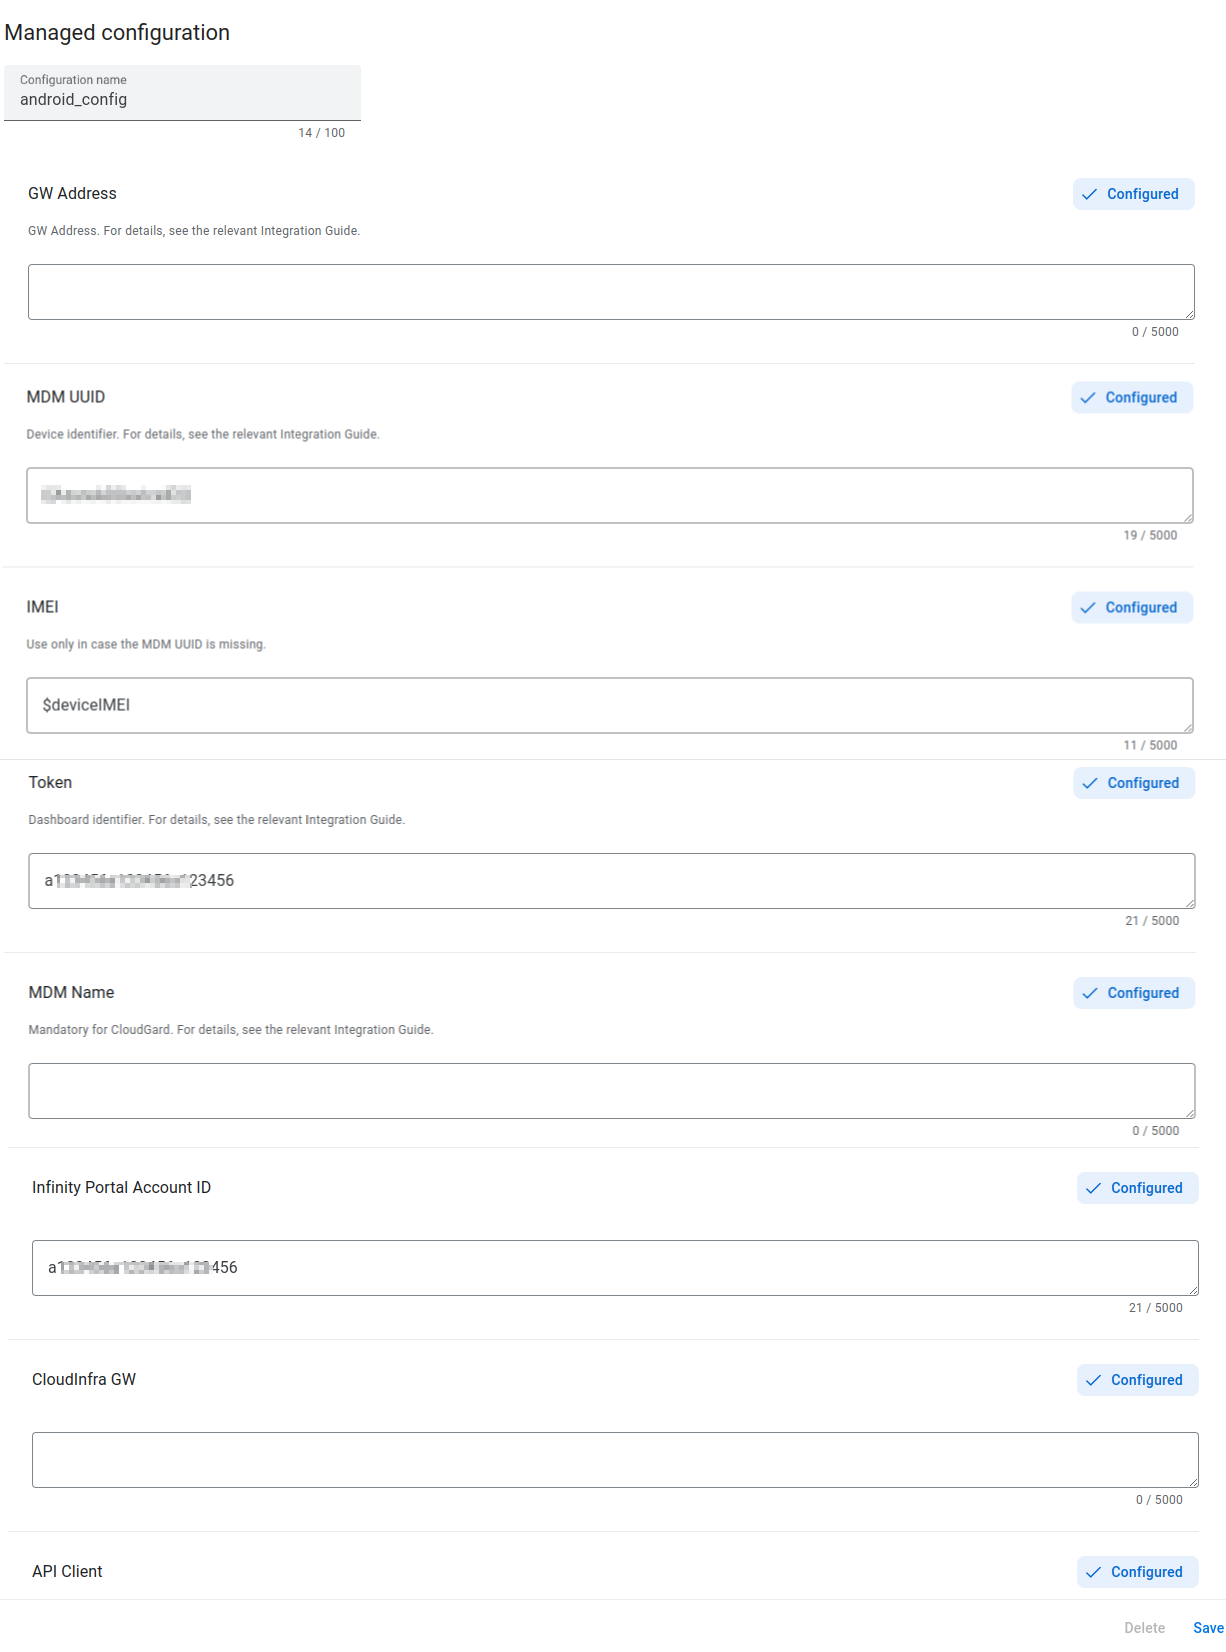
In Settings > Managed configuration section, click Add Configuration.

-
In the Managed configuration page, enter the configuration values according to this table.

Note - This configuration is required for company-owned Android devices to register in Harmony Mobile Protect app using the Sign in with Google option:
Configuration Key
Value Type
Configuration Value
GW Address
String
Enter the Security Gateway
 Dedicated Check Point server that runs Check Point software to inspect traffic and enforce Security Policies for connected network resources. server for your region:
Region
Server
US
gw.locsec.net
Ireland (EU region)
eu-gw.locsec.net
Australia (Asia region)
au-gw.locsec.net
Canada (Canada)
ca-gw.locsec.net
UK region (UK)
uk-gw.locsec.net
India
in-gw.locsec.net
Token
String
** Dashboard ID Hash **
-
Click Save.
Adding the Harmony Mobile Protect app to your App Catalog for iOS Devices
-
Log in to your Google Admin console.
-
Go to Apps > Web and mobile apps > Add app and click Search for apps.
-
In the Search apps window, enter Harmony Mobile.
-
In Harmony Mobile Protect iOS, click View app details.
-
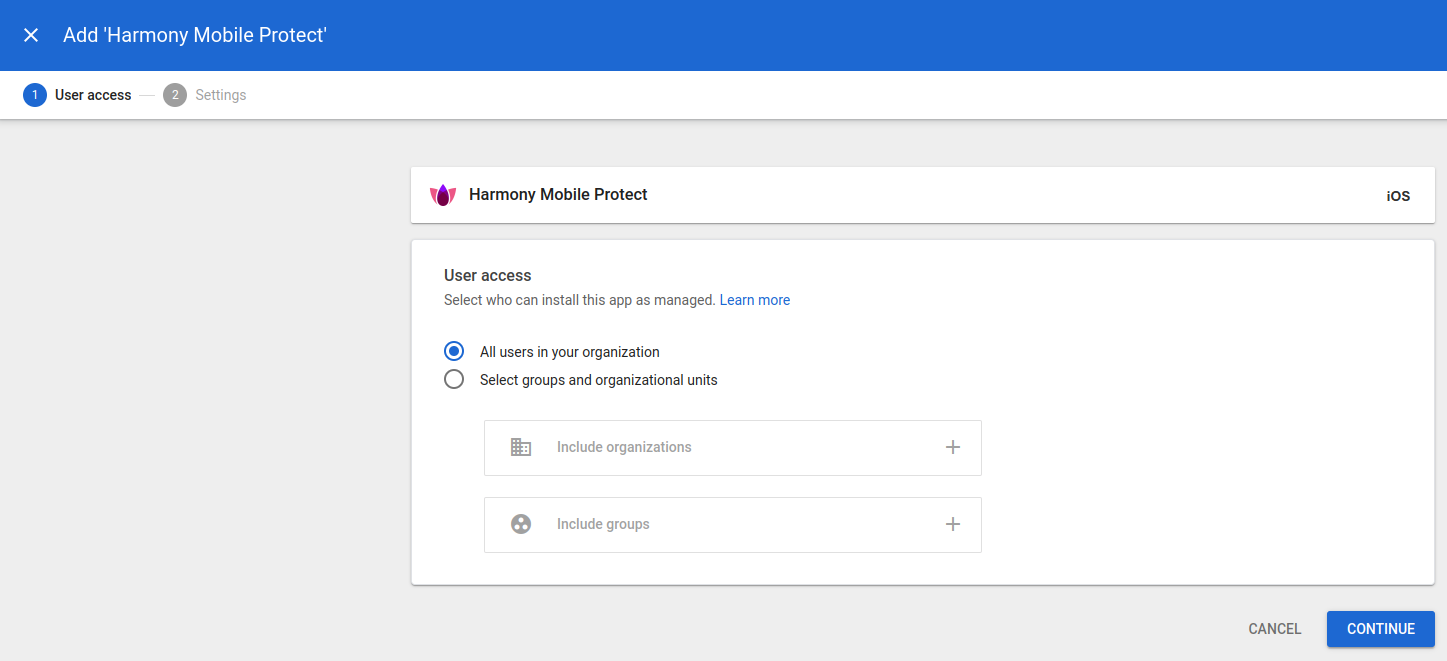
In the User access section, enter the user access information and click Continue.
-
To add a managed configuration, go to Managed configurations and click Add Managed Configuration.

-
In the Managed configuration page, enter these details:

-
Name
-
Configuration:
<dict>

<key>Lacoon Server Address</key>

<string>GW_ADDRESS</string>

<key>token</key>

<string>YOUR_TOKEN</string>

</dict>
Enter the configuration values according to this table:
Note - This configuration is required for company-owned iOS devices to register in Harmony Mobile Protect app using the Sign in with Google option.
Configuration Key
Value Type
Configuration Value
GW Address
String
Enter the Security Gateway server for your region:
Region
Server
US
gw.locsec.net
Ireland (EU region)
eu-gw.locsec.net
Australia (Asia region)
au-gw.locsec.net
Canada (Canada)
ca-gw.locsec.net
UK region (UK)
uk-gw.locsec.net
India
in-gw.locsec.net
Token
String
** Dashboard ID Hash **
-
Click Save.
-
-
In Settings > Managed configuration section, choose Select configuration and select the managed configuration you created.

-
Click Save.