Scheduled Reports allows you to automatically generate reports at the specified date and time, and email it to the specified recipients.
|

|
Notes:
- The report becomes effective 24 hours after you schedule it. For example, if you schedule for a new report today for 02:00 PM, then it is enforced from the next day at 02:00 PM.
- This feature is not supported for Check Point Cyber Security Reports.
- For performance reasons, it is recommended to schedule reports to run in off-peak hours. For example, during non-business hours.
- The default time zone for the schedule report is Coordinated Universal Time (UTC). For example, to schedule the report at 1:00 AM EST, specify the time as 6:00 AM (depending on Daylight Savings Time).
- Reports are generated in real-time for Vulnerability Management and Posture Management.
|
To schedule a report:
-
Navigate to Overview > Reports and do one of these.
-
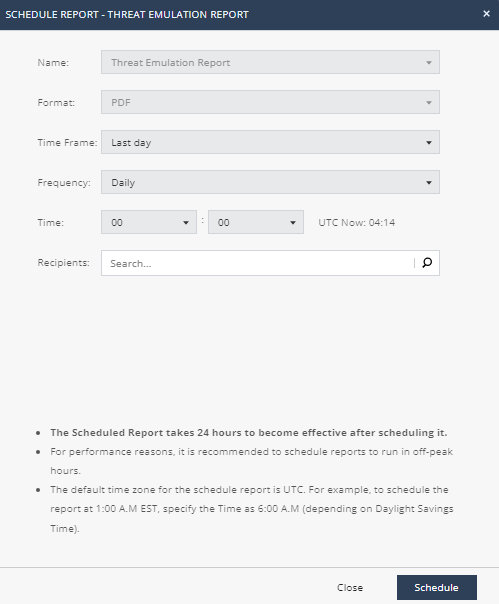
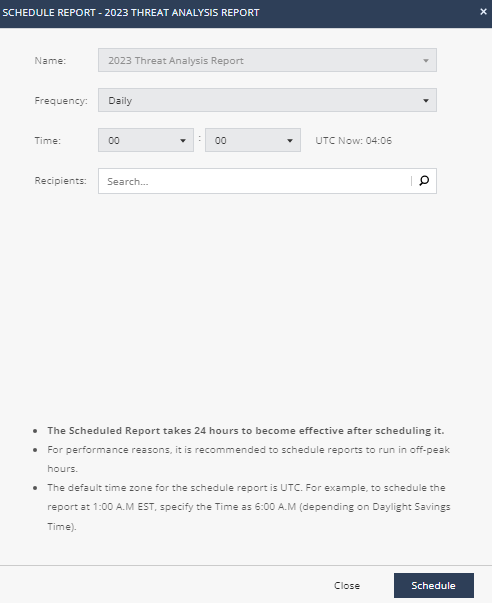
From the Name list, select the report.
-
From the Time Frame list, select the period for the report.
-
From the Frequency list, select the frequency to generate the report.
- To generate the report everyday, select the day of the week.
- To generate the report weekly, select the day of the week.
- To generate the report every month, select the date.
-
In the Time field, specify the time for the system to generate the report and send it to the recipients.
By default, the time is in UTC. For example, if you want to generate the report at 01.00 AM Eastern Standard Time (EST), you must specify the time as 06.00 AM UTC.
-
In the Recipients field, enter the recipients for the report.
-
Click Schedule.
The schedule is added to the table. The report becomes effective 24 hours after you schedule it.
-
To edit a scheduled report, select the report in the table and click Edit.
-
To delete a scheduled report, select the report in the table and click Delete.

 and select Schedule Report.