Web Applications
Harmony Connect Application-Level supports http and https applications. After the administrator sets up an application and gives access permissions, the users can access the application from the User App Portal or through a designated URL of the following format: https://REGION.<App_Name>.<Site_Name>.connect.checkpoint.com/ACCOUNT.
To set up web applications:
-
From the Policy menu, go to Access Control > Application Access and click Add or a + thumbnail.
-
In the Add New Application window, select the Web application type and click Next.
-
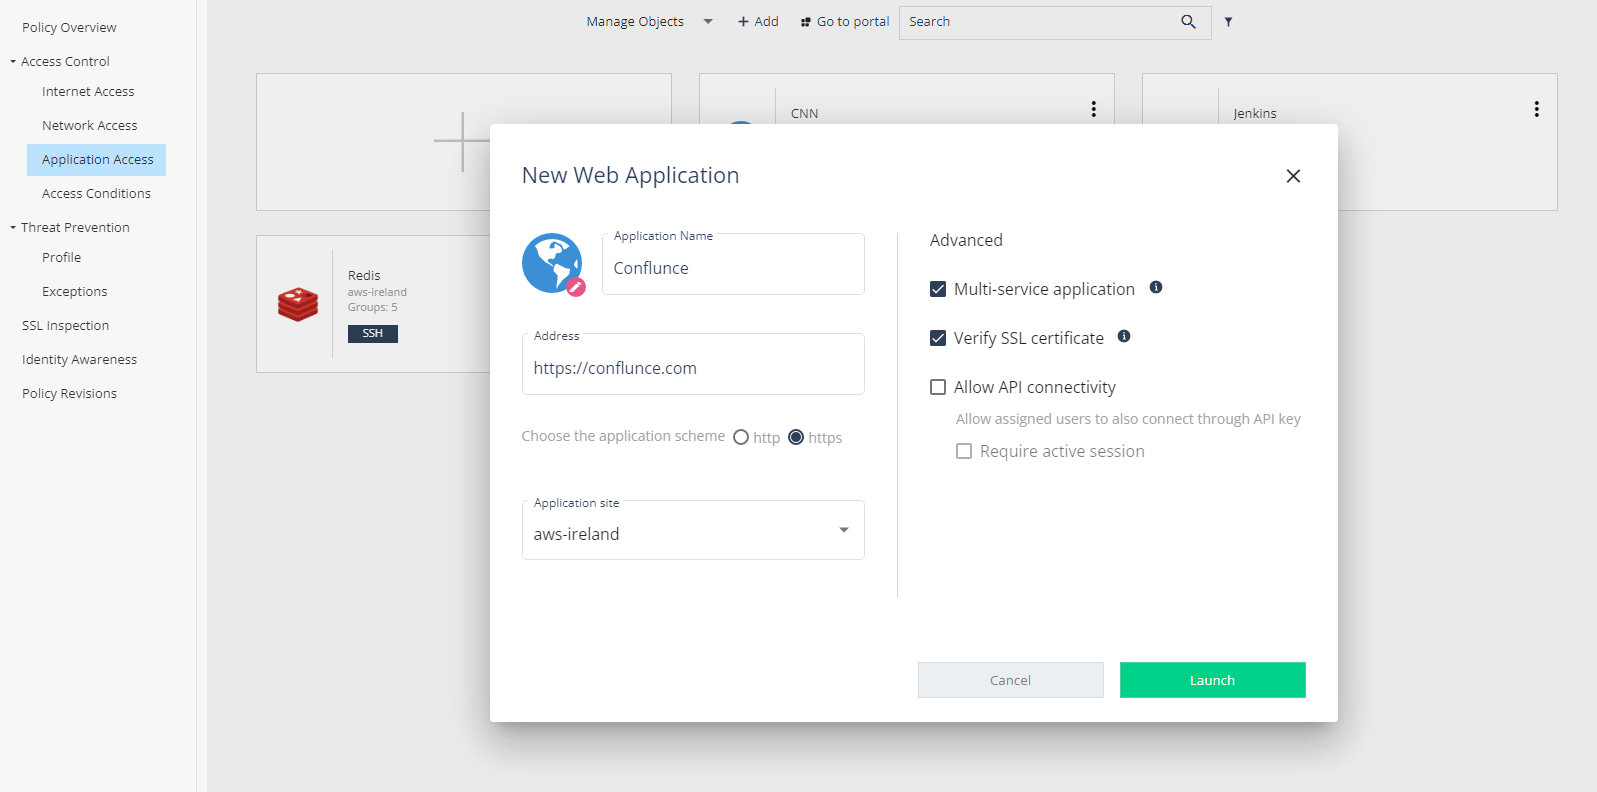
Fill in the following details:
-
Application Name: Select a short name. At the end, your application URL is: https://REGION.<App_Name>.<Site_Name>.connect.checkpoint.com/ACCOUNT. This name appears later in the User App Portal.
-
Address: Insert your internal application address with port number. For example, https://example.com:444/. If you do not specify the port number, then the default port number is used:
-
443 for https
-
80 for http
-
-
Choose the application scheme set up: Choose http or https.
-
Application site: Select the site where your application is located.
-
Advanced settings:
-
Multi-service application: For applications hosted on the public internet, custom or home-grown application, and applications that map to multiple APIs.
-
Allow API connectivity: Allows limited access to users and servers through a restrictive API. See API Authorization.
-
Verify SSL certificate: For https applications, Harmony Connect verifies the application's SSL certificate against any of the root Certificate Authorities listed in the sk180610. If the verification fails, Harmony Connect blocks the access to the application.

Note - Harmony Connect cannot verify self-signed SSL certificates.
-
-
-
Click Launch.
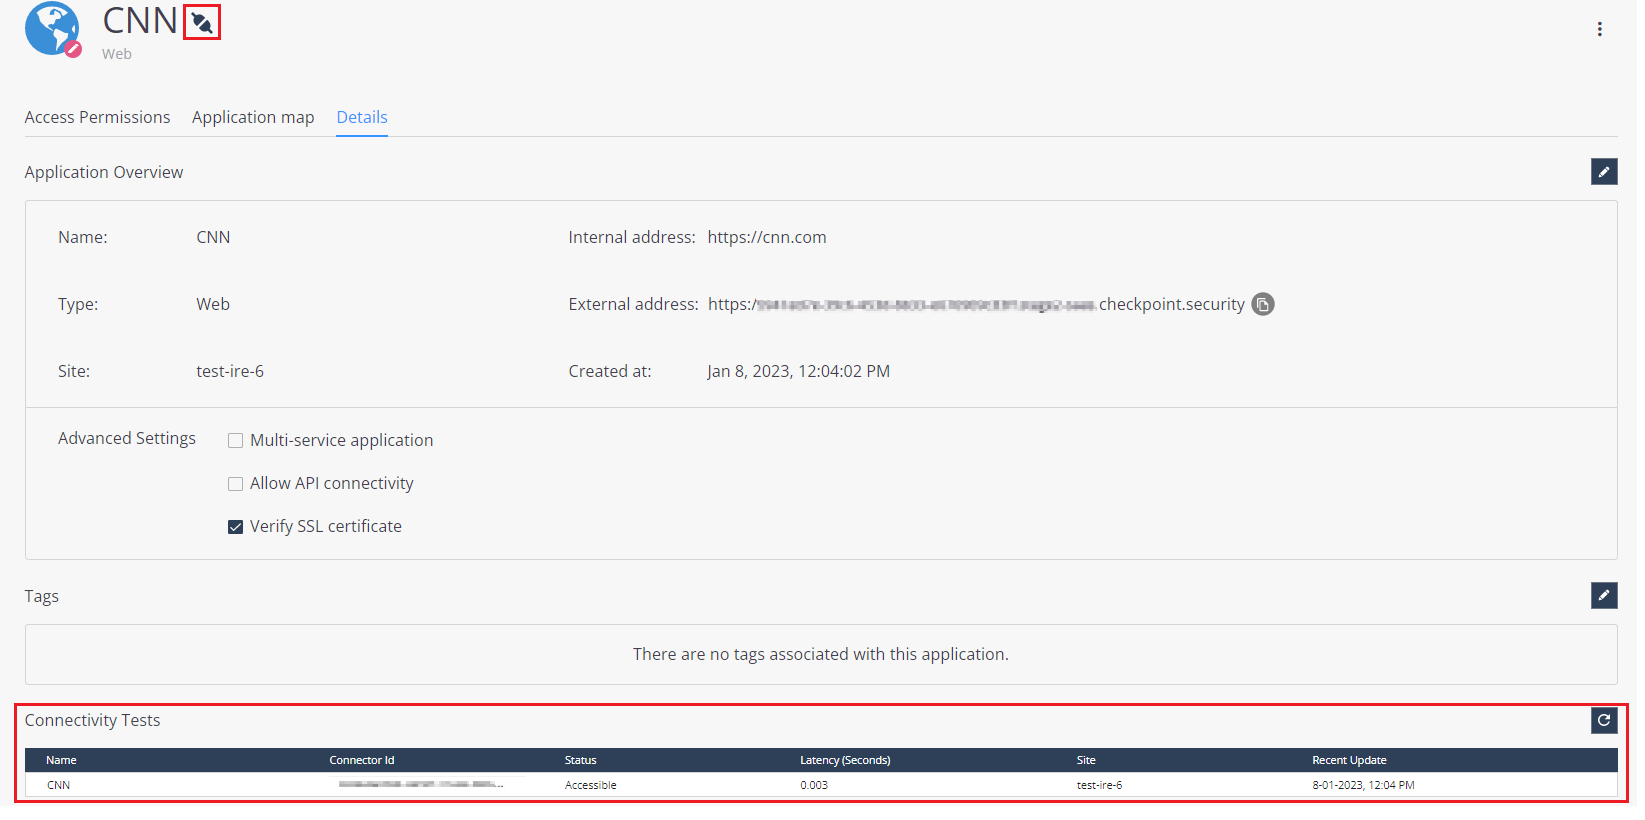
The new app launches. Users with permissions can access it from the User App Portal or through the designated External address, which looks like: https://REGION.<App_Name>.<Site_Name>.connect.checkpoint.com/ACCOUNT.
-
Define the users and groups that have permissions to access this application. For more information, see Configuring Access Permissions.
-
Optionally, on the Application map tab, you can browse the links associated with this web application and configure whether the users can access these links directly or through Check Point. For more information, see Linked Web Applications.
-
To check connectivity of the web application, on the Details tab, click the connectivity icon next to the web application name. Under Connectivity Tests, you can see the details of the test.
Note - You can check connectivity only with an upgraded Connector. If you do not see the icon, upgrade the Connector as described in Appendix B - Upgrading the Connector (Application Access).