
Phishing Protection
Phishing protection is comprised of the phishing workflows in the policy itself and from the general Anti-Phishing engine settings.
For information about the Anti-Phishing engine settings, see Anti-Phishing .
Phishing Workflow
The administrators can select any of these workflows for Anti-Phishing when phishing is detected in emails.
|
Workflow |
Description |
|---|---|
|
User receives the email with a warning |
An email to the user is scanned, and when found to be suspicious, the email subject is replaced with a Phishing Alert notice, and the original subject is provided in brackets. The body of the message includes a customizable message to the user, along with a link to remove the warning if a false positive is suspected by the user. For more information about customizing the subject prefix for phishing warning emails, see Customizing the Subject Prefix for Phishing Warning Emails.
|
|
Quarantine. User is alerted and allowed to request a restore (admin must approve) |
An email to the user is scanned, and when found malicious, the subject is replaced with a Quarantined notice, and the original subject is provided in brackets. The body of the message is replaced with a customizable message to the user, along with a link to release the email if a false positive is suspected.
|
|
Quarantine. User is not alerted (admin can restore) |
In this mode, the email is automatically quarantined with no user notification. |
|
Quarantine. User is alerted and allowed to restore the email |
An email to the user is scanned, and when found malicious, the subject is replaced with a quarantined notice, and the original subject is provided in brackets. The body of the message is replaced with a customizable message to the user, along with a link to release the file if a false positive is suspected. The attachment is also stripped and noted in the replaced body. In this workflow, the user has the option to release the quarantined attachment. Using the link in the email, the user can release the attachment. The original email and attachment will be immediately delivered back to the inbox. |
|
Email is allowed. Deliver to Junk folder |
The detected email is delivered to the recipient's Junk folder. |
|
Email is allowed. Header is added to the email |
The detected email is delivered to the recipient with an additional header that can be configured in the policy. |
|
Do nothing |
The detected email is delivered to the recipients. |


For more information on who receives the restored emails, see Who Receives the Emails Restored from Quarantine.
|
|
Note - To create an Allow-List or Block-List for Anti-Phishing, see Anti-Phishing Exceptions. |

Suspected Phishing Workflow
The administrators can select any of these workflows for Anti-Phishing when suspected phishing is detected in emails.
|
Workflow |
Description |
|---|---|
|
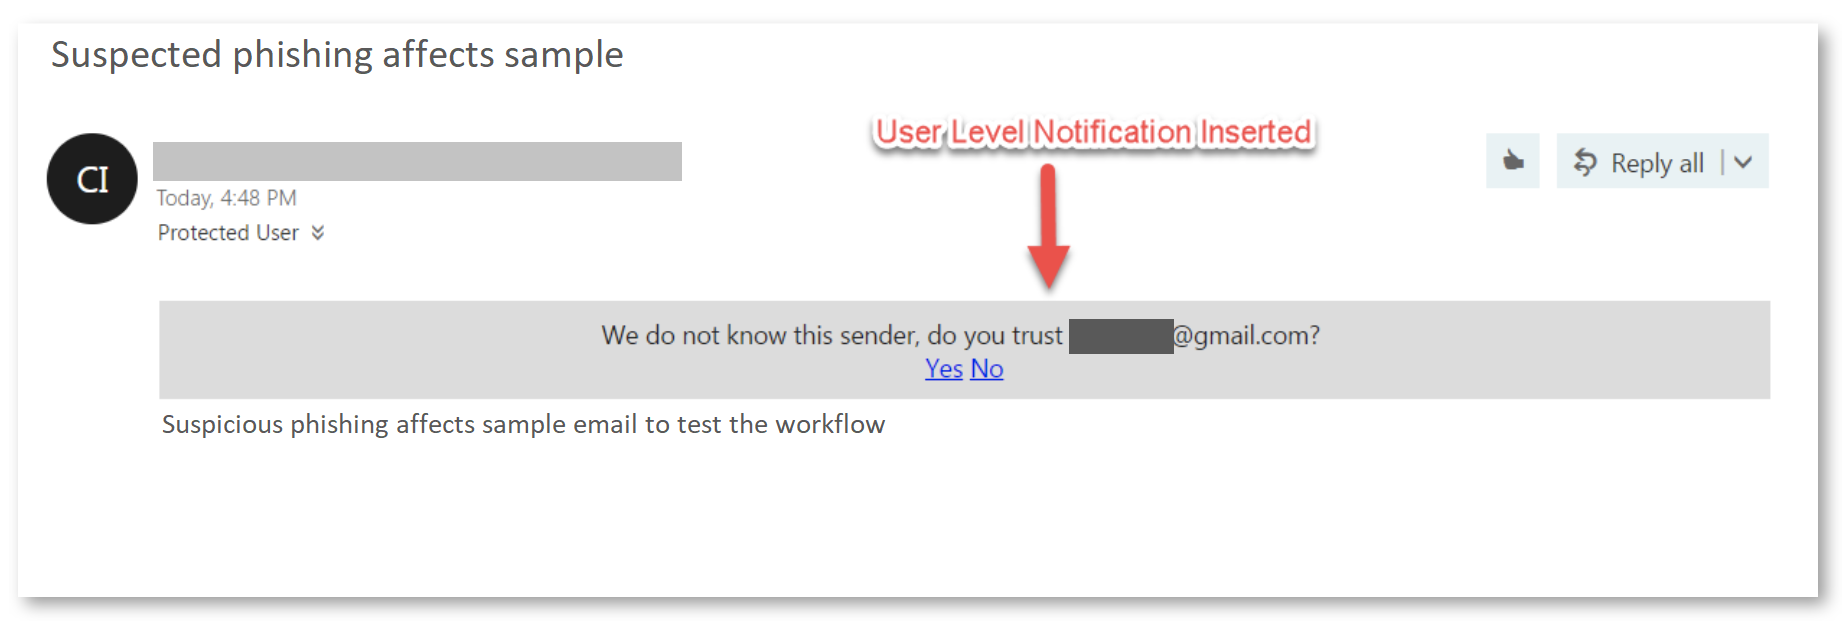
User receives the email with a warning |
The detected email is delivered to the user with a notification inserted in the body of the email. For more information about customizing the subject prefix for phishing warning emails, see Customizing the Subject Prefix for Phishing Warning Emails. |
|
Quarantine. User is not alerted (admin can restore) |
The detected email is automatically quarantined with no user notification. |
|
Quarantine. User is alerted and allowed to request a restore (admin must approve) |
An email to the user is scanned, and when found malicious, the subject is replaced with a Quarantined notice, and the original subject is provided in brackets. The body of the message is replaced with a customizable message to the user, along with a link to release the email if a false positive is suspected. |
|
Quarantine. User is alerted and allowed to restore the email |
An email to the user is scanned, and when found malicious, the subject is replaced with a quarantined notice, and the original subject is provided in brackets. The body of the message is replaced with a customizable message to the user, along with a link to release the file if a false positive is suspected. The attachment is also stripped and noted in the replaced body. In this workflow, the user has the option to release the quarantined attachment. Using the link in the email, the user can release the attachment. The original email and attachment will be immediately delivered back to the inbox. |
|
Email is allowed. Deliver to Junk folder |
The detected email is delivered to the recipient's Junk folder. |
|
Email is allowed. Header is added to the email |
The detected email is delivered to the recipient with an additional header that can be configured in the policy. |
|
Do nothing |
The detected email is delivered to the recipients. |
For more information on who receives the restored emails, see Who Receives the Emails Restored from Quarantine.
Customizing the Subject Prefix for Phishing Warning Emails
When the system detects a phishing email, and it is configured to deliver the email to the end user with a warning, Email Security adds a warning banner and a subject prefix to the email. These banners help end users identify potential threats.
By default, the subject prefix is displayed as Phishing Alert!. Administrators can now customize this prefix to better align with organizational communication standards and user experience requirements.
Benefits of Customizing the Subject Prefix
This enhancement enables organizations to:
-
Use terminology that aligns with internal security policies and communication standards
-
Reduce user alert fatigue
-
Improve clarity and consistency in user-facing notifications
-
Remove the subject prefix entirely, if preferred
Configure the Subject Prefix
To customize the phishing warning subject prefix:
-
Access the Email Security Administrator Portal.
-
From the left navigation panel, go to Policy.
-
Create a new Threat Detection policy or open an existing policy.
-
Select the required protection mode.
-
Prevent (Inline)
-
Detect and Remediate
-
-
In the Phishing section, select User receives the email with a warning from the required workflow dropdown.
-
Phishing workflow
-
Suspected phishing workflow
-
-
Click the gear icon next to the workflow action.
-
In the configuration window, modify the Customize Phishing Subject Alert Format field according to your organizational requirements.
-
Click Save and Apply.