Restoring Quarantined Emails - End-User Experience
After the administrator approves an end-user request to restore an email from quarantine, Email Security performs these actions:
-
Removes the quarantine/clean email notifications received for the quarantined email from the end-user mailbox.
-
Adds the original email to the end-user mailbox, where the email received time is the restore time of the email from quarantine, but not the original email sent time.
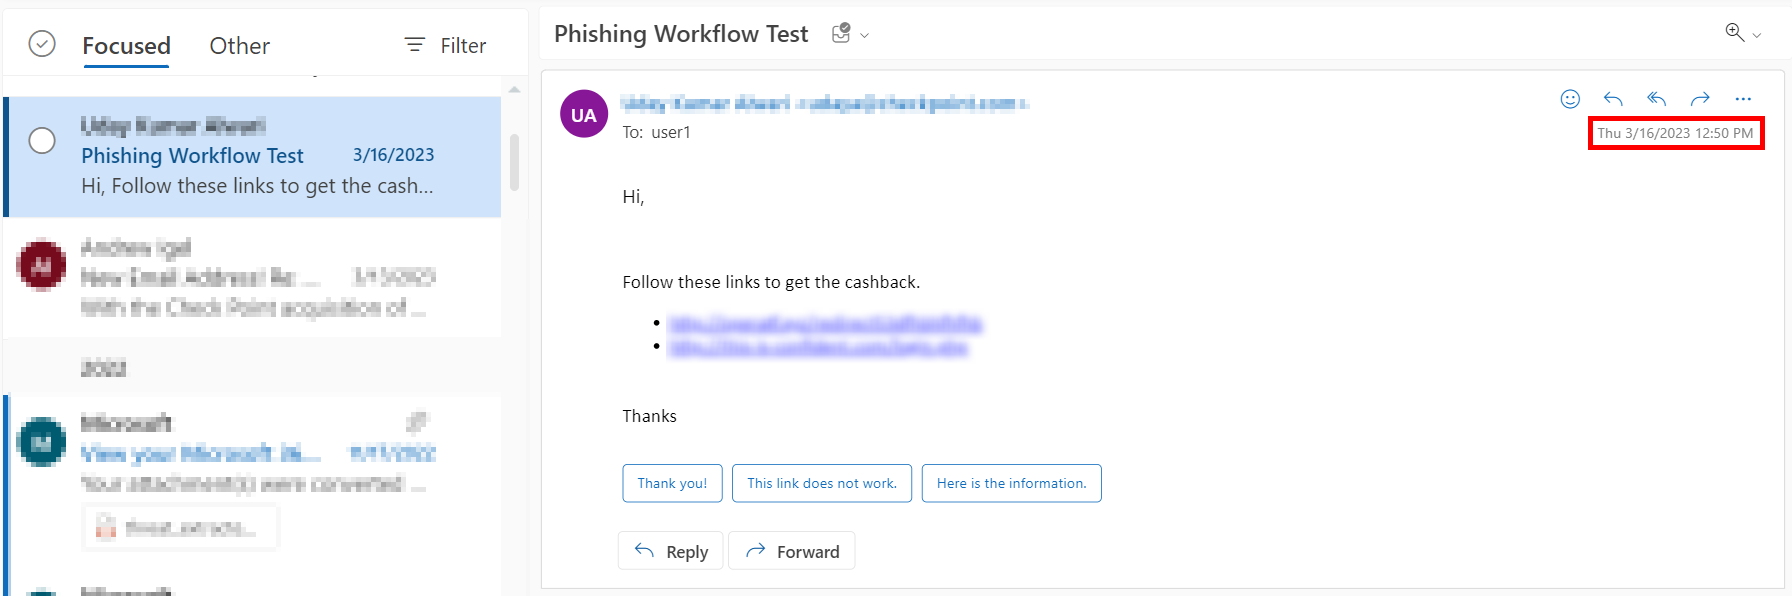
This example shows the initial email received by the end-user.

This example shows the same email received by the end-user after the administrator approved the restore request.
|
|
Note - The initial email received by the end-user is removed and the restored email gets delivered as a new email to the end-user mailbox. The email received time is the restore time of the email by the administrator, but not the original email sent time. |

Who Receives the Emails Restored from Quarantine
-
Emails quarantined by
-
Depending on the configured workflow, Email Security delivers the email only to the requesting user or to all the original recipients.
-
If the user restores the email without administrator approval, Email Security delivers the email only to the requested user.
-
If the administrator releases the email from quarantine, Email Security delivers the email to all the original recipients of the email.
-
-
-
Emails quarantined in Microsoft:
-
Email Security delivers the restored emails to all the original recipients regardless of whether it is restored by the user or the administrator.
-
Notifying End Users about Rejected Restore Requests
To notify end users when their quarantine restore requests are rejected:
-
Go to Security Settings > User Interaction > Quarantine.
-
In the End User Notifications section, configure the required notifications.
-
For Office 365 users, to stop sending alerts for individual quarantined emails, select Office 365 Users – Stop alerts on individual quarantined emails (recommended) checkbox.
-
For Google users, to stop sending alerts for individual quarantined emails, select Google Users - Stop alerts on individual quarantined emails (recommended) checkbox.
-
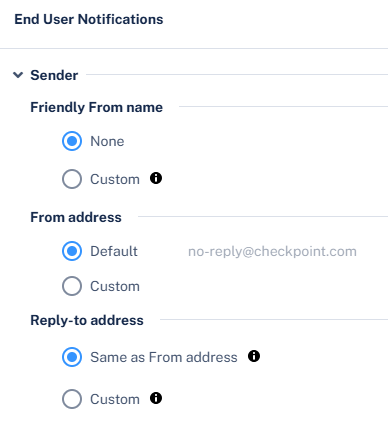
To configure the sender email address for notifications, do these:
-
Friendly-From name
-
If no friendly-from name is required, select None.
-
To use a customized name, select Custom and enter the sender name.
-
-
From address
-
To use the default email address, select Default. The default email address is no-reply@checkpoint.com.
-
To use a custom email address, see Customizing the From address for Email Notifications.
-
-
Reply-to address
-
To use From address as the Reply-to address, select Same as From address.
-
To use a custom email address, select Custom and enter the email address.
-
-
-
Click Save and Apply.
|
|
Note - This will also enable end user notifications for approved and rejected phishing reports. See Automatic Ingestion of End User Reports. |
To configure the notification subject and body:
-
Go to Security Settings > SaaS Applications
-
To configure the notification for Office 365 Mail, click Configure for Office 365 Mail.
-
To configure the notification for Gmail, click Configure for Gmail.
-
Scroll-down to Advanced and edit these templates:
-
Decline message subject
-
Decline message body
-