Configuring a Report Schedule
To configure a report schedule:
- Go to Analytics > Report Scheduler.
-
Click Create Schedule.
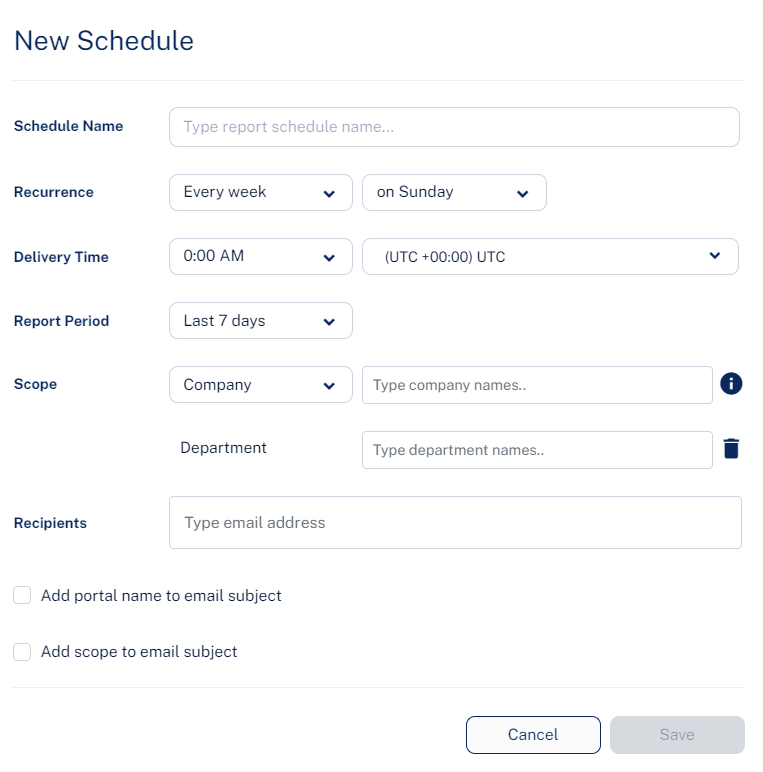
- Enter the required Schedule Name.
-
For Recurrence, select when you need to schedule the report.
-
Every week
Select the week day.
-
Every month
-
To schedule the report for a specific week of every month:
Select the week of the month (on first, on second, on third, on fourth, on last).
Select the week day.
-
To schedule the report for a specific day of every month:
Select on specific day.
Enter the specific date (1st to 28th) of the month.
-
To schedule the report for the last day of every month, select last day.
-
-
- For Delivery Time, select the required time and time zone.
-
For Report Period, select the period over which the report has to be generated:
Last 7 days
Last 14 days
Last 30 days
Previous month
Previous quarter
-
Select the scope of the report:
All users
Company and then enter the company name as specified in the Company field in Azure AD.
Department and then enter the department name.
- For Recipients, enter the email addresses of users for whom the report has to be sent.
- To add the Check Point Portal portal tenant name to the email subject of the report, select the Add portal name to email subject checkbox.
- Click Save.