Domain Management
This chapter includes procedures for creating and configuring Multi-Domain Security Management objects.
Creating a Domain - Wizard
This wizard contains several windows that let you configure Domain settings. You can use a simplified procedure or customize the procedure by selecting additional settings groups.
If you choose the option, you can configure any of the other settings at a later time.
To run the Add Domainwizard:
- In the , click in the Selection bar.
- Select the view.
- In the pane, right-click .
- Select from the menu. The wizard opens.
- In the window, select one of these options:
- Select this option and define these basic Domain settings:
- - Enter a unique Domain name.
- - Select one or more GUI clients that are authorized to manage this Domain.
- - Define the first Domain Management Server included in this Domain. If you use the method, these default values are assigned automatically:
- : Deactivated
- Select this option to configure any of these additional settings groups:
- - Enter contact and other user-defined information.
- - Assign all Global Objects or assign only those Global Objects used in the currently assigned Global Policy. You can also subscribe to Domain level IPS services.
- - Select one or more administrators authorized to manage the Domain.
- - Activate version and blade updates for the Domain.
- Select settings groups to include in the wizard, or clear settings groups to remove from the wizard.
- Automatically use these wizard settings when creating a new Domain. You can also configure this property on the tab in the window.
Configuring General Properties
In thewindow, enter a unique Domain name. You can optionally enable Check Point QoS.

|
Note - If you want to enable Check Point QoS, you must use . This option is not available if you use the mode.
|
Domain Properties
You can enter information in Domain Properties fields. These fields typically contain contact information or other descriptive data about the Domain. Superusers can define the fields that show in the Administrator Properties window.
Assigning a Global Policy
You can include all Global Objects when assigning the Global Policy or assign only those global objects required by the Global Policy. This includes objects directly or indirectly referenced by rules, such as network objects contained in groups. Reference objects are also copied to the Domain Management Server databases. Administrators can see them individually or as members of a group.
Although you can change global settings later, we recommend that you do so carefully. Consider the following scenario:
A Domain assigns a Global Policy including all Global Objects. All objects are copied to the global database. If a Global Policy is re-assigned with only those objects applicable to the assigned Global Policy, extraneous objects not used by the Global Policy are removed from the database. In this case, if the removed objects are required by Domain security rules or objects, the assignment operation will terminate with an error message showing these missing objects.
This window only shows in the wizard option. If you are using the option, you can define these properties later.
To assign a Global Policy:
- Select one of these configuration settings:
- - Assigns all global objects to this Domain.
- - Assigns only those Global Objects required by the Domain Global Policy.
- Select one or more of these options:
- - Adds the global IPS profiles to the Domain IPS profiles list. IPS profiles defined for individual Domains are not affected.
- - If activated, saves a snapshot of settings before assigning a Global Policy. This allows you to go back to an earlier state.
Assigning Administrators
Superusers are automatically assigned to all Domains with full read/write privileges. You cannot remove or assign them, nor can you change their permission profiles.
You assign global manager and domain manager administrator accounts to specified Domains. You assign a permissions profile to administrators while assigning them to the new Domain. These administrators can manage the Domain according to their administrator type and permissions profile.
You can only assign administrators to new domains if you use the wizard option. If you use the wizard option, only superusers are assigned to the new Domain. You can add more administrators later.
To assign a permissions profile to a new Domain:
- Select one or more administrators.
- Click to move the selected administrators from the list to the list.
- In the window, select a permissions profile.
You can create a new permissions profile or see an existing permissions profile from this window:
You can also do these actions in thewindow:
- To select all administrator accounts in a group, click .
- To remove administrators from the list, select them and then click .
- To add a new administrator account, click. The window opens.
Assign GUI Clients
In this window you can assign GUI client computers authorized to manage the specified Domain. GUI Clients are computers running the SmartConsole and SmartDomain Manager clients. GUI clients shown in the Assigned list can get access to the specified Domain.
To assign a GUI client to a Domain, select it in the Not Assigned list and then click Add.
Click New GUI Client to define new GUI client. The Add GUI Client window opens.
Version and Blade Updates
The window lets administrators manage new features and Software Blades without doing a full management upgrade. Upgrades can include new features or Software Blades. These are typically available as hotfixes or minor releases. Install version and blade updates on each Multi-Domain Server and then activate them using the SmartDomain Manager.
Only new versions or blades and those that have not been installed show in this window.
To install and activate version and blade updates:
- Install the update on your Multi-Domain Servers.
- Run
mdsstopmdsstart
When restarting multiple Multi-Domain Servers, do so at the same time to prevent plug-in-mismatch errors. - Activate the updates on your Domains:
- In the SmartDomain Manager, select Version & Blade Updates on the Selection Bar.
- Select one or more Domains.
- Right-click the selected Domains and then select .
- Activate and configure new features or blades using SmartDashboard for each Domain Management Server.
This window is only included in the wizard option.
Activating or Deactivating Updates for a Domain
- Updates installed on Multi-Domain Servers, but not yet activated, are shown in the Not Activated list.
- To activate an update, select it and click Add. The update moves to the Activated list.
- To deactivate an update, select it and click Remove. The update moves to the Not Activated list.
Creating Domain Management Servers
You can define one or two Domain Management Servers (the second is one for High Availability) as part of the Create Domain wizard procedure. This window option is available only when using the wizard option. If you use the method, you can define the Domain Management Server at a later time.
Select one of these options:
- - Define Domain Management Servers now. Select an option to define one or two Domain Management Servers.
- - Define your Domain Management Servers later.
|
Note - If you create two Domain Management Servers at this time, they will start automatically. You can only have two Domain Management Servers for a Domain if there is more than one Multi-Domain Server.
|
Creating a Domain - CLI
Description
Use the mdscmdadddomain
Syntax
mdscmd adddomain <DomainName> <-n Name | -i IPv4 | -a IPv6> [-t target <ServerName>][-m <ServerName> -u user -p password]
Argument
|
Description
|
DomainName
|
Name of the Domain to which the Domain Management Server is assigned. The name cannot include spaces or special characters (except for the underscore character).
|
-n name
|
Domain Management Server name.
|
-i IPv4
|
Domain Management Server IPv4 address.
If you do not use the -i argument, the system automatically assigns an address from a predefined pool of available addresses.
|
-a IPv6
|
Domain Management Server IPv6 address.
If you do not use the -a argument, the system automatically assigns an address from a predefined pool of available addresses.
|
-t target ServerName
|
Optional: Name of the Multi-Domain Server that the Domain Management Server is assigned to. This argument is necessary only if you assign the Domain Management Server to a remote Multi-Domain Server.
|
-m ServerName
|
Remote Multi-Domain Server host name or IPv4 address. You must use this argument when you work with a Domain Management Server on a remote Multi-Domain Server.
The remote Multi-Domain Server must be defined as a GUI client.
|
-u user-p password
|
Credentials of the Superuser for the remote Multi-Domain Server. These arguments are necessary to log in to the remote Multi-Domain Server. Make sure that you do not show the password during remote login.
|
You must use at least one these arguments to identify the Domain Management Server:
-n DomainName -i IPv4-a IPv6
When you create a new object, you can use one or more of these arguments to manually define the name or IP address.
You must configure ranges of IPv4 and IPv6 addresses on your Multi-Domain Server for automatic address assignment to work. If no ranges are defined or there are no available IP addresses available, the command will fail.
The -t-m-umdscmd
|
Note - The old form of this command (mdscmd addcustomer
|
Configuring Domain Selection Groups
To create a Domain selection group:
- In any SmartDomain Manager View, select Manage > Selection Groups > Domain Groups.
- Click Add to add a group. The Domain selection Groups window opens.
- In the Add Group window, enter a group name.
- Select Domains from the Not in Group list and click Add. The Domains in this group now show in the In Group list.
Configuring Existing Domains
This section includes procedures for changing existing Domain definitions.
To configure an existing Domain:
- Double click the Domain in any General view.
The Domain Configuration window opens. - Click a tab to define settings for that category.
Defining General Properties
In the general tab can change the Domain name and enable the QoS feature.
To configure general properties:
- Click the tab.
- If necessary, enter a new Domain name.
- Select to or clear to disable it.
Defining Domain Properties
You can enter information in Domain Properties fields. These fields typically contain contact information or other descriptive data about the Domain. Superusers can define the fields that show in the Administrator Properties window.
Assign Global Policy Tab
You can include all Global Objects when assigning the Global Policy or assign only those global objects required by the Global Policy. This includes objects directly or indirectly referenced by rules, such as network objects contained in groups. Reference objects are also copied to the Domain Management Server databases. Administrators can see them individually or as members of a group.
Although you can change global settings later, we recommend that you do so carefully. Consider the following scenario:
A Domain assigns a Global Policy including all Global Objects. All objects are copied to the global database. If a Global Policy is re-assigned with only those objects applicable to the assigned Global Policy, extraneous objects not used by the Global Policy are removed from the database. In this case, if the removed objects are required by Domain security rules or objects, the assignment operation will terminate with an error message showing these missing objects.
To assign a Global Policy, define these configuration settings:
- - Assigns all Global Objects to this Domain.
- - Assigns only those Global Objects required by the Domain Global Policy.
- - Adds the global IPS profiles to the Domain IPS profiles list. IPS profiles defined for individual Domains are not affected.
- - If activated, saves a snapshot of settings before assigning a Global Policy. This allows you to go back to an earlier state.
Assigning Administrators
In this window, you assign administrators to, or remove administrators from Domains. Administrators assigned to a Domain can manage that Domain according to their permissions. Superusers are automatically assigned to new Domains with full read/write permissions. You cannot remove them or change their permissions.
Assigning Domains to an Administrator
Using the Administrators pane to assign multiple administrators to a Domain:
- Select in the SmartDomain Manager Selection bar.
- Click the icon so that the pane shows.
- In the pane, right-click a domain and then select .
- In the Assign Do one or more of these tasks:
- Select one or more administrators and then click to move selected administrators from the list to the list. When you add an administrator to the list, the window opens.
- Select one or more administrators and then click to remove selected administrators from the list.
- Click to define a new administrator. The window opens.
- Click to change an administrator's permissions. The window opens.
- Click to assign or remove members of a specified group.
Assigning Administrators to a Domain
You can assign and remove administrators to a Domain using one of these procedures:
Using the Domain tab:
- Select the administrators tab.
- Do one or more of these tasks:
- Select one or more administrators and then click to move selected administrators from the list to the list. When you add an administrator to the list, the window opens.
- Select one or more administrators and then click to remove selected administrators from the list.
- Click to define a new administrator. The window opens.
- Click to change an administrator's permissions. The window opens.
- Click to assign or remove members of a specified group.
Using the Administrators pane to assign multiple administrators to a domain:
- Select in the SmartDomain Manager Selection bar.
- Click the icon so that the pane shows.
- In the pane, right-click a domain and then select .
- In the Assign Do one or more of these tasks:
- Select one or more administrators and then click to move selected administrators from the list to the list. When you add an administrator to the list, the window opens.
- Select one or more administrators and then click to remove selected administrators from the list.
- Click to define a new administrator. The window opens.
- Click to change an administrator's permissions. The window opens.
- Click to assign or remove members of a specified group.
Assigning Permission Profiles
A permissions profile is a predefined set of SmartConsole administrative permissions that you assign to administrators and Domains. This feature lets you manage complex, granular permissions for many administrators with one definition. Permission profiles do not apply to SmartDomain Manager activities.
When you assign an administrator account to a domain, you must assign a permissions profile. You can assign a predefined permissions profile or you can create a unique, Domain-specific permissions profile for the administrator.
Administrators with applicable permissions can create and manage permissions profiles. By default, only superusers can create or configure permissions profiles. You can change the global properties to let global and Domain managers create and configure permission profiles for their assigned Domains.
Multi-Domain Security Management includes default permissions profiles:
- - Administrators cannot use SmartConsole applications to see or configure settings.
- - Administrators can use SmartConsole only to see information. They cannot configure settings.
- - Administrators can use SmartConsole applications to see and configure all settings.
- - Administrators can use SmartConsole applications to see and configure all settings with the exception of DLP.
You can assign one of the default permissions profiles to any administrator and domain.
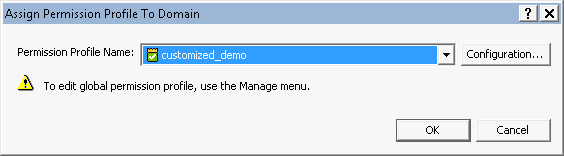
To assign a permissions profile:
- Select a profile from thelist.
- In the window, select a permissions profile form the list.
You can also do these actions here:
- Click > to create a new permissions profile.
- Click > to create a unique permissions profile for the selected administrator and Domain. This option only shows for superusers and the permissions profile name is assigned automatically.
- Click > to see the selected permissions profile definition.
Defining GUI Clients
To create a new GUI client:
- Select a view.
- Right-click the Multi-Domain Security Management root and select from the Options menu.
- Select the of the GUI client from the drop-down list. Choose one of the following:
- - Generic GUI client type that lets any client computer connect to Domain Management Servers. You can only have one GUI client of the type in the deployment. The name must be . This option is useful for system testing but is less secure.
- - Identify the GUI client by resolving the specified Name.
- - Identify the GUI client by a specified IPv4 or IPv6 Address.
- - Identify the GUI client by a specified IPv4 and/or IPv6 Address Range. Any computer with an IP address within this specified range can connect to Domain Management Servers.
- - Identify the GUI client by a specified Domain. Any client located in the specified Domain can connect to the Domain Management Servers
- Enter a for the new GUI client. If you selected the , the name is assigned automatically and you cannot change it. The name cannot include spaces or special characters (except for the underscore character).
- Enter the applicable information according GUI client types:
- - Enter an IPv4 and/or IPv6 address, or click to resolve the address from the DNS.
- - Define the first and the last IP addresses in the range. You define a range for IPv4 or IPv6 addresses.
- - Enter the applicable Domain.
- Select the client option to let this GUI client access the Multi-Domain Servers in your environment. Clear (default) this option to define this client as a Domain-level GUI client.
Version and Blade Updates
The window lets administrators manage new features and Software Blades without doing a full management upgrade. Upgrades can include new features or Software Blades. These are typically available as hotfixes or minor releases. Install version and blade updates on each Multi-Domain Server and then activate them using the SmartDomain Manager.
Only new versions or blades and those that have not been installed show in this window.
To install and activate version and blade updates:
- Install the update on your Multi-Domain Servers.
- Run
mdsstopmdsstart
When restarting multiple Multi-Domain Servers, do so at the same time to prevent plug-in-mismatch errors. - Activate the updates on your Domains:
- In the SmartDomain Manager, select Version & Blade Updates on the Selection Bar.
- Select one or more Domains.
- Right-click the selected Domains and then select .
Activate and configure new features or blades using SmartDashboard for each Domain Management Server.
Activating or Deactivating Updates for a Domain
- Updates installed on Multi-Domain Servers, but not yet activated, are shown in the Not Activated list.
- To activate an update, select it and click Add. The update moves to the Activated list.
- To deactivate an update, select it and click Remove. The update moves to the Not Activated list.
Deleting a Domain
When you delete a Domain, all Domain Management Servers assigned to this Domain are also deleted.
To delete a domain using the SmartDomain Manager:
- In the tab, click.
- Right-click the applicable and select .
To delete a domain using the Multi-Domain Server CLI:
Description
Use this command to delete an existing Domain. When deleting a Domain, you also delete the Domain Management Servers.
Usage
mdscmd deletedomain <DomainName> -m <ServerName> -u <user> -p <password>
|
|
|
|
Argument
|
Description
|
DomainName
|
Name of the Domain
|
-m ServerName
|
Remote Multi-Domain Server host name or IPv4 address. You must use this argument when you work with a Domain Management Server on a remote Multi-Domain Server.
The remote Multi-Domain Server must be defined as a GUI client.
|
-u user -p password
|
Credentials of the Superuser for the remote Multi-Domain Server. These arguments are necessary to log in to the remote Multi-Domain Server. Make sure that you do not show the password during remote login.
|
|
Note - The old version of this command (mdscmd deletecustomer) is still supported.
|
Creating a Domain Management Server - Wizard
This release supports both IPv4 and IPv6 addresses. You must always enter an IPv4 address.
Domain Management Servers share one Multi-Domain Server physical interface by using their own routable virtual IP addresses. The Multi-Domain Server physical IP addresses must also be routable and not hidden by virtual IP addresses.
You can configure the Multi-Domain Server to use a range of virtual addresses for automatic assignment to Domain Management Servers. When you create a Domain Management Server, the Multi-Domain Server assigns an IP address from this range. Alternatively, you can manually assign a virtual IP address for a new Domain Management Server. You must make sure that your routing tables include these assigned IP addresses.
You can retrieve an IP address using the button. If you have already defined resolvable domain names (by using the DNS or by editing the /etc/hosts
To configure a new Domain Management Server using the wizard:
- In the window, select a Multi-Domain Server from the list.
- Enter a unique name for the Domain Management Server or accept the automatically assigned name.
The name cannot include spaces or special characters (except for the underscore character).
- Click to assign IPv4 and IPv6 addresses from the predefined pool of available addresses.
You can also manually enter IP addresses.
- Clickand select one of these options:
Add License Information Manually
- Click .
- In the email message that you received from Check Point, select the entire license string (starting with
cplic putlic... - In the Add License window, click to paste the license details you have saved on the clipboard into the Add License window.
- Click to display your Validation Code. Compare this value with the validation code that you received in your email. If validation fails, contact the Check Point licensing center, providing them with both the validation code contained in the email and the one displayed in this window.
Import a License File
- Click .
- In the Open window, browse to and double-click the desired license file.
Get from the License Repository
- Click .
This option is only available if you have valid, unattached licenses in the repository. - In the select, click a Domain Management Server license.
The license automatically attaches to the Domain Management Server and the window closes.
If you selected the two Domain Management Server option, do these steps again for the second Domain Management Server.
Creating a Domain Management Server - CLI
Description
Use the mdscmdadddomain
Syntax
mdscmd adddomain <DomainName> <-n Name | -i IPv4 | -a IPv6> [-t target <ServerName>][-m <ServerName> -u user -p password]
Argument
|
Description
|
DomainName
|
Name of the Domain to which the Domain Management Server is assigned. The name cannot include spaces or special characters (except for the underscore character).
|
-n name
|
Domain Management Server name.
|
-i IPv4
|
Domain Management Server IPv4 address.
If you do not use the -i argument, the system automatically assigns an address from a predefined pool of available addresses.
|
-a IPv6
|
Domain Management Server IPv6 address.
If you do not use the -a argument, the system automatically assigns an address from a predefined pool of available addresses.
|
-t target ServerName
|
Optional: Name of the Multi-Domain Server that the Domain Management Server is assigned to. This argument is necessary only if you assign the Domain Management Server to a remote Multi-Domain Server.
|
-m ServerName
|
Remote Multi-Domain Server host name or IPv4 address. You must use this argument when you work with a Domain Management Server on a remote Multi-Domain Server.
The remote Multi-Domain Server must be defined as a GUI client.
|
-u user-p password
|
Credentials of the Superuser for the remote Multi-Domain Server. These arguments are necessary to log in to the remote Multi-Domain Server. Make sure that you do not show the password during remote login.
|
You must use at least one these arguments to identify the Domain Management Server:
-n DomainName -i IPv4-a IPv6
When you create a new object, you can use one or more of these arguments to manually define the name or IP address.
You must configure ranges of IPv4 and IPv6 addresses on your Multi-Domain Server for automatic address assignment to work. If no ranges are defined or there are no available IP addresses available, the command will fail.
The -t-m-umdscmd
|
Note - The old form of this command (mdscmd addcustomer
|
Changing a Domain Management Server
Use this procedure to change an existing Domain Management Server.
To create or change a Domain Management Server:
- Double-click a Domain Management Server.
- In the window, select a Multi-Domain Server from the list.
- Click to assign an IPv6 address from the predefined pool of available addresses.
You can also resolve addresses by name or manually enter IP addresses. IPv6 addresses are optional.
- Clickand select one of these options:
Add License Information Manually
- Click .
- In the email message that you received from Check Point, select the entire license string (starting with
cplic putlic... - In the Add License window, click to paste the license details you have saved on the clipboard into the Add License window.
- Click to display your Validation Code. Compare this value with the validation code that you received in your email. If validation fails, contact the Check Point licensing center, providing them with both the validation code contained in the email and the one displayed in this window.
Import a License File
- Click .
- In the Open window, browse to and double-click the desired license file.
Get from the License Repository
- Click .
This option is only available if you have valid, unattached licenses in the repository. - In the select, click a Domain Management Server license.
The license automatically attaches to the Domain Management Server and the window closes.
Deleting a Domain Management Server
To delete a Domain Management Server using the SmartDomain Manager:
- In the tab, click.
- Right-click the applicable and select .
To delete a Domain Management Server using the Multi-Domain Server CLI:
Description
Use this command to delete an existing Domain Management Server.
Syntax
mdscmd deletemanagement <DomainName> <-n Name | -i IPv4 | -a IPv6> [-m <SeverName> -u user -p password]
Argument
|
Description
|
DomainName
|
Domain that contains the Domain Management Server
|
-n Name
|
Domain Management Server name
|
-i IPv4
|
Domain Management Server IPv4 address
|
-a IPv6
|
Domain Management Server IPv6 address
|
-m ServerName
|
Remote Multi-Domain Server host name or IPv4 address. You must use this argument when you work with a Domain Management Server on a remote Multi-Domain Server.
The remote Multi-Domain Server must be defined as a GUI client.
|
-u user-p password
|
Credentials of the Superuser for the remote Multi-Domain Server. These arguments are necessary to log in to the remote Multi-Domain Server. Make sure that you do not show the password during remote login.
|
You must use at least one these arguments to identify the Domain Management Server:
-n DomainName -i IPv4-a IPv6
When you create a new object, you can use one or more of these arguments to manually define the name or IP address.
You must configure ranges of IPv4 and IPv6 addresses on your Multi-Domain Server for automatic address assignment to work. If no ranges are defined or there are no available IP addresses available, the command will fail.
The -t-m-umdscmd
|
Note - The old version of this command (mdscmd deletecma) is still supported.
|
|

