Access Policy
The Access Policy defines what users are allowed or denied access to when browsing the internet. It enables administrators to:
-
Control access to web categories, for example, social media, news, gambling
-
Allow or block specific URLs or domains
-
Manage access to cloud-based and web applications, for example, Dropbox, YouTube, ChatGPT
These controls can be tailored per user or user group, ensuring policies are aligned with business roles and security requirements. For example, marketing teams might be granted access to social media platforms, while finance users are restricted to business-related sites only.
|
|
Note - For Check Point SASE Linux clients, Secure Web Gateway (SWG) Access Policy rules do not support wildcard domain patterns (for example, *.example.com). Using wildcards may cause incorrect traffic evaluation or policy bypass. Use explicit domain names instead. |
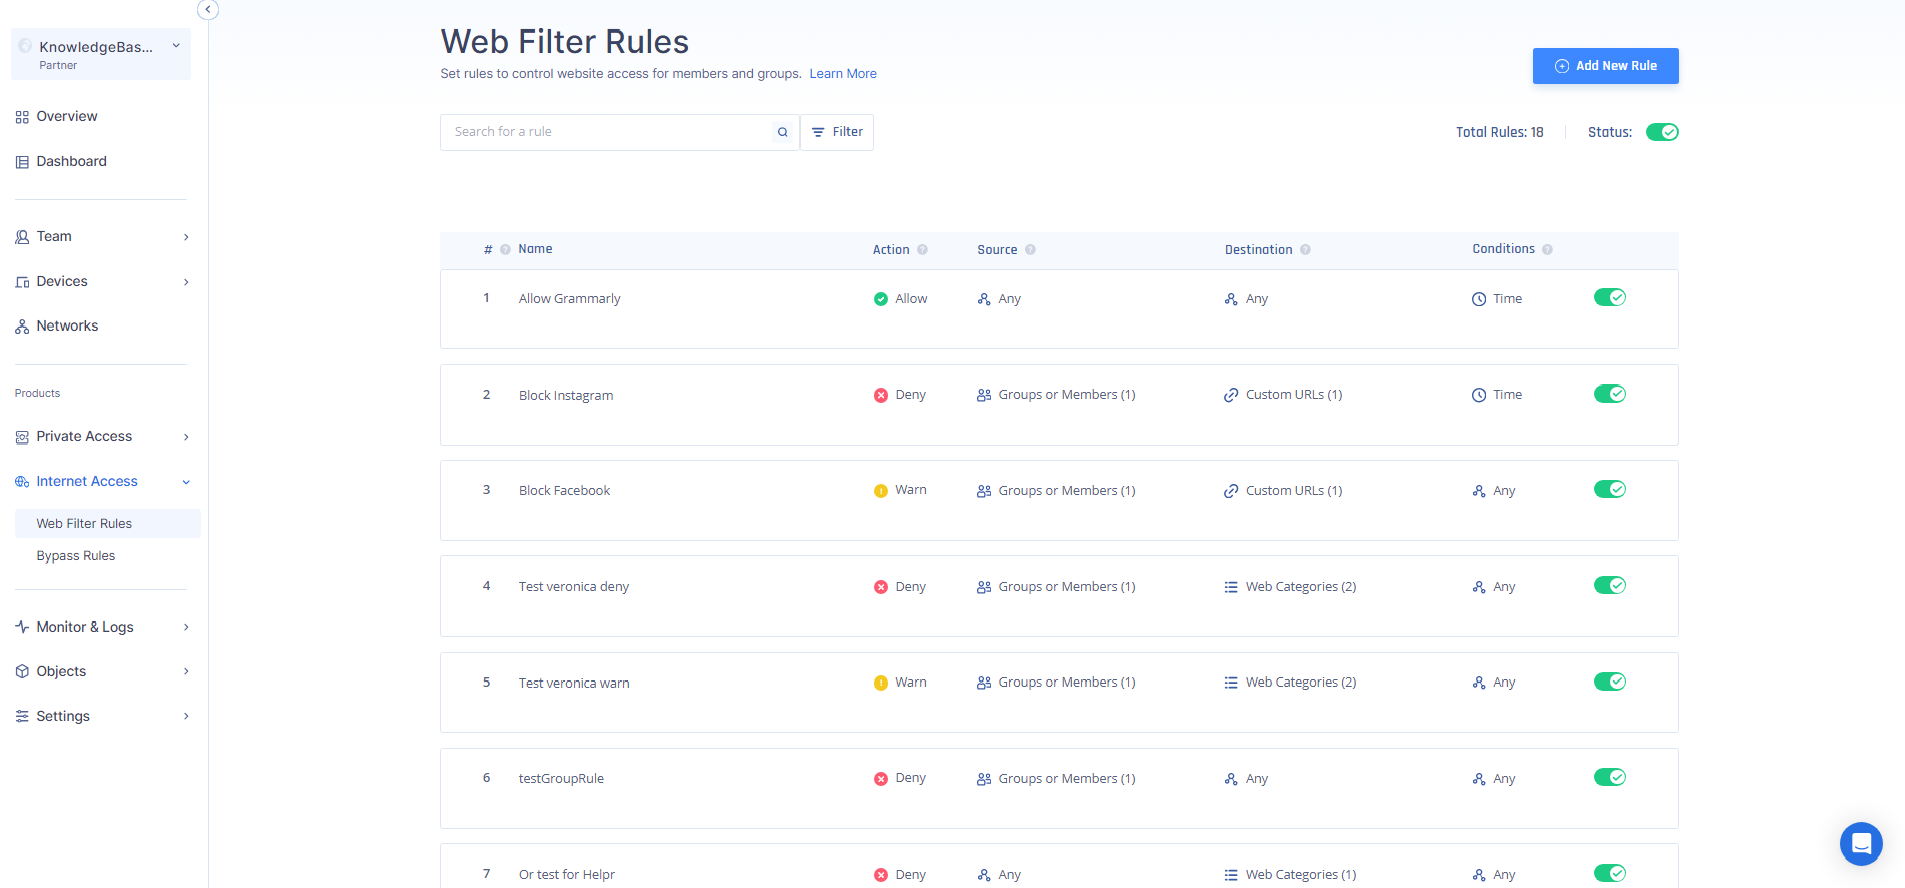
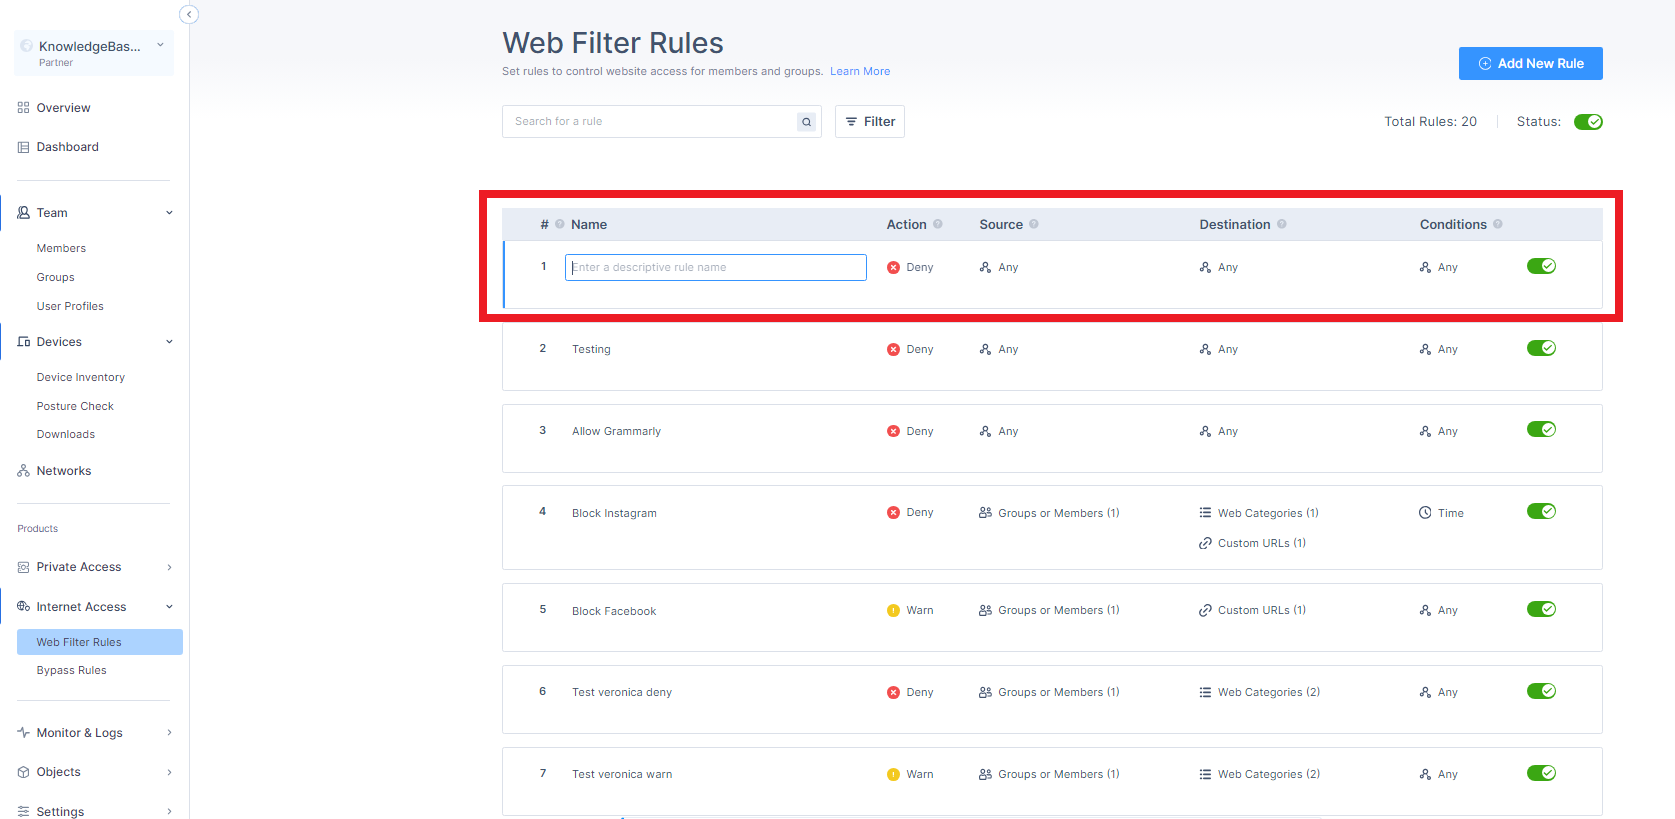
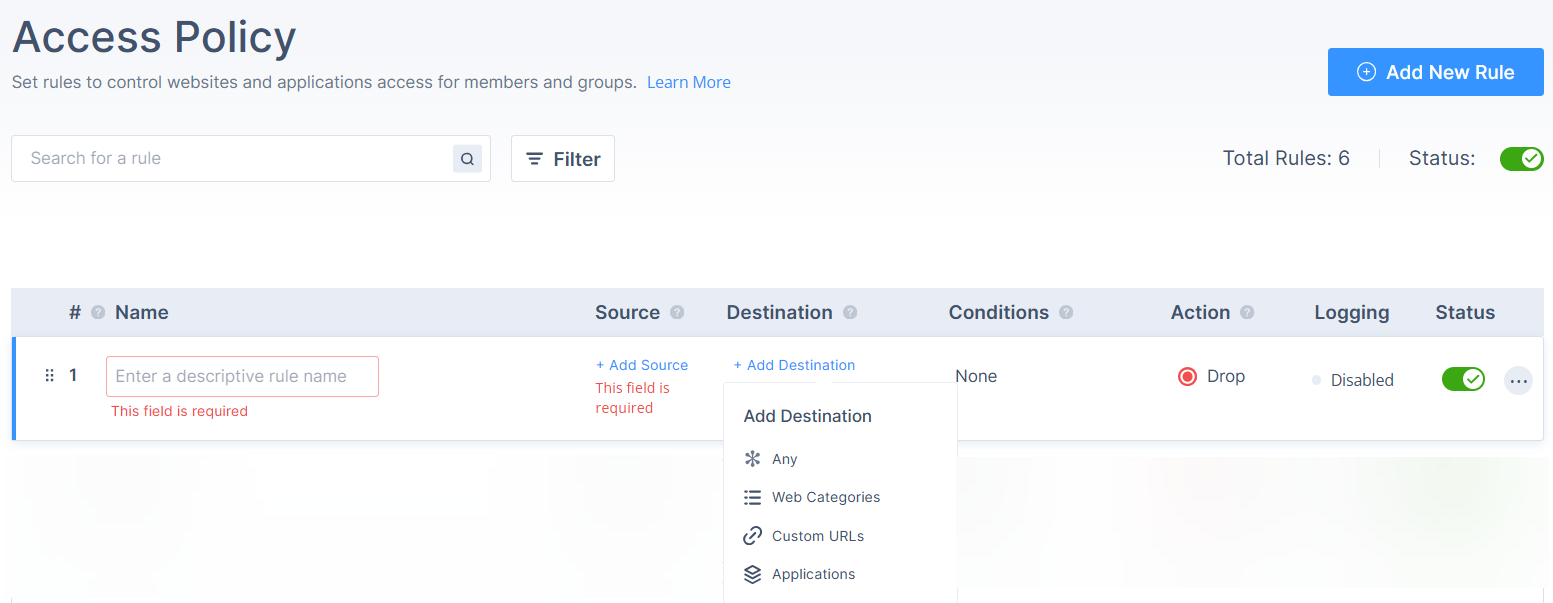
To view the Access Policy page, access the SASE Administrator Portal and click Internet Access > Access Policy.
|
Column |
Description |
|---|---|
|
Name |
Name of the Rule. |
|
Source |
|
|
Destination |
Destination of the web traffic generated by the source (Any, Web categories, Custom URLsor Applications or Updatable Onjects). |
|
Conditions |
Allows admin to define time-based constraints for each rule. When a condition is applied, the rule is enforced only during the specified time frame (example: weekdays between 9:00 AM and 6:00 PM). This enables administrators to create policies that adapt to business hours, shift schedules, or specific access windows, for example, restricting access to social media sites outside of working hours. If no condition is set, the rule applies at all times. |
|
Action |
Action for web traffic:
|
¹The end user needs to confirm the warning message, so it do not show the alert for the inspected resource for the next 24 hours.
Application Policy
Application Policy enables you to monitor, manage, and enforce access control over the SaaS applications used in an organization. It uses state of the art applications catalog and detection engine to accurately recognize and classify SaaS applications based on their behavior, signatures, and traffic patterns.
Support
Minimum agent version supported is 11.5.
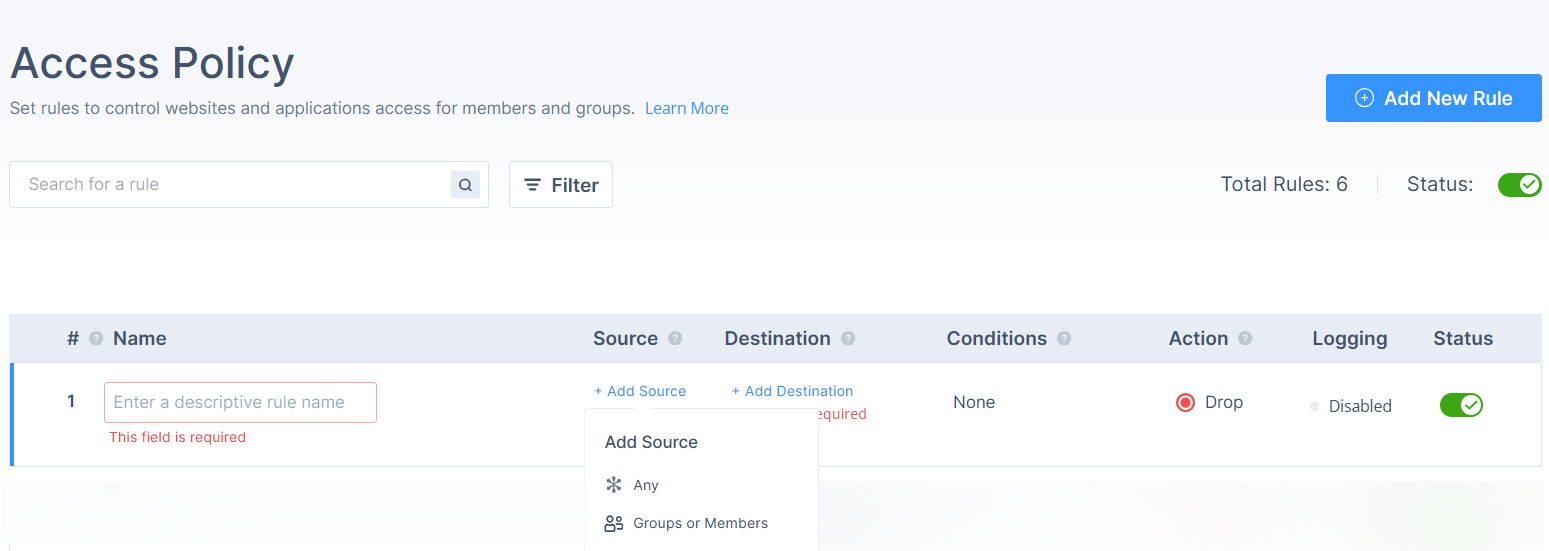
Creating an Access Policy
-
Access the SASE Administrator Portal and click Internet Access > Access Policy.

Note - The access policy is a first-match-rule base.
-
Click Add New Rule.
A new rule appears in the table.
-
In the Name field, enter a name for the rule.
-
From the Action list, select one:
-
Drop (default)
-
Accept
-
Warn
Note - Custom URLs support wildcards, see Custom URLs.
-
-
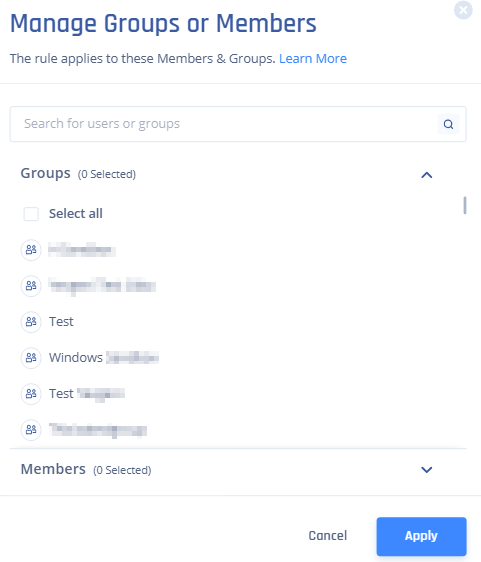
In the Source field, add user or group list to which you want to apply the rule.
-
Click Add Source and select any one from these:
-
Any
-
Groups or Members: Select group(s) or member(s) from the list.
-
-
Click Apply.
-
-
In the Destination field, select the destination.
-
Click Add Destination.
-
To apply the rule to all destinations, select Any.
-
Click Apply.
-
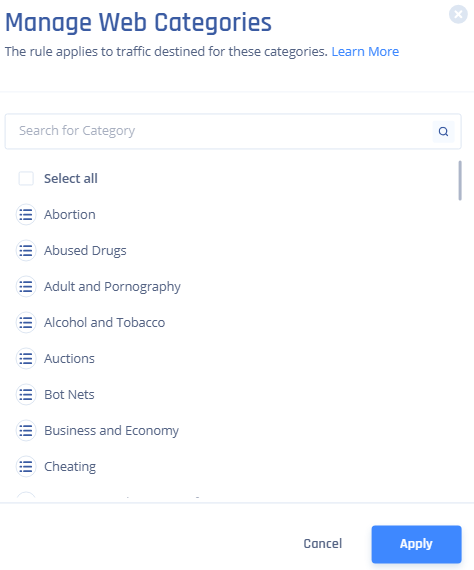
To add web categories, select Web Categories.
The Manage Web Categories window appears.
-
Select the categories from the list.
-
Click Apply.
-
To add custom URLs, select Custom URLs.
The Manage Custom URLs window appears.
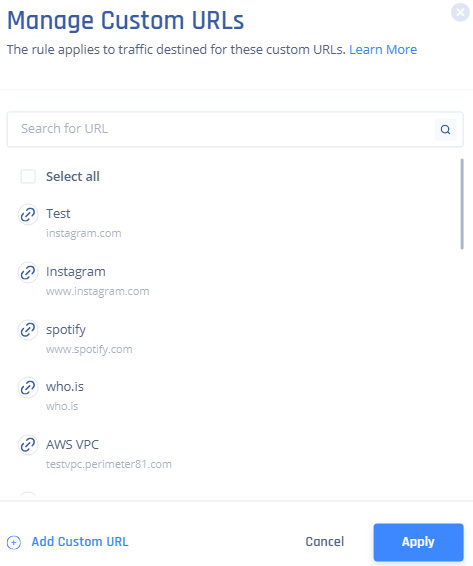
-
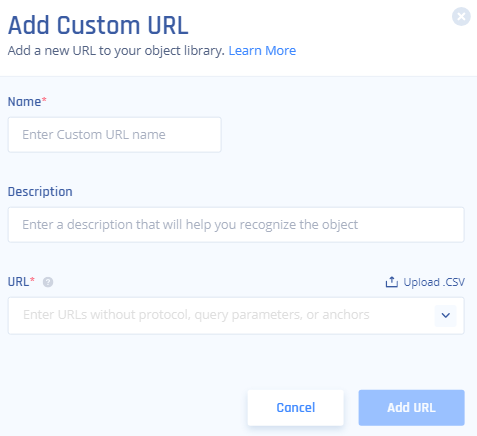
Select the custom URL. If the URL is not listed, click Add Custom URL and specify these and click Add URL:
-
Name
-
Description
-
URL
Optionally, click Upload .CSV to upload a .csv file with list of URLs.
-
-
Click Apply.
-
To add applications, select Applications.
The Add Application window appears.

-
Search the application and click
 to select the application.
 -
Click Apply Changes.
-
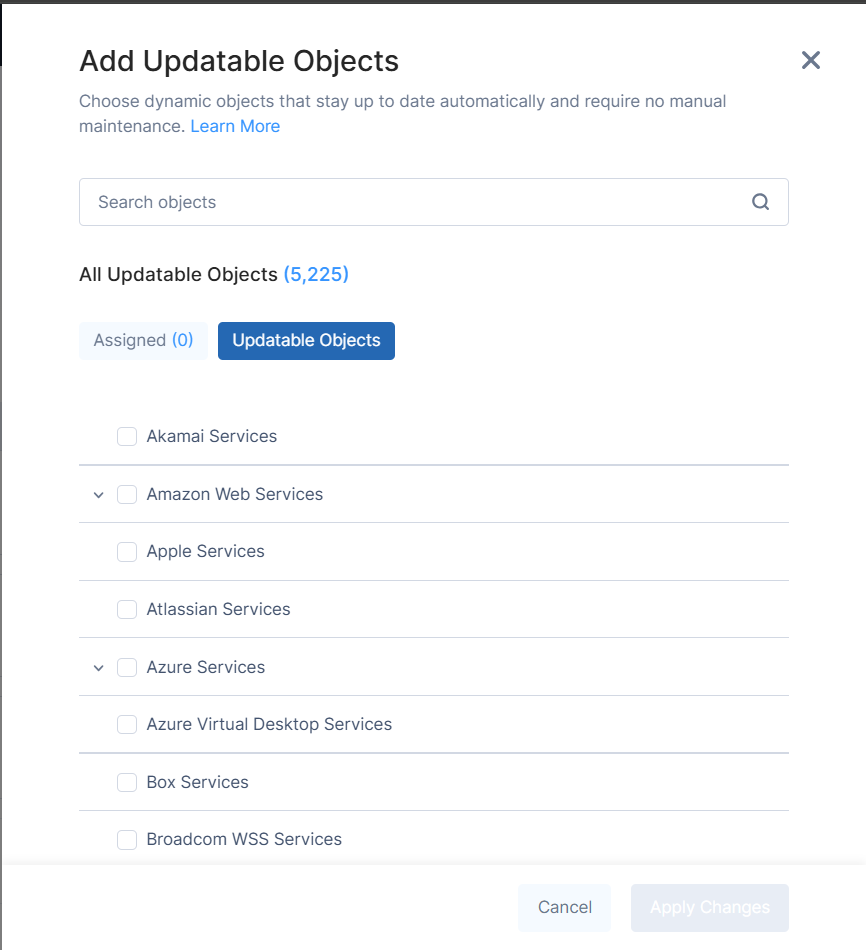
To add updatable objects, select Updatable Objects.
-
For more information, see Updatable Objects.
-
The Add Updatable Objects window appears.
-
Use the Search Objects field to find services, or click Updatable Objects to select the required services.
-
Selected services appear under the Assigned tab.
-
Click Apply Changes.
-
-
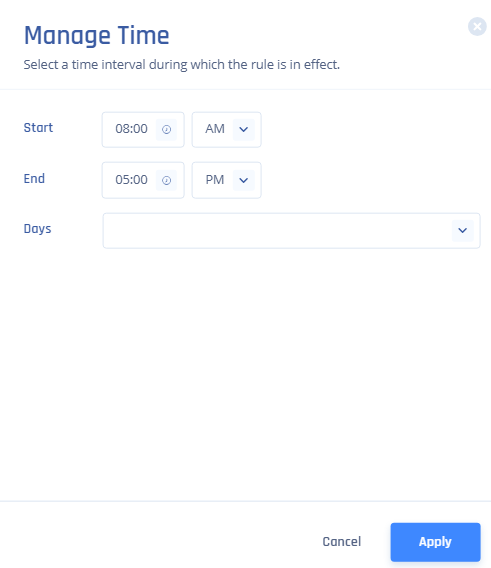
In the Conditions field, specify the timeframe for which the rule must be active.
-
Click Add Condition > Time.
The Manage Time window appears.
-
Select the Start time from the list.
-
Select the End time from the list.
-
Select the Days from the list.
-
Click Apply.
-
-
To activate the rule, turn on the Status toggle button.
-
Click Apply in the bottom of the page.

-
Click Apply.