Webhooks
Webhooks allow third-party systems to trigger automations. You can use webhooks for:
- Out-of-the-box automations
- Custom automations
- Cloned automations
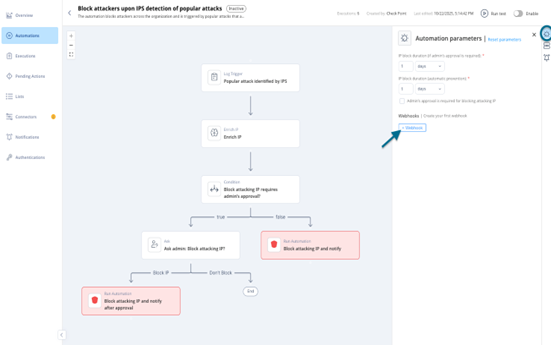
Triggering an Out-of-the-Box Automation Using Webhooks
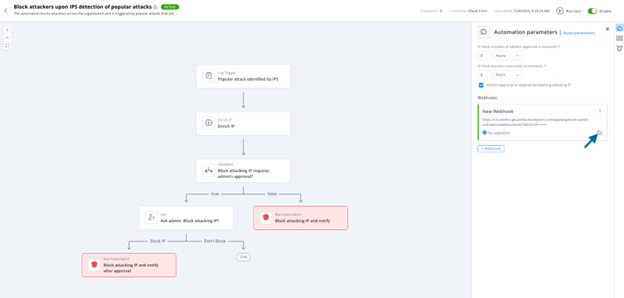
To trigger an automation using a webhook:
-
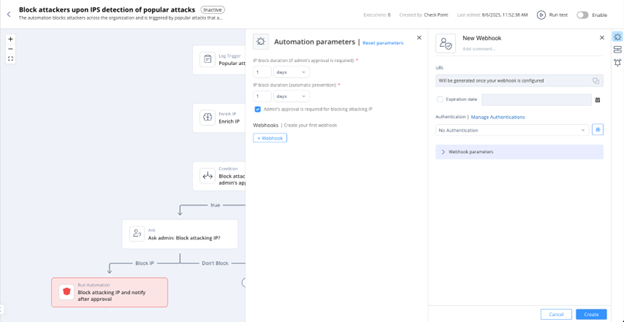
In the Automation Parameters panel, click +Webhook.
-
In the New Webhook window, enter the required details:
-
Name
-
(Optional) Expiration date
-
(optional) authentication
-
-
Click Create to create the webhook.
For detailed configuration steps, see Creating a Webhook.
Triggering a Custom Automation Using Webhooks
To trigger a custom automation using a webhook:
-
Open a blank automation (create a new one or edit an existing blank automation).
-
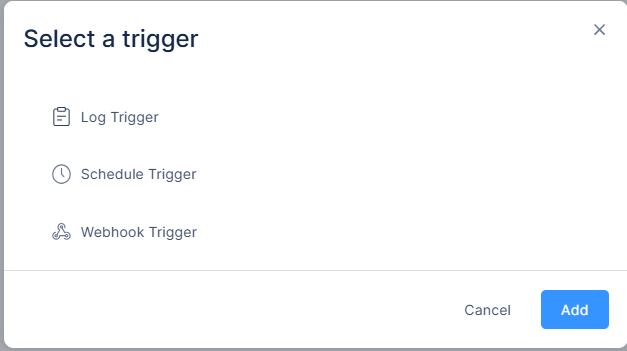
Click Click to add trigger, select Webhook Trigger and click Add.
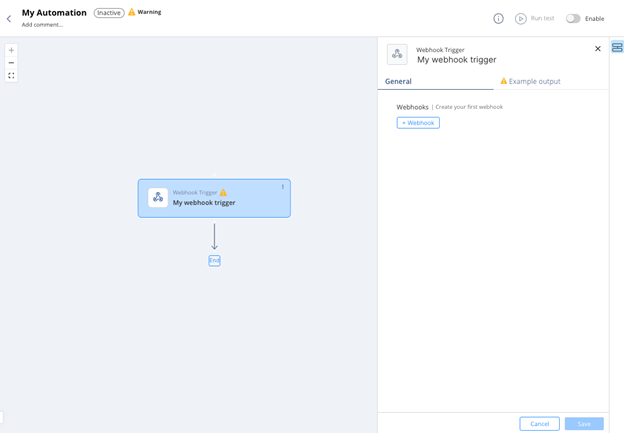
Webhook trigger is created.
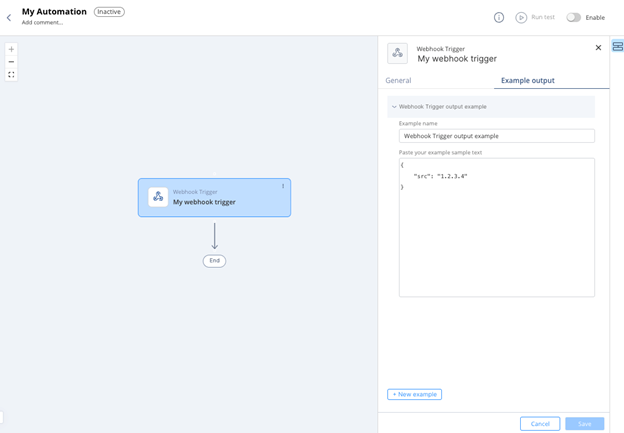
-
Configure the Example Output to define the expected webhook payload that third-party systems send to trigger the automation. The example shows the fields that the system passes to the subsequent steps.
-
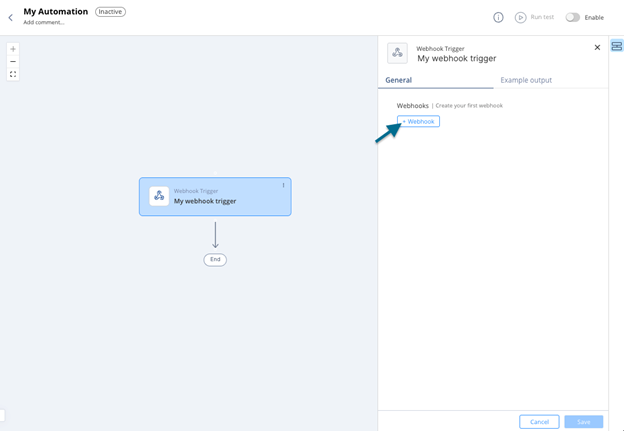
In the General tab, click +Webhook.
-
After you use a field from the trigger’s example output in a subsequent step, add field mapping to it under Webhook Parameters.
For more details, see Creating a Webhook.
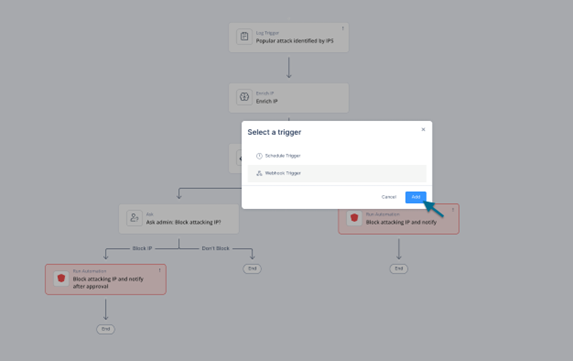
Triggering a Cloned Automation Using Webhooks
To trigger a cloned automation using a webhook:
-
Open Automation, click
 and select Replace Trigger.
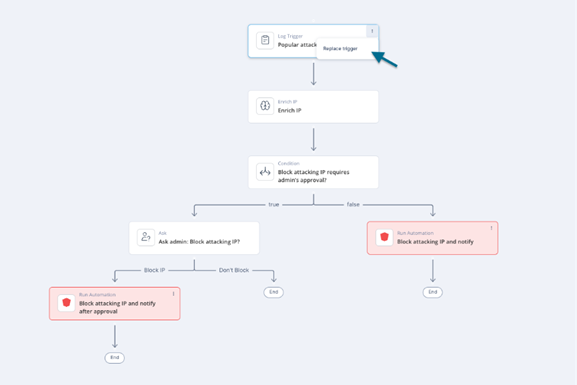
-
Selected Webhook Trigger, click Add.
-
Click Continue to replace the trigger.
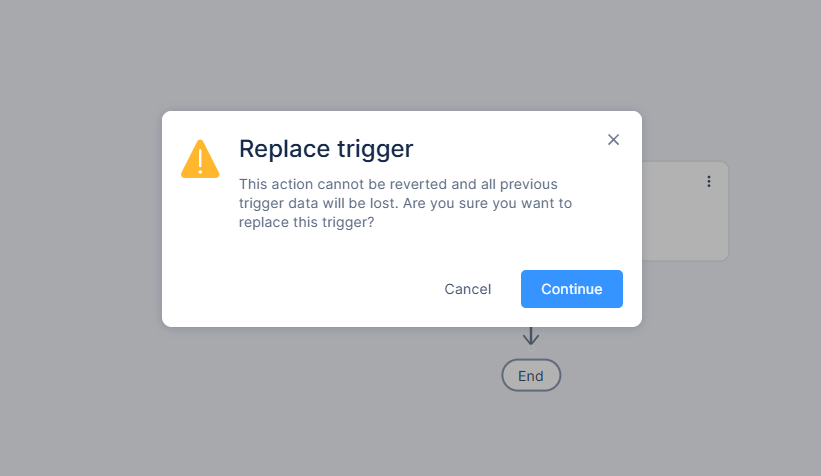
A warning message appears
 Note - Replacing a trigger permanently deletes all previous trigger data. This action cannot be undone.
 -
In the General tab, click +Webhook.
-
After you use a field from the trigger’s example output in a subsequent step, you can add field mapping to it under Webhook Parameters.
-
Click Create
For more information on replacing triggers, see Replace Trigger.
Creating a Webhook
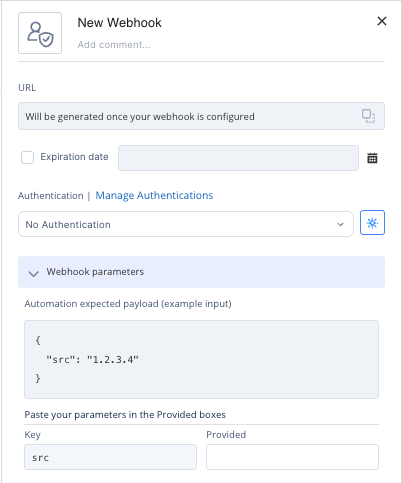
Webhook URL
-
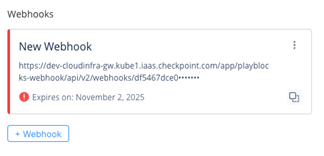
Each webhook is assigned a unique URL when the webhook is created.
-
Once generated, you can copy and use this URL in any service or application that needs to trigger the webhook.
Notes --
The URL cannot be modified.
-
This URL is sensitive and should be protected. Do not share or expose it—anyone who has access to the URL can trigger the webhook.
-
-
If the URL is exposed:
-
Clone the webhook.
-
Update any integrations to use the new webhook’s URL.
-
Delete the old webhook.
-
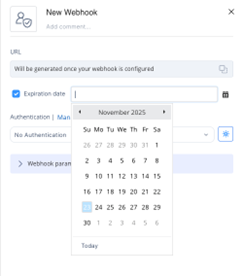
Expiration Date
-
(Optional) Set an expiration date by selecting Expiration Date and choosing the desired date.
-
Seven days before a webhook expires, and again on the expiration date, you receive a reminder email.
-
In the portal, expired webhooks are marked in the automation webhooks list.
-
If a webhook expires:
-
Clone the webhook.
-
Update any integrations to use the new webhook’s URL.
-
Delete the old webhook.
-
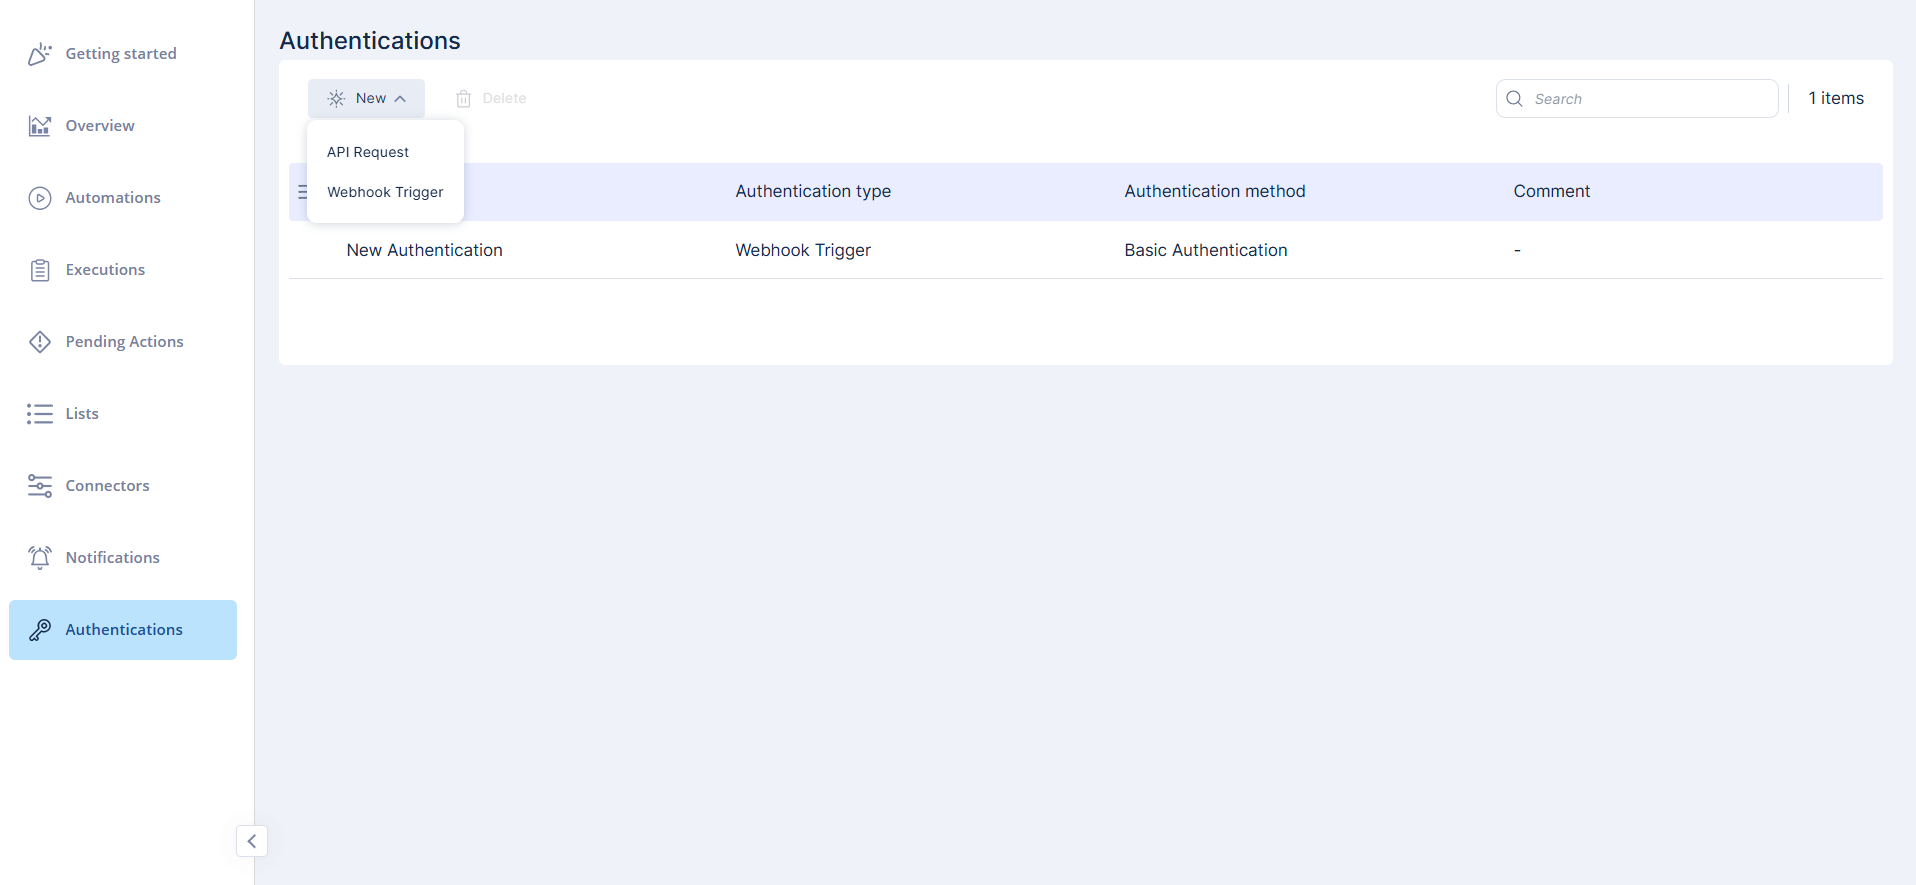
Authentication
A webhook may include authentication. Supported types:
-
Basic Authentication (username and password)
-
Custom Authentication (custom key–value pair)
We recommend adding authentication for security. Even if someone obtains the webhook URL, they still need valid credentials.
Select an existing authentication from the drop-down list or create a new one.
Click Manage Authentications to open the Authentications page, where you can view details or edit existing authentication settings.
For more information, see Authentications.
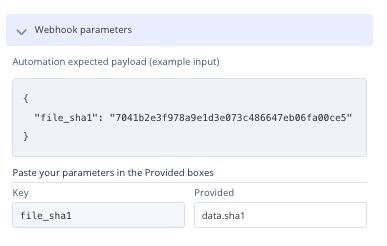
Webhook Parameters – Mapping Webhook Payload Fields
When configuring a webhook:
-
The automation’s trigger step may include an Example Output, which defines the expected data structure for subsequent steps.
-
In rare cases, the webhook payload sent by the third-party system does not match the format expected by Playblocks.
-
Use Webhook Parameters to map fields from the incoming webhook payload to the fields defined in the Example Output:

Note - If mapping is not defined, the system assumes identical field names as shown in the example output.
-
Mapping ensures that the automation receives the correct data in the correct format.
-
Example Scenario
-
The Example Output includes a field named file_sha1.
-
A later step in the automation relies on this field.
-
The third-party system sends a payload in these format:
Copy{
"data": {
"sha1": "7041b2e3f978a9e1d3e073c486647eb06fa00ce5"
}
}
-
-
Since the incoming payload uses a different structure and field name, create a mapping so the automation receives the value in the expected file_sha1 field.
-
Steps to Create a Mapping
-
Go to Webhook Parameters in the webhook configuration.
-
Map the incoming field (data.sha1) to the expected field (file_sha1).
-
Using a Webhook
Once the webhook is created:
-
Enable the automation.
-
Copy the webhook URL from the webhook card.
 Note - The webhook URL is sensitive. Do not share or expose it. Anyone with access to the URL can trigger the webhook.
 -
Use the URL as the POST request endpoint in the third-party system.
-
Configure these in the third-party system:
-
Authentication (if defined)
-
Webhook payload
-
-
Test the webhook by sending a sample payload from the third-party system to confirm the automation triggers correctly.
For Webhook Trigger step schema definitions, see Appendix G - Using Custom Automation Step Schemas.
For webhook REST APIs, see Appendix H – Webhooks and Authentications