Customization in Playblocks
Playblocks provides flexible customization options to tailor automations according to your organization's needs. These are the primary methods to create or customize automations:
Creating Automation from Blank
Creating an automation from blank allows you to build fully customized flows from scratch, tailoring every step to your specific use case.
To create an automation from blank:
-
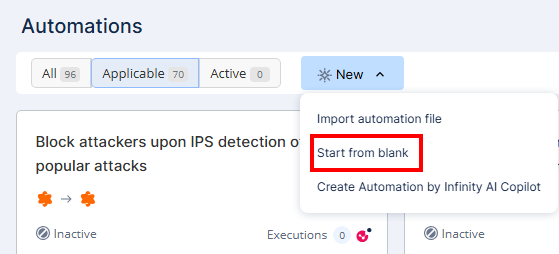
Access Playblocks and go to Automations.
-
Click New and select Start from blank.
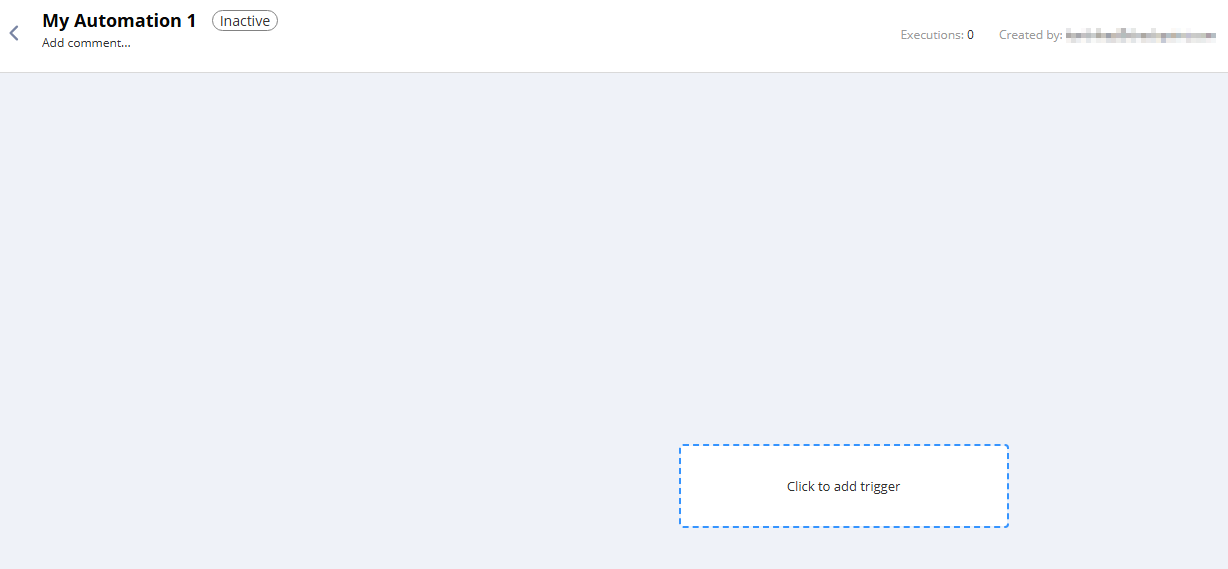
A new automation window appears.
-
Click the box to add a trigger.
-
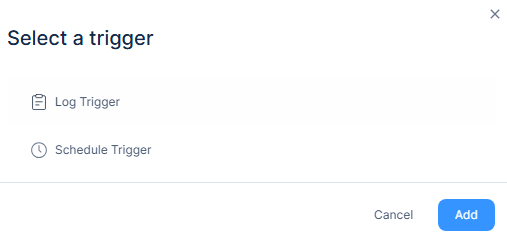
Select a trigger:
-
Log Trigger - To monitor specific log types with optional filters and time intervals. See Log Trigger.
-
Schedule Trigger - To execute the automation at defined time intervals. See Schedule Trigger.
-
-
Click Add.
Log Trigger
In the Log Trigger window:

-
In the General tab:
-
From the Type list, select the log type:
-
Logs
-
Audit

Note - An additional option Events is available if you select Quantum SD-WAN as the source product.
-
-
From the Get logs from list, select the source product for the logs.
Note - For Quantum products, there are two options:
-
Quantum Management (Infinity Portal)
Opens the cloud logs view (requires (Undefined variable: Vars_CloudGuard.tp_smart1_cloud_old) or Log Sharing).
-
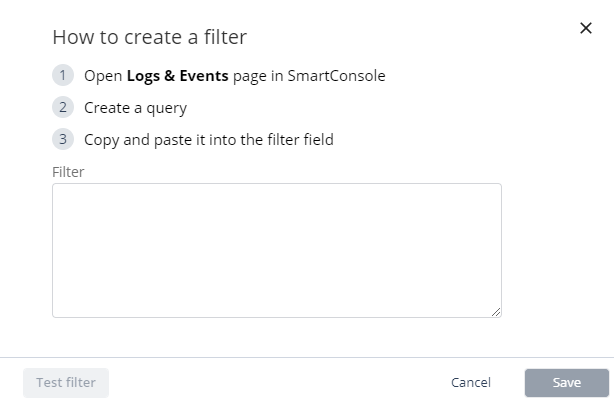
Quantum Management (Self-Hosted Log Server)
Opens a manual input for filter text.
Additional products that support filter editing via the cloud logs view are:
-
Harmony Endpoint
-
Email Security
-
SASE
-
SD-WAN
-
CloudGuard WAF Application Security
-
-
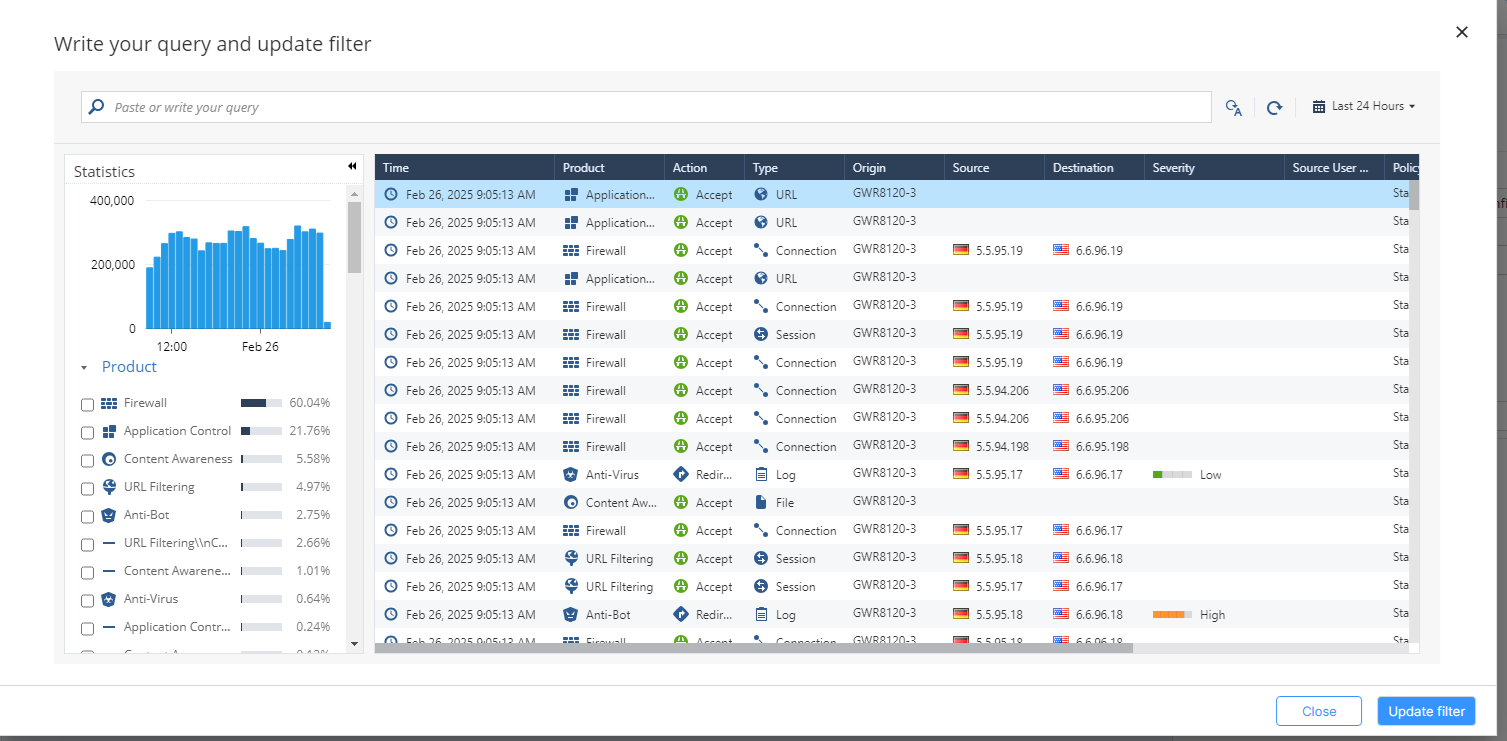
In the Filter field, choose the filter from the product logs.
-
From the Interval list, select how often Playblocks will search for matching logs.
-
(Optional) In the Condition section, add criteria to refine when the automation is triggered.
This enables more tailored log monitoring and precise automation triggers. The automation will only be triggered when all conditions are met. The condition types available are:
-
-
Count distinct or count occurrences within a field
For example, trigger automation if logs are found from three different sources.
-
Option to save values for later use

-
-
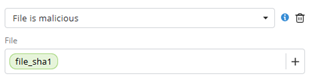
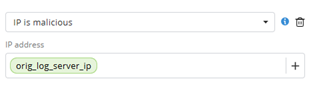
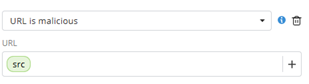
File/IP/URL is Malicious
Uses Check Point Reputation Service to verify if values are flagged as malicious.
-
Skip log if value exists in list
Skips log if the value field (example, IP address) already exists in a predefined list.

-
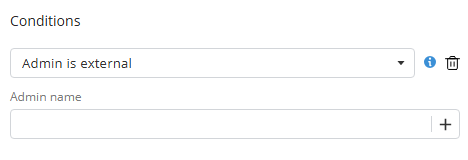
Admin is external
Checks if the admin field from log is an external user.
-
Fields exist in log
Ensures specified fields are present.

-
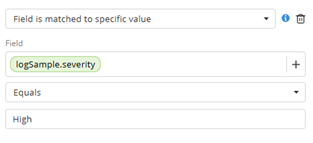
Field is matched to specific value
Checks if a field’s value is equal to, not equal to, or contains a specific value.
-
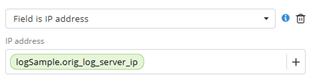
Field is IP address
Validates that a field contains a valid IP address.
-
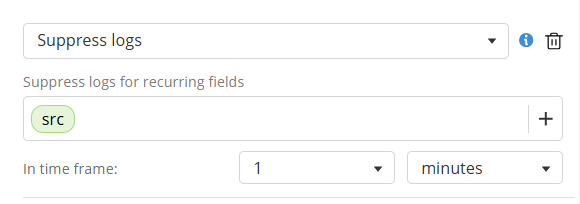
Prevents triggering based on repeated matches.
-
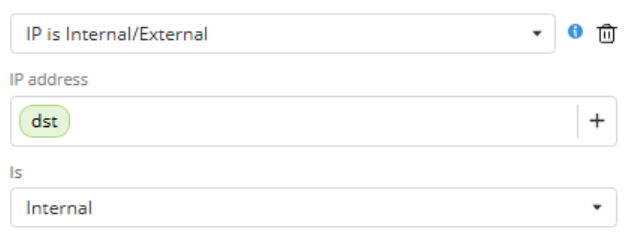
IP is Internal/External
Checks if an IP field from log is internal/external.
-
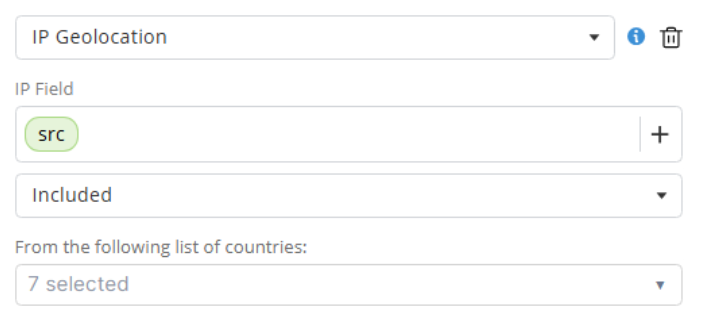
Validates whether the origin country of an IP field is included or excluded from a specified country list.
-
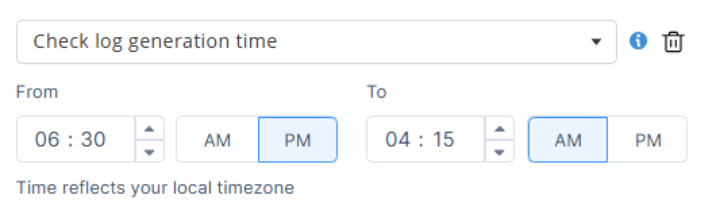
Check log generation time
Validates whether the log timestamp falls within a defined time window.
-
-
-
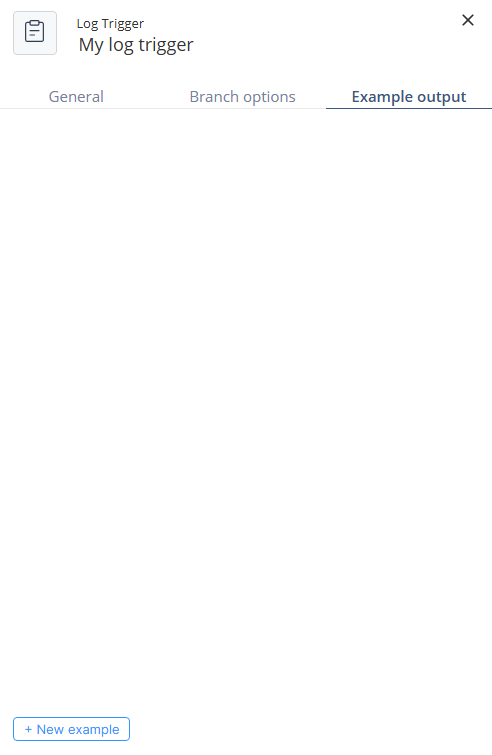
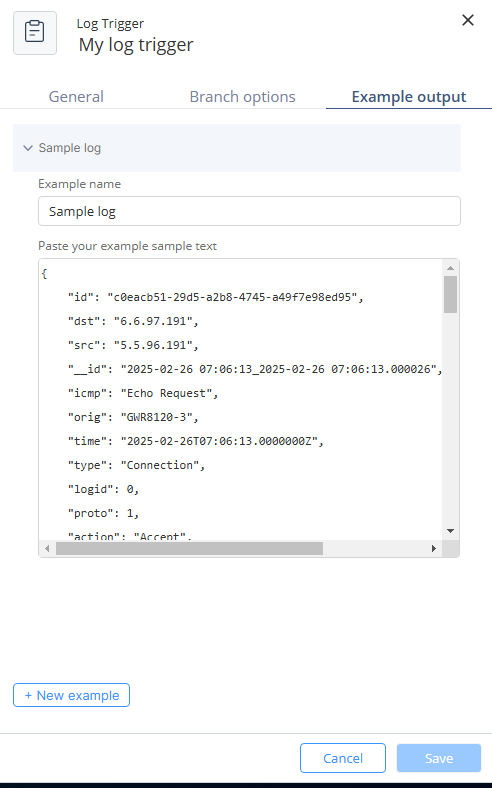
In the Example output tab:
-
If logs matching your filter were found in the last 24 hours, the system displays an example log.
-
Otherwise, you can manually define an example to enable use of log fields:
-
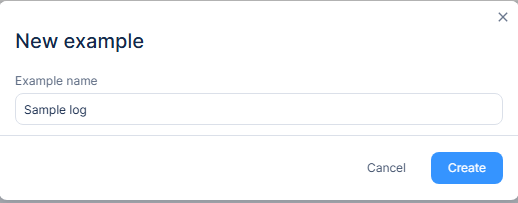
Click New example.
-
Enter a name and click Create.
-
Paste your example sample text.
-
Click Save.
-
-
-
Click Create.
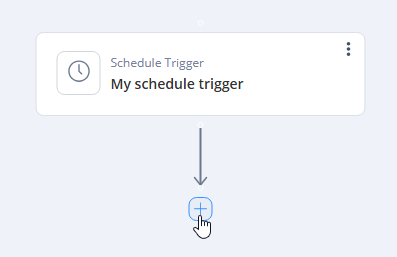
Schedule Trigger
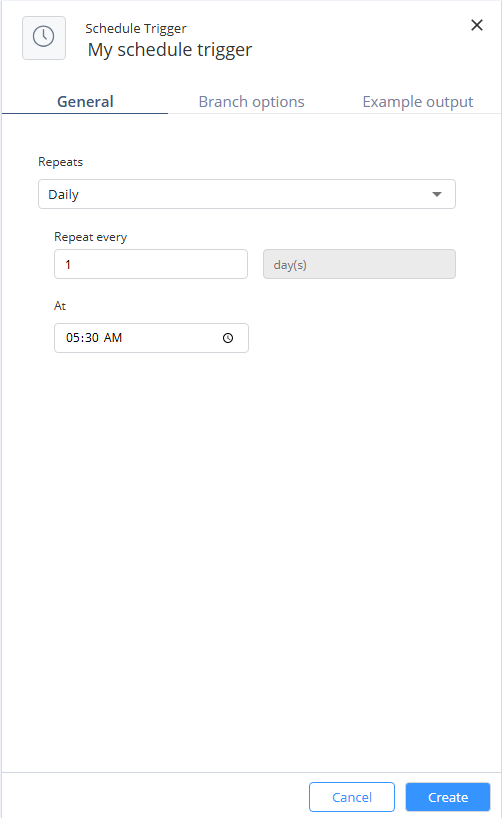
In the Schedule Trigger window:
-
In the General tab, from the Repeats list, select the frequency to repeat the trigger to run the automation:
-
Monthly - Runs the automation every X months, on specified days.
-
Weekly - Runs the automation on selected weekdays, at a specific time.
-
Daily - Runs the automation every X days, at a set time.
-
Hourly - Runs the automation every X hours.
-
-
Click Create.
Managing Trigger
-
Hover over the End button in your trigger.
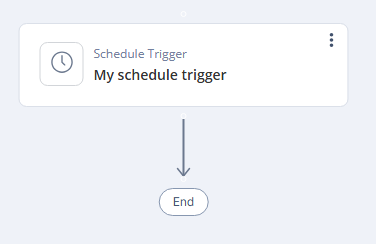
It changes to +.
-
Click +.
-
Select the required option:
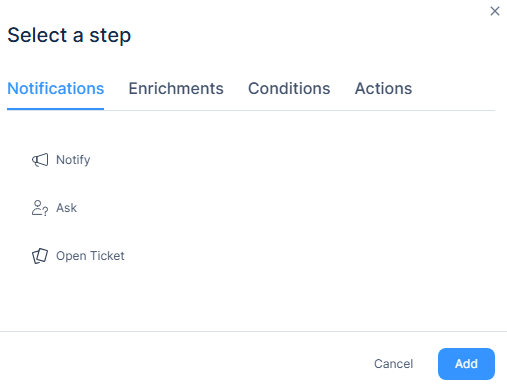
Notifications
-
In Notifications, select one of these:
-
Notify
-
To send a notification with customizable subject and message content, select Notify.
-
Click Add.
The Notify window appears.
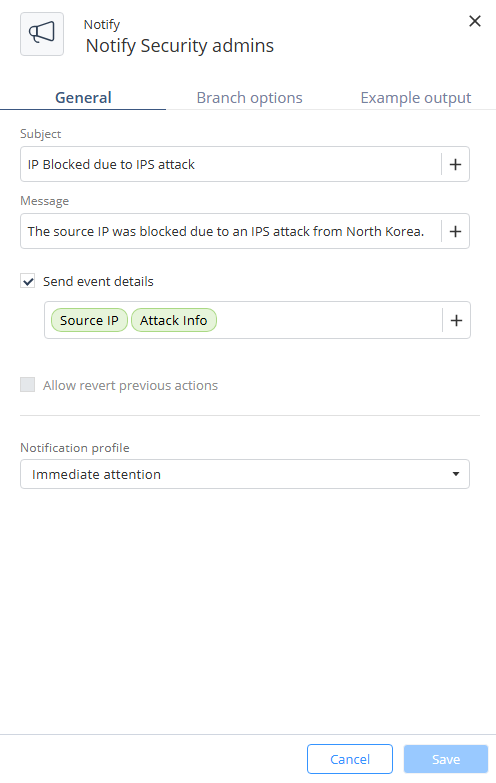
-
Enter these:
-
Subject - Text combined and dynamic values from previous steps or automation parameters.
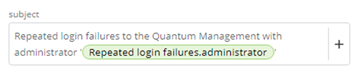
-
Message - Text combined and dynamic values from previous steps or automation parameters.
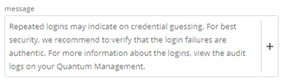
-
(Optional) Send event details - Include selected event data from the outputs of the current or previous steps, or from the automation parameters.
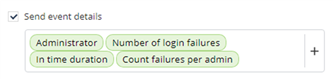
-
Notification profile - Select the notification profile of the step.

-
-
Click Create.
-
-
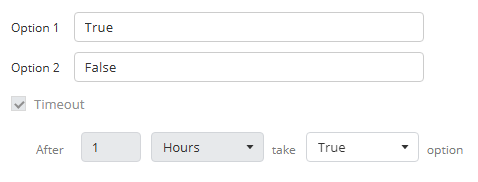
Ask
-
To send a customizable message that prompts a user response, select Ask.
-
Click Add.
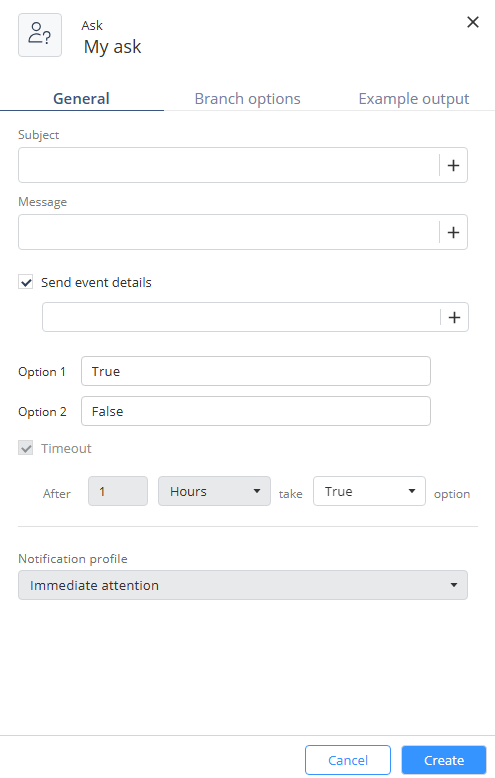
The Ask window appears.
-
Enter these:
-
Subject - Text combined and dynamic values from previous steps or automation parameters.

-
Message - Text combined and dynamic values from previous steps or automation parameters.
-
(Optional) Send event details - Include selected event data from the outputs of the current or previous steps, or from the automation parameters.

-
Options and Defaults - Define user response options and a default fallback in case of timeout.
-
Notification profile - Select the notification profile of the step.
-
-
Click Create.
-
-
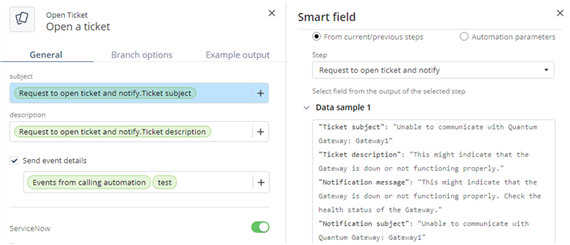
Open Ticket
-
To create a ticket, select Open Ticket.
-
Click Add.
The Open Ticket window appears.
-
Enter these:
-
Subject - Configure the ticket subject, with the option to add fields from the outputs of the current or previous steps and from the automation parameters.
-
Description - Configure the ticket description, with the option to add fields from the outputs of the current or previous steps and from the automation parameters.
-
(Optional) Send event details - Choose whether to send event details, and select specific details from the outputs of the current or previous steps, or from the automation parameters.
-
-
Click Create.
-
-
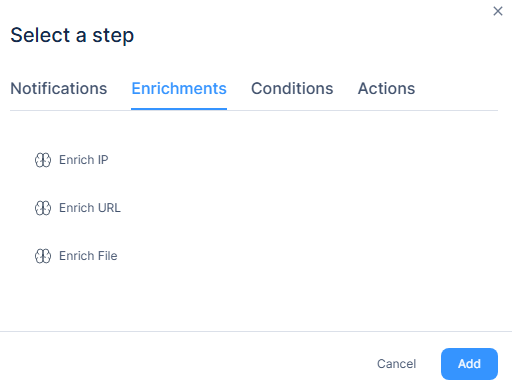
Enrichments
Enrichment steps query Check Point Reputation Service to return relevant data for IP addresses, URLs, or file hashes from previous step outputs. Each enrichment provides threat intelligence about the value being checked.
-
In Enrichments, select one of these:
-
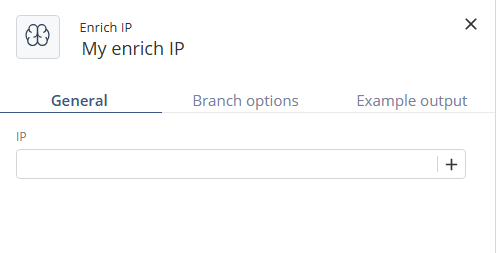
Enrich IP
-
To return data for an IP address, select Enrich IP.
-
Click Add.
The Enrich IP window appears.
-
Enter an IP address selected from previous steps outputs. The system returns the following information:

-
Click Create.
-
-
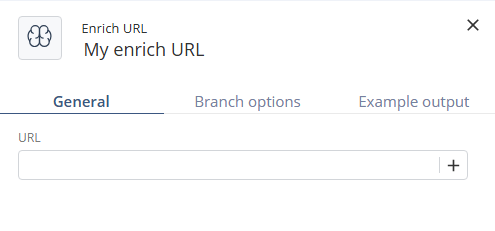
Enrich URL
-
To return data for a URL, select Enrich URL.
-
Click Add.
The Enrich URL window appears.
-
Enter a URL selected from previous steps outputs. The system returns the following information:

-
Click Create.
-
-
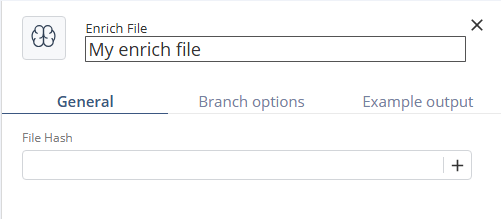
Enrich File
-
To return data for a file hash, select Enrich File.
-
Click Add.
The Enrich File window appears.
-
Enter a file hash selected from previous steps outputs. The system returns the following information:

-
Click Create.
-
-
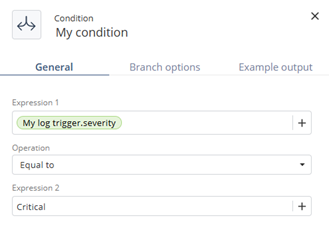
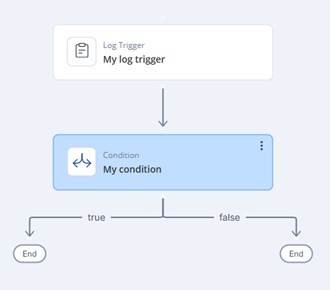
Conditions
Conditions are used to create branches in the automation flow based on logical evaluations.
-
In Conditions tab, select Condition.
-
Click Add.
The My Condition window appears.
-
Specify these:
-
Expression 1
-
Operation:
-
Equal to
-
Not equal to
-
Greater than
-
Greater than or equal to
-
Less than
-
Less than or equal to
-
-
Expression 2
Both expressions can use static values or outputs from previous steps. Define what happens when the condition is met or not met.
-
Actions
Action steps perform operations such as running predefined automations, adding indicators to lists, creating IOC management indicators, or sending external API requests.
Run Automation
-
In Actions tab, select Run Automation.
-
Click Add.
The Run Automation window appears.
-
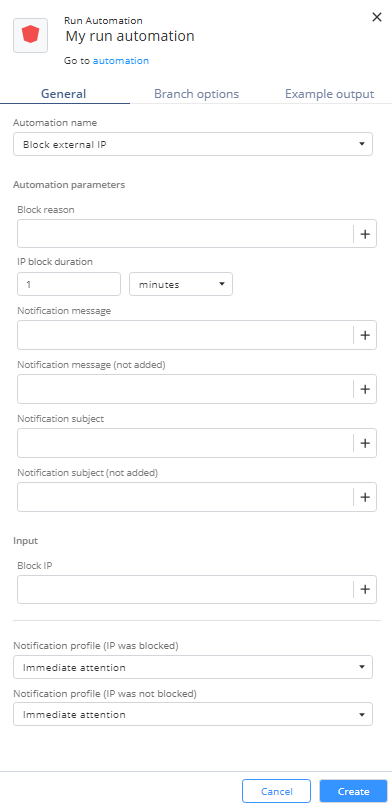
In the General tab, from the Automation name list, select one of these and specify the automation parameters and Input:
-
Block External IP:
-
Block reason
-
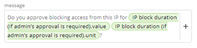
IP block duration
-
Notification message
-
Notification message (not added)
-
Notification subject
-
Notification subject (not added)
-
Block IP
-
Notification profile (IP was blocked)
-
Notification profile (IP was not blocked)
-
-
Quarantine Internal IP
-
Quarantine reason
-
IP quarantine duration
-
Notification message
-
Notification message (not added)
-
Notification subject
-
Notification subject (not added)
-
Open ticket if device IP was quarantined
-
Quarantine IP
-
Notification profile (Device IP was quarantined)
-
Notification profile (Device IP was not quarantined)
-
-
Open ticket and notify
-
Open ticket
-
ServiceNow ticket type
-
Jira ticket type
-
Notification subject
-
Notification message
-
Ticket subject
-
Ticket description
-
Notification profile
-
-
Isolate endpoint device
-
Device isolation duration
-
Notification subject
-
Notification message
-
Open ticket if device was isolated
-
type
-
deviceName
-
deviceIp
-
machineId
-
comment
-
Notification profile
-
-
-
Click Create.
Add to List
-
Select Add to list and then click Add:
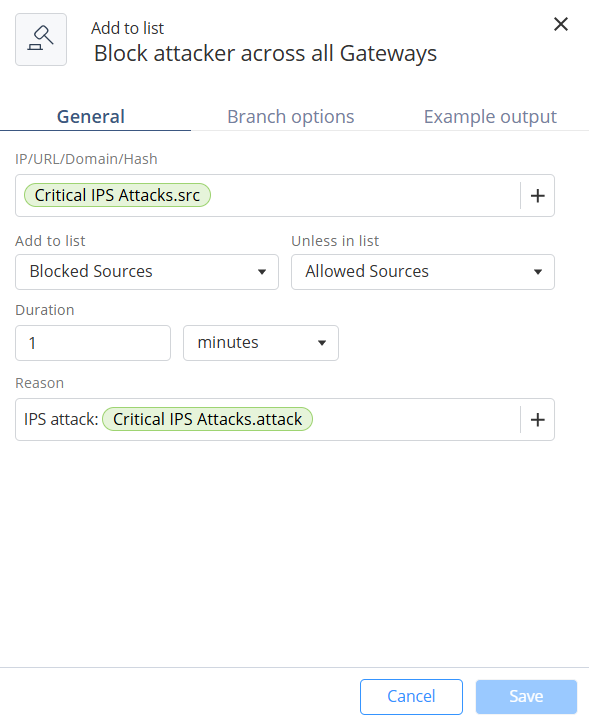
The Add to list window appears.
-
Specify these:
-
IP/URL/Domain/Hash - A value of type IP, URL, Domain, or Hash from the outputs of previous steps.
-
Add to list
-
Unless in list
-
Duration
-
Reason
-
-
Click Create.
Create IOC Management Indicators
-
Select Create IOC Management Indicators and then click Add:
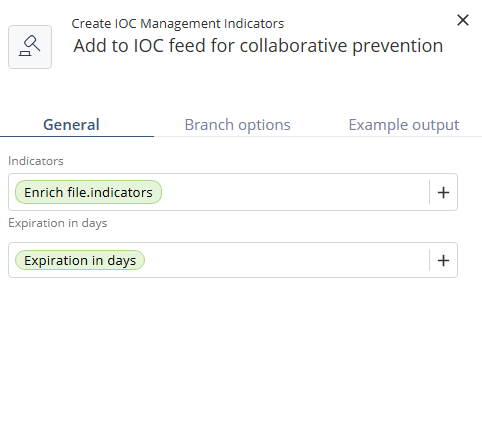
The Create IOC Management Indicators window appears.
-
Specify these:
-
Indicators
-
Expiration in days
-
-
Click Create.
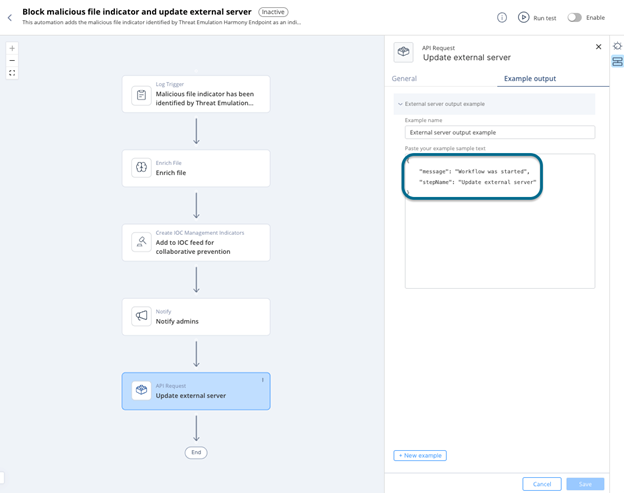
API Request
-
AccessPlayblocks and go to Automations.
-
Open your Automation and click +.
-
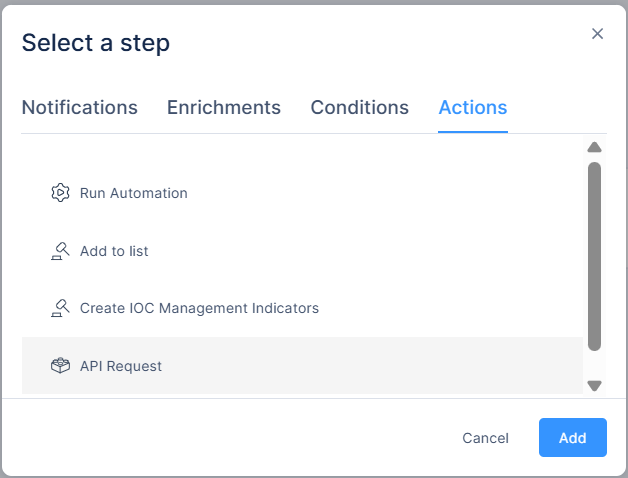
Select Actions > API Request.
-
Click Add.
-
Fill these parameters.
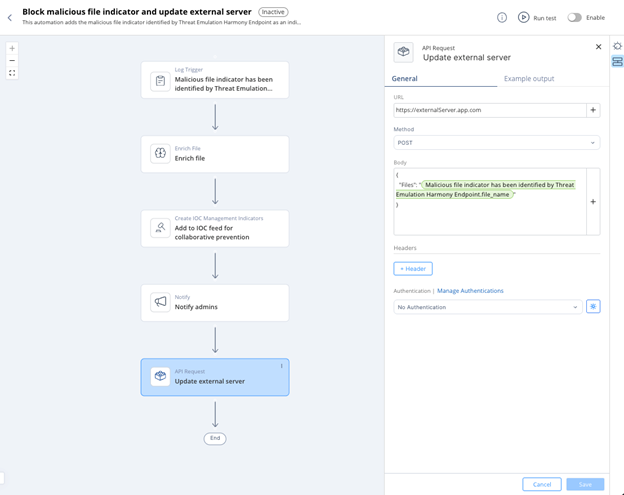
- URL: The HTTPS endpoint for the request.
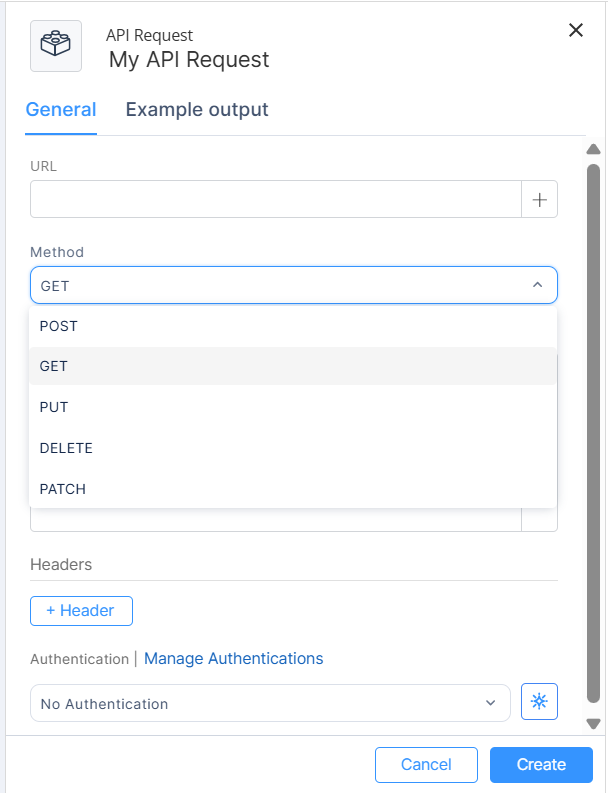
- Method: The HTTP method for the request. Supported methods:
- POST
- GET
- PUT
- DELETE
- PATCH
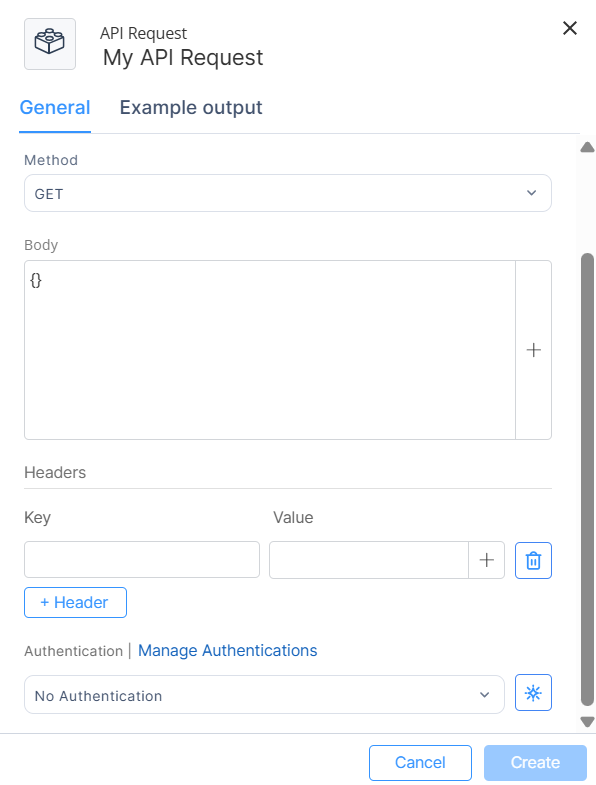
- Headers (optional): Request headers.
- These headers are automatically added by Playblocks and cannot be overridden:
- Content-Type: application/json
X-Requested-By: Playblocks-Automation
X-Forwarded-For: Playblocks-Internal
- To add custom headers, click +Header
- Add key and Value.
- These headers are automatically added by Playblocks and cannot be overridden:
- Body (optional): Request body. Used only for POST, PUT, and PATCH methods.
- Authentication: Supported types:
- Bearer Token
- Basic Authentication (username and password)
- Custom Authentication (custom key–value pair)
For more information, see Authentications.
- You can select an existing authentication.
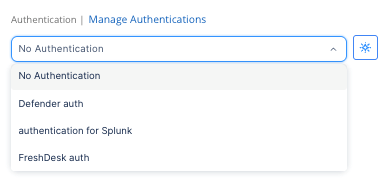
- Click
 to create a new authentication.
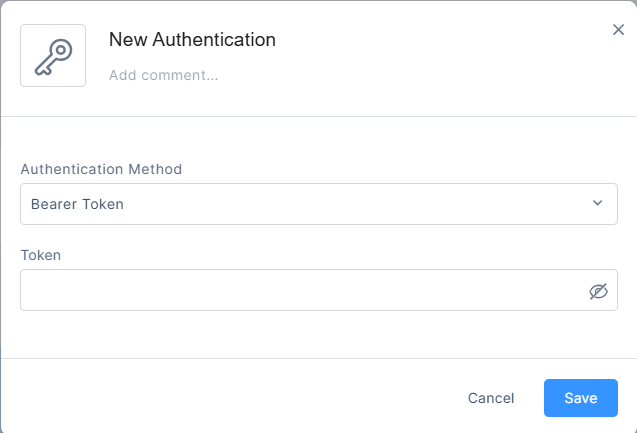
New Authentication window appears. - Enter these details:
- Name
- Add comment
- Authentication Method
- Token
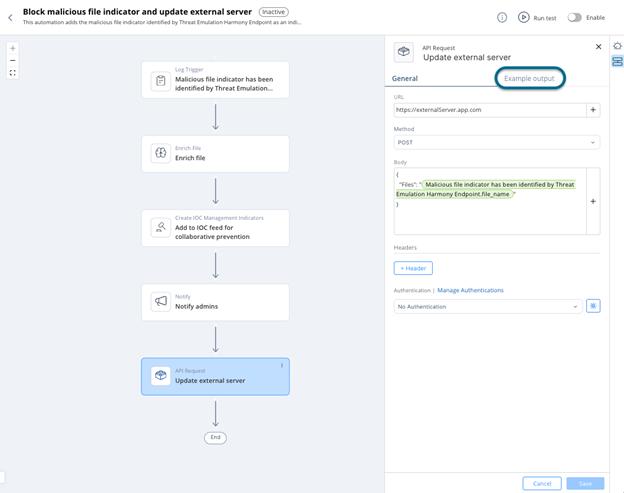
Example Output
The example output defines the required structure for the step’s result, which is the response returned by the API request.
Example output from the actual output of that step during execution:
- Click Example output.
- Run the automation manually using the Run Test button at the top of the automation page.
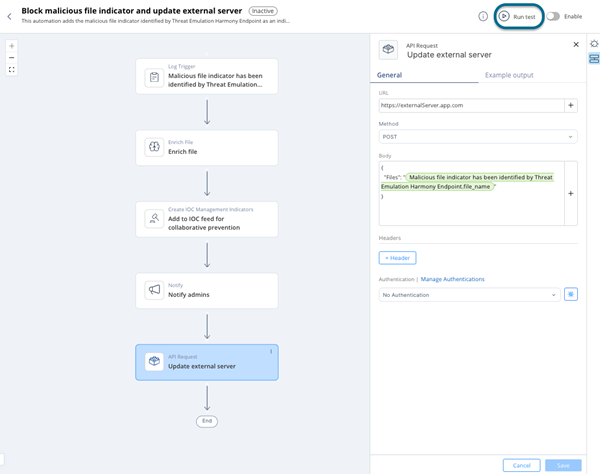
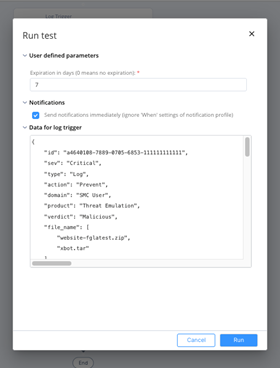
Run test popup appears - Copy the output of the API Request step.
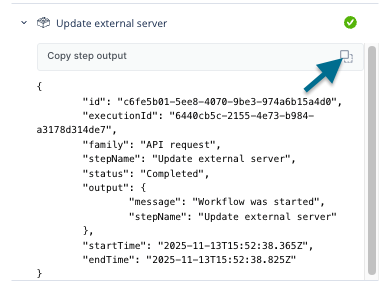 Note - You can also copy this output from the Executions page.
 - Paste the output into the Example Output.
- Click Save.
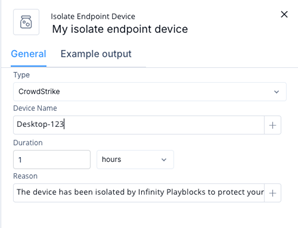
Isolate Endpoint Device
-
Select Isolate Endpoint Device and then click Add.
The Isolate Endpoint Device window appears.
-
Specify these:
-
Type - Select the endpoint product:
-
Harmony Endpoint
-
CrowdStrike
-
Microsoft Defender
-
SentinelOne
-
Device Name - Enter the device name, or select a value from previous step outputs or automation parameters.
-
Duration - Select how long the device remains isolated.
-
Reason - Enter the reason for isolating the device.
-
-
Click Create.
|
|
Note - The selected endpoint product must be configured before the isolation action can run. |
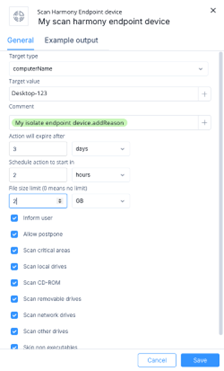
Scan Harmony Endpoint Device
-
Select Scan Harmony Endpoint device and then click Add.
-
The Scan Harmony Endpoint device window appears.
-
Specify these:
-
Target type - Select how to identify the device:
-
computerName
-
computerId
-
computerIp
-
Target value - Enter the value that matches the selected target type, or select a value from previous step outputs or automation parameters.
-
Comment - Optional comment for the action.
-
Action will expire after - Select when the action expires.
-
Schedule action to start in - Select when to start the action. Use 0 to run immediately.
-
File size limit - Set the maximum file size to scan. Use 0 for no limit.
-
Inform user - Notify the endpoint user with a UserCheck popup message.
-
Allow postpone - Allow the endpoint user to postpone the operation.
-
Scan critical areas - Scan operating system, processes, and memory.
-
Scan local drives
-
Scan CD-ROM
-
Scan removable drives
-
Scan network drives
-
Scan other drives
-
Skip non executables
Note - Select at least one scan area.
-
-
Click Create
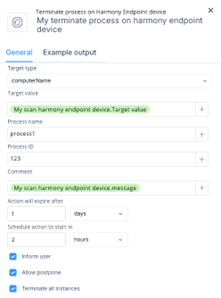
Terminate Process on Harmony Endpoint Device
-
Select Terminate process on Harmony Endpoint device and then click Add.
The Terminate process on Harmony Endpoint device window appears.
-
Specify these:
-
Target type - Select how to identify the device:
-
computerName
-
computerId
-
Target value - Enter the value that matches the selected target type, or select a value from previous step outputs or automation parameters.
-
Process name - Enter the process name to terminate.
-
Process ID - Optional process ID.
-
Comment - Optional comment for the action.
-
Action will expire after - Select when the action expires.
-
Schedule action to start in - Select when to start the action. Use 0 to run immediately.
-
Inform user - Notify the endpoint user with a UserCheck popup message.
-
Allow postpone - Allow the endpoint user to postpone the operation.
-
Terminate all instances - Terminate all matching process instances.
computerIp
-
-
Click Create.
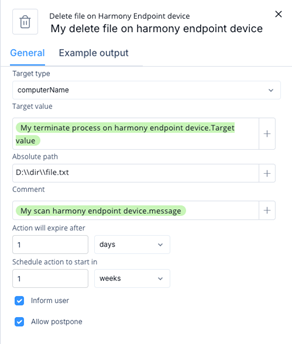
Delete File on Harmony Endpoint Device
-
Select Delete file on Harmony Endpoint device and then click Add.
The Delete file on Harmony Endpoint device window appears.
-
Specify these:
-
Target type - Select how to identify the device:
-
computerName
-
computerId
-
computerIp
-
Target value - Enter the value that matches the selected target type, or select a value from previous step outputs or automation parameters.
-
Absolute path - Enter the full path of the file to delete.
-
Comment - Optional comment for the action.
-
Action will expire after - Select when the action expires.
-
Schedule action to start in - Select when to start the action. Use 0 to run immediately.
-
Inform user - Notify the endpoint user with a UserCheck popup message.
-
Allow postpone - Allow the endpoint user to postpone the operation.
-
-
Click Create.
Exporting/Importing Automation
You can export and import an automation in json format.
-
To export an automation:
-
In the card view, click
 in an automation card that you want to export and then click Export.
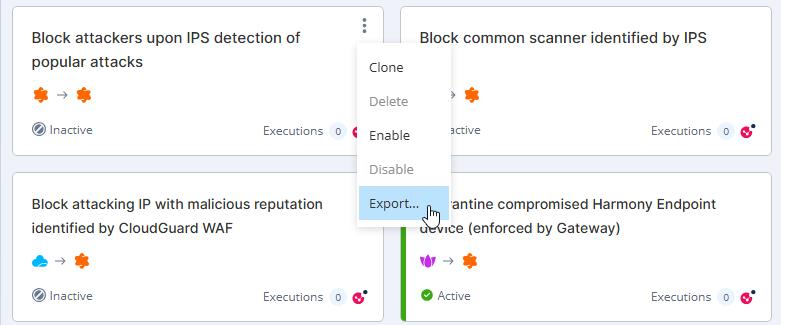
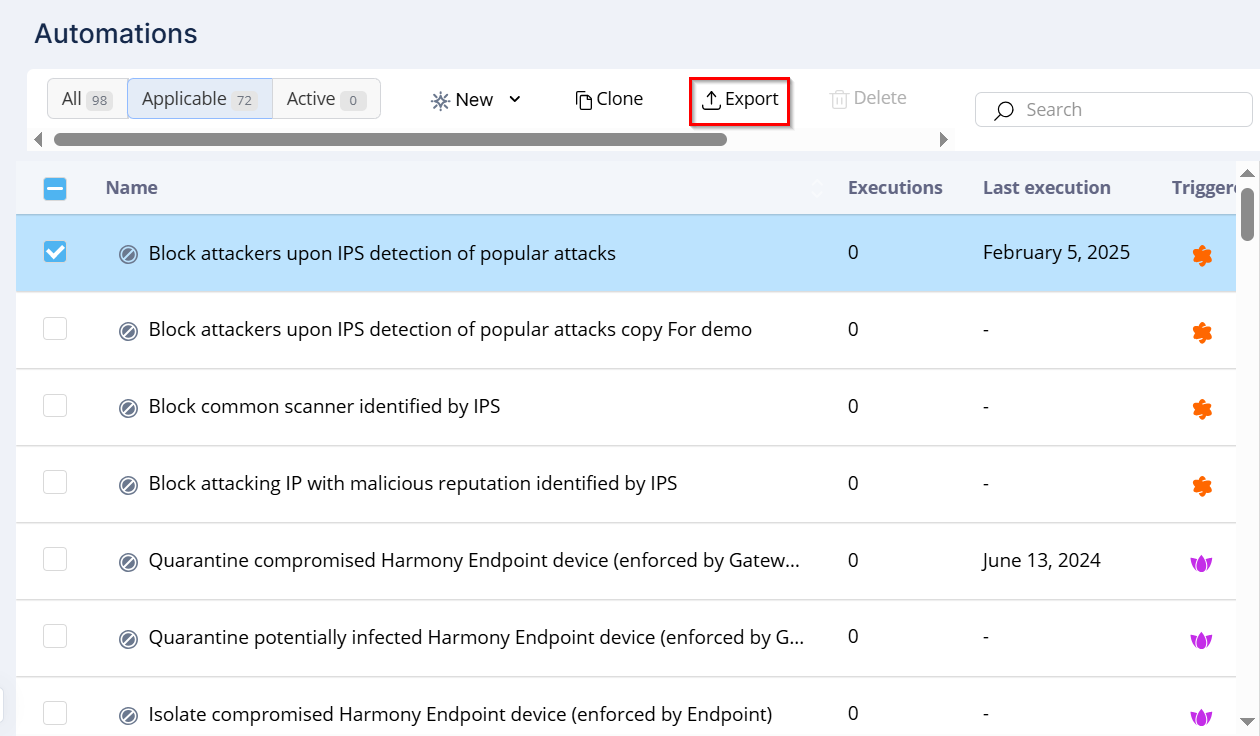
-
In the table view, select the automation that you want to export and then click Export.
-
-
To import an automation, click New.
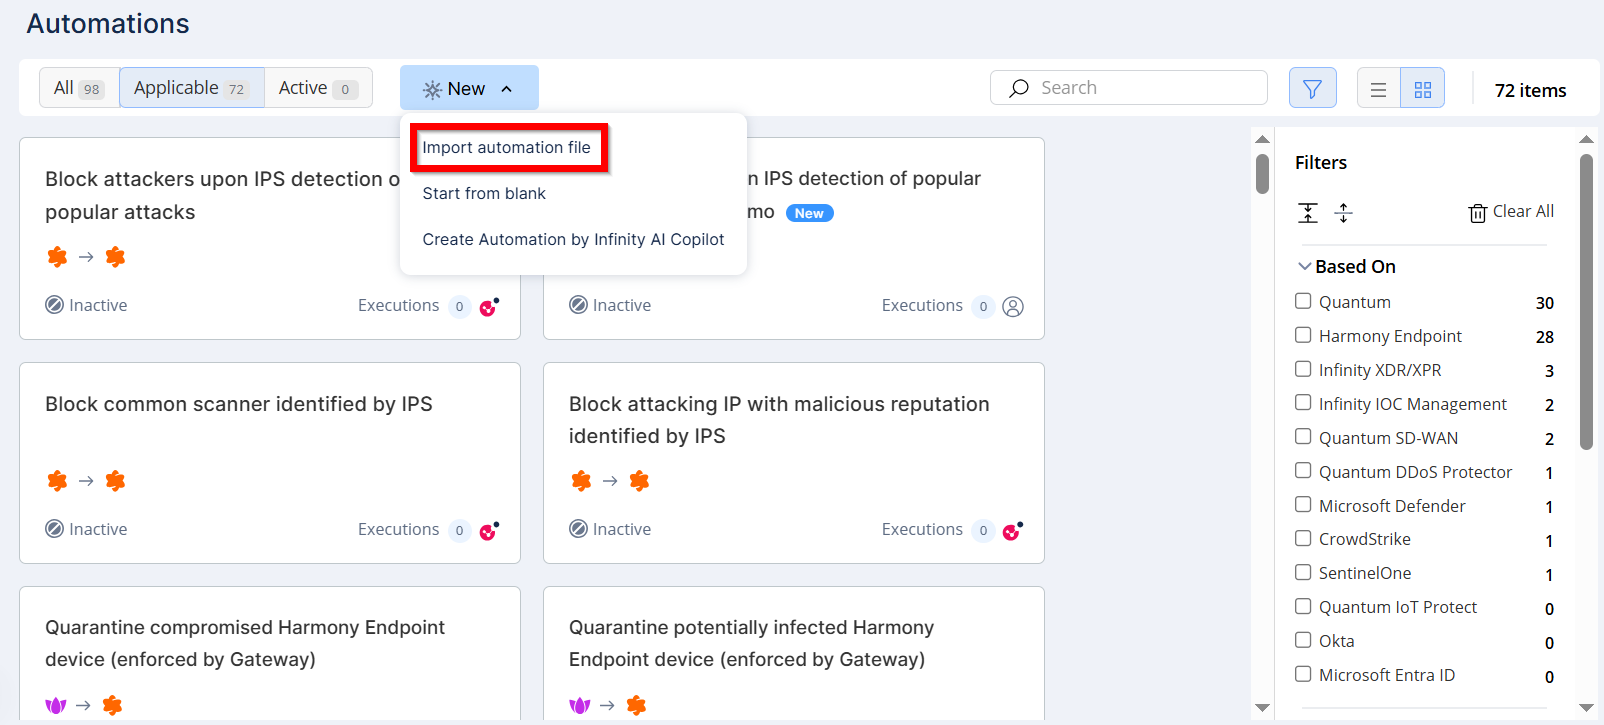
-
Select Import automation file.
The Import automation file window appears.
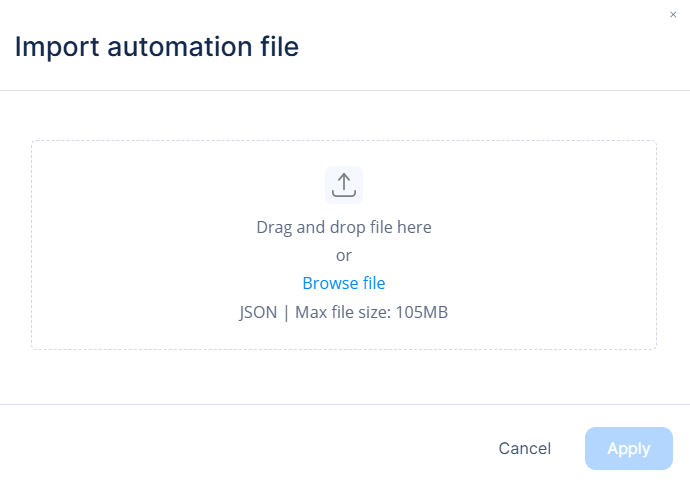
-
Choose the .json file from your local drive.
-
Click Apply.
Cloning Existing Automation
You can clone an existing automation for editing and customization. To do that:
-
In the card view, click
in an automation card that you want to clone and then click Clone.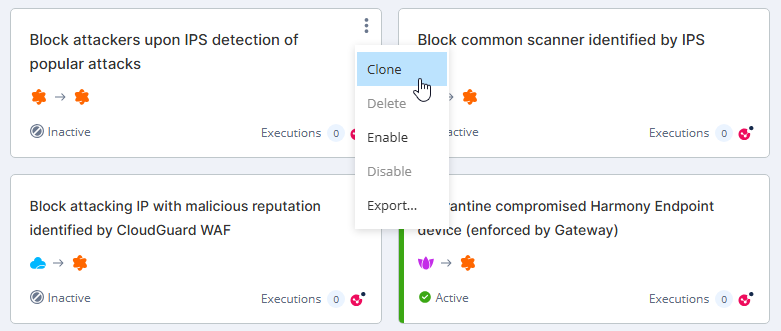
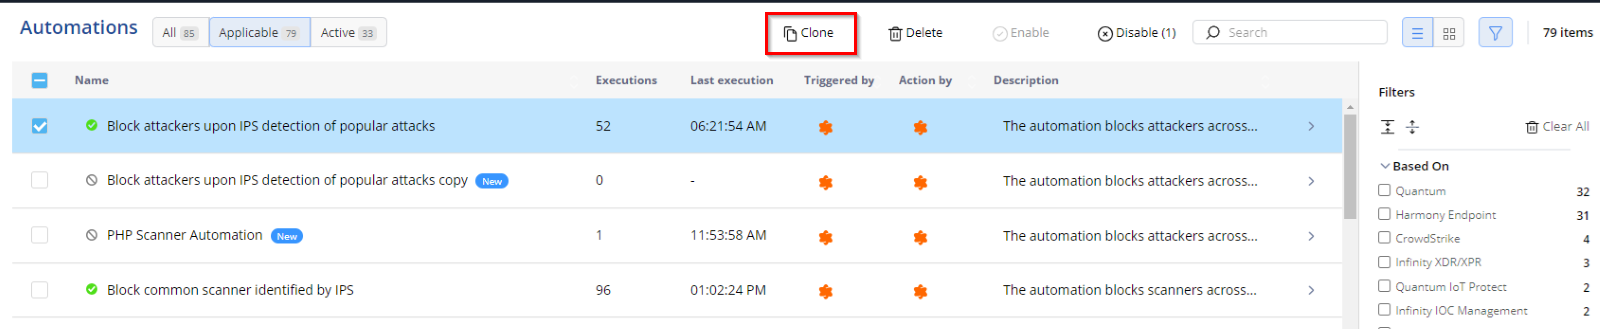
-
In the table view, select the automation that you want to clone and then click Clone.
Creating Automation by AI Copilot
AI Copilot allows you to create custom Playblocks automations using a natural language prompt. You can design fully tailored workflows from scratch with a single prompt.
It supports all standard automation steps, except these:
It can generate automations based on Quantum logs and supports these log trigger conditions:
|
|
Notes:
|
To create an (Undefined variable: Vars_CloudGuard.tp_al_copilot) automation:
|
|
Note - (Undefined variable: Vars_CloudGuard.tp_al_copilot) automation creation is supported only in the EU and US regions. |
-
Access Playblocks and go to Automations.
-
Click New and select Create Automation by (Undefined variable: Vars_CloudGuard.tp_al_copilot).
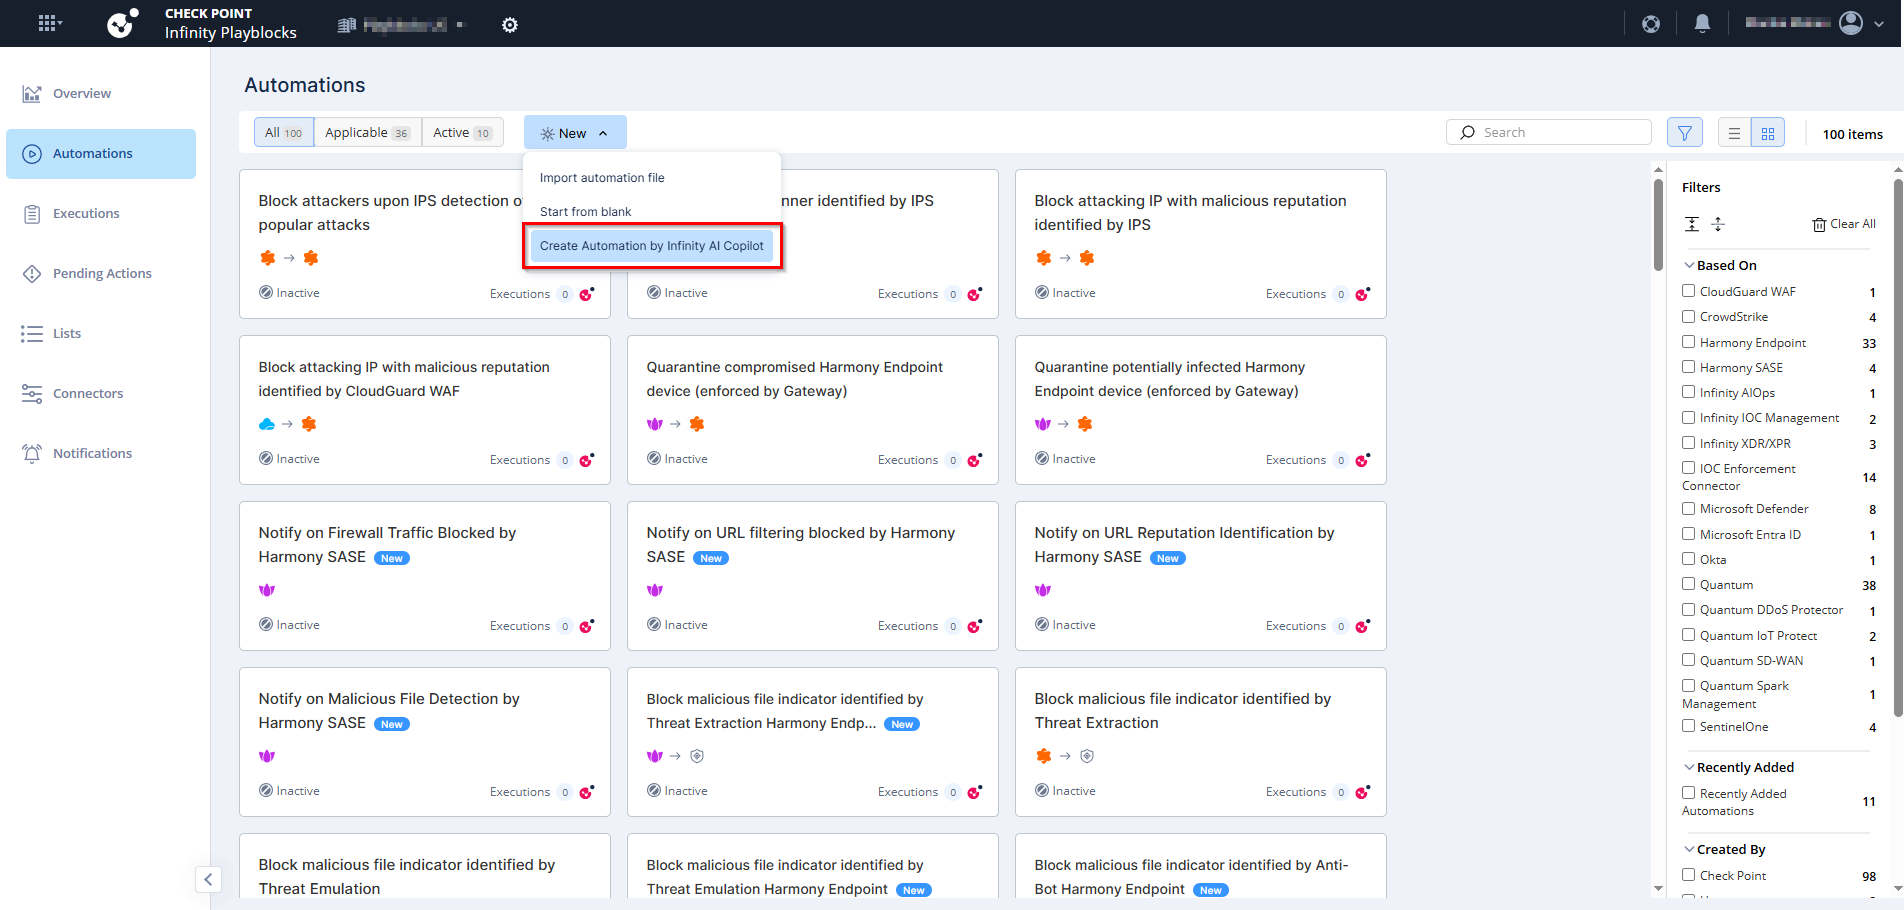
The Generate new automation using (Undefined variable: Vars_CloudGuard.tp_al_copilot) window appears.
-
Enter your prompt, for example, Create an automation that blocks IPS attacks, opens a ticket, and notifies the admin.
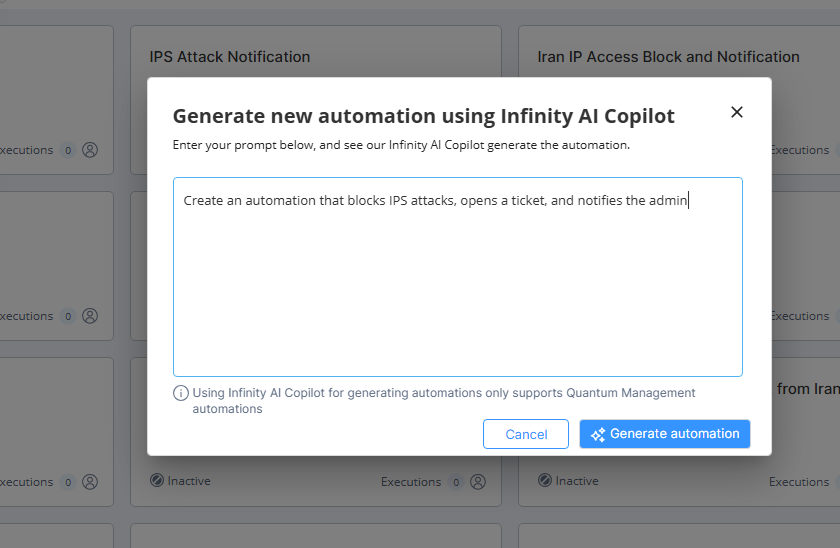
-
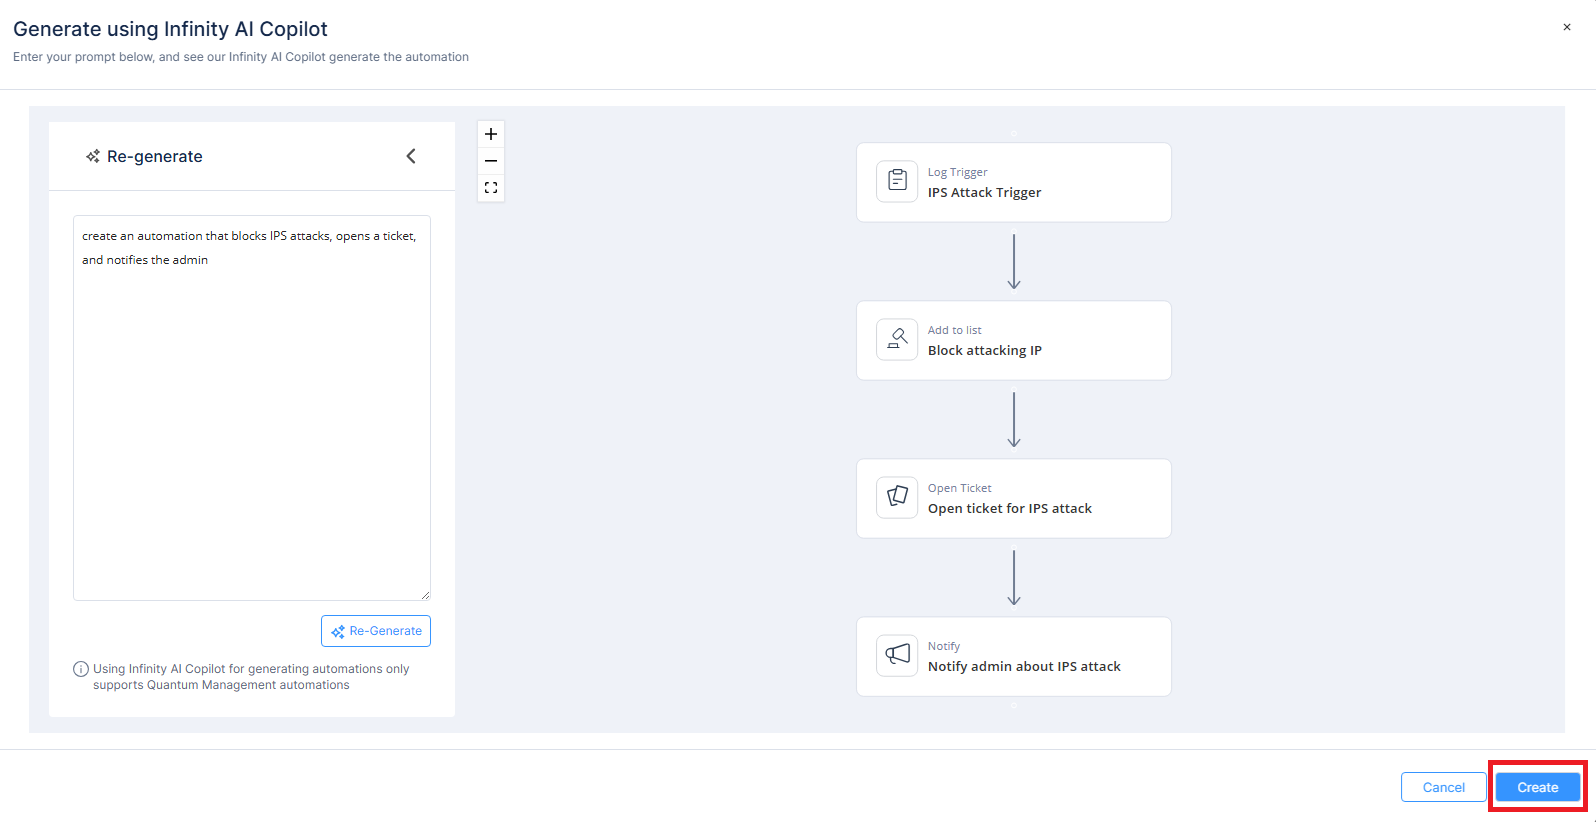
Click Generate automation.
The system generates the requested automation.
-
Click Create.
-
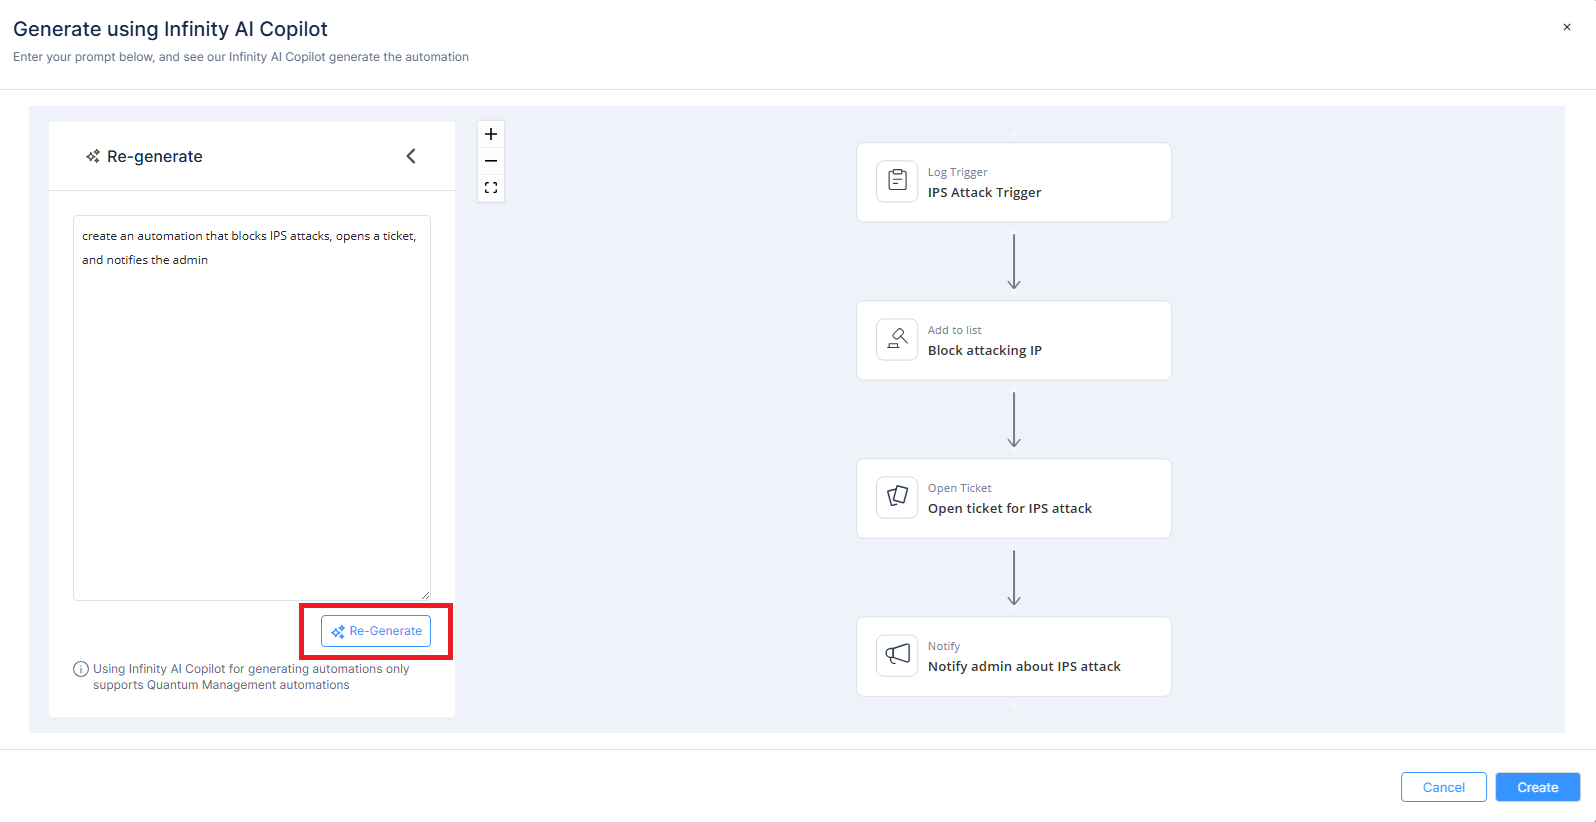
To modify a step(s), in the Re-generate section, rephrase the prompt you entered and click Re-Generate.
|
|
Note - To know how to use custom automation step schema, see Appendix G - Using Custom Automation Step Schemas. |
Automation Capabilities
Out-of-the-Box Automations
|
Use Case |
Default automations provided by the system. |
|
Abilities |
|
|
Editing Restrictions |
|
Cloned Automations – Not Exported but Exportable
|
Use Case |
Cloned from out-of-the-box automations without structural changes. |
|
Abilities |
|
|
Editing Restrictions |
|
Fully Custom or Modified Automations – Exported and Exportable
|
Use Case |
Cloned and modified, or created from blank, import, or AI. |
|
Abilities |
|
|
Editing Restrictions |
|
Cloned Automations – Not Exported or Exportable
|
Use Case |
Limited to 3 default automations:
|
|
Abilities |
|
|
Editing Restrictions |
|
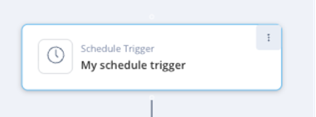
Replace Trigger
Replace Trigger allows you to change the current trigger type in your automation to a different one.
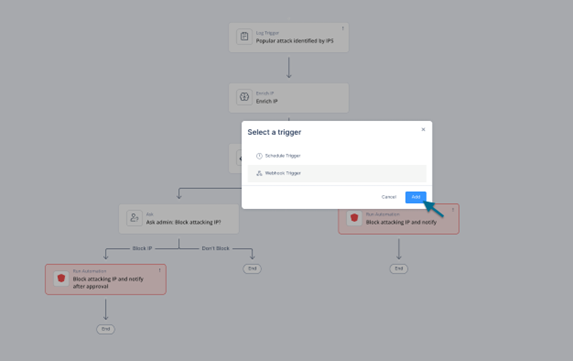
Choose trigger type:
-
Log Trigger – Starts the automation when a specific log event occurs.
-
Webhook Trigger – Starts the automation when data is sent to a webhook endpoint.
-
Scheduled Trigger – Starts the automation based on a predefined schedule (for example, daily or hourly).
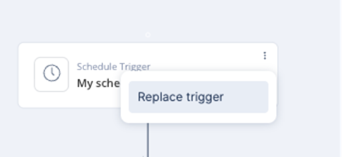
To replace a trigger:
-
In the trigger step, click
 .
.
-
Click Replace Trigger.
-
Choose the new trigger type and click Add.
A warning message appears
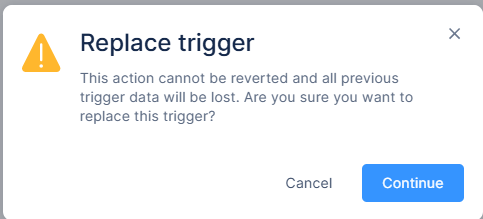 Note - Replacing a trigger permanently deletes all previous trigger data. This action cannot be undone.
 -
Click Continue.
Configuring the New Trigger
-
The system creates the new trigger immediately for a Webhook Trigger.
-
For all other trigger types, enter the required parameters in the trigger window and click Save.
Note - When you replace a trigger, the Example Output associated with the previous trigger is removed. Any steps in the automation that rely on fields from that output displays validation errors.
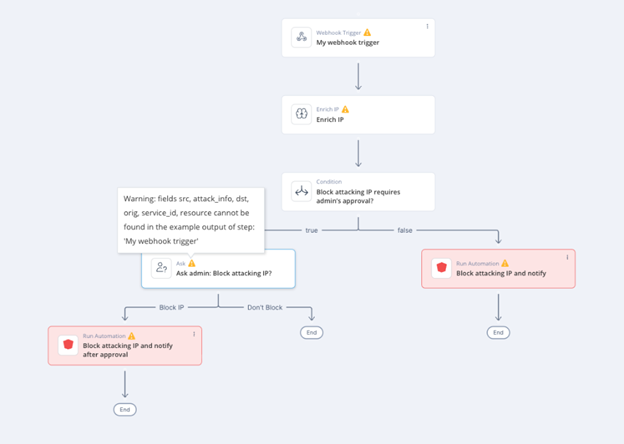
Resolving Validation Errors
When you replace a trigger, steps that reference fields from the previous trigger may display validation errors. These errors occur because the referenced fields are not available in the new trigger’s output example.
To resolve these errors:
-
Remove unused references
-
Open the step that shows the validation error.
-
Remove any references to fields from the previous trigger that are no longer required.
-
Save the step.
-
-
Update output example and references
-
Open the new trigger configuration.
-
In the Example Output, add all required fields that are referenced by dependent steps.
-
If the new trigger uses different field names, update the references in the dependent steps to match the new field names.
-
Save the changes.
-
Notes -
-
All references in dependent steps must match the fields defined in the trigger’s Example Output.
-
You can either add old field names to the new example output or update the dependent steps to use the new field names.
Switching to a Webhook trigger
-
Create the webhook.
-
Open Webhook Parameters and review the Automation Expected Payload.
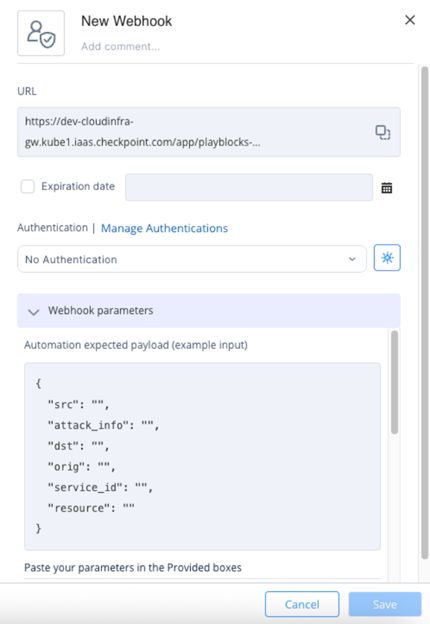
-
Use this payload as a guideline for the required fields.
-
Update the Example Output with all necessary fields.
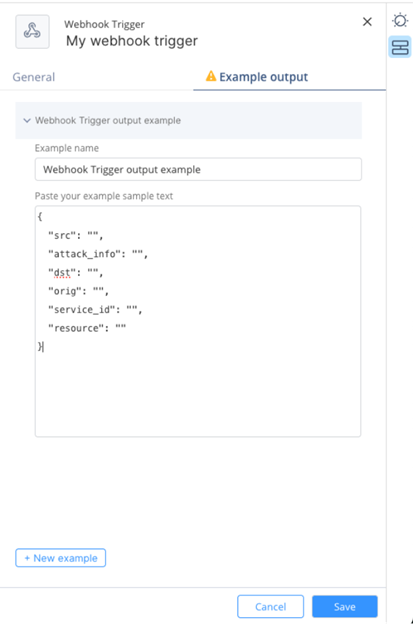
-
Click Save.
The system automatically resolves validation errors.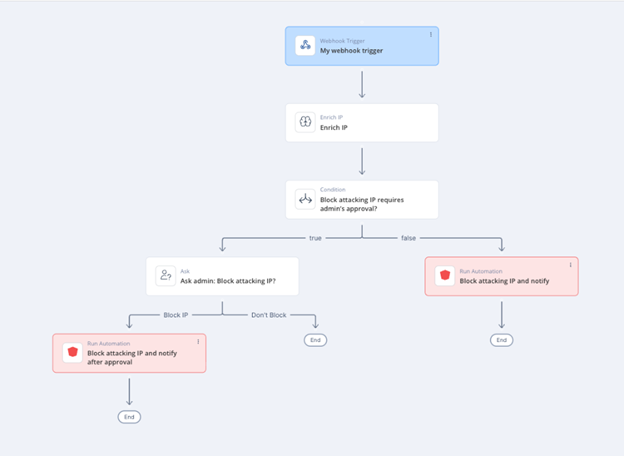 Note - The expected payload is only a structural guideline. It does not represent the actual payload your webhook sends.