Getting Started with Check Point Portal
This video introduces you to Check Point Portal:
Watch the Video
Supported Browsers
Check Point Portal (formerly known as Infinity Portal) is compatible with the latest versions of these browsers:
-
Mozilla Firefox
-
Google Chrome
-
Apple Safari
-
Opera
-
Microsoft Edge
How to Create an Account
A Check Point Portal account is necessary for access and management of the different SaaS![]() Software as a Service (SaaS) - An application delivered over the Internet by a provider. The application doesn’t have to be purchased, installed, or run on users’ computers. SaaS providers were previously referred to as ASPs (application service providers). services. By default, a user who creates an account in the Check Point Portal receives primary administrator permissions. Use the primary administrator account to create child accounts, manage identities, and give access and privileges (such as read-only) to child account users in the portal. If necessary, add secondary administrator accounts using admin privileges, which is especially applicable for MSSP
Software as a Service (SaaS) - An application delivered over the Internet by a provider. The application doesn’t have to be purchased, installed, or run on users’ computers. SaaS providers were previously referred to as ASPs (application service providers). services. By default, a user who creates an account in the Check Point Portal receives primary administrator permissions. Use the primary administrator account to create child accounts, manage identities, and give access and privileges (such as read-only) to child account users in the portal. If necessary, add secondary administrator accounts using admin privileges, which is especially applicable for MSSP![]() Managed Security Service Provider (MSSP) - An managed security service provider (MSSP) provides outsourced monitoring and management of security devices and systems. Common services include managed firewall, intrusion detection, virtual private network, vulnerability scanning and anti-viral services. or Distributors.
Managed Security Service Provider (MSSP) - An managed security service provider (MSSP) provides outsourced monitoring and management of security devices and systems. Common services include managed firewall, intrusion detection, virtual private network, vulnerability scanning and anti-viral services. or Distributors.
Check Point Portal saves these privileges and uses them for services on the portal. For more information about user privileges, see User Roles.
This video shows how to register a new account in the Check Point Portal:
Watch the Video
To create a new account in the Check Point Portal:
-
Go to Check Point Portal.
-
If you have a GitHub account, you can log in with it.
-
Enter your email address.

Note: Logging in to the Check Point Portal with a private email address is not supported.
-
Click Register.
-
Enter your first name and last name.
-
Enter a password. Follow this password policy and make sure your password:
-
Is at least 15 characters long.
-
Contains at least one lowercase letter.
-
Contains at least one uppercase letter.
-
Contains at least one number.
-
-
Select the checkbox for I accept the Terms of Service and the Privacy Policy.
-
Click Register.
-
Enter the code you received in your email to verify it and click Submit.
Check Point Portal creates a new user for you.
-
Use Multi-Factor Authentication (MFA
 Multifactor Authentication - an electronic authentication method in which a user is granted access to a website or application only after successfully presenting two or more pieces of evidence (or factors) to an authentication mechanism.) to secure your account. For this, scan the provided QR code with your preferred authentication app or enter your phone number to receive an SMS or a phone call. For more information, see Multi-Factor Authentication.
 -
In the Account details screen, enter these details to register your account:
-
Account name
Note: The account name cannot include special characters (
!@#$%^&*or other special characters). -
Country
-
The Available Regions window opens, displaying available services based on the selected region. These regions are available for data storage:
-
Europe (EU)
-
USA (US)
-
Australia
-
Canada
-
India
-
Israel
-
Singapore
-
United Arab Emirates
-
United Kingdom
To see services available for a specific region, click the region name. A green checkmark next to the service name indicates that the service is available for that region.

Best Practice - If you require a service that is not in your selected region, Check Point recommends that you select a region with the necessary services. Migrating an account from one region to another is not recommended.
-
-
Select the account type (Customer is the default type). It is not possible to change the account type after the account is created.
-
Enter your website or domain name.
-
-
Optionally, select Subscribe to Check Point's Newsletters and Communication Updates.
-
Select the checkbox for I accept theTerms of Serviceand thePrivacy Policy.
-
Click Continue.
For more information about Check Point Portal account management,
How to Log in to your Account
The preferred method to log in to the Check Point Portal is with SSO![]() Single Sign-On (SSO) - A session/user authentication process that permits a user to enter one name and password in order to access multiple applications. authentication. If this method is not available, you can log in with:
Single Sign-On (SSO) - A session/user authentication process that permits a user to enter one name and password in order to access multiple applications. authentication. If this method is not available, you can log in with:
-
username and password
-
GitHub credentials
-
username and passkey
To log in to your account:
-
Go to Check Point Portal and enter your email address.
-
Click Sign in.
To log in with GitHub:
-
Go to Check Point Portal.
-
Click GitHub.
The GitHub login page opens.
-
Enter your GitHub credentials:
-
Enter your GitHub username or email address, then enter your password.
-
Alternatively, click Continue with Google to use your corporate (work or school) Google account.
-
-
Click Sign in.
The Check Point Portal opens or suggests that you create an account if you do not have one.
To authenticate with a passkey:
-
On the Check Point Portal login page, enter your email address and click Sign in.
-
If you do not use SSO, you need to provide a password or a passkey. Click Sign in with passkey.
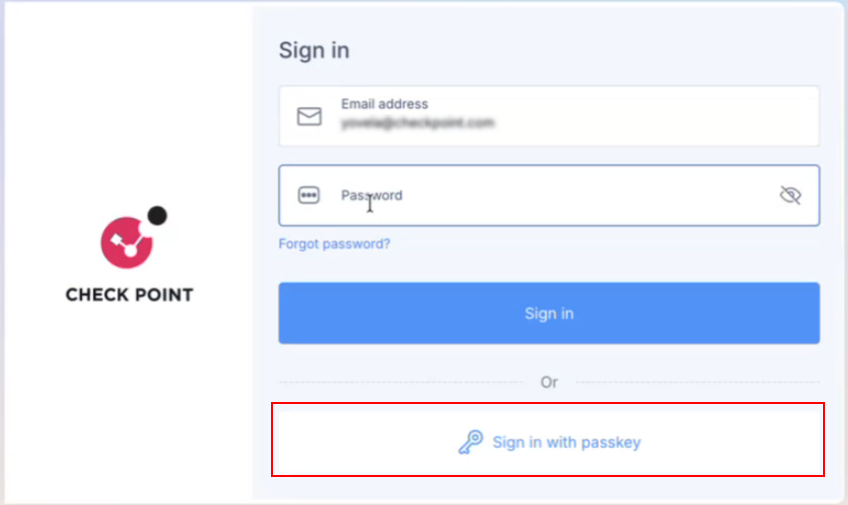
-
If you have multiple saved passkeys, select the appropriate option.
-
Enter the biometric data or PIN on your device.
For more information about passkeys, see Configuring a Passkey.
To change your password:
-
Click Forgot password?.
-
Enter the account's email address and select Send Email.
A new activation link is sent to your email address. Follow the instructions in the email to create a new password.
To go back to an expired session:
When your Check Point Portal work session ends, the expired session message appears.
To go back to your session, click Next and enter your password.
How to Delete your Account
|
|
Note - This is not the same as deleting an account in Manage Accounts. For more information, |
After you delete an account, you cannot restore it. Check Point Portal uses unique account names. If you delete an account, a different user can use the same account name.
Important Prerequisites:
-
This account cannot be associated with a User Center
The Check Point User Center offers Single Sign-On (SSO) management for all your Check Point needs: (1) Manage Accounts & Products (2) Get Support Offers (3) License Products (4) Open & manage your Service Requests (5) Access Downloads and product documentation (6) Search Technical Knowledge Center account(s). -
This account cannot have a child account.
-
To delete this account, you must be the Primary Administrator (Primary Contact).
To delete your account:
-
Go to
 > General.
 -
Below Delete Account, select Delete this Account.
The Delete Account window opens. Make sure to read the important information.
-
In the text input field, enter the name of the account to delete.
-
Click Delete Account.
When the deletion is complete, the login screen opens.
Using the Navigation Menu
This table outlines the various menu items available in the Check Point Portal.
|
Icon |
Item |
Description |
|---|---|---|
|
|
Button |
Shows a list of available services for Check Point Portal. |
|
|
Current Account |
For administrators with multiple company accounts, use the down arrow to select an account. If you have only one account, the drop-down menu does not show. |
|
|
Account Settings |
Opens a menu of settings for the Check Point Portal. |
|
|
Manage Accounts Settings |
Opens a menu to manage your child accounts for a Check Point Portal account of type MSSP or Customer Parent. |
|
|
Help Button |
Note - For some services, use Contact an expert to send a message to an Check Point Portal expert. |
|
|
Notification Indicator |
Shows the number of notification messages about new events in the Check Point Portal service. To see the messages, click the bell icon. |
|
|
Profile Settings and Signing Out |
|


