
Adding the Mobile Security Protect app to your App Catalog

|
Notes:
|
Add Mobile Security Protect app for iOS
-
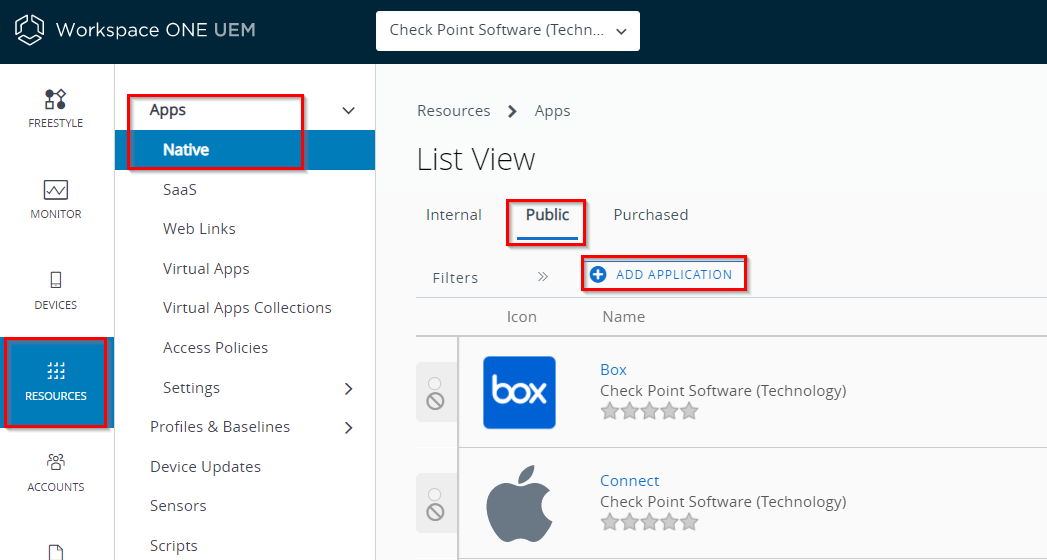
Go to Resources > Apps > Native > Public.
-
Click +Add Application.
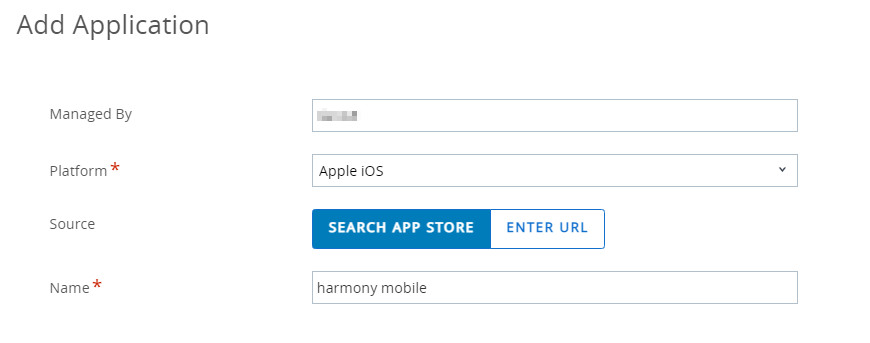
The Add Application window appears.
-
From the Managed By drop-down menu, select the proper Organization Group.
-
From the Platform list, select Apple iOS.
-
Select Source as Search App Store.
-
In the Name field, enter Harmony Mobile.
-
Click Next.
The search result window shows the Mobile Security Protect app.
-
Go to the Mobile Security Protect app and click +Select.

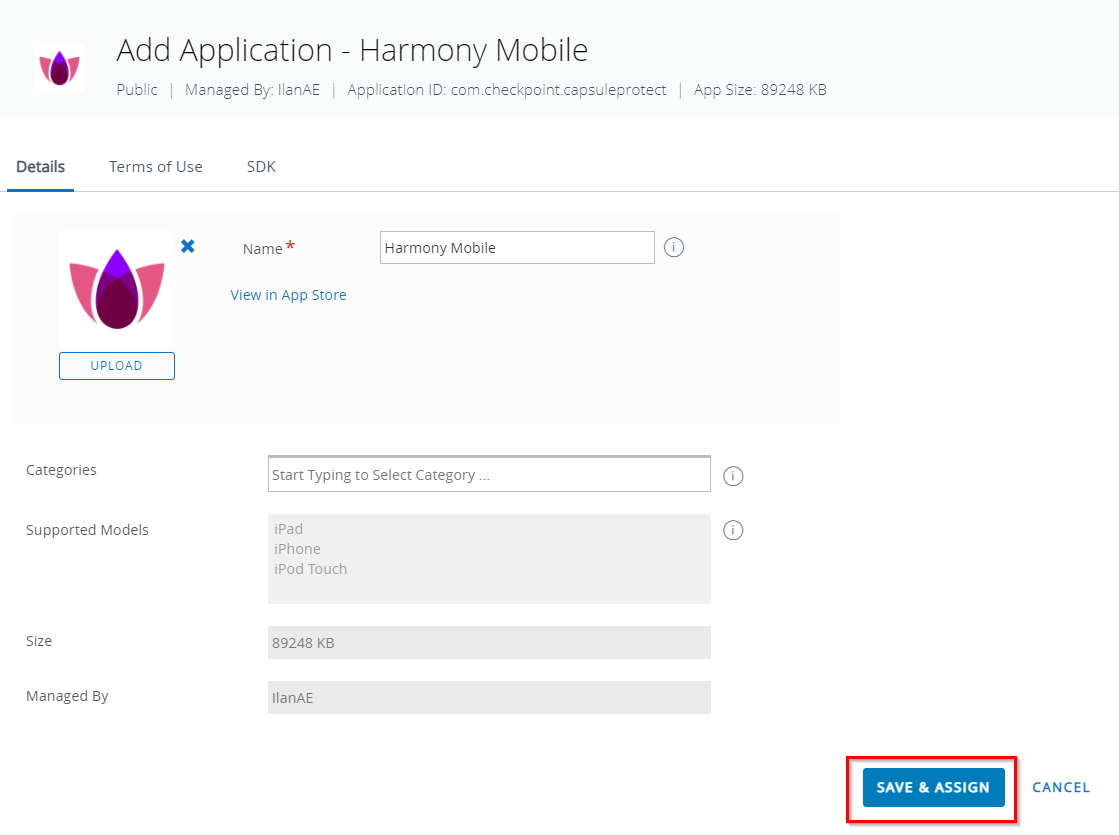
The Add Application - Harmony Mobile window appears.
-
Click Save & Assign.
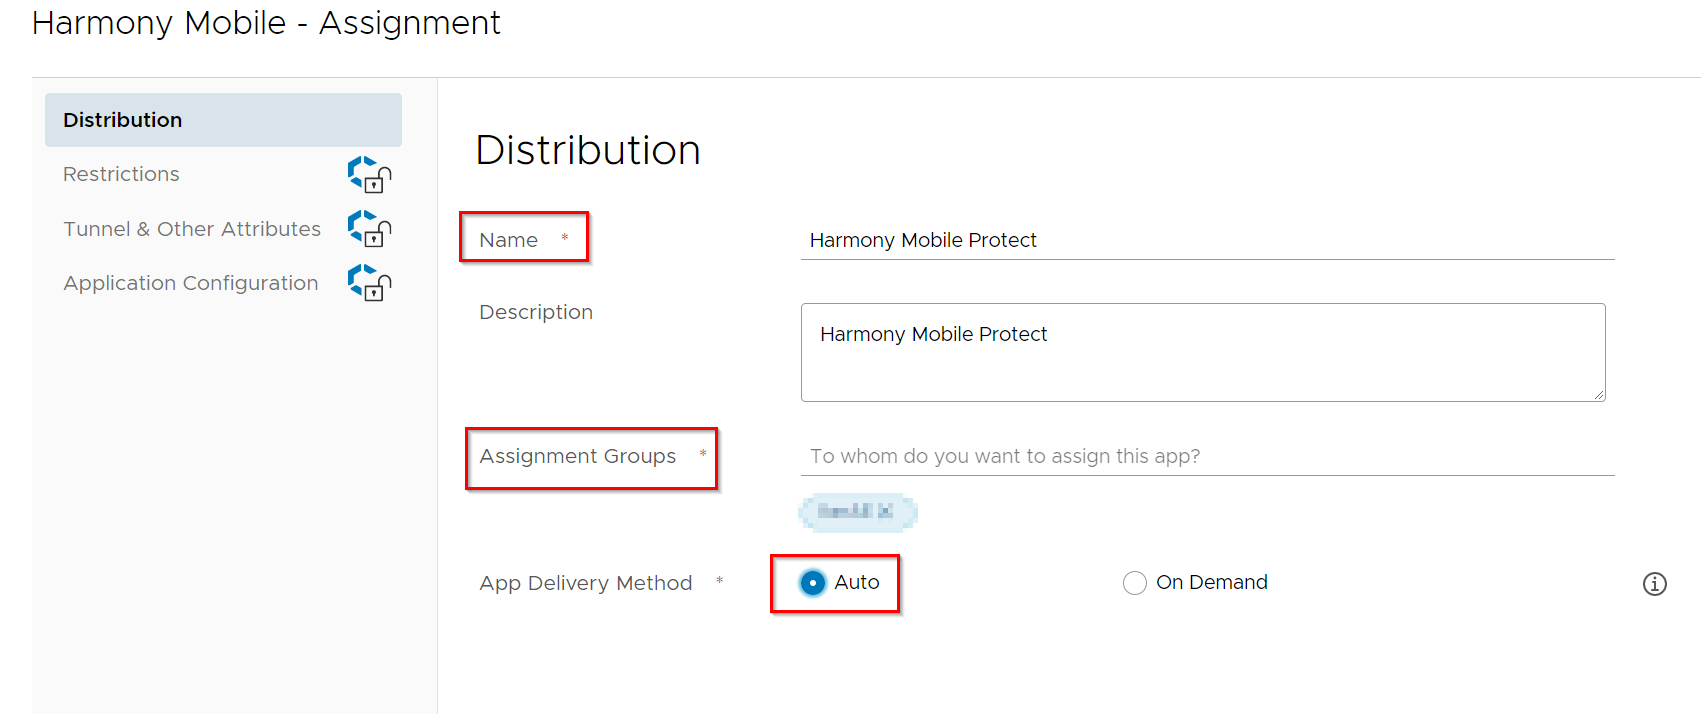
The Harmony Mobile - Assignment window appears in the Distribution tab.
-
Enter the assignment Name and select the Assignment group. This is the group of iOS devices that will be pushed with Mobile Security Protect app.
-
Set the App Delivery Method as Auto.
Note - You can set the assignment group to a group that includes only devices that are tagged with CHKP status tags (active/inactive/provisioned). If the Mobile Security Protect app is not installed or removed from the device, then the device is marked as not protected and will be tagged. This prompts the user to install the app on the device. For more information, see Automatic Activation of Mobile Security: Prompt the Protect app installation.
-
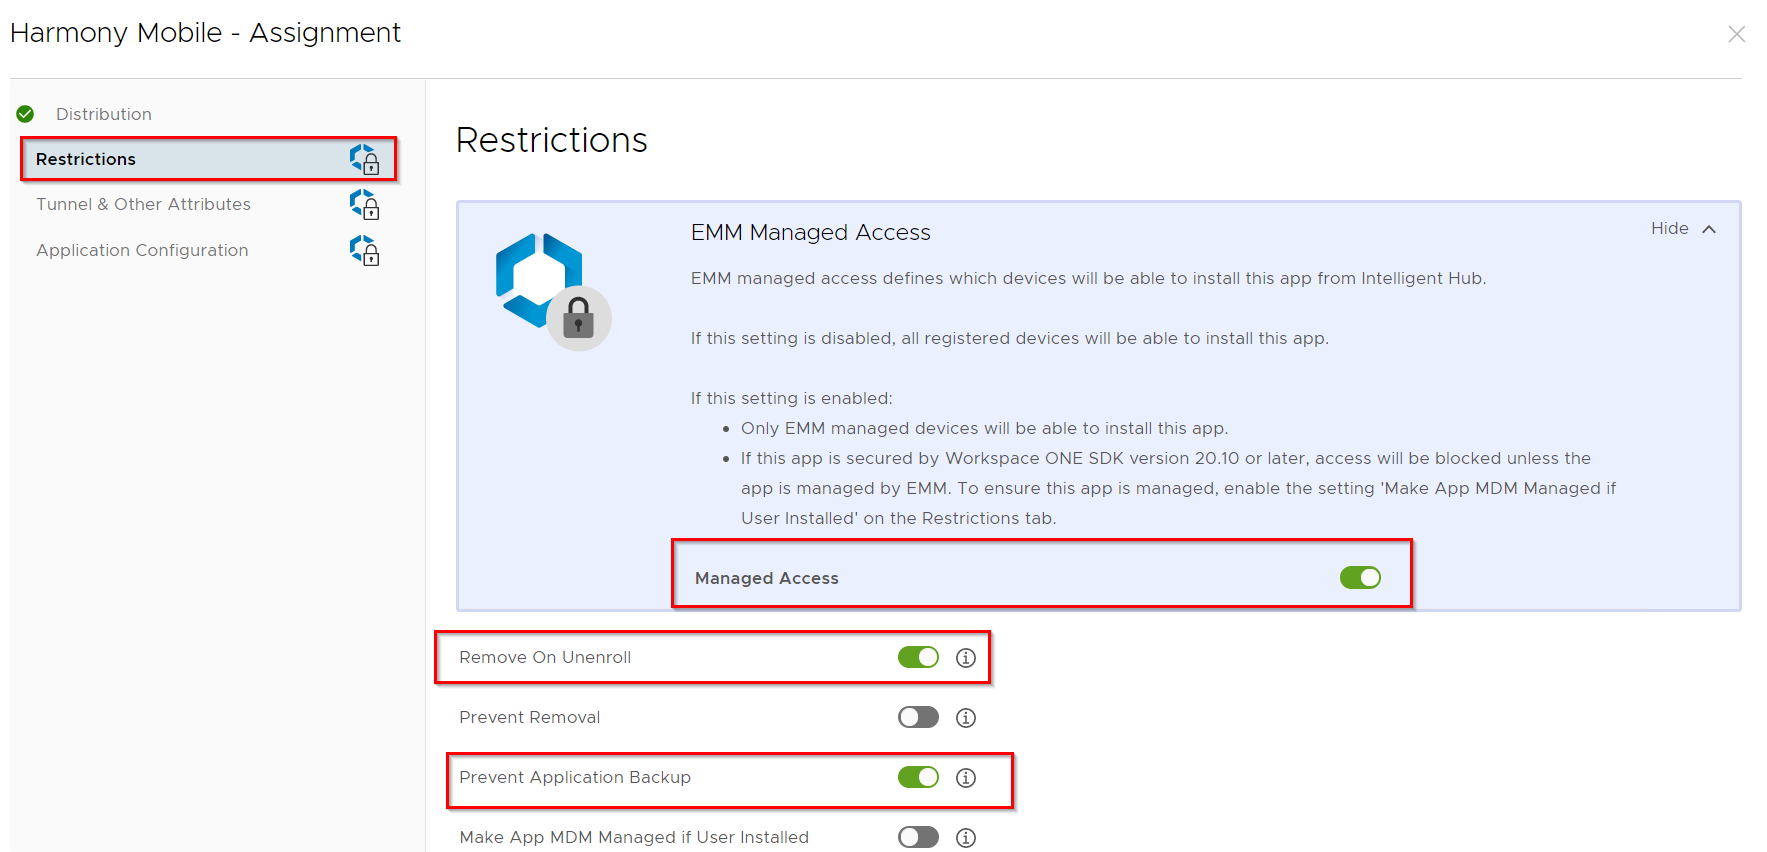
Go to the Restrictions tab and turn ON these:
-
Managed Access.
-
Remove On Unenroll.
-
Prevent Application Backup.
-
-
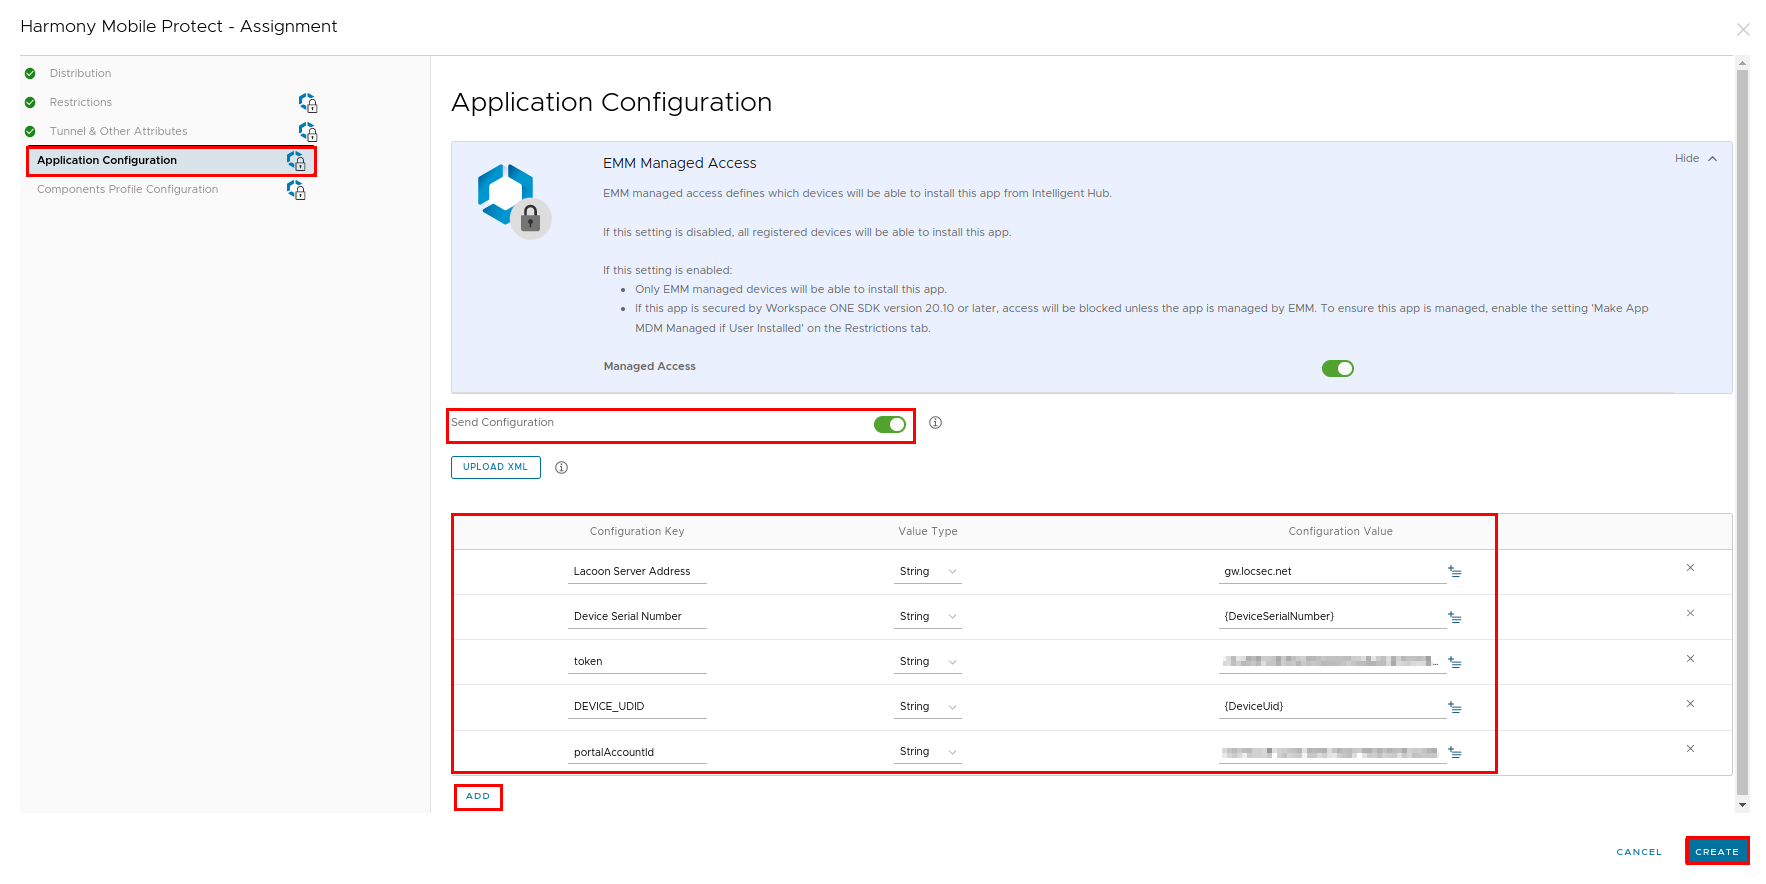
Go the Application Configuration tab and turn ON Send Configuration.
-
Click +Add to insert rows in the Application Configuration table and enter the Key-Value information as given in the following table:
Configuration Key
Value Type
Configuration Value
Lacoon Server Address
String
Enter the Security Gateway server for your region:
Region
Server
US
gw.locsec.net
Ireland (EU region)
eu-gw.locsec.net
Australia (Asia region)
au-gw.locsec.net
Canada (Canada)
ca-gw.locsec.net
UK region (UK)
uk-gw.locsec.net
India
in-gw.locsec.net
Device Serial Number
String
{DeviceSerialNumber}
token
String
hash_tenant_id**
(The SHA-256 value of the Dashboard Management ID. You must use the token configured in the Deployment section in the Mobile Security Dashboard go to Settings > Integrations. For more information see Deployment.)
DEVICE_UDID
String
{DeviceUid}
portalAccountId
String
Account ID of the application in the Check Point Portal.
ios_dep_notification_permission
(Enable this key to grant Zero Touch notification permission for iOS)
Boolean
true
Note - It is recommended to copy and paste the Configuration Key and Configuration Value directly from the table above.
-
Click Create.
-
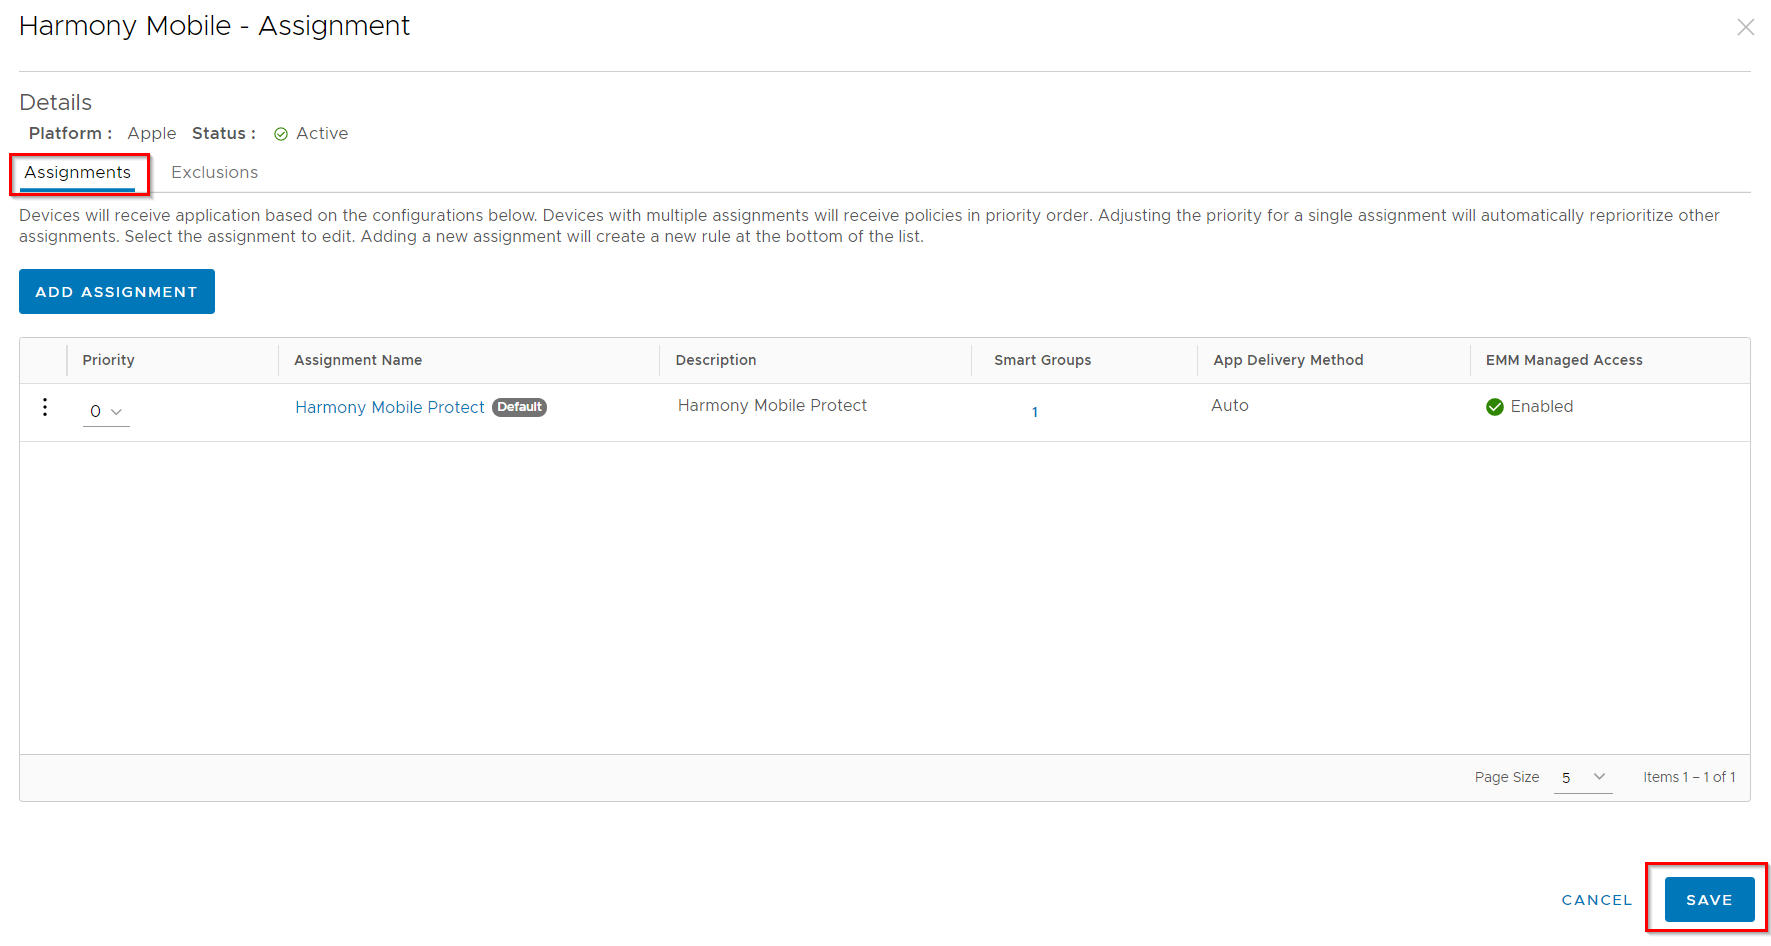
Verify Assignment details and click Save.
-
On the next screen, click Publish.
Add Mobile Security Protect app for Android
-
Go to Resources > Apps > Native > Public.
-
Click +Add Application.
The Add Application window appears.
-
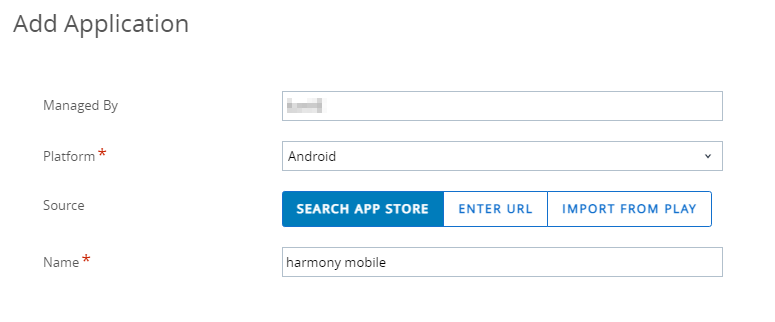
Select the Platform as Android and search for Mobile Security Protect:
Note - Android EMM
 Enterprise Mobility Management. A set of tools and processes to secure and manage company-owned or employee-owned (BYOD) devices irrespective of their locations. registration is required here - select the appropriate settings for your organization - Groups & Settings > All Settings > Devices & Users > Android > Android EMM Registration.
Example:
-
Click Next.
-
Select Mobile Security Protect and click Select.
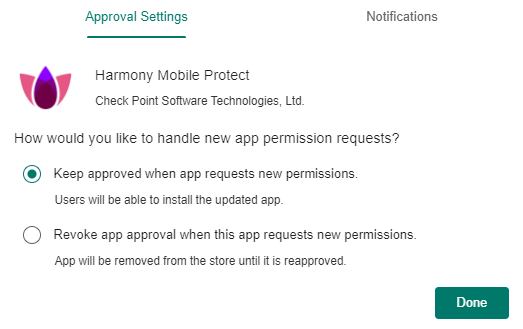
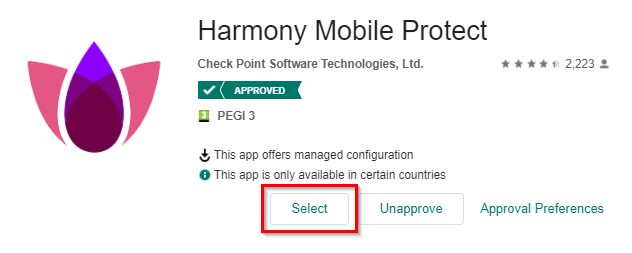
-
Enter the app Name as Mobile Security Protect.
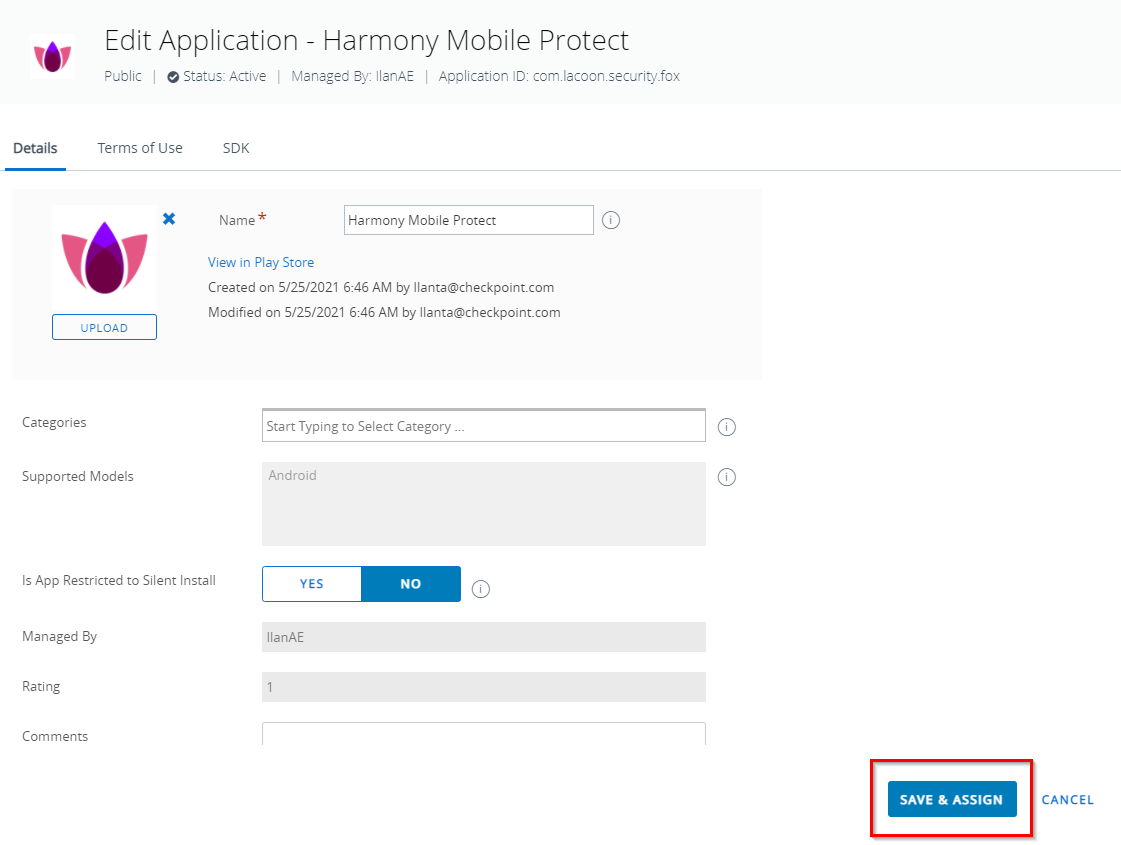
-
Click Save & Assign.
The Mobile Security Protect - Assignment window appears in the Distribution tab.
-
Enter the assignment Name and select the Assignment group. This is the group of iOS devices that will be pushed with Mobile Security Protect app.
-
Select the App Delivery Method as Auto.
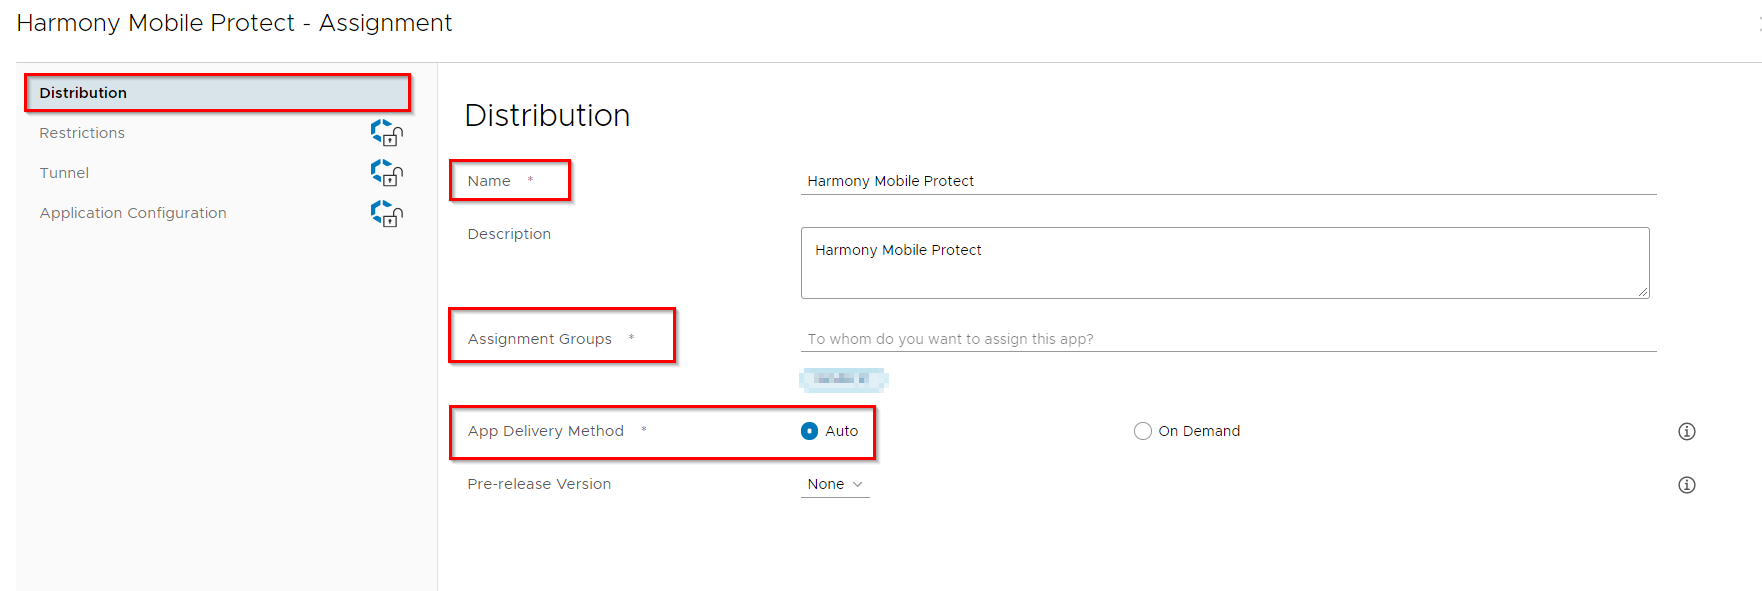
-
Go to the Restrictions tab and turn ON Managed Access.
-
Go to the Application Configuration tab and turn ON Send Configuration.
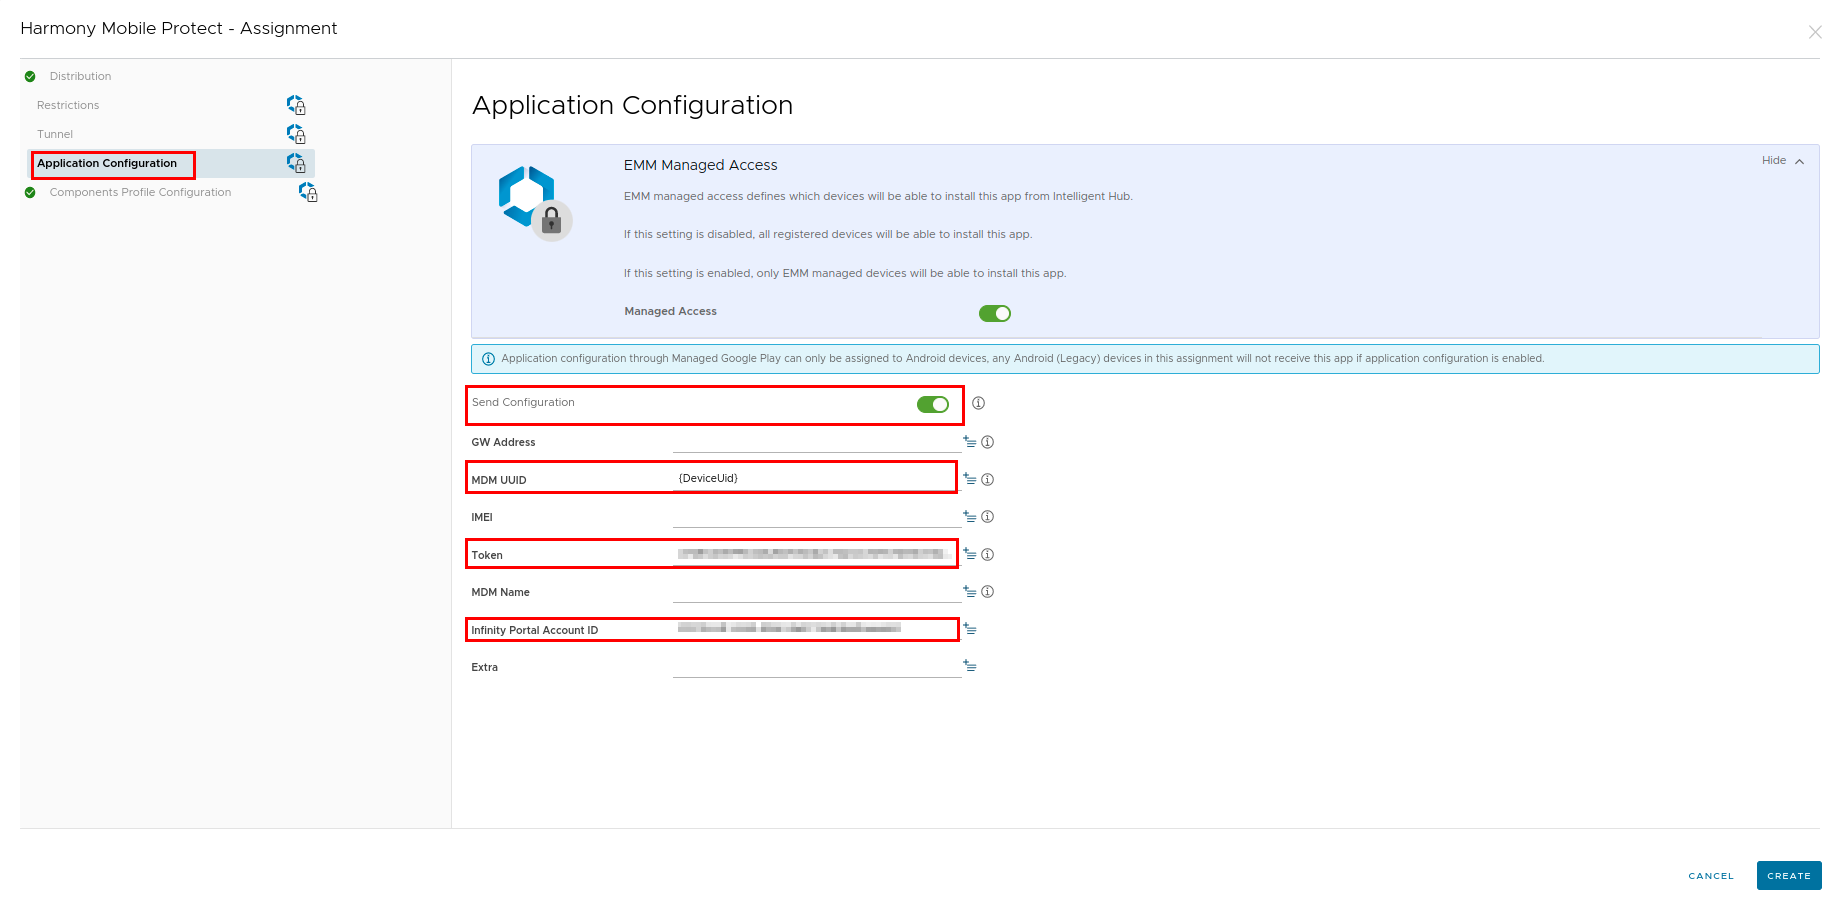
-
Enter the following configurations:
Item
Configuration Value
mdm_uuid
{DeviceUid}
GW Address
Enter the Security Gateway server for your region:
Region
Server
US
gw.locsec.net
Ireland (EU region)
eu-gw.locsec.net
Australia (Asia region)
au-gw.locsec.net
Canada (Canada)
ca-gw.locsec.net
UK region (UK)
uk-gw.locsec.net
India
in-gw.locsec.net
Token
hash_tenant_id**
(The SHA-256 value of the Dashboard Management ID. You must use the token configured in the Deployment section in the Mobile Security Dashboard go to Settings > Device Management. For more information, see Deployment.)
portalAccountId
Account ID of the application in the Check Point Portal.
-
Click Create.
-
Review the Assignment details and click Save.
-
Click Publish.