Deploying the Harmony Mobile Protect app automatically (Zero Touch Deployment)
This section is optional.
UEM![]() Unified Endpoint Management. An architecture and approach that controls different types of devices such as computers, smartphones and IoT devices from a centralized command point. solutions traditionally prompt the mobile device user to install the application once it is registered. In addition, to get full protection, the user needs to approve the required permissions and profiles. Many users are vigilant about installing new mobile applications or granting different permissions, and as a Security company, Check Point even encourages that. Most of them do not know that the Harmony Mobile Protect app is focused on device characteristics and behaviors and not the content stored on or flowing through the device. Furthermore, some users are incompliant with the company’s security policy
Unified Endpoint Management. An architecture and approach that controls different types of devices such as computers, smartphones and IoT devices from a centralized command point. solutions traditionally prompt the mobile device user to install the application once it is registered. In addition, to get full protection, the user needs to approve the required permissions and profiles. Many users are vigilant about installing new mobile applications or granting different permissions, and as a Security company, Check Point even encourages that. Most of them do not know that the Harmony Mobile Protect app is focused on device characteristics and behaviors and not the content stored on or flowing through the device. Furthermore, some users are incompliant with the company’s security policy![]() Collection of rules that control network traffic and enforce organization guidelines for data protection and access to resources with packet inspection., especially when they use their own devices. Therefore, users often decide not to install the app or approve the required configuration. On top of that, users who do agree to install and accept the configurations will often not do it immediately, delaying the application activation. As a result, many devices remain exposed to potential cyber-attacks.
Collection of rules that control network traffic and enforce organization guidelines for data protection and access to resources with packet inspection., especially when they use their own devices. Therefore, users often decide not to install the app or approve the required configuration. On top of that, users who do agree to install and accept the configurations will often not do it immediately, delaying the application activation. As a result, many devices remain exposed to potential cyber-attacks.
Mobile Security’s innovative zero-touch technology lets the Harmony Mobile Protect app to be installed and activated automatically without any user interaction.
The solution uses a VPN profile that is pushed automatically by Microsoft Intune to the device and used by the Harmony Mobile Protect app. When deployed, it runs the activation flow automatically, and the device becomes active and shows in the Mobile Security dashboard without the user opening the app on the device.
|
|
Note - If you selected Automatic integration in Configuring UEM Integration Settings, skip the procedures below and go to Deploying SSL Certificate (Zero Touch SSL). |
-
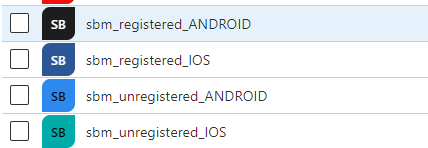
To set the zero touch flow you should create four new empty Security groups (See Creating Security Group for your Devices) with these names:
-
sbm_unregistered_ANDROID
-
sbm_registered_ANDROID
-
sbm_unregistered_IOS
-
sbm_registered_IOS

Note - The group name is important. So it is recommended to copy the group names from this document.
-
-
For each group, assign Check Point application as the owner. In the New Group screen of the relevant group, select Owners and then choose Mobile Security application as the owner.
Note - To find the Mobile Security application, enter Check Point Mobile Security. Intune does not search partial application names, for example, Harmony or Mobile.
Zero Touch Deployment for Android Enterprise devices
-
In the Microsoft Intune Admin Center, go to Devices > Manage devices > Configuration > Policies.
-
Click Create > New Policy.
-
Select the Platform as Android Enterprise.
-
Select Profile type as Templates.
-
From the Templates list, select Device restrictions.
-
Click Create.

-
In the Basics tab, enter a name for your profile (example, Harmony_zero_touch_AE).

-
Click Next.
-
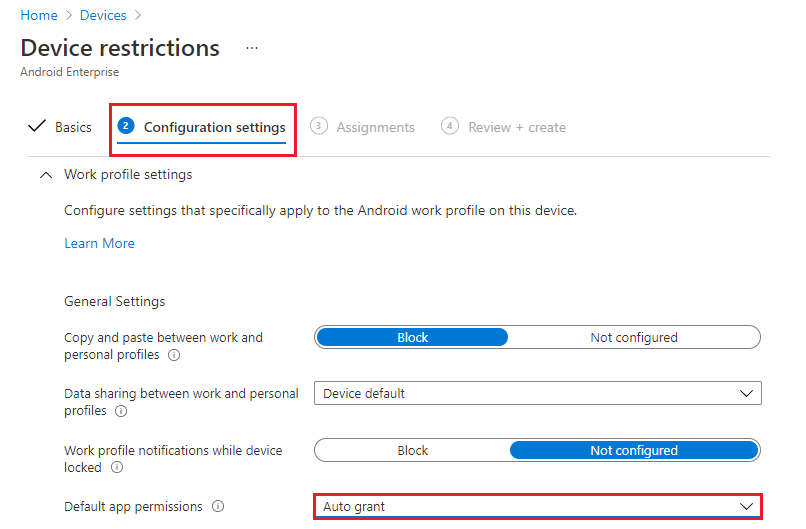
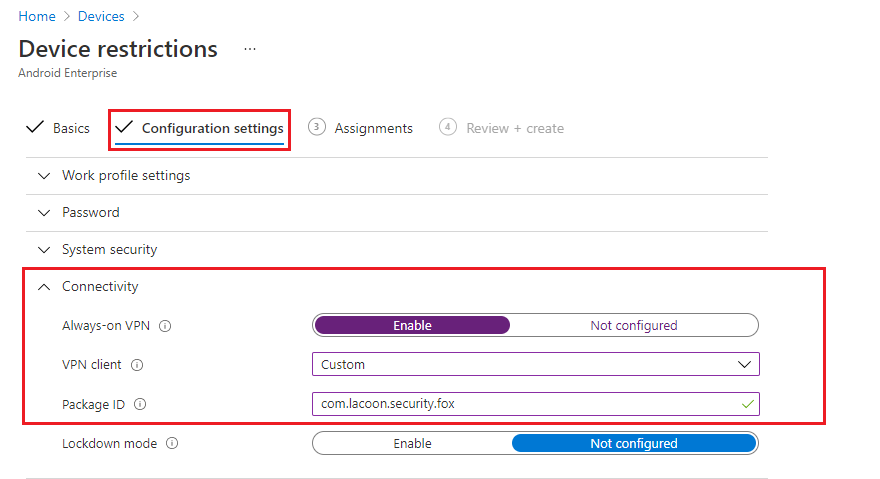
In the Configuration settings tab, go to Work profile settings.
-
From the Default app permissions list, select Auto grant.
-
Go to Connectivity section and set these values:
-
Always-on VPN - Enable
-
VPN client - Custom
-
Package ID - com.lacoon.security.fox
-
-
Go to the Assignments tab:
-
Under Included groups, click Add groups and assign the profile to sbm_unregistered_ANDROID group that you created in the previous section.
-
Under Excluded groups, click Add groups and exclude the profile from sbm_registered_ANDROID group.

-
-
Click Next.
-
Review and create the profile.
Zero Touch Deployment for iOS devices
-
In the Microsoft Intune Admin Center, go to Devices > Manage devices > Configuration > Policies.
-
Click Create > New Policy.
-
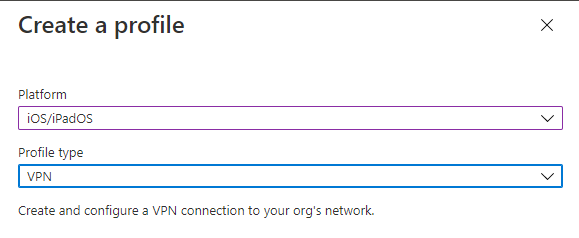
Select the Platform as iOS/ iPadOS.
-
Select Profile type as Templates.
-
From the Templates list, select VPN.
-
Click Create.
-
In the Basics tab, enter a name for your profile (example, harmony_zero_touch_iOS).

-
Click Next.
-
In the Configuration settings tab:
-
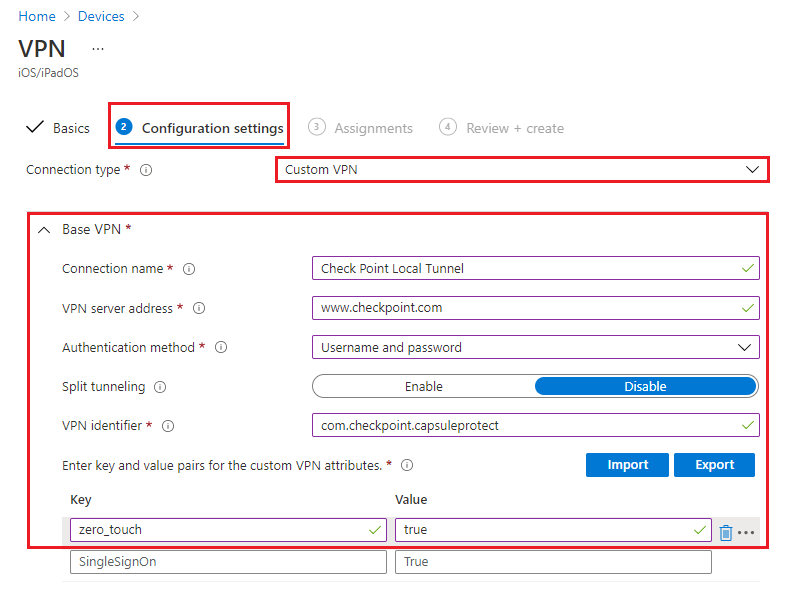
Select Connection type as Custom VPN.
-
Under Base VPN, enter these:
-
Connection name - Check Point Local Tunnel
-
VPN server address - www.checkpoint.com
-
Authentication method - Username and password
-
Split tunneling - Disable
-
VPN identifier - com.checkpoint.capsuleprotect
-
Custom VPN attributes - zero_touch = true
-
-
-
Under Automatic VPN, select Type of automatic VPN as On-demand VPN.
-
Click Add to add On-demand rules.
-
On the side panel, select these:
-
I want to do the following - Connect VPN
-
I want to restrict to - All domains

-
-
Click Save.
-
Select Block users from disabling automatic VPN as Yes.

-
Click Next.
-
Go to the Assignments tab and under Included groups, click Add groups.
-
Search and select the Security Group which represents the Mobile Security users in Intune.
Note - In iOS, you do not need to set the profile to the
sbm_unregistered_iOSas you set in Android. -
Click Next.
-
Review and create the profile.
Zero Touch Notification Permissions for iOS
This feature automatically grants notification permission to Harmony Mobile Protect app when you install the app through UEM, without user interaction.
|
|
Important:
|


To enable Zero Touch notification permissions for iOS devices:
-
In the Microsoft Intune Admin Center, go to Devices > Configuration and click Create > New Policy.

-
On the side panel:
-
Select Platform as iOS/iPadOS.
-
Select Profile type as Templates.
-
Select Device features and then click Create.

-
-
In the Basics tab, enter a name for your profile and then click Next.

-
In the Configuration settings tab, click App Notifications and then click Add.

-
Do these:
-
In the App bundle ID field, enter com.checkpoint.capsuleprotect
-
In the App name field, enter Harmony Mobile Protect.
-
From the Notifications list, select Enable.
-
Click Save.

-
-
Click Next.

-
In the Assignments tab, under Included groups, click Add groups and add your relevant groups.

-
Click Next.
-
Review the settings and then click Create.

Deploying SSL Certificate (Zero Touch SSL)
This section is relevant if you use the On-Device Network Protection (ONP) feature with the Https Inspection option turned on.
First, you need to create a certificate in Mobile Security Administrator Portal and then set the configuration on the UEM to push it to the devices. This certificate is used for the ONP SSL![]() Secure Sockets Layer. The standard security technology for establishing an encrypted link between a web server and a browser. Inspection.
Secure Sockets Layer. The standard security technology for establishing an encrypted link between a web server and a browser. Inspection.
Creating a certificate in the Mobile Security Administrator Portal
-
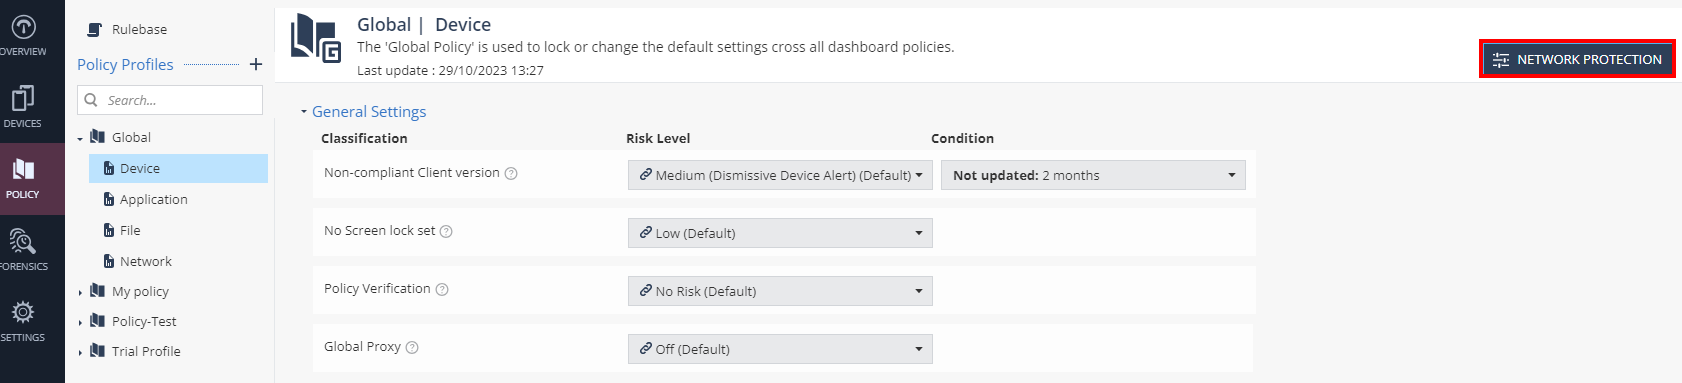
In the Mobile Security Administrator Portal, go to the Policy tab and expand your policy profile.
-
Click any one of these:
-
Device
-
Application
-
File
-
Network
-
-
Click Network Protection.
-
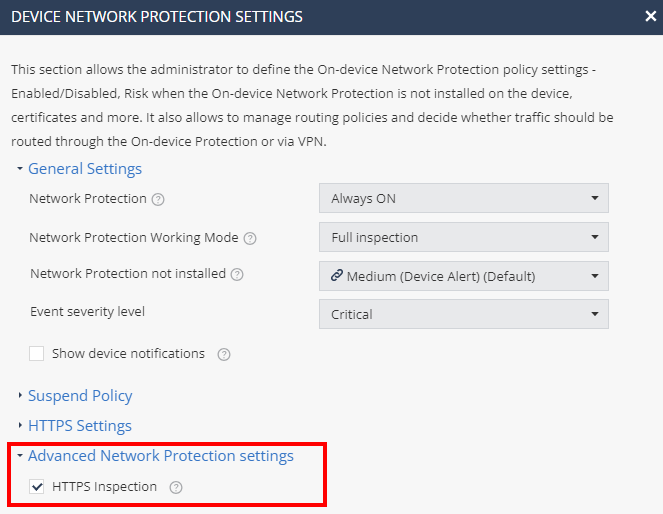
In the Advanced Network Protection settings section, enable HTTPS Inspection.
-
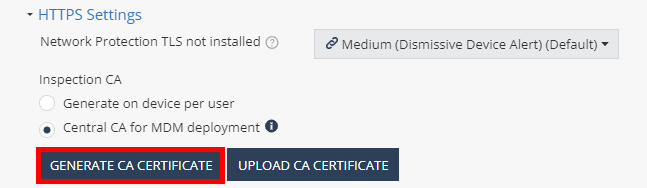
In the HTTPS Settings section:
-
Select Central CA for MDM deployment.
-
Click Generate CA Certificate.
-
-
Click OK.
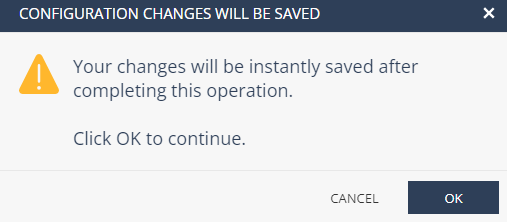
-
Enter the certificate name and click Add.
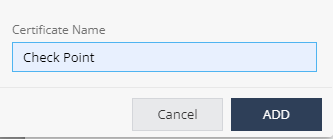
The system generates the CA certificate.
-
Click Download Certificate.
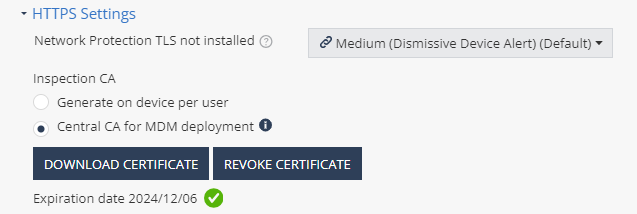
The system downloads the certificate to your computer.
|
|
Note - If you use different policies for device groups, the enforcement of the certificate pushed by the UEM may take up to 24 hours on iOS devices. This limitation is not relevant if the entire fleet of devices use the Global policy. |
Creating a certificate profile on the UEM:
-
 For Android Enterprise devices:
-
In the Microsoft Intune Admin Center, go to Devices > Configuration > Policies.
-
Click Create > New Policy.
-
Select Platform as Android Enterprise.
-
Select Profile type as Templates.
-
From the Templates list, select Trusted certificate.
-
Click Create.

-
In the Basics tab, enter a name for your profile.
-
In the Configuration settings tab, upload the certificate that was downloaded from the policy in Mobile Security dashboard.
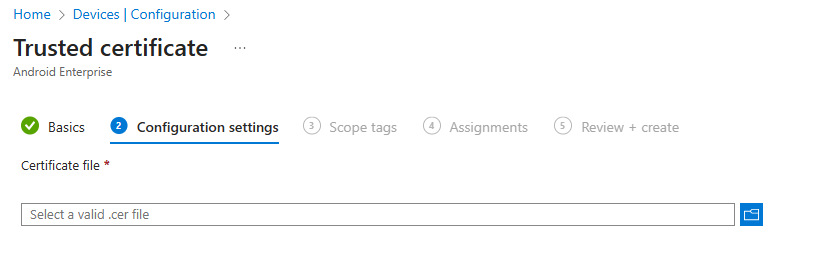
Note - The system downloads the CA certificate in
crtformat. Convert it to*.cerformat before the upload. Intune requires the certifcate in*.cerformat. -
Click Next.
-
Go to the Assignments tab > Included groups, click Add groups.
-
Search and select your Security Group.
-
Review and create the profile.
-
-
For iOS devices:
-
Go to Devices > Configuration > Policies.
-
Click Create > New Policy.
-
Select Platform as iOS/iPadOS.
-
Select Profile type as Templates.
-
From the Templates list, select Trusted certificate.
-
Click Create.

-
In the Basics tab, enter a name for your profile.
-
In the Configuration settings tab, upload the certificate that was downloaded from the policy in Mobile Security dashboard.

Note - The system downloads the CA certificate in
crtformat. Convert it to*.cerformat before the upload. Intune requires the certifcate in*.cerformat. -
Click Next.
-
Go to the Assignments tab > Included groups, click Add groups.
-
Search and select your Security Group.
-
Review and create the profile.
-