Advanced Configuration
|
|
Important Update - This documentation is deprecated as Gaia R80.40 has reached its end of support. For the latest information, refer to the Harmony Mobile Connector Installation Guide R81.20. |

Migrating Encryption Keys from User Device Management (UDM) to Connector
-
Install and configure the Harmony Mobile Connector on a new VM. For more information, see Installing and Configuring Harmony Mobile Connector.
-
Copy these files from the UDM server:
/opt/CPudm-R80.20/conf/pii_encryption_predefined.iv
/opt/CPudm-R80.20/conf/pii_encryption_predefined.key
/opt/CPudm-R80.20/conf/pii_fields.xml
/opt/CPudm-R80.20/conf/pii_filter.properties
/opt/CPudm-R80.20/conf/pii_encryption.key
/opt/CPudm-R80.20/conf/pii_encryption.iv
-
Back up the encryption keys on the connector machine:
/opt/CPsbmc/components/pii_filter/conf
-
Copy the files from step 2 to the Harmony Mobile Connector:
/opt/CPsbmc/components/pii_filter/conf/ -
Restart the Harmony Mobile Connector:
sbmc_stop
sbmc_start
-
Edit the MDM integration wizard in Harmony Mobile dashboard. Clear the Server is behind UDM System checkbox and follow the procedures in Configuring the Connector in Harmony Mobile Administrator Portal.
Setting up an On-Premises SMTP Service (without UEM)
-
In Installing and Configuring Harmony Mobile Connector , follow all the procedures except the pii protector settings.
-
Configure your on-premises SMTP service:
-
In the Harmony Mobile Administrator Portal, go to Settings > Integrations.
-
Click + and select SMTP.
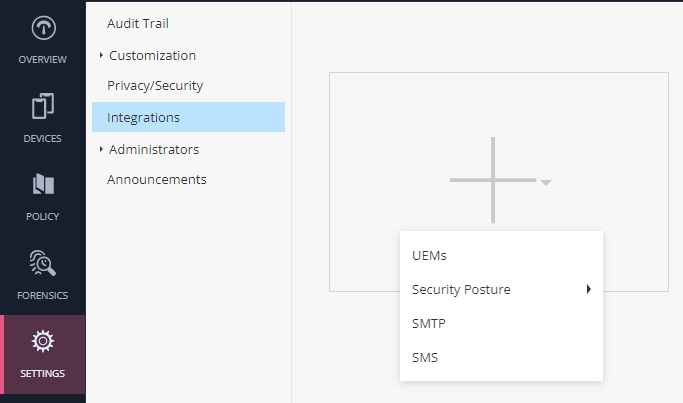
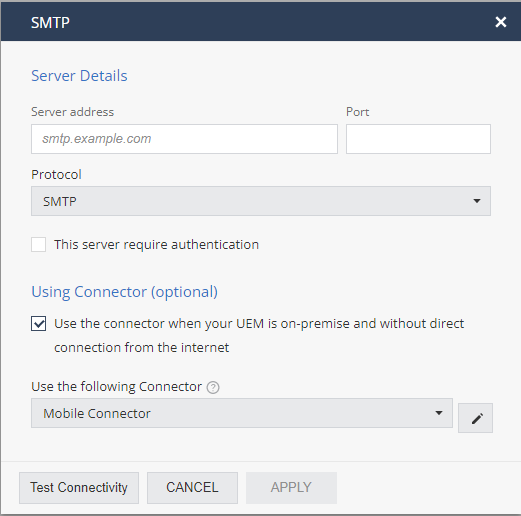
The SMTP window appears.

-
Configure Server Details:
-
SMTP transport for ports 25 and 587.
-
SMTPS transport for port 465.
-
-
To use the connector with an on-premises UEM without a direct internet connection, select the checkbox under Using Connector section.
-
Click Test Connectivity.
If there are no errors, click Apply.
-
Working with a Proxy
To connect a proxy from the Harmony Mobile Connector to the internet or to the UEM:
-
Log in to the VM through
ssh. -
Update the settings to access Harmony Mobile dashboard through the proxy.
-
Open this settings file:
vi /opt/CPsbmc/components/pii_protector/application.yml
-
Update the relevant settings in the file (server > Proxy), for example:
proxy:
         enabled: true
         host: "myproxy.mydomain.com"
         port: 8080
         authentication-required: true
         user: "proxy_user"
         password: "proxy_password"
-
-
Update the settings to access the Harmony Mobile Connector cloud component through the proxy.
-
Open this settings file:
vi /opt/CPsbmc/components/api_dispatcher/application.yml -
Update the relevant settings in the file:
-
relay Proxy:
Example:
proxy:
        enable: true
        host: "myproxy.mydomain.com"
        port: 8080
        username: "proxy_user"
password: "proxy_password" -
MDM Proxy:
If there is a proxy to connect to the UEM.Example:
proxy:
         enable: true
         host: "myproxy.mydomain.com"
         port: 8080
         username: "proxy_user"
         password: "proxy_password"
-
-
Using a UEM with a Self-Signed Certificate
To use a UEM server with a self-signed certificate (not signed with a valid Certificate Authority):
-
Download the UEM certificate in a Privacy Enhanced Mail (PEM) format and copy it to the Harmony Mobile Connector server.
-
Connect to the VM through
sshwith your user credentials. -
Update the settings file to use the self-signed certificate:
-
Open the settings file:
vi /opt/CPsbmc/components/api_dispatcher/application.yml -
When you connect to the UEM, use the self-signed certificate.
mdm > ssl >use_self_sign_certificatePath to the UEM certificate:
mdm > ssl >certificate_pathExample:
use_self_sign_certificate: true
certificate_path: "/web/conf/my_uem_certificate.pem"
Note - The option to disable the SSL verification to the MSD should be used only in Proof of Concept (POC) and not in production.
-
Setting up High Availability for the Connector
To set up a high availability for the Harmony Mobile Connector:
-
Create a copy of the existing VM that runs the Harmony Mobile Connector.
-
Change the new VM IP address (in Gaia).
In clish:
show interface eth0
set interface eth0 ipv4-address <ip> mask length <16/23>
save config -
Add the new IP address to the UEM settings in Harmony Mobile dashboard.
Viewing Connector
To set up a new viewing connector (an instance without API dispatcher. Read-only):
-
Follow the steps in Setting up High Availability for the Connector to set up the additional Harmony Mobile Connector VM.
-
In the Expert mode, on the Harmony Mobile Connector, run these commands:
-
To restart SBMC:
sbmc_stop; sbmc_start
-
To deactivate api_dispatcher:
-
-
source /opt/CPsbmc/scripts/sbmc_functions.sh
-
stop_component api_dispatcher
Upgrading Harmony Mobile Connector from R80.XX to R80.40
-
Create a snapshot of the current R80.XX virtual machine.
-
Connect to the VM through
sshand log in to Expert mode with your username and password. -
Run this script to back up the configuration files:
SBMCBACKUPDIR=/var/log/SBMCBACKUP-
mkdir $SBMCBACKUPDIR
cp $SBMCDIR/components/api_dispatcher/application.yml $SBMCBACKUPDIR/api_dispatcher_application.yml
cp $SBMCDIR/components/pii_protector/application.yml $SBMCBACKUPDIR/pii_protector_application.yml
cpr $SBMCDIR/components/pii_filter/conf $SBMCBACKUPDIR/conf
cp /web/conf/sbmc_private_key.pem $SBMCBACKUPDIR/sbmc_private_key.pem
cp /web/conf/sbmc_public_key.pub $SBMCBACKUPDIR/sbmc_public_key.pub
-
Upgrade to R80.40.
-
Install the Harmony Mobile Connector. For more information, see Installing and Configuring Harmony Mobile Connector.
-
Restore files from backup:
SBMCBACKUPDIR=/var/log/SBMCBACKUP-
cp $SBMCBACKUPDIR/sbmc_private_key.pem /web/conf/sbmc_private_key.pem
cp $SBMCBACKUPDIR/sbmc_public_key.pub /web/conf/sbmc_public_key.pub
rmrf $SBMCDIR/components/pii_filter/conf-
cpr $SBMCBACKUPDIR/conf $SBMCDIR/components/pii_filter/conf
cp $SBMCBACKUPDIR/pii_protector_application.yml $SBMCDIR/components/pii_protector/application.yml
-
Update the
$SBMCDIR/components/api_dispatcher/application.ymlconfiguration file with the relevant values from$SBMCBACKUPDIR/api_dispatcher_application.yml. -
Restart SBMC:
sbmc_stop
sbmc_start
Saving the Encrypted MDM Password
To save the encrypted MDM password in the Connector configuration files:
-
Connect to the VM through
sshand log in to Expert mode. -
Run this command and replace <mdm_password> with your MDM password:
curl_cli --request POST 'http://localhost:7777/json_map?action=hide' --header 'Content-Type: application/json' --data-raw '{"fields":[{"id":"PASSWORD","value":"<mdm_password>","type":"USERNAME"}]}'The output displayed is the encrypted password.
Note - To successfully run the command, make sure to enter the correct input parameters and avoid extra space characters.
-
Edit the settings file
vi /opt/CPsbmc/components/api_dispatcher/application.ymland paste the output password to the relevant MDM configuration.Example:
mdm:
    credentials:
                the relevant mdm you use:
                         password: <paste output password here>