Installation
Installing Gaia
To install a VM with R81.20 version:
-
Install Gaia on an open server or on a server that was upgraded from a previous Gaia version. For instructions, see R81.20 Installation and Upgrade Guide.
-
Run the Gaia First Time Configuration Wizard. For instructions, see:
-
Running the First Time Configuration Wizard in Gaia Portal in R81.20 Installation and Upgrade Guide.

Note - Gaia for Mobile Security Connector does not require a separate license. It is part of the Mobile Security license agreement.
-
After you install the VM, change the admin user to use bash:
-
Log in to Gaia:
https://<gaia_vm_ip>Username - The admin username set when you installed Gaia
Password - The password set when you installed Gaia.
-
Under User Management, click Users.
-
Select your admin user and click Edit.

-
Change Shell to
/bin/bashand click OK.
Installing and Configuring Mobile Security Connector
|
|
Note - Mobile Security Connector was formerly called Harmony Mobile Connector. |
To install the Mobile Security Connector package:
-
Log in to Gaia:
https://<gaia_vm_ip>Username - The admin username set when you installed Gaia
Password - The password set when you installed Gaia.
-
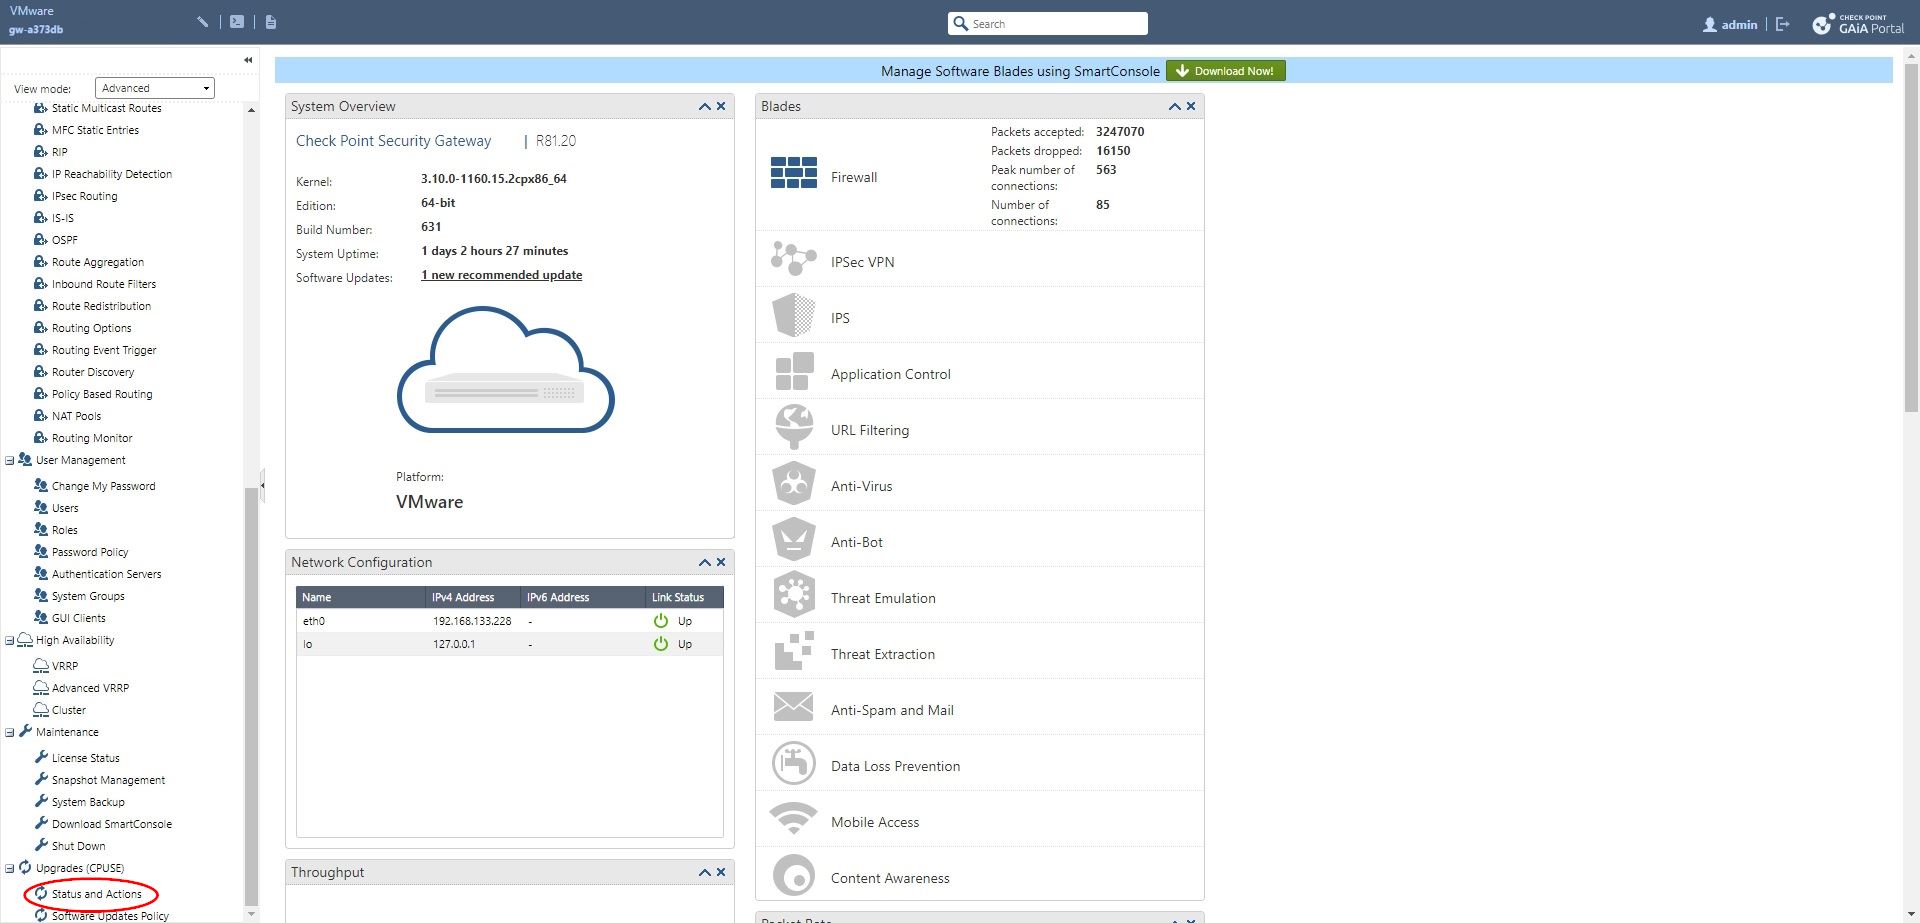
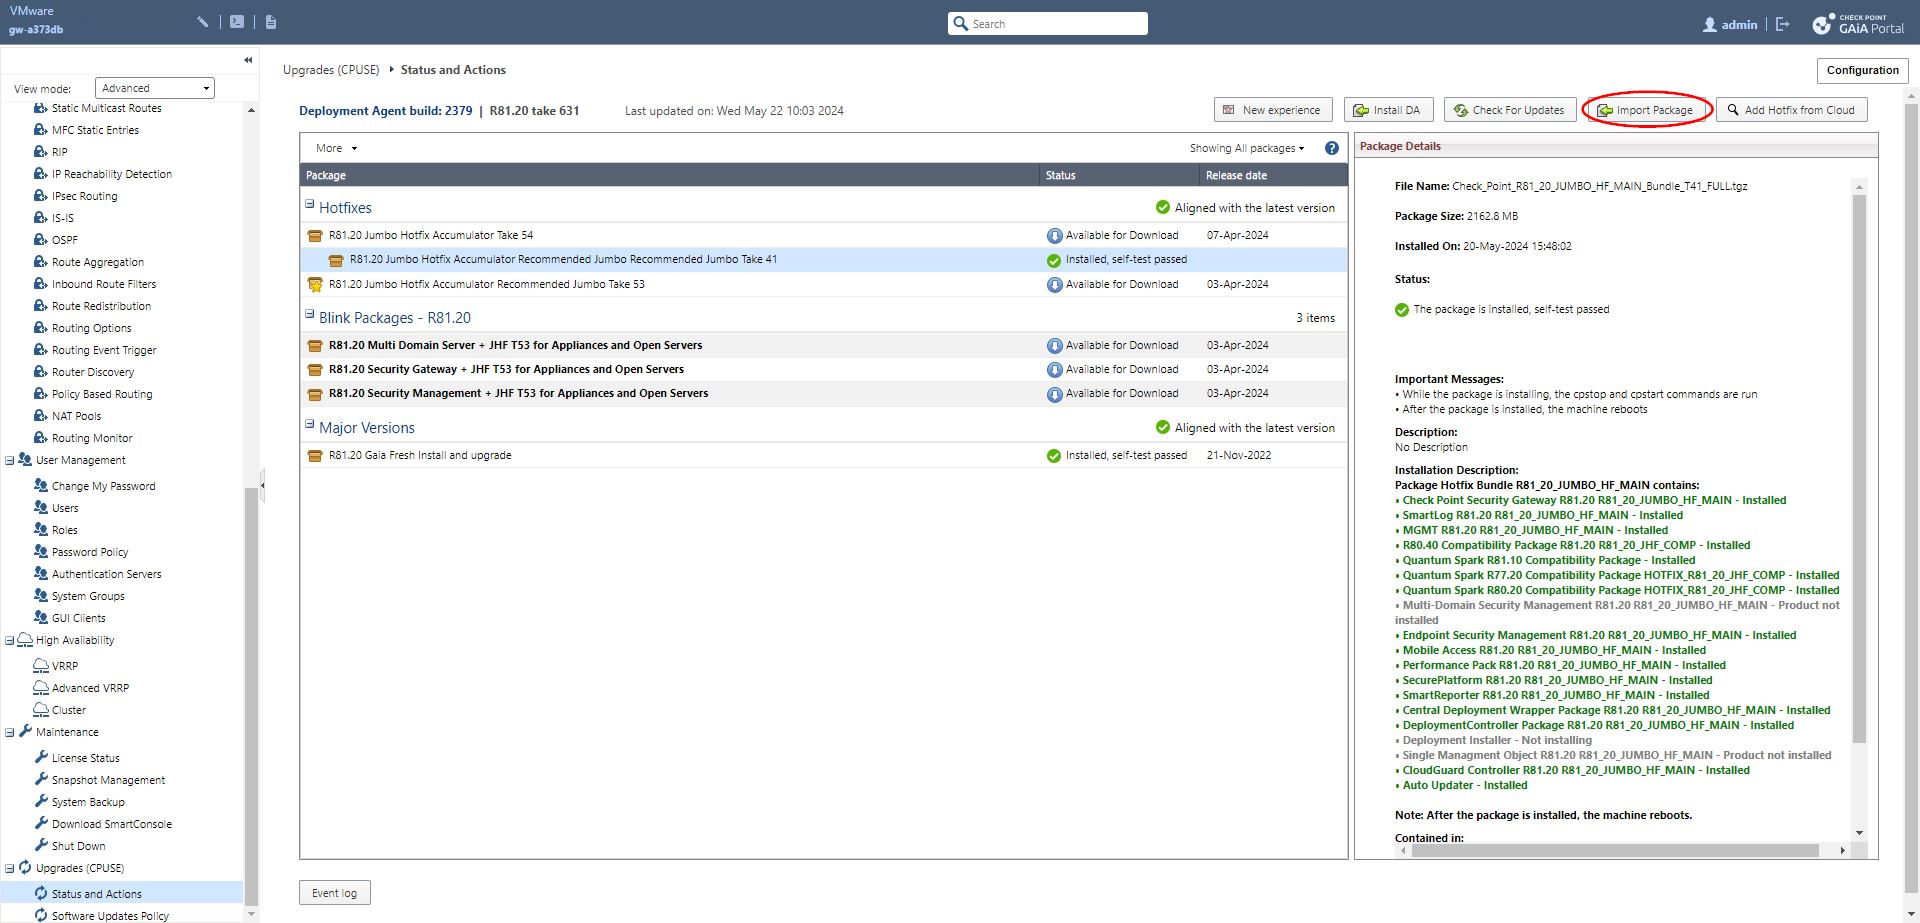
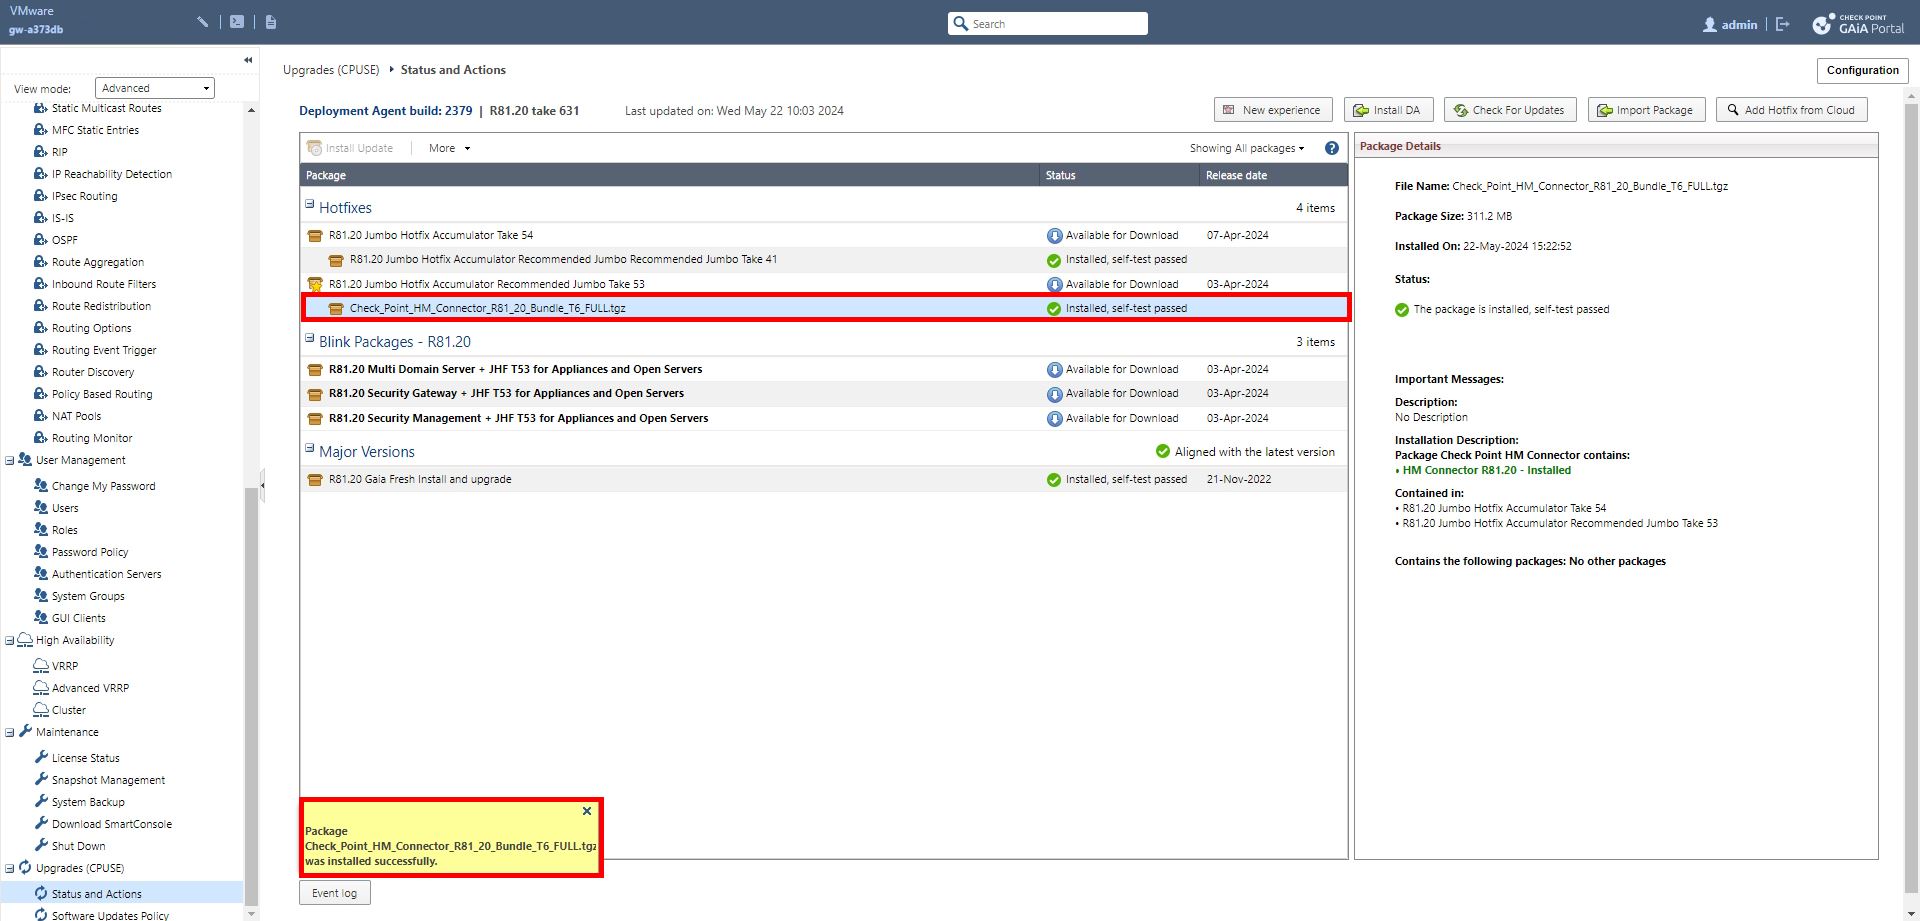
On the left panel, under Upgrades (CPUSE), click Status and Actions.
-
Download and install the latest recommended Jumbo Hotfix Accumulator.
In the sample screenshot below, the latest take shown is Jumbo Hotfix Accumulator Take 84.

-
To download the Mobile Security Connector package, click Mobile Security Connector R81.20 Take 8.
-
Click Import Package.
-
In the Import Package window, browse and select the Mobile Security Connector package downloaded in the previous step and click Import.
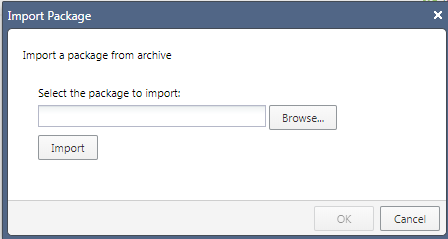
Wait for the upload and import to finish.
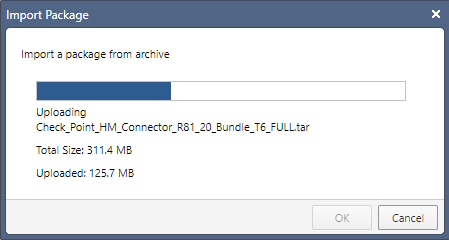
When the import is completed, a message appears in the bottom left corner of the screen.

-
To view the imported package, under Showing Recommended Packages, select All.

The imported Mobile Security Connector package is listed under Hotfixes, with Downloaded Successfully status.
-
Right-click the package and select Install Update.

When the installation completes, the package status changes to Installed and a message appears in the bottom left corner.
-
Under Maintenance, click Shut Down > Reboot.

|
|
Notes -
|
To configure the Mobile Security Connector:
-
Connect to the VM through
sshand your initial credentials in Expert mode. -
To create private and public keys, run:
sbmc_create_keysSample output:

-
Copy the public key for the Mobile Security dashboard configuration:
cat /web/conf/sbmc_public_key.pub -
Open the settings file
vi /opt/CPsbmc/components/api_dispatcher/application.yml
and update these:-
Configure Relay settings:
relay:
    url: <Relay URL according to the region>
    task_info_key: <Harmony Mobile dashboard URL (without https)>
Example:
relay:
    url: https://us-relay.locsec.net
    task_info_key: "my.dashboard.checkpoint.com"
-
Update pii filter_url:
pii:filter_url: "http://localhost:7777/" -
Update private_key_path:
signature:private_key_path: "/web/conf/sbmc_private_key.pem" -
Configure on-premises UEM credentials if you need to store the UEM login credentials in the Connector configuration.
(You can also configure the UEM in the Check Point Portal. For more information, see Integrate UEM with Connector)
Note - When you update the MDM credentials in the
application.ymlfile, remove only the # sign from the updated rows and the credentials keyword row. Verify the structure is as follows:mdm:
credentials:
<relevant MDM credentials>
-
XenMobile Basic Authentication:
MDM credentials:
username: <username>
password: <encrypted password>
URL: <Server URL>
mdmType: "xenmobile"
-
XenMobile Bearer Token Authentication:
MDM credentials:
customer_id: <customer id>
client_id: <client id>
secret_key: <encrypted secret key>
URL: <Server URL>
mdmType: "xenmobile"
-
BlackBerry UEM:
MDM credentials:
username: <username>
password: <encrypted password>
URL: <Server URL>
provider: <provider> (most probably "AD")
domain: <domain>
SRPID: <SRP ID>
mdmType: "bbuem"
-
Airwatch:
MDM credentials:
username: <username>
password: <encrypted password>
URL: <Server URL>
aw-tenant-code: <API KEY>
mdmType: "airwatch"
-
MobileIron Core:
MDM credentials:
username: <username>
password: <encrypted password>
URL: <Server URL>
mdmType: "mobileiron"
-
JAMF:
MDM credentials:
username: <username>
password: <encrypted password>
URL: <Server URL>
mdmType: "jamf"
-
Generic MDM (for example, Mdportsolution):
MDM credentials:
username: <username>
password: <encrypted password>
URL: <Server URL>
mdmType: "generic"
-
-
Configure on-premises SMTP:
smtp:
    enable: true
    smtpSSLEnable: true (in case of SMTPS, port 465)
-
Configure on-premises SYSLOG:
syslog:
      enable: true
-
-
Update the pii protector settings
vi /opt/CPsbmc/components/pii_protector/application.yml
Update these fields:
zuul:
    routes:
         proxy:
              url: <Harmony Mobile dashboard URL>
Example:
zuul:
    routes:
         proxy:
              url: https://my.dashboard.locsec.net/
Note - For the Harmony Mobile dashboard URL, enter the Dashboard URL value in the New Connector window. Add
https://at the beginning of the URL and close it with a '/' character. -
Restart the Mobile Security Connector:
sbmc_stop
sbmc_start
Configuring the Connector in Mobile Security Administrator Portal
To log in to the Mobile Security Administrator Portal:
-
Sign in to Check Point Portal.
-
Click the Menu icon in the top left corner.

-
In the Workspace Security section, click Mobile.

-
Accept the terms of service and click Try Now (Applies only for first-time login).
The Mobile Security home page appears.
To configure a new Connector:
-
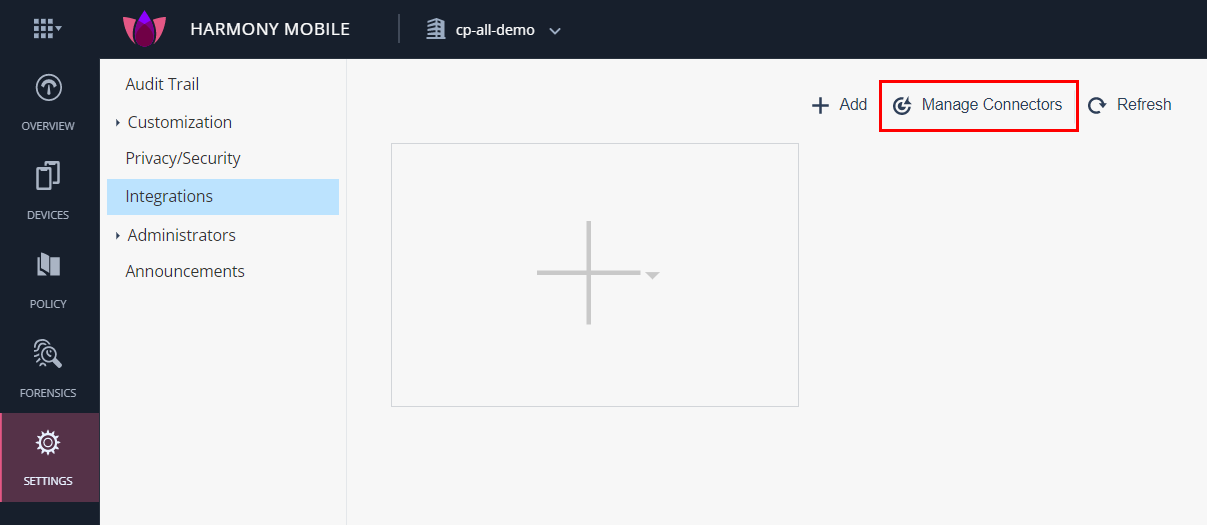
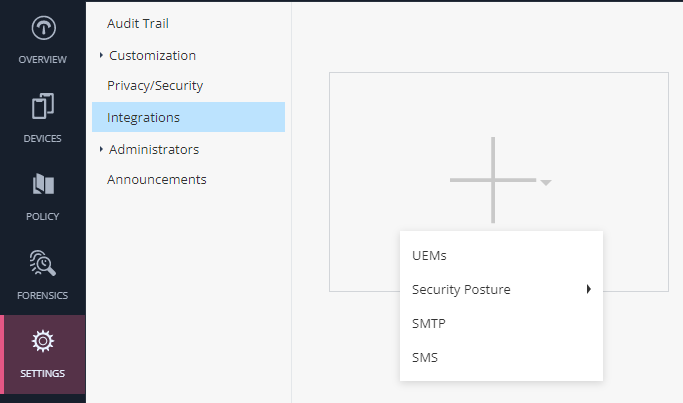
In the Mobile Security Administrator Portal, go to Settings > Integrations.
-
Click Manage Connectors.
-
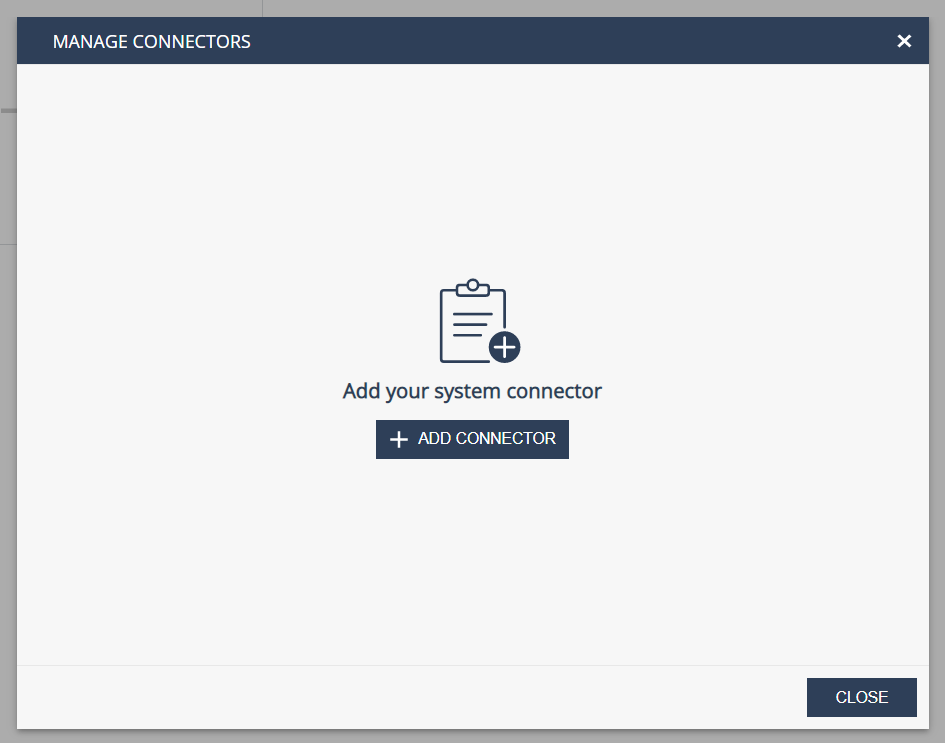
In the Manage Connectors window, click +Add Connector.
-
In the New Connector window:
-
Enter a Connector Name.
-
Upload or copy and paste the public key from the Install and Configure Mobile Security Connector section.
-
In Server Address and in HA Server Address (optional), enter the Mobile Security Connector Virtual Machine address in this format:
https://<url or ip_address>/pii_protector -
Dashboard URL is auto-generated and read-only.
-
(Optional) Directory Service - Select this check box to configure directory service. To configure, see Configuring directory service.
-
Click Create.

-
To integrate the UEM with Connector:
-
In the Mobile Security Administrator Portal, go to Settings > Integrations.
-
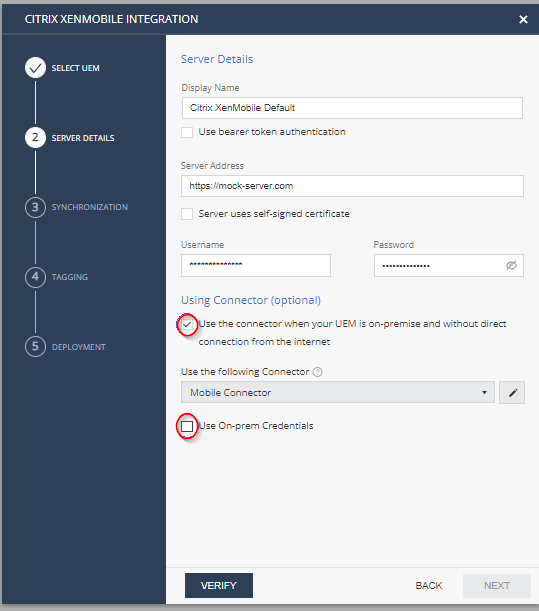
Click + and select UEMs.

-
Select a UEM service and click Next.

-
In the Server Details tab, select the checkbox under Using Connector section.
-
If the UEM login credentials are stored in the Connector configuration (see On-premises UEM login credentials), select the Use On-prem Credentials checkbox.
Otherwise, enter the UEM server details.
-
Click Verify and Next.
-
For on-premises SMTP support:
-
Click the Synchronization Configuration tab.
-
To import the device username and email address from the MDM, select the Device owner name and Device owner email checkboxes.

-
-
Click Next and Finish.
-
Verify these conditions:
-
The device is synchronized in UEM.
-
The device data appears as decrypted in the on-premises Mobile Security dashboard.
-
(Optional) For on-premises SMTP support:
-
In the Mobile Security Administrator Portal, go to Settings > Integrations.
-
Click + and select SMTP.
The SMTP window appears.

-
Configure Server Details:
-
SMTP transport for ports 25 and 587.
-
SMTPS transport for port 465.
-
-
To use the connector with an on-premises UEM without a direct internet connection, select the checkbox under Using Connector section.
-
Click Test Connectivity.
If there are no errors, click Apply.
(Optional) For on-premises Syslog support:
-
In the Mobile Security Administrator Portal, go to Settings > Integrations.
-
Click + and select Security Posture.
Select Syslog or ArcSight. The Syslog window appears.

-
Configure Syslog Server Details.

-
To use the connector with an on-premises UEM without a direct internet connection, select the checkbox under Using Connector section.
-
Click Test Connectivity.
-
If there are no errors, click Apply and then Save.
-
Verify these conditions:
-
The device is synchronized in UEM.
-
The device data appears as decrypted in the on-premises Mobile Security dashboard.
-
(Optional) Configuring the directory service:
The Mobile Security Connector directory service enables you to search the Active Directory (AD) using LDAP, and to enroll users to Mobile Security.
Open and update this settings file:
vi /opt/CPsbmc/components/directory_service/application.yml
-
Configure ldap settings:
ldap:
   url: <ldap server URL>
   base: <base branch>
   userDN: <user dn>
   password: <ldap password>
Example:
ldap:
   url: "ldap://192.168.133.70:389"
   base: "DC=locsec,DC=net"
   userDN: "CN=Administrator,CN=Users,DC=locsec,DC=net"
   password: "1234"
-
Configure SBM settings:
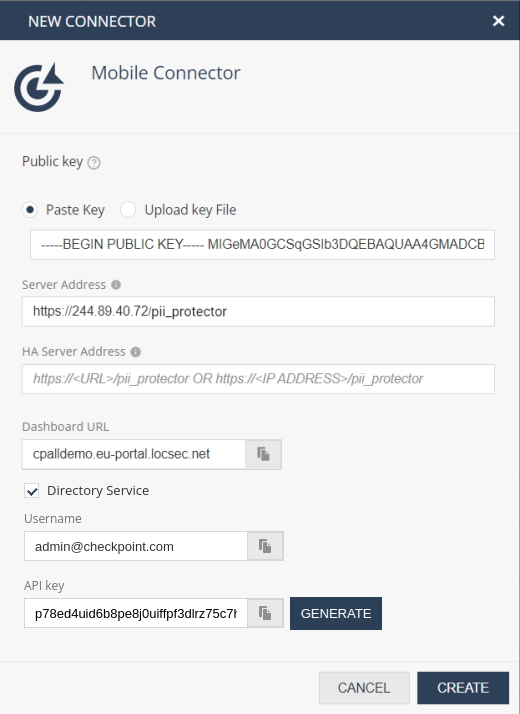
 sbm:
    dashboardUrl: <Harmony Mobile dashboard URL>
    username: <admin in Harmony Mobile dashboard>
    apiKey: <API key generated by the admin>
Example:
 sbm:
    dashboardUrl: "https://cpalldemo.eu-portal.locsec.net/"
    username: "admin@checkpoint.com"
    apiKey: <Generated API key>
Notes -
-
For the Harmony Mobile dashboard URL, enter the Dashboard URL value in the New Connector window. Add
https://at the beginning of the URL and close it with a '/' character. -
For the API key, click Generate in the New Connector window and copy the generated API key.
-
-
Configure Directory Service login:
login:
     username: <username>
     password: <encrypted password>
-
Access Directory Service UI and enroll devices:
-
Restart Mobile Security Connector:
sbmc_stop
sbmc_start
-
Browse to
http://connector-ip/directory_service -
To log in, enter username and password.
-
Use the search bar to search for a user. In the search results, select a user from the User Repository table.
The selected user's devices are displayed in the Devices table. Note that this is only for users with a listed email address.
-
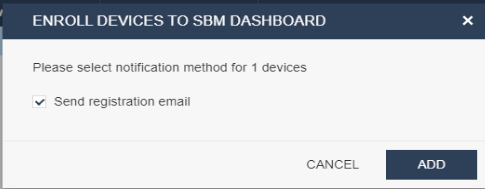
To add a device to Mobile Security dashboard, select the required device and click Enroll to SBM dashboard.

-
Clear the Send registration email checkbox and click Add.
-