Configuring IPsec Integration
You can route the traffic from a Citrix SD-WAN device to the Internet through IPsec tunnels. Check Point inspects the traffic in these tunnels and secures the users in the office.
Through the IPsec you can enable Check Point security from your Citrix SD-WAN management dashboard.

|
Note - A WAN Edge IPsec Interface name must have a suffix of _1. |
To configure Citrix SD-WAN IPsec on your SD-WAN Device perform these steps:
Creating the First IPsec Check Point Tunnel
|
|
Note - A WAN IPsec Interface Name must have a suffix of _1. |
To create an IPsec tunnel:
-
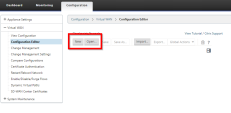
Go to Configuration > New (or, alternatively, Configuration > Open).
Example:
-
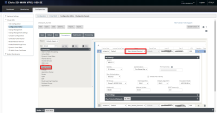
Go to Configuration page > Virtual WAN > Connection Editor.
-
In the Connection section select the applicable Site, click Intranet Services and click [+Service].
-
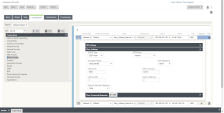
On the right pane of the window in the WAN Links section configure your WAN interface as your IPsec Source Interface:
-
Click Apply.
Example:

-
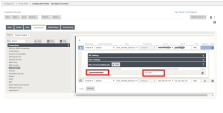
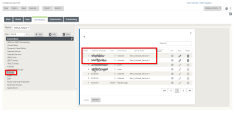
Go to Configuration page > Connections tab > IPsec Tunnels.
-
Click [+] to add a new IPsec Tunnel.
-
Set these parameters:
Service type - Set to Intranet and select the new created Intranet service.
-
On the right pane of the window open the new created WAN link (for example, New_Intranet_Service_1).
Note - IKE and IPsec Settings/configuration must be configured as stated in the Check Point Infinity Portal Portal instructions.
Example:
-
 Configure the New_Intranet_Service_1 template:
Field Settings Tunnel Addresses
Local IP Address
Configured on the Harmony Connect Site (see Creating a New Site).
Peer IP Address
The IP address of the Check Point IPsec tunnel as appear at the previous steps.
IKE Settings
IKE Version
IKEv2 is preferred, IKEv1 is also supported
Identity
IP Address
Authentication
Pre-Shared Key
Pre-Shared Key
Paste the Key generated on the Harmony Connect Site (see Creating a New Site).
Peer Authentication
Mirrored
DH Group
Group 2 (MODP1024)
Hash Algorithm
SHA1
Identity Algorithm
SHA1
Encryption Mode
AES 256-Bit
IPsec Settings
Tunnel Type
ESP+Auth
PFS Group
None
Encryption Mode
AES 256-Bit
-
Go to the IPsec Protect Networks and click [+Add].
-
Source IP/Prefix section enter all the internal sub-networks that in your branch are defined as Internal Sub-Networks at Check Point Site configuration.
-
Destination IP/Prefix - Set to 0.0.0.0/0.
Example:
-


Creating the Second IPsec Check Point Tunnel
Repeat Steps 3-11 to create the second WAN link for the second the New_Intranet_Service_2 tunnel.
Routing Traffic through the IPsec Tunnels
-
Go to Connection > Routes and click [+] to add a new routing rule.
-
Set these parameters:
-
Network IP Address - Select one of the internal sub-networks behind your branch device. Make it your primary tunnel.
-
Service Type - Set to Internet.
-
Service Name - Set to the first IPsec tunnel configured in the previous steps (see Creating the First IPsec Check Point Tunnel).
Example:
-
-
Create an additional rule for the same sub-networks with the Service Name set to the second IPsec tunnel that you configured at the previous steps.
-
Repeat Steps 1-3 to configure the New_Intranet_Service_2 tunnel.
-
Create additional routing rules for the rest of the sub-networks behind your branch device.

Deploying Changes
-
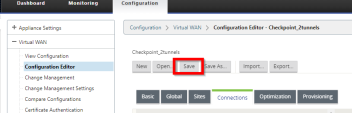
To save your configuration go to Configuration tab > Virtual WAN > Configuration Editor.
-
Click Save.
Example:
-
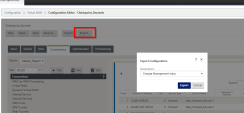
Go to Configuration tab > Configuration editor and select the Checkpoint_2tunnels option.
-
Click Export to stage and activate the configuration.
-
In the Export Configuration window select Destination > Check Management inbox.
-
Click Export.
Example:
-
Save the changes.
-
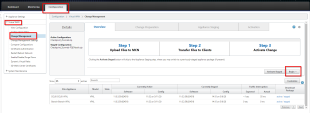
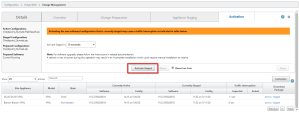
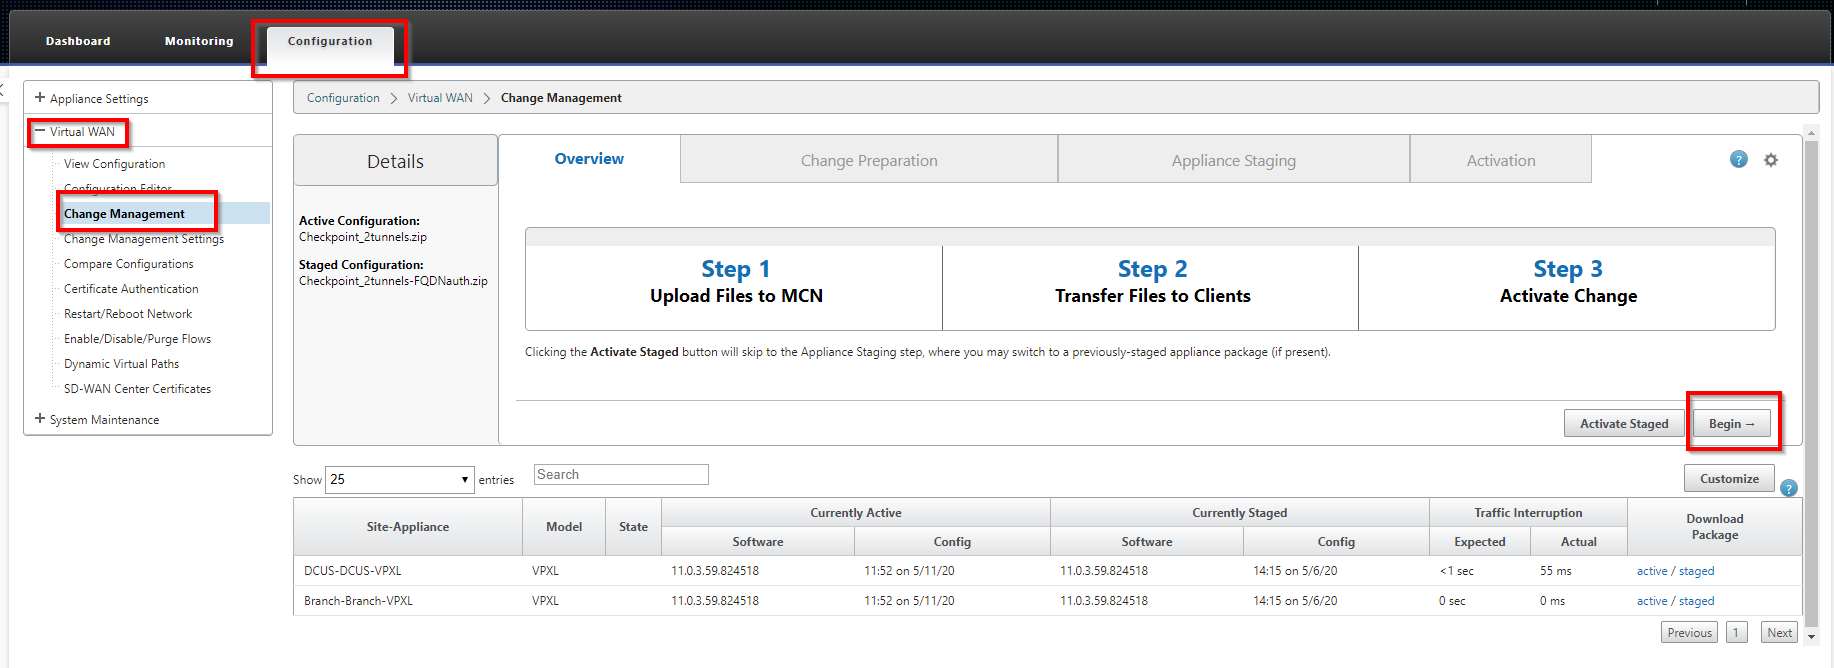
Go to Configuration tab > Virtual WAN > Change Management.
Example:
-
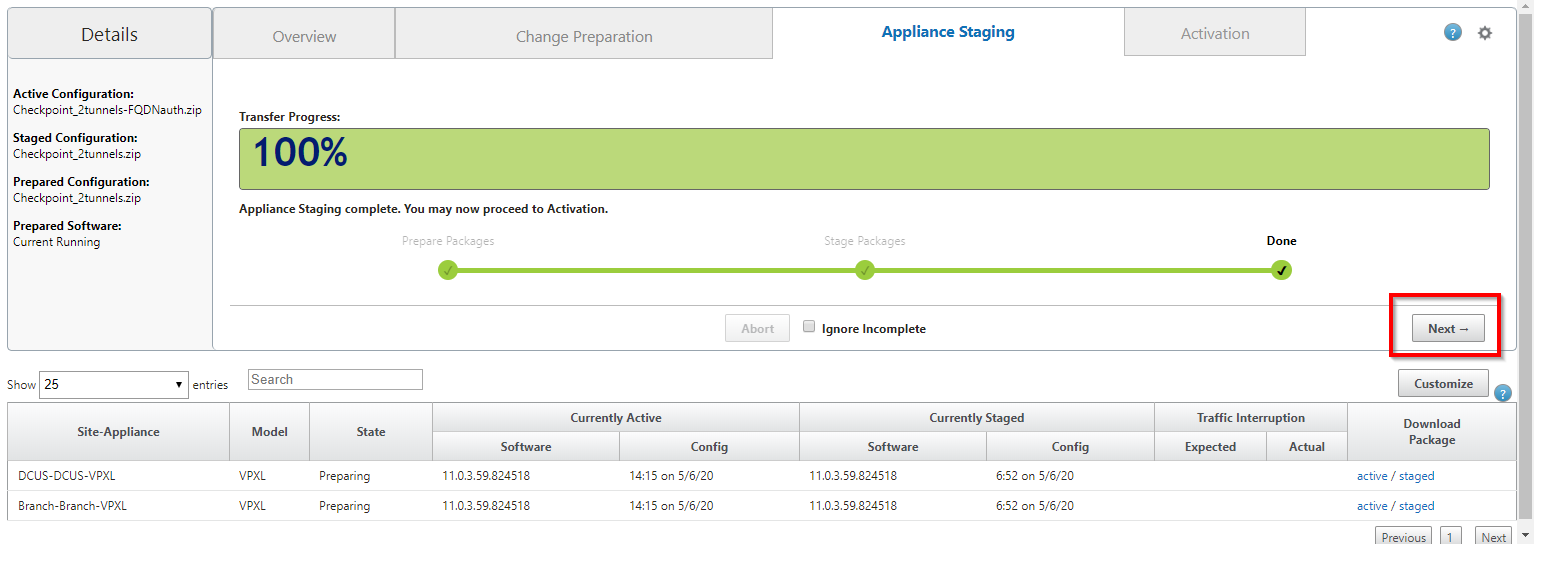
Click Next.
Example:

-
Click Activate Staged.
Example:
-
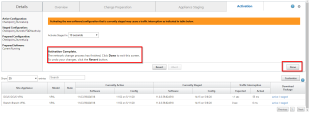
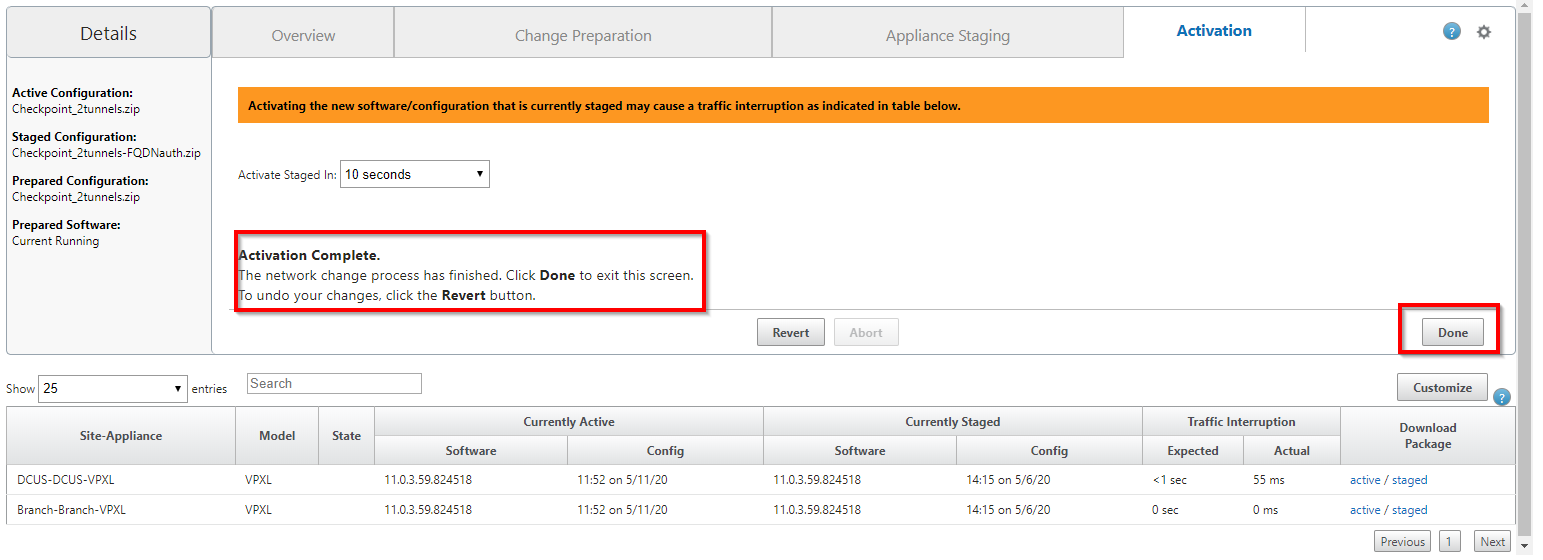
Wait for the activation to complete.
Example:


To test your Harmony Connect configuration see Testing your Configuration.