Configuring Azure Virtual WAN
To prepare the Azure Virtual WAN for integration with Check Point Harmony Connect perform these steps:
-
Create an Azure Virtual WAN for integration with Check Point.
-
Select secured resources for integration with Check Point.
-
Assign API Access for Check Point.
Creating an Azure Virtual WAN
To create an overlay network and provide optimized access between branch offices and Microsoft resources you must log into your Azure Portal and perform configuration steps.
For more information see the online guide.
Procedure:
-
Define an Azure Virtual WAN that represents your overlay network.
-
Create a regional hub.
A regional hub concentrates connections from branch offices and VNets in a specific region. Select one of the Microsoft Azure geographic locations closest to your users or to your applications.
-
Create any of these assets:
-
Site - A representation of your branch office. It optimizes access from your users in the branch office to Microsoft resources, for example, cloud SaaS applications and cloud data centers.
-
Select an applicable branch office routing device vendor, for example, Cisco, Silver Peak, and more.
-
Set up VPN tunnels between your branch device and the virtual site.
-
Connect the site to the regional hub.
-
(Optional) Download the Microsoft Point-to-Site client to optimize network traffic users outside the office or roaming users. The Point-to-Site client routes all of their traffic through Microsoft Azure Virtual WAN.
Later, when we add Check Point security to the networking path, users outside of the branch office will be also secured.
-
-
VNet - A network in your Azure workspace. It that can host compute instances.
Connect the VNet to the regional hub. It optimizes an access from your servers hosted in the VNet to other Microsoft resources.
-
Selecting Secured Resources in Azure Portal
Select specific resources for Check Point protection and secure their traffic.
Procedure:
-
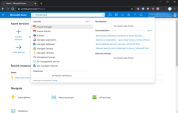
Go to Azure Firewall Manager.
-
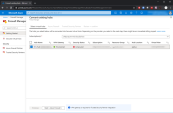
Go to Convert Existing Hubs.
-
Select the regional hub with its traffic that you want to secure.

Note - At this point this is just a declaration. In the actual configuration you select granular sites and VNets that need to have their traffic secured in later steps.
Example:
-
Click Next - Azure Firewall.
-
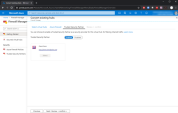
Click Next - Trusted Security Partner.
-
Select Check Point.
Example:
-
Click Next and complete the conversion.
-
Go to Connections and select the site or the VNet you defined before.
-
Select the site or the VNet and click Secure Internet Traffic.
Assigning API Access to Check Point
To complete the secure setup you must provide Check Point API access and link your Check Point portal to your Azure portal. For this purpose you must create a Service Principal. With this Service Principal Check Point fetches the assets you want to secure and creates an applicable cloud network security architecture that secures their traffic.
A service principal is defined by these parameters:
-
Password
-
Application ID
-
Subscription ID
-
Tenant ID
Use all the parameters in the next configuration step (see Launching Azure Virtual WAN Integration in the Check Point Infinity Portal).
For more information see the online guide.
Procedure:
-
Go to Azure Active Directory.
-
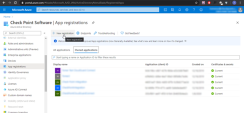
Go to App Registrations.
Example:
-
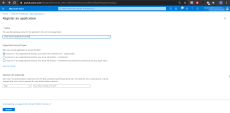
Click New Registration
-
In the Register an Application window set these parameters:
-
Name - Enter a free text that describes the target application. For example, Check Point Harmony Connect.
-
Supported Account Types - Select an applicable Account Type.

Note - All fields marked with an asterisk (*) are mandatory.
-
-
Click Register.
Example:

Note - Next screen contains the Application ID and Tenant ID for our next configuration steps.
-
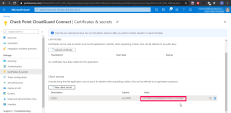
 Create an Authentication Secret Key and retrieve the Password.
-
Go to Certificates & Secrets.
-
Scroll down to Client Secrets.
-
Click [+] to create a new Client Secret.
-
In the Description field enter a free-text description for the Client Secret.
-
Select an expiration date.
-
Click Add.
Example:
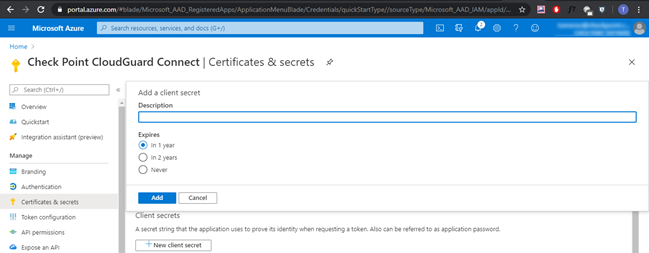
-
From the Value field copy the value of this new Client Secret.
Use this value as a password for the next configuration steps.

Note - This Secret value is lost and cannot be retrieved after you close the window.
Example:
-
-
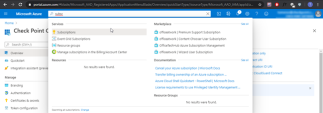
 Assign a subscription and a role to the new App Registration and retrieve the Subscription ID.
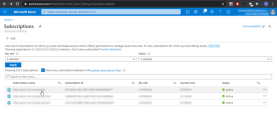
A subscription represents a billing scope. The ID of this subscription is the Subscription ID. Use this value for the next configuration steps.
-
Go to Subscriptions.
Example:
-
Select the specific subscription for the integration with Check Point.
Example:
-
In the Subscriptions window go to Access Control (IAM).
-
Click Add > Add Role Assignment.
-
Set these parameters:
-
Role - Assign the Role to an Owner.
Check Point requires the owner role for this integration. This role implies that Check Point automatically applies security every time a new Azure resource is defined as secured. It ensures that Check Point automatically secures traffic between the regional hubs and the Internet.
-
Assign Access To - Set to User, group, or service principal.
-
-
-
Select the app registration created in the previous steps.
-
Click Save.

