Harmony Connect Agent
The Harmony Connect Agent is a lightweight application for Windows and macOS that provides secure Internet Access to remote users. The Harmony Connect Agent routes all internet-facing traffic through a Check Point Cloud, where full network security is enforced.
The Harmony Connect Agent is supported on these operating systems:
-
Windows 10 and higher
-
macOS
-
Mojave 10.14
-
Catalina 10.15
-
Big Sur 11
-
Monterey 12
-
Ventura 13
-
In this page, you can configure how the agent behaves on the computers of the end users.

|
Notes -
|
Corporate Office Security
Corporate Office Security can be different in different companies. Some enterprises prefer a zero-trust approach, so that the location of the user does not affect the applied security mechanism. Therefore, the agent has to run always, regardless of the user's presence in the company office. With the zero-trust approach, make sure to set the Corporate Office Security option to Harmony Connect Agent should run outside and inside corporate offices.
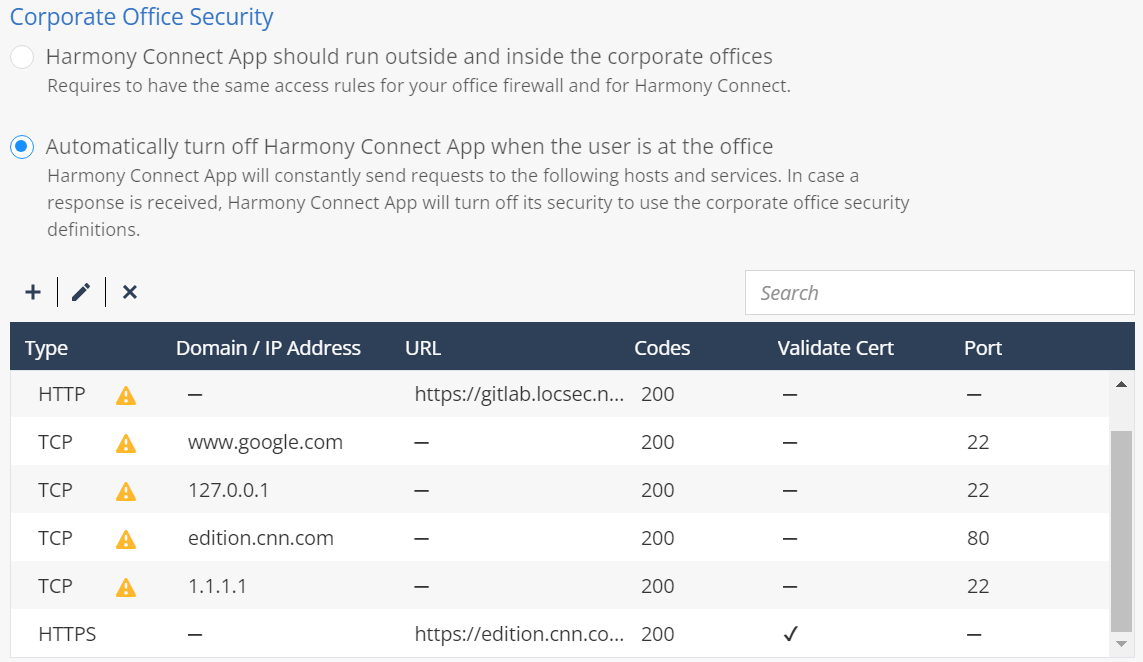
In other enterprises, administrators may want to use their existing network security when the users are at the corporate office instead of Harmony Connect security provisions. To achieve this, select Automatically turn off Harmony Connect Agent when the user is at the office and configure resources based on the IP addresses and ports that are only accessible when users are at the office. Check Point constantly polls these locations and once it identifies them, the agent changes its status to Inside Office and disables traffic tunneling.
You can allow access to the selected corporate resources only to the users who come to the corporate office, or if the administrators prefer the security definitions in the corporate offices. Then you configure the Harmony Connect Agent settings to automatically detect the physical presence of devices in the office and turn off the automatic routing to the Check Point Harmony Connect service.
Harmony Connect Agent constantly attempts to access any of the pre-defined office-only resources (not through its cloud![]() An administrator approved Harmony Connect cloud location that processes the internet and corporate traffic. service). Whenever one of these resources becomes available, Harmony Connect Agent turns off its automatic routing. As a result, the users can access the internet directly, without routing traffic into Check Point Cloud. Typically, the users have some network security solution at that corporate office, which is in charge of the security inspection.
An administrator approved Harmony Connect cloud location that processes the internet and corporate traffic. service). Whenever one of these resources becomes available, Harmony Connect Agent turns off its automatic routing. As a result, the users can access the internet directly, without routing traffic into Check Point Cloud. Typically, the users have some network security solution at that corporate office, which is in charge of the security inspection.
|
|
Note - TCP is not supported when you add a new service type. Harmony Connect continues to support the existing TCP service types but you cannot edit them. We recommend that you upgrade all TCP service types to HTTP or HTTPs service types for enhanced security. |
To configure the Corporate Office Security Settings:
-
Go to Settings > Harmony Connect Agent.
-
Select one of these options:
-
Harmony Connect Agent should run outside and inside the corporate offices - Your office firewall and Harmony Connect must have the same access rules.
-
Automatically turn off Harmony Connect Agent when the user is at the office - The Harmony Connect Agent constantly sends requests to the hosts and service specified in the table below. If a response is received, the Harmony Connect Agent turns off its security and uses the corporate office security definitions.
-
Click
 to specify the office-only resources that Harmony Connect constantly attempts to access to detect the devices location.
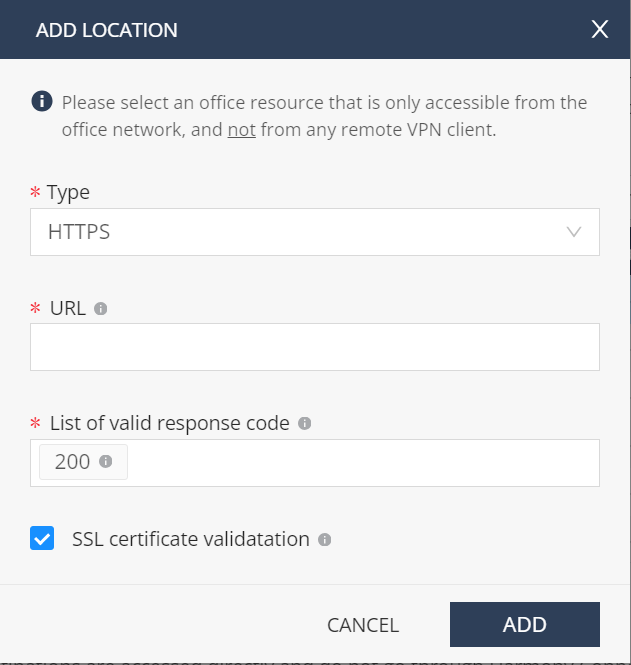
The Add Location window appears.
-
From the Type list, select the service protocol:
-
HTTP
-
HTTPS
-
ICMP
The default service type protocol is HTTPS.
-
-
For HTTP or HTTPS service type:
-
In the URL field, enter the URL. Ensure that the URL starts with the service type protocol (http or https) you specified.
-
From the List of valid response code list, select the response code. The default is 200.
-
By default, the SSL certificate validation checkbox is selected. It indicates that the URL must have a valid certificate. Otherwise, it is not considered as a office-only resource and the system does not turn off the Harmony Connect Agent.
Note - This option is available only when you select HTTPS as a service type.
-
-
For the ICMP service type, in the Domain and IP address field, enter the domian or IP address.
-
Click Add.
-
-
|
|
Notes -
|
Bypass Destinations
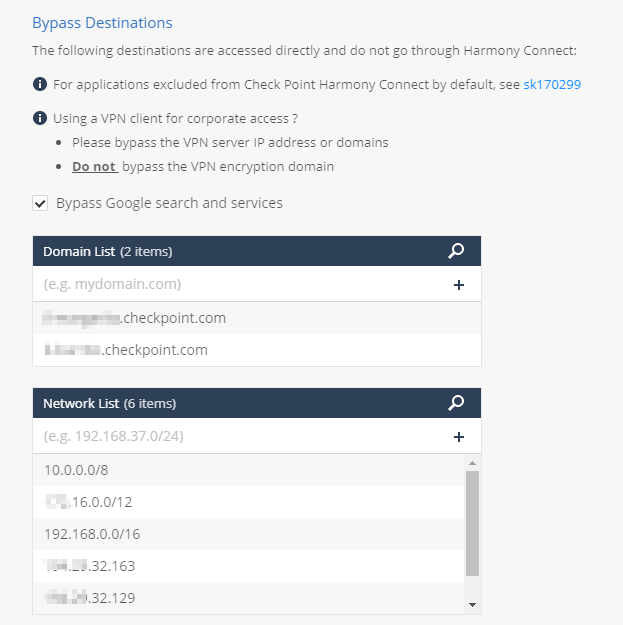
By default, Harmony Connect Agent routes all traffic through the Check Point cloud. Specify destinations which are accessed directly and do not go through Harmony Connect.
See below the examples of destinations that you may want to bypass:
-
If you use a VPN client on your computer, specify the VPN server addresses (IP address or domain name). This way you ensure that your corporate firewall allows traffic that originates from the IP addresses of your users and does not block traffic from the IP address of Check Point Cloud.
-
Some specific websites may not be reachable when you use the Harmony Connect Agent. As a solution, you can add the domain addresses of these websites to the bypass list.

Best Practice - Check Point recommends to consider the websites exclusion from SSL Inspection instead of destination bypass in these settings.
-
If you need to access some resources on your internal network directly, exclude the subnet address of your network. By default, Check Point has the common class-3 IP ranges that typically belong to private networks, such as 192.168.0.0/16 , in the bypass destination list.
Refer to sk170299 to see additional applications that do not participate with the IPsec tunnels of Harmony Connect by default.
|
|
Note - To enhance security and offer protection against the TunnelCrack diversion attack, if a device acquires an external IP address that is outside the following range (specified in the RFC 1918 portal), then the bypass destinations are ignored and all the traffic is routed through Check Point cloud for the device. For more information, see sk181792.
|
To configure the Bypass Destination settings:
Go to Settings > Harmony Connect Agent and set these parameters:
-
Domain List
-
Network List
Suspend Security by the End User
|
|
Note - You can use the Anti-tampering Manager service specific role to provide write access only to Suspend Security by the End User, Exit Agent by the End User and Uninstall Agent |
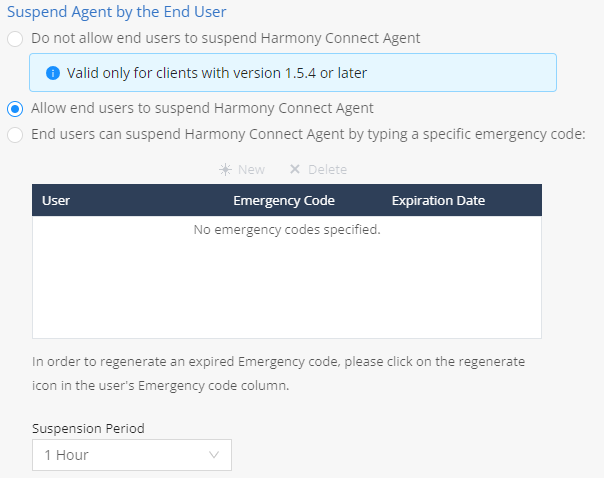
By default, users can suspend their Harmony Connect Agent protection for a few hours. However, you can either prevent all end-users from suspending the protection or allow specific users to suspend the protection after they enter the emergency code.
-
Do not allow end users to suspend Harmony Connect Agent - Prevents end-users from suspending the agent.
Note - This setting applies only to Harmony Connect Agent v1.5.4 and higher. On devices with older agents, if a end-user tries to suspend the agent, a prompt appears to enter the Emergency Code. As the Emergency Code generation is disabled, inform end-users to ignore the prompt and that suspension of the agent is not permitted.
-
Select Allow end users to suspend or exit Harmony Connect Agent - Allows end users to suspend the agent without the emergency code.
-
End users can suspend Harmony Connect Agent by typing a specific emergency code - Allows end-users to suspend the agent by entering the emergency code. The emergency code is per user.
-
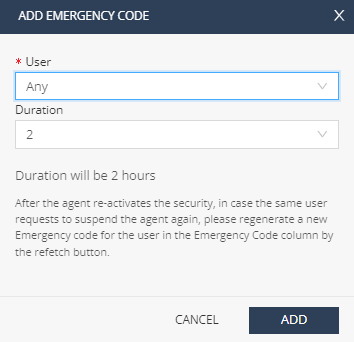
Click New.
-
In the User field, enter or select the name of a user.
-
From the Duration list, select the duration for the emergency code expiration.
-
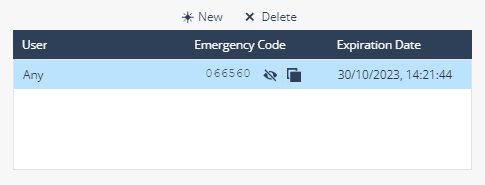
Click Add.
The system generates the emergency code for the user. After the emergency code expires, regenerate the emergency code to suspend the agent again.
-
-
From the Suspension Period list, select the duration to suspend the agent. After the duration, the agent automatically reconnects and resumes its service.
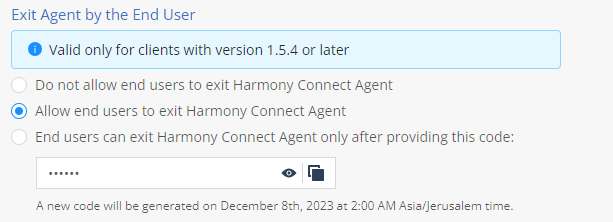
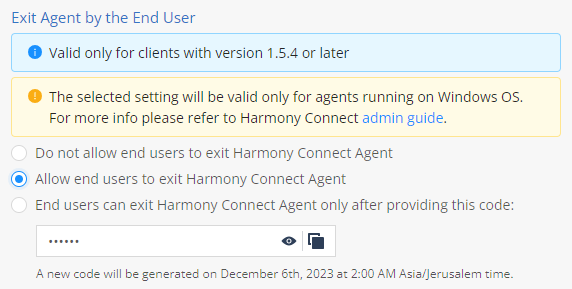
Exit Agent by the End User
You can allow or prevent end-users from exiting the agent.
|
|
Note - This setting applies only to Harmony Connect Agent v1.5.4 and higher. |
-
Do not allow end users to exit Harmony Connect Agent - Prevents end-users from exiting the agent.
-
Allow end users to exit Harmony Connect Agent - Allows end-users to exit the agent without the emergency code.
-
End users can exit Harmony Connect Agent by typing a specific emergency code - Allows end-users to exit the agent by entering the emergency code.
Note - The emergency code applies to all end-users.
Uninstall Agent
This option enables end users to uninstall the Harmony Connect Agent.
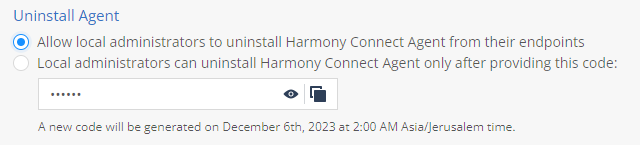
-
Allow local administrators to uninstall Harmony Connect Agent from their endpoints - Allows the local administrator of the OS to uninstall the agent on an end-user endpoint.
-
Local administrators can uninstall Harmony Connect Agent only after providing this code - Allows the local administrator of the OS to uninstall the agent on an end-user endpoint upon entering the emergency code.
Notes:
-
The emergency code applies to all end-users.
-
If you select this option, then all the settings under Exit Agent by End User apply only to Windows and the system disables the Exit option in the agent for macOS.
-
Windows
To uninstall the agent on a Windows device, follow the computer's procedure to uninstall an application.
macOS
To uninstall the agent on a macOS device:
-
Right-click the Harmony Connect.app file and click Show Package Contents.
-
Open the Contents > MacOS folder.
-
Double-click the uninstall shell script to run it or use the terminal to run it.

-
At the prompt, enter the device password and click OK to proceed.
-
If an emergency code is set, at the prompt, enter the emergency code and click OK.
The system starts to run the script. Wait until the following output is displayed that indicates that the agent is successfully uninstalled.