[In Progress]Connecting Gateways and Clusters
Connecting a Security Gateway/CloudGuard Network Security Gateway
-
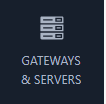
From the left navigation panel, click Gateways & Servers.
-
Click the New icon
 and select Gateway.
The Check Point Gateway properties window opens.
-
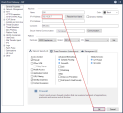
Fill in the required fields for the Check Point Security Gateway:
-
Enter name - The name for the Security Gateway.
-
IP Address
-
Automatic IPv4 address: The Security Gateway's IP address is set to an internal IP address, which is used for cloud communication over an outbound tunnel.
-
Custom IPv4 address: Configure a static IP address if it is not an SD-WAN Gateway.
You can configure the Security Gateway object in Smart-1 Cloud with a Static IP address as the main IP address (in the same way you configure when managing a Security Gateway from an on-premises Management Server).
When you configure the Security Gateway object with a Tunnel IP, management traffic, control connections, and Smart-1 Cloud tenant communicate to that main static IP address through the maas_tunnel interface.

Note - We recommend configuring the main static IP address if you have a static
IP address and it is not an SD-WAN Gateway.
This approach simplifies the configuration for functions such as UserCheck, NAT rules, and VPN configuration.
-
-
-
Click Connect in the Device field.
The Connect Device window opens.
-
In the Security Gateway type drop-down, select Appliance/Open Server or Quantum Spark.
-
Follow the on-screen instruction to connect your Security Gateway. The connection status is: Pending connection, and once the Security Gateway connects to Smart-1 Cloud, the status change to: Connected.
-
Click Next to close the Connect Device window.
-
Click OK.
If you have an existing Security Gateway configured with Tunnel IP and you want to change it to a static IP address, follow this procedure:
-
Edit the Security Gateway object in SmartConsole:
-
Open SmartConsole or Web SmartConsole.
-
Change the IP address in the Security Gateway object properties to static IP address.
-
Click OK.
-
Open the Security Gateway object again and click Test SIC Status to test SIC communication.
-
-
Click Register.
This creates a new Security Gateway object in the Service with the name that you entered.
-
Click Connect Gateway
-
For an on-premises Security Gateway, follow the instructions to complete the connection.
Note - The connection of a new Security Gateway includes two steps:
-
Connect the Security Gateway to the service.
Here, it is necessary to perform a step on the Security Gateway (according to the instructions) to connect the Gateway to the service.
When the process is finished, the status in the portal shows: Pending SIC.
-
Connect the Management to the Security Gateway.
After you connect to the service, log in to SmartConsole and start the SIC between the Management and Gateway.
The portal shows Registration complete.
-
-
For a CloudGuard Network Security Gateway:
-
Copy the Token from the Connect Gateway screen.
-
In the Security Gateway deployment template:
-
Paste the Token into the applicable field in the deployment template.
-
Complete all other fields in the template and start the deployment.
-
When the CloudGuard Security Gateway deployment completes:
-
A tunnel is established between the Security Gateway and the Smart-1 Cloud.
-
The status of the Security Gateway changes to Pending trust (SIC) establishment.
-
-
-
Connect to SmartConsole, open the new Security Gateway object, init SIC, and publish the session.
-
-

Connecting a Cluster
-
From the left navigation panel, click Gateways & Servers.
-
Click the New icon
and select Cluster.The Check Point Cluster window opens.
Note - Web SmartConsole support to configure a Security Gateway/Cluster object for Gaia OS versions R80.10 and higher.
-
Fill in the required fields:
-
Enter Name: The Cluster name.
-
IP address: The Cluster VIP IP address.
-
-
Click Connect next to Member ID 1.
The Check Point Cluster Member window opens.
-
Enter the name and IP address of Member ID 1.
Note:
-
Automatic IPv4 address: The Security Gateway's IP address is set to an internal IP address, which is used for cloud communication over an outbound tunnel.
-
Custom IPv4 address: Configure a static IP address if it is not an SD-WAN Gateway.
-
-
Click Connect below the Secure Internal Communication.
The Connect Device window opens.
-
Select the Cluster Gateway type.
-
Follow the on-screen instruction to connect the Cluster member to the Smart-1 Cloud management.
-
When the Connection Status changes to Connected, click Next.
-
Click Connect to establish Secure Internal Communication.
-
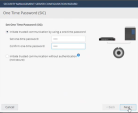
Create a One-Time Password
-
-
Click Connect next to Member ID 2.
Repeat steps 4.a-4.g for this member.
-
Navigate to the Network Management tab.
-
Click Get Interfaces > Get Interfaces With Topology.
-
Click the MaaS Tunnel interface, and in General > Network Type, select Private.
-
Finalize the topology definitions for the Cluster.
-
Click OK to create the Cluster object.
-
Install policy on the Cluster.
-
From the left navigation panel, click Gateways & Servers.
-
Click the New icon
and select Cluster.The Check Point Cluster window opens.
Note - Web SmartConsole support to configure a Security Gateway/Cluster object for Gaia OS versions R80.10 and higher.
-
Fill in the required fields:
-
Enter Name: The Cluster name.
-
IP address: The Cluster VIP IP address.
-
-
Click Connect next to Member ID 1.
The Check Point Cluster Member window opens.
-
Enter the name and IP address of Member ID 1.
Note:
-
Automatic IPv4 address: The Security Gateway's IP address is set to an internal IP address, which is used for cloud communication over an outbound tunnel.
-
Custom IPv4 address: Configure a static IP address if it is not an SD-WAN Gateway.
-
-
Click Connect below the Secure Internal Communication.
The Connect Device window opens.
-
Select Appliance/Open Server in the Cluster Gateway type.
-
Copy the Token from the Connect Device screen.
-
-
Click Connect next to Member ID 2.
Repeat steps 4.a-4.g for this member.
-
In the Security Cluster deployment template:
-
Paste the Tokens you copied from the Smart-1 Cloud portal for each member into the applicable fields in the deployment template.
-
Fill all the other fields in the template and start the deployment.
-
When the CloudGuard Network Security Gateway deployment completes:
-
A tunnel is established between the Security Gateway and the Smart-1 Cloud.
-
The status of the Security Gateway changes to Pending trust (SIC) establishment.
-
-
-
In SmartConsole or Web SmartConsole:
Follow the admin guide applicable to the solution you are deploying to configure the Cluster object and Cluster members in SmartConsole.
Notes:
-
When you enter the Cluster Virtual IP address, make sure not to give an IP address in the subnet 100.64.x.x.
-
When you add the cluster members to the cluster object, use the existing members from step 1.
-
Onboarding a new Quantum appliance using Zero Touch deployment
Run this procedure to on-board a new appliance in Zero Touch and configures it as a Security Gateway or a Cluster Member.
-
Remove your new appliance from the shipping carton, connect the power cable and turn on the appliance.
-
The light on one of the network interface ports starts blinking.
-
With a DHCP Server:
Connect the network cable to that interface port.
Your connection must lead to the environment with a working DHCP server.
-
Without a DHCP Server:
Configure one of the interfaces with the applicable networking information:
-
Connect to the command line on the appliance.
-
In the Expert mode, disable the Zero Touch DHCP:
/opt/CPzetc/bin/zetc_setlaunch 0 -
In Gaia Clish, configure the applicable IP address:
set interface <Name of Interface> onset interface <Name of Interface> ipv4-address <IPv4 Address> mask-length <Subnet Mask Length> -
In Gaia Clish, configure the applicable default route:
set static-route default nexthop gateway address 192.168.1.254 offset static-route default nexthop gateway address <IPv4 Address> on -
In Gaia Clish, configure the applicable DNS servers:
set dns primary <IPv4 Address>set dns secondary <IPv4 Address>set dns tertiary <IPv4 Address> -
In Gaia Clish, save the configuration:
save config -
Plug the network cable into that interface port.
-
-
-
Navigate to Connect Gateways page in the Smart-1 Cloud portal.
-
A card that represents your appliance appears.
This may take 2-3 minutes.
Note - If the card for your appliance does not appear, check the Service and Contract page.
-
Click the card for your appliance and enter all applicable information, then click OK.
To replace an existing Security Gateway, click the arrow near the Configure Device button.
-
Follow the instructions in the portal.
-
After the card status changes to Registration completed, you can configure your new Security Gateway in SmartConsole.
Connecting a Quantum Spark Appliance
To connect Quantum Spark to Smart-1 Cloud, follow these steps:
-
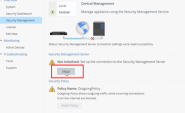
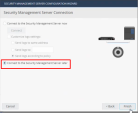
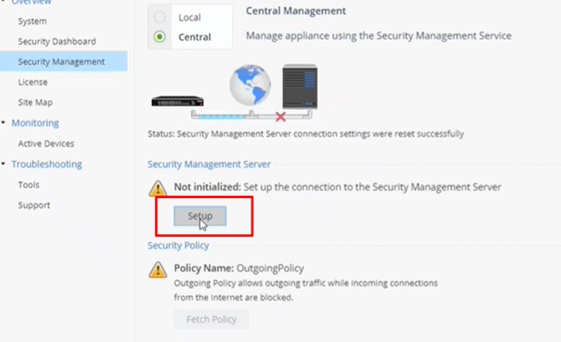
Connect to the Quantum Spark WebUI and in the Security Management tab, click Setup.
-
Check the Use Security Management service check box and click Next.
-
Click Use the Infinity Portal to generate a new authentication token and add the token.
-
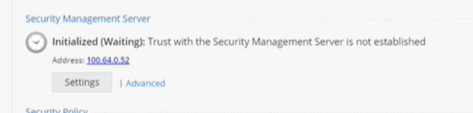
The status changes to: Connected successfully to the Security Management Server. Click Next.
-
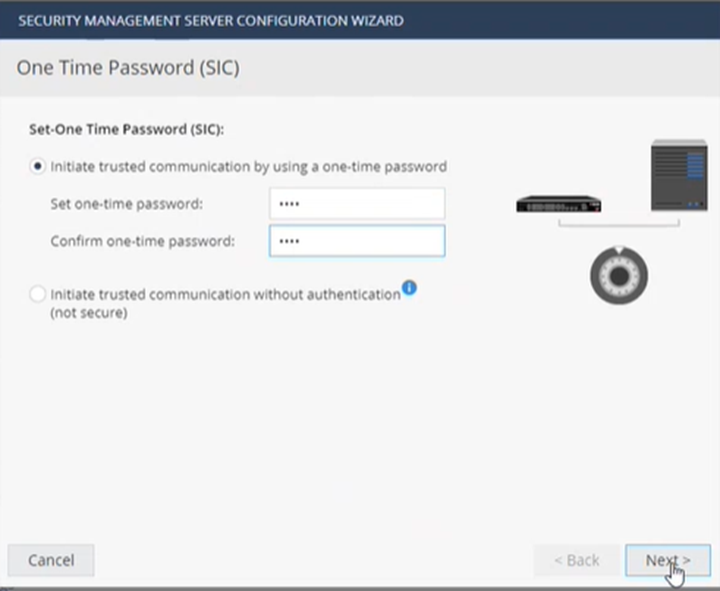
Add the one-time password and click Next:
-
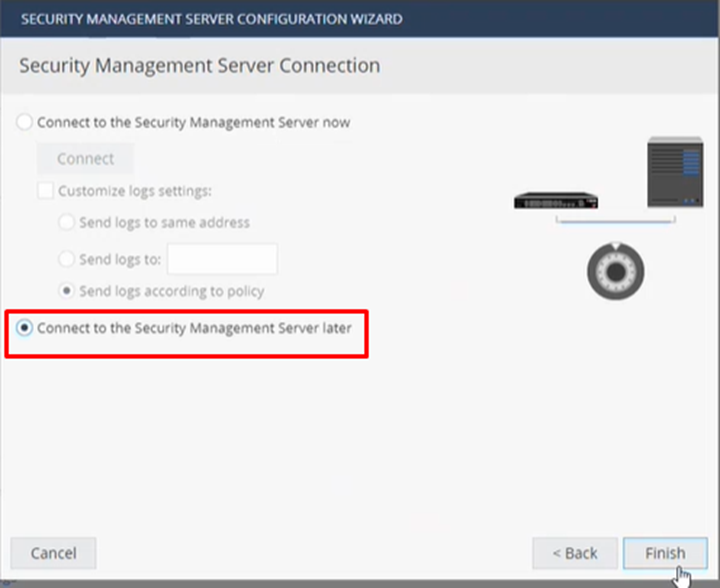
Check Connect to the Security Management Server Later and click Finish.
You can see in the WebUI that it is waiting for a connection from The Security Management.
-
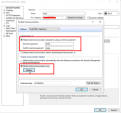
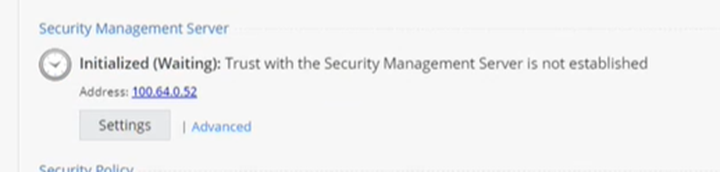
Open the Security Gateway object in SmartConsole and ensure the Hardware type is correct.
-
Enter a one-time password, check the Initiate trusted communication now check box and click Initialize.
-
Save the object in SmartConsole and publish the changes.
-
From the left navigation panel, click Gateways & Servers.
-
Click the New icon
and select Gateway or Cluster.The Check Point Gateway or Cluster window opens.
Note - The server detects if there are existing Security Gateway objects in the database.
For existing gateway objects, the server asks:
Do you want to create a new gateway object, or use an existing gateway -
Fill in the required fields for the Check Point Security Gateway:
-
Enter name - The name for the Security Gateway.
-
IP Address
-
Automatic IPv4 address: The Security Gateway's IP address is set to an internal IP address, which is used for cloud communication over an outbound tunnel.
-
Custom IPv4 address: Configure a static IP address if it is not an SD-WAN Gateway.
-
-
-
Click Connect in the Device field.
The Connect Device window opens.
-
In the Security Gateway type drop-down, select Quantum Spark.
-
Follow the on-screen instruction to connect your Security Gateway. The connection status is: Pending connection, and once the Security Gateway connects to Smart-1 Cloud, the status change to: Connected.
-
Click Next to close the Connect Device window.
-
Click OK.

Connecting a Maestro Security Group
|
|
Important - This procedure supports only Maestro Security Groups that runs R81.10 and higher versions. |
-
Smart-1 Cloud does not support Maestro Security Groups in the VSX mode.
-
The SMO Image Cloning is not supported if the Security Group R81.10 and higher contains different appliance models.
-
DAIP is not supported.
-
Automatic IP not supported with Maestro Security Group.
-
On the Maestro Orchestrator, configure the required Security Group - in Gaia Portal or Gaia Clish.
See the Quantum Maestro Getting Started Guide and the Maestro Administration Guide for your version.

Important - Write down the IP address of the Security Group. You must configure it later in Smart-1 Cloud.
-
Install the required Hotfixes on the Security Group: For details, refer to sk181495.
-
Connect to the Smart-1 Cloud Portal.
-
Add the Security Group as a new Security Gateway object:
From the left navigation panel, click Gateways & Servers.
-
Click the New icon
and select Gateway.The Check Point Gateway properties window opens.
-
Fill in the required fields for the Check Point Security Gateway:
-
Enter name - The name for the Security Gateway.
-
IP Address - In the IP address field, enter the IP address of the Security Group as you configured it on the Maestro Orchestrator (this is the IP address assigned to the Mgmt interface of the Security Group).
-
-
Click Connect in the Device field.
The Connect Device window opens.
-
In the Security Gateway type drop-down, select Appliance/Open Server.
-
Follow the on-screen instruction to connect your Security Group. The connection status is: Pending connection, and once the Security Group connects to Smart-1 Cloud, the status change to: Connected.
-
Click Next to close the Connect Device window.
-
Click OK.
-
Before you add a new Security Group Member to the Security Group that is connected to Smart-1 Cloud (while the "
maas_tunnel" is active and working), you must install the required Hotfixes on that Security Group Member. -
To examine the status of the Smart-1 Cloud connection on all Security Group Members:
-
In Gaia gClish:
-
Connect to the command line on the Security Group.
-
If your default shell is the Expert mode, go to Gaia gClish:
gclish -
Run:
show security-gateway cloud-mgmt-service
-
-
In the Expert mode:
-
Connect to the command line on the Security Group.
-
If your default shell is Gaia gClish, go to the Expert mode:
expert -
Run:
maas status
-
-
-
To disable the Smart-1 Cloud connection on the Security Group:
-
In Gaia gClish:
-
Connect to the command line on the Security Group.
-
If your default shell is the Expert mode, go to Gaia gClish:
gclish -
Run:
set security-gateway cloud-mgmt-service off
-
-
In the Expert mode:
-
Connect to the command line on the Security Group.
-
If your default shell is Gaia gClish, go to the Expert mode:
expert -
Run:
maas off
-
-
-
To enable the Smart-1 Cloud connection on the Security Group again:
-
In Gaia gClish:
-
Connect to the command line on the Security Group.
-
If your default shell is the Expert mode, go to Gaia gClish:
gclish -
Run:
set security-gateway cloud-mgmt-service on
-
-
In the Expert mode:
-
Connect to the command line on the Security Group.
-
If your default shell is Gaia gClish, go to the Expert mode:
expert -
Run:
maas on
-
-