Deactivating Office 365 Mail
-
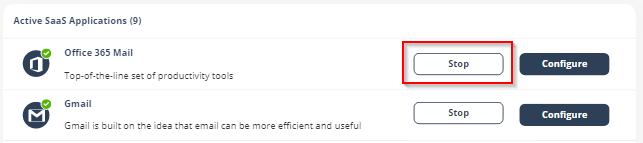
Navigate to Security Settings > SaaS Applications.
-
Click Stop for Office 365 Mail.
-
In the confirmation pop-up, click Stop.
Upon deactivation,
To complete the deactivation process:
-
If you receive Office 365 protection was successfully uninstalled message, follow these steps.
-
Sign in to the Microsoft Entra ID (formerly Azure AD) portal as a Global Administrator or a Co-Administrator.
-
In the left menu, select Enterprise applications.
The All applications pane opens and displays a list of the applications in your Microsoft Entra ID (formerly Azure AD) tenant.
-
Select the
-
In the Manage section of the left menu, select Properties.
-
At the top of the Properties pane, select Delete, and then select Yes to confirm you want to delete the application from your Microsoft Entra ID (formerly Azure AD) tenant.
-
Review the Reported message destinations settings (

Note - When you initially connected Email Security to Microsoft 365, these settings were modified to ensure reported emails appear in the Email Security Administrator Portal. For more information, see Reported Phishing Emails.
-
-
If you receive
-
 In the Exchange Admin Center
-
Sign in to the Exchange Admin Center as the Global Administrator or a Co-Administrator.
-
In the left menu, select Mail Flow, and then Rules.
-
Delete all entries that start with
-
In Journal Rules, click on the value shown right after the text "Send undeliverable journal reports to:”.
-
In the dialog box, clear the value (or set a new value as your preference) and click Save.
-
-
In the left menu, select Mail Flow, and then Connectors.
-
Delete all entries that start with
-
In the left menu, select Protection, and then Connection Filter.
-
Select the Default entry and click Edit.
-
In the dialog box that appears, click Connection filtering, and remove the IP address relevant to your data region in the Allowed IP Address list:
-
If your data residency is in the United States:
-
35.174.145.124
-
3.214.204.181
-
-
If your data residency is in Europe:
-
52.212.19.177
-
52.17.62.50
-
-
If your data residency is in Australia :
-
13.211.69.231
-
3.105.224.60
-
-
If your data residency is in Canada:
-
15.222.110.90
-
52.60.189.48
-
-
If your data residency is in India :
-
3.109.187.96
-
43.204.62.184
-
-
If your data residency is in United Arab Emirates :
-
3.29.194.128
-
3.29.194.144
-
-
If your data residency is in United Kingdom :
-
13.42.61.32
-
13.42.61.47
-
-
-
Click Save.
-
-
In the Microsoft Entra ID (formerly Azure AD) portal
-
Sign in to the Microsoft Entra ID (formerly Azure AD) portal as the Global Administrator or a Co-Administrator.
-
In the left menu, select Enterprise applications.
The All applications pane opens and displays a list of the applications in your Microsoft Entra ID (formerly Azure AD) tenant.
-
Select the
-
In the Manage section of the left menu, select Properties.
-
At the top of the Properties pane, select Delete, and then select Yes to confirm you want to delete the application from your Microsoft Entra ID (formerly Azure AD) tenant.
-
-
After a certain period of time your tenant-related data will be deleted. If you want the data to be deleted immediately, contact Check Point Support.