Activating Office 365 Mail

To protect Office 365 Mail, Email Security uses Check Point Cloud Security Platform - Emails V2 enterprise application that is automatically added to your Microsoft Azure cloud platform.

As a prerequisite to activate Office 365, make sure you have these:

  • You are a user with Privileged Role Administrator role or higher permissions, or you have the credentials of such a user.

  • You have the minimum supported SaaS license. See Minimum License Requirements to Activate SaaS Applications.

  • If some mailboxes are on an on-premises Exchange server, see Appendix H: Activating Office 365 Mail in Hybrid Environments.

  • When onboarding, Email Security assumes the Exchange Administrator role. To ensure successful onboarding, do not change the default permissions assigned to the Exchange Administrator role.

    Note - If you modify the default permissions of Exchange RBAC role groups or the Microsoft Entra ID role permissions assigned to the Exchange Administrator role, the system does not support onboarding, and it may fail.

  • If another Check Point tenant is currently connected to your Microsoft 365 account, all security settings in the Check Point Portal override the existing tenant’s settings and become the only protection for that Microsoft 365 account. If you want to manage different parts of the Microsoft 365 account from two tenants, see Connecting Multiple Portals to the Same Microsoft 365 Account.

00:00:

00:05: This tutorial demonstrates how to activate protection for Office 365 Mail with

00:10: Check Point Email Security.

00:12: Log in to the Check Point Portal and access the Email Security Administration Portal.

00:18: If you already have a contract purchase from checkpoint, click already have a contract

00:22: and follow the on-screen instructions to add your user Center account.

00:26: Otherwise click Start free trial by default.

00:29: The trial is for 14 days and you can access all the features.

00:34: To start using Email Security,

00:36: click "Let's Get Started" on the Welcome page that appears.

00:40: Click Start for Office 365.

00:43: Select the mode of installation. Checkpoint recommends using

00:47: automatic mode, which provides better maintenance management and a

00:51: smoother user experience.

00:53: To limit the license consumption and protection to a specific group of users select

00:57: this checkbox. If you want to protect all users in your organization,

01:01: you can ignore this step.

01:05: Accept the terms of service and click okay.

01:08: You are now redirected to the Microsoft login page, follow the on-screen

01:12: instructions and sign in with Microsoft Global administrator credentials.

01:17: Review the permissions requested by checkpoint and click accept to Grant the

01:21: permissions.

01:22: To protect all the users in the organization.

01:24: Select all organization.

01:27: To protect a specific group of users, select specific group and enter

01:31: the group name and then click okay.

01:34: If you need to connect multiple Email Security tenants to the same Microsoft 365

01:39: account, select the checkbox and click OK.

01:41: If this option is not available, please contact Check Point Support.

01:46: After activating Office 365 Mail,

01:49: Email Security runs in Learning Mode and performs several calibration processes. By

01:54: default,

01:55: it takes up to 48 hours to learn the user behavior and adjust the phishing detection

02:01: security engines depending on the number of protected mailboxes and the volume of

02:05: their emails.

02:06: Please note that In Learning Mode, no email will be flagged as phishing or spam.

02:11: Email Security automatically exits Learning Mode after the calibration processes

02:16: are complete and you will immediately start seeing the detections. Note that at this

02:21: point, Email Security only monitors your emails for threats and does not quarantine

02:26: them.

02:27: To prevent threats, you must change the policy protection mode to do that.

02:31: Go to policy.

02:33: Expand Office 365, male and click the default threat protection

02:37: policy ru.

02:39: Select the policy protection mode as prevent inline.

02:43: Choose the desired workflows for the different types of detections.

02:47: Scroll down and click Save and Apply.

02:49: Now, that the policy protection mode is changed to Prevent (Inline), Email Security

02:54: starts taking preventive actions.

To activate Office 365 Mail:

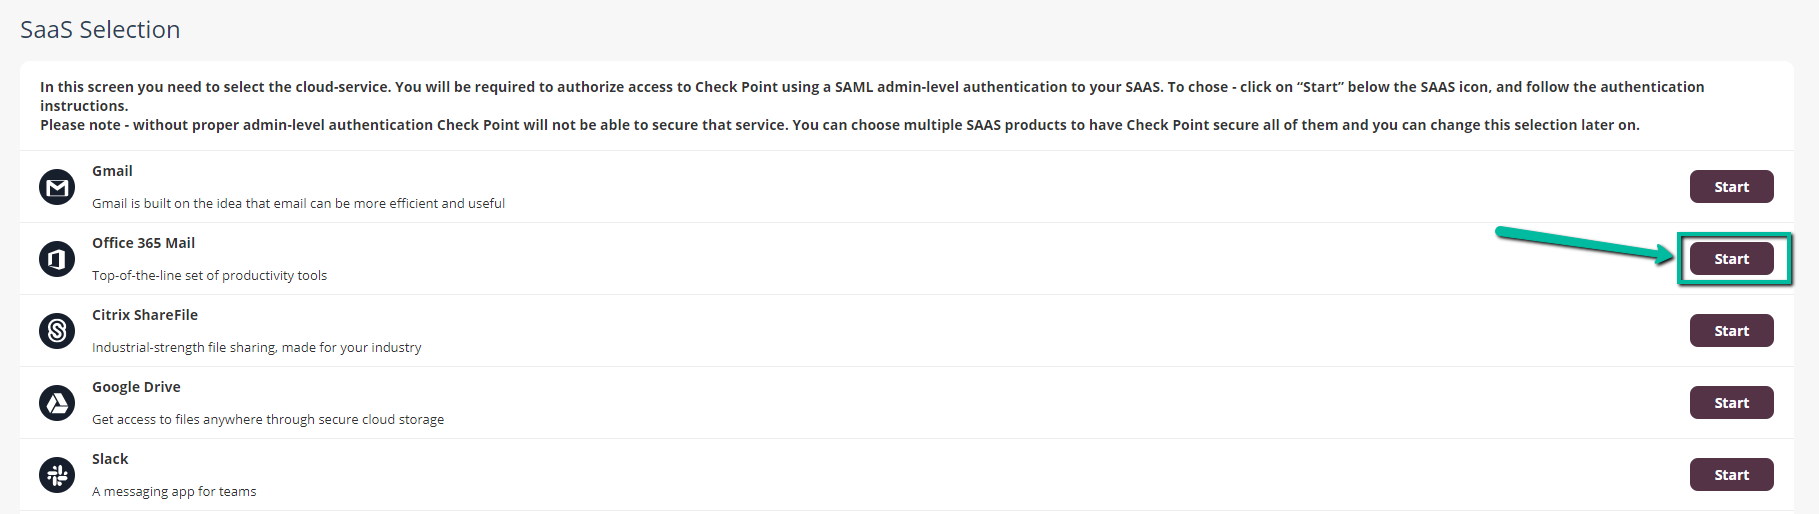
  1. From the Getting Started Wizard click Start for Office 365 Mail.

    or

    Navigate to Security Settings > SaaS Applications and click Start for Office 365 Mail.

  2. Select the mode of operation for Office 365.

    • Automatic mode

      Email Security performs the necessary configurations to your Microsoft 365 environment and operates in Monitor only mode. For more information, see Automatic Mode Onboarding - Microsoft 365 Footprint.

    • Manual mode

      You must manually perform the necessary configurations in the Office 365 Admin Exchange Center before you bind the application to your Office 365 email account and every time you add or edit the security policy associated with Office 365 emails. For more information, see Appendix A: Check Point Manual Integration with Office 365.

    Notes :

    • If you are a FedRAMP customer, manual onboardiing is not supported for GCC High and DoD licenses in Azure Government.

    • Check Point recommends using Automatic mode, allowing better maintenance, management, and smoother user experience. Before using the Manual mode, contact Check Point Support to help resolve any issues raised with the Automatic mode for onboarding.

  3. In the Office 365 License section, select the required license type:

    • GCC High / DoD - For Azure Government

    • Office 365 / GCC (Excluding GCC High) - For Azure Commercial

  4. Enable the I Accept Terms Of Service checkbox.

  5. If you need to limit the license consumption and protection to a specific group of users or to connect multiple Email Security tenants to the same Microsoft 365 account:

    1. Enable the Restrict inspection to a specific group (Groups Filter) checkbox and click OK.

    2. In the Office 365 Authorization window that appears, sign in with a user with Privileged Role Administrator role or higher permissions.

      In the authorization screen, click Accept to grant permissions for Check Point Cloud Security Platform - Emails V2 application.

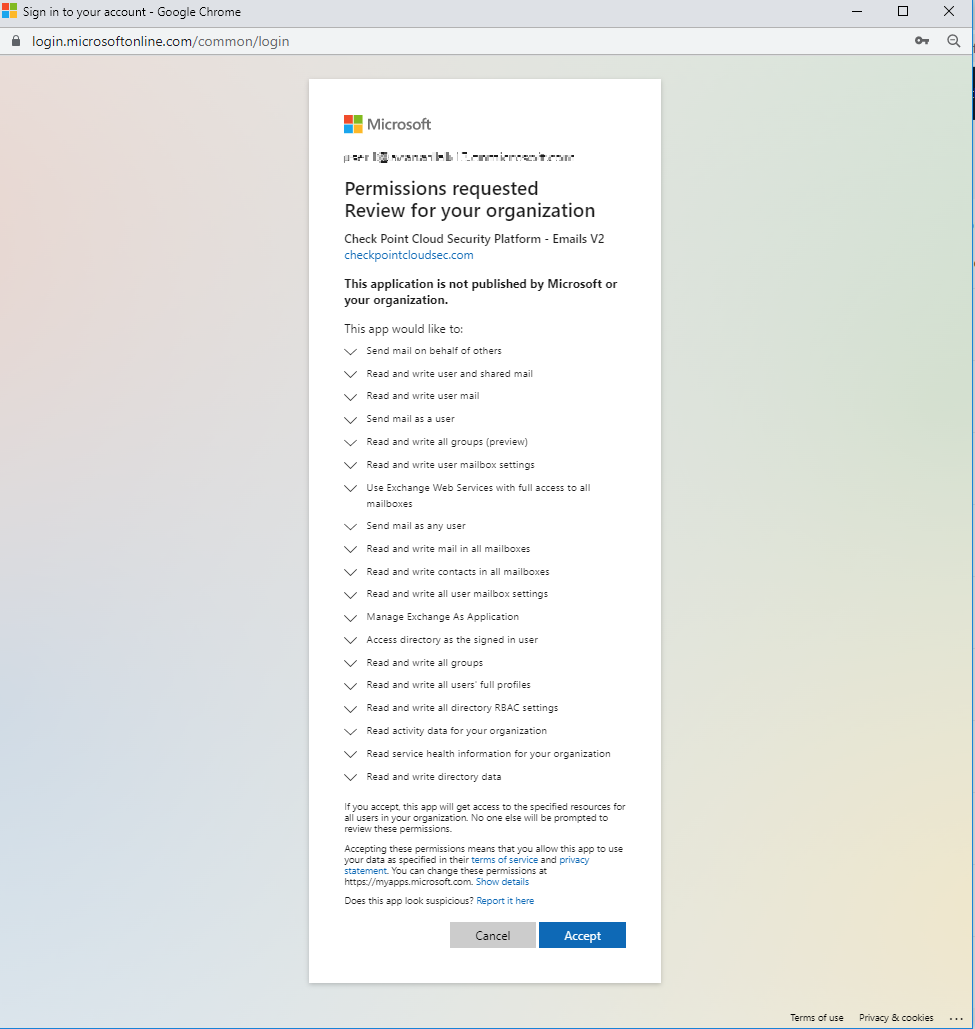
      To view the permitted IP addresses to access this application, see Appendix I: Permitted IP Addresses to access the Check Point Azure Application.

    3. In the Office 365 Mail - Group Selection pop-up, select Specific group.

    4. Enter the group name you need to protect with Email Security.

      Notes:

      • The group name must have an associated email address.

      • Email Security supports these groups for group filtering:

        • Assigned Membership:

          • Microsoft 365 Group

          • Mail-enabled Security Group

          • Distribution List

        • Dynamic Membership:

          • Microsoft 365 Group

    5. If you need to connect multiple Email Security tenants to the same Microsoft 365 account, enable the Multiple portals will be connected to this Office 365 account checkbox.

      Caution - Before you enable the checkbox, see Connecting Multiple Portals to the Same Microsoft 365 Account.
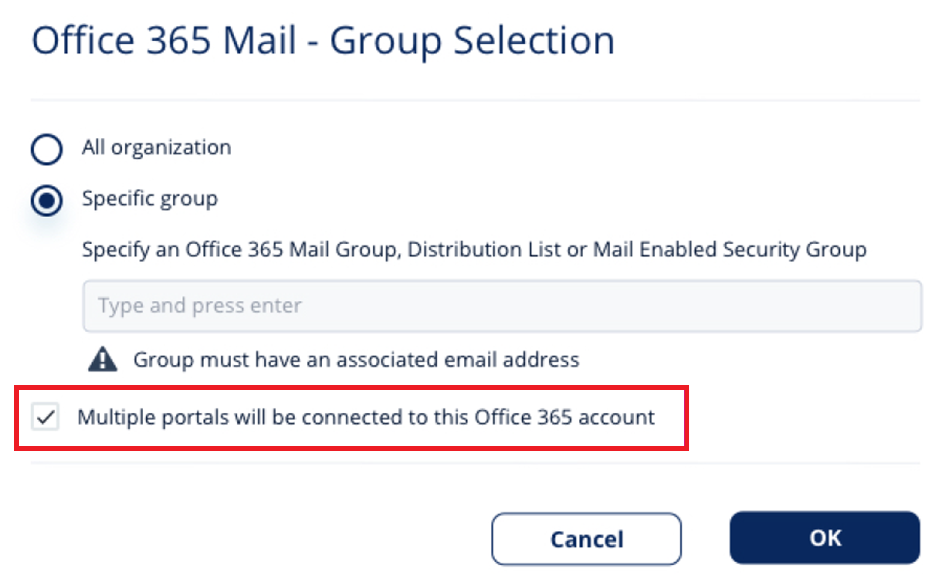
    6. Click OK.

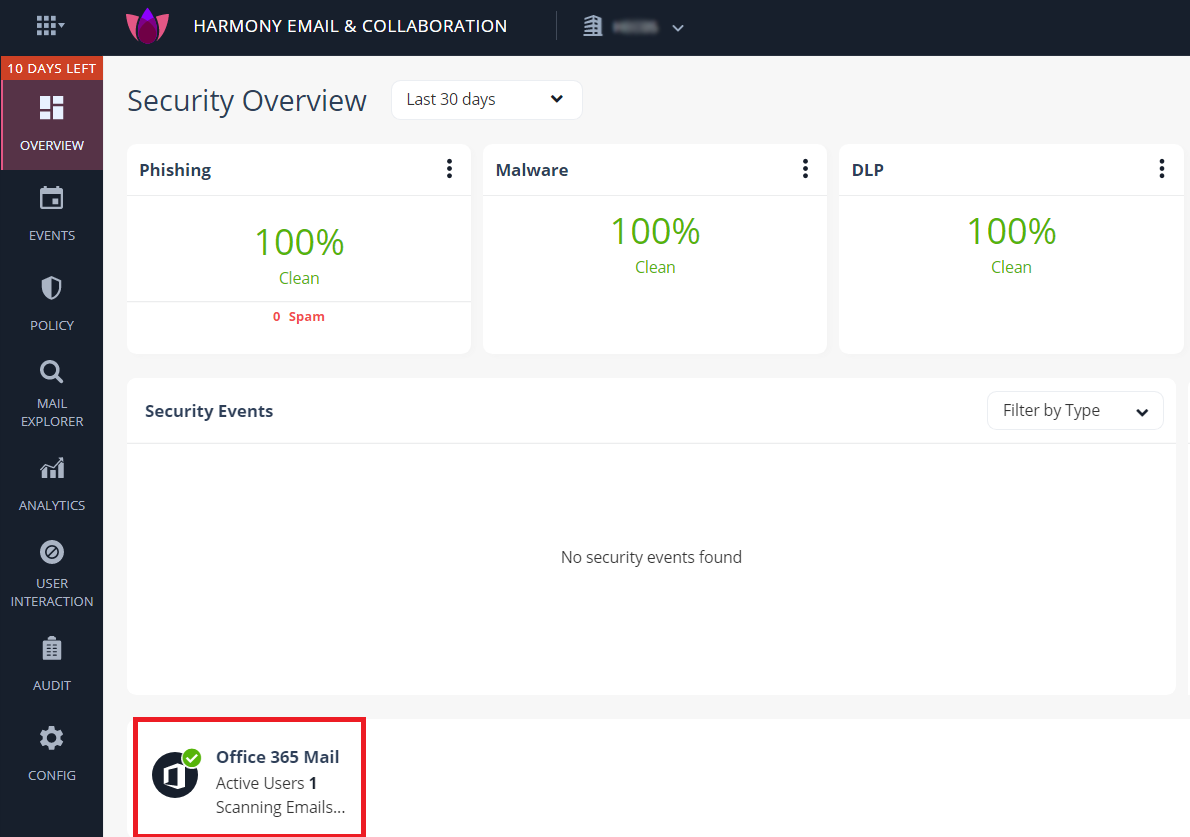
Now, the Office 365 Mail SaaS is enabled and monitoring begins immediately.

Note - To scan auto-forwarded messages through Microsoft 365, contact Check Point Support.

Note - By default, Monitor only mode is assigned for all the SaaS applications you connect to. This allows you to immediately see the value that Email Security brings as it recognizes security incidents that occurred before on your SaaS platform. To configure email protection, see Threat Detection Policy.