Activating Google Workspace (Gmail and Google Drive)
Prerequisites
To activate Google Workspace, you must have these:
-
You have the Administrator access to activate Google Workspace.
-
Additional Google Workspace license to integrate with Harmony Email & Collaboration. (Integration is not supported for clients on the free G-Suite license tiers.)
-
You have the minimum supported SaaS license. See Minimum License Requirements to Activate SaaS Applications.
-
If you use GCDS (Google Cloud Directory Sync) to synchronize your user groups on-premises and in the cloud, before activating Google Workspace, you must create exclusion rules for these user groups.
-
check_point_inline_policy
-
check_point_inline_outgoing_policy
-
check_point_monitor_policy
-
check_point_monitor_outgoing_policy
For more information, see User Groups.
-
By default, the Google Chrome browser authenticates the signed-in Chrome user in Google Workspace instead of a selected account. To see if you are signed in to Google Chrome, look for the user name in the browser's top-right corner.
Possible workarounds:
-
Perform the Google Workspace activation using a non-Chrome browser.
-
Sign out (switch to Guest) any logged-in Chrome user before you continue.
While onboarding Google Workspace (Gmail / Google Drive), Harmony Email & Collaboration creates a service user (cloud-sec-av@[domain]) in the root organizational unit.
Before onboarding, make sure that these settings are selected in your Google Admin console.
-
Go to Authentication Settings of the root organizational unit and check these settings.
-
The Allow users to turn on 2-Step Verification check-box is selected.
-
If the Only security key option is selected, do not select the Don’t allow users to generate security codes option.
-
|
|
Notes: If the Authentication Settings are not supported, onboarding fails. To resolve this issue, do one of these.
|
Activating Gmail
To activate Gmail:
-
Navigate to Security Settings > SaaS Applications.
-
Click Start for Gmail.
-
Select the mode of operation:
-
Automatic mode
Harmony Email & Collaboration performs the necessary configurations to your Google Workspace environment and operates in Monitor only mode.
-
Manual mode
You must manually configure the necessary settings in the Google Admin Console before linking the application to your Gmail account and every time you add or edit the security policy associated with emails.

Note - Check Point recommends using Automatic mode for better maintenance and management and a smoother user experience. Before using the Manual mode, contact Check Point Support to help resolve any issues raised with the Automatic mode for onboarding.
-
-
Enable the I Accept Terms Of Service checkbox and click OK.
-
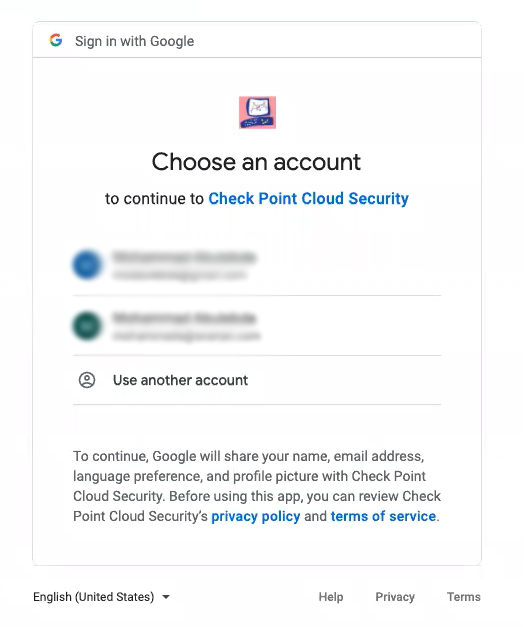
In the Google Workspace window that appears, sign in with Google administrator credentials.
-
After successful authentication, you will be redirected to the Harmony Email & Collaboration application installation page.
Click Admin Install.
-
In the Admin install pop-up that appears, click Continue.
-
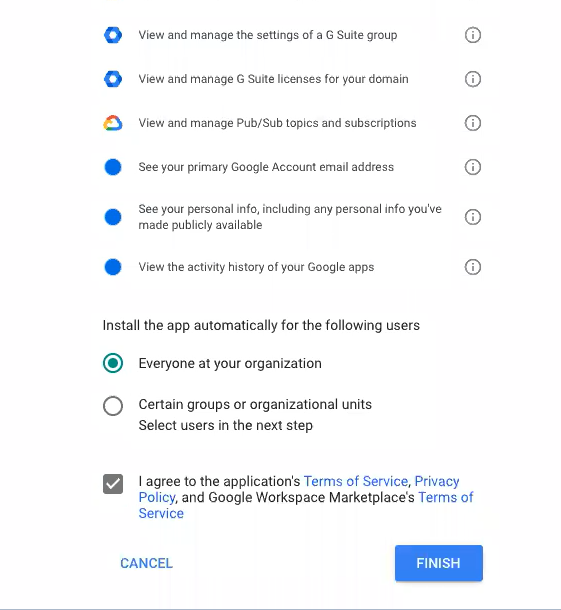
Review the permissions requested by Harmony Email & Collaboration application. Select Everyone at your organization, accept the terms of services, and click Finish.
-
In the confirmation pop-up that appears after the Harmony Email & Collaboration application completes the installation, click Done.
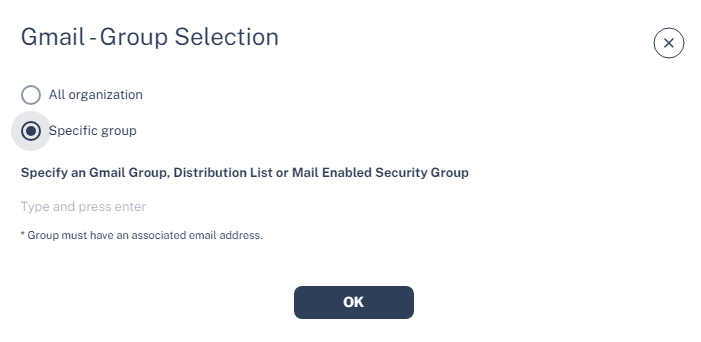
Gmail - Group Selection pop-up that appears.
-
To protect all users in your organization, select All Organization and click OK.
-
To protect specific users in your organization, select Specific group, enter the group name and click OK.

Note - The group name must have an associated email address.
If you selected Automatic mode of operation, Harmony Email & Collaboration enables the Gmail SaaS application and starts monitoring for security events.
If you selected Manual mode of operation, you need to make additional changes to integrate Google Gmail with Harmony Email & Collaboration.
Activating Google Drive
To activate Google Drive:
-
Navigate to Security Settings > SaaS Applications.
-
Click Start for Google Drive.
-
Log in to the Google Workspace Marketplace using your Google administrator credentials.
-
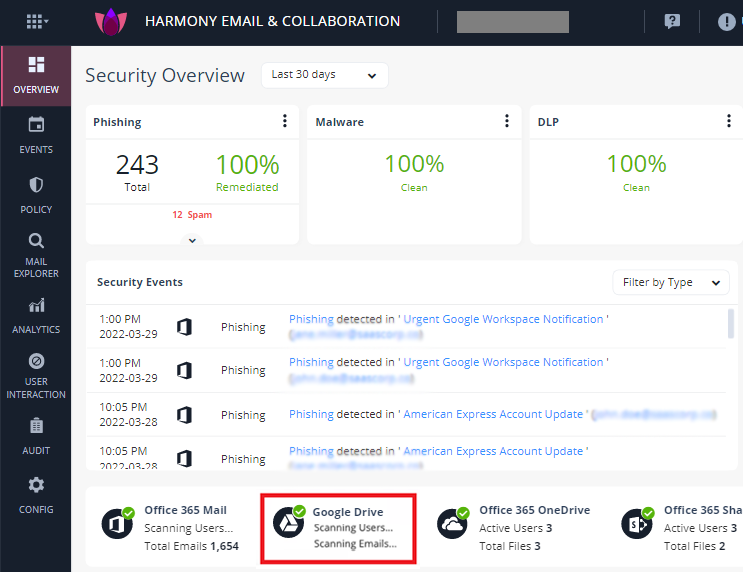
If the Check Point Cloud Security app is already installed from Google Workspace Marketplace, after successful authentication, Harmony Email & Collaboration starts scanning the Google Drive of users.
If not, continue from steps 3 in Activating Gmail.
|
|
Note - After activating Google Drive, Harmony Email & Collaboration performs retroactive scan of its content. For more information, see Onboarding Next Steps. |
For more details about automatic configuration on Google Workspace, see Google Workspace Footprint.
Google Workspace Footprint
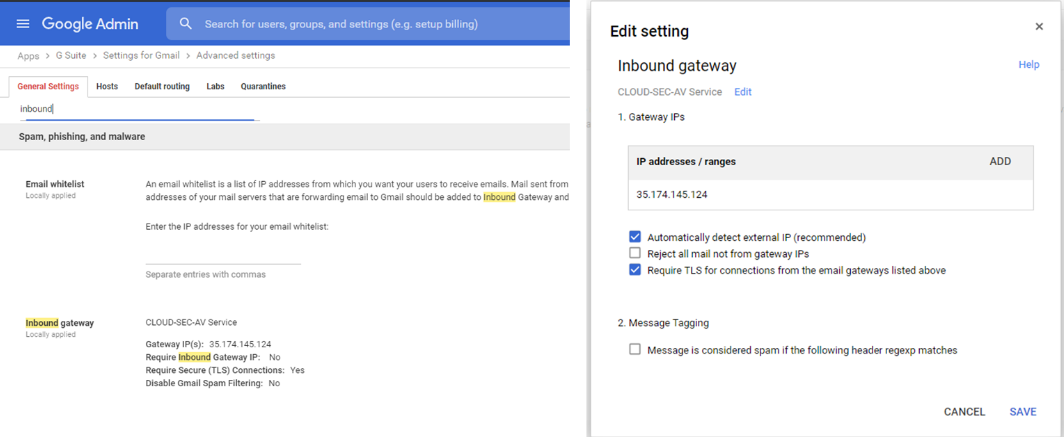
After Activating Google Workspace (Gmail and Google Drive), Harmony Email & Collaboration automatically creates a Super Admin, host (mail route), inbound gateway, SMTP relay service, two user groups, and four content compliance rules.
Super Admin
While installing the Check Point Cloud Security app, a new Super Admin user account is created in your Google Admin console.
The Super Admin user has an email address in the cloud-sec-av@[domain] format and is sometimes referred to as the Check Point Service User.
This user requires a Gmail license. For more details about the Super Admin role, see Pre-built administrator roles.
What is the Super Admin User Used For?
Harmony Email & Collaboration uses Super Admin user to perform tasks that cannot be accomplished with the Google APIs.
Harmony Email & Collaboration uses Super Admin user to do these tasks:
-
To connect with Google Workspace and create User Groups, Host, Inbound Gateway, SMTP Relay Service, and Content Compliance Rules.
-
To enable different artifacts that allow DLP inspection of outgoing emails in Protect (Inline) policy mode.
-
To do maintenance activities from time to time, primarily to optimize support case handling.
-
To take actions on files uploaded to Google Drive that do not have an owner. For more information, see Google Drive Permissions Changes.
-
To support new features in the future.
Super Admin Security
The password of the Super Admin contains 43 random characters, a mix of lower case letters, upper case letters, and digits. The password is safely stored in AWS Key Management Service (AWS KMS).
Also, Check Point recommends to enable Multi-Factor Authentication (MFA) to enhance security for this account.
Changing the Google Application Role
After successfully onboarding the Google Workspace SaaS application to Harmony Email & Collaboration, the administrator can change the role assigned to the Check Point application. To do that:
-
Sign in to your Google Admin console with an account with super administrator privileges.
-
Create a custom admin role. For more information, see Google Documentation.
-
Assign these privileges to the role:
-
In the Admin console privileges:
-
Assign Settings privilege to Gmail.
-
Assign Groups privilege.
-
-
In the Admin API privilege, assign Groups privilege.
-
-
Search for the Cloud-Sec-AV Service Admin role and do these:
-
Unassign the Super Admin role. For more information, see Google Documentation.
-
Assign the custom admin role created in step 2. For more information, see Google Documentation.
-
User Groups
After activating Google Workspace, Harmony Email & Collaboration automatically creates these user groups.
-
check_point_inline_policy
-
check_point_inline_outgoing_policy
-
check_point_monitor_policy
-
check_point_monitor_outgoing_policy
Host
Harmony Email & Collaboration automatically creates a host (aka mail route) in your Google Admin console. You can see the host from the Google Admin Console under Apps > G Suite > Settings for Gmail > Hosts.
|
|
Note - By default, the Required mail to be transmitted via a secure (TLS) connection (Recommended) checkbox is selected. To disable it, contact Check Point Support. |

Inbound Gateway
Harmony Email & Collaboration automatically creates an Inbound gateway. You can see the inbound gateway from the Google Admin console under Apps > G Suite > Settings for Gmail > Advanced Settings.
SMTP Relay Service
Harmony Email & Collaboration automatically creates an SMTP relay service. You can see the SMTP relay service from your Google Admin console under Apps > G Suite > Settings for Gmail > Advanced Settings.

Content Compliance Rules
Harmony Email & Collaboration automatically creates three Content Compliance Rules. You can review the content compliance rules from your Google Admin console under Apps > G Suite > Settings for Gmail > Advanced Settings. The rules are called:
-
[tenantname]_monitor_ei
-
[tenantname]_monitor_ii
-
[tenantname]_monitor_eo
-
[tenantname]_inline_ei
where ei stands for incoming traffic, ii stands for internal traffic, and eo stands for outgoing traffic.
Note - The [tenantname]_inline_ei rule gets created when the Protect (Inline) mode is enabled. If you remove the Protect (Inline) mode for users in Harmony Email & Collaboration, the Content Compliance Rule remains in the Google Admin console but the content of the user group check_point_inline_rule gets updated to reflect that no users are protected in this mode.
Google Drive Permissions Changes
Depending on the Google Drive policy configured by the administrator, Harmony Email & Collaboration takes action (quarantine, remove permissions) on the files uploaded to Google Drive.
Harmony Email & Collaboration uses different users to take these actions depending on whether the Drive containing the file has an owner.
-
If Google Drive has an owner, Harmony Email & Collaboration takes the action on behalf of the owner.
-
If Google Drive does not have an owner, Harmony Email & Collaboration follows this procedure:
-
Harmony Email & Collaboration adds the Super Admin user as an owner of the Drive.
-
Harmony Email & Collaboration uses the Super Admin user to take the necessary action on the file.
-
Harmony Email & Collaboration removes the Super Admin user from being the owner of the Drive.
-


