
SAML Configuration for JumpCloud
-
Log in to the Avanan
Administrator Portal.
-
In the SAML
SSO URL field, click
 to copy the SAML
SSO URL.
to copy the SAML
SSO URL.
-
In the SAML
SSO URL field, click
-
Log in to the JumpCloud Administrator Portal.
-
Go to Applications and click
 .
.
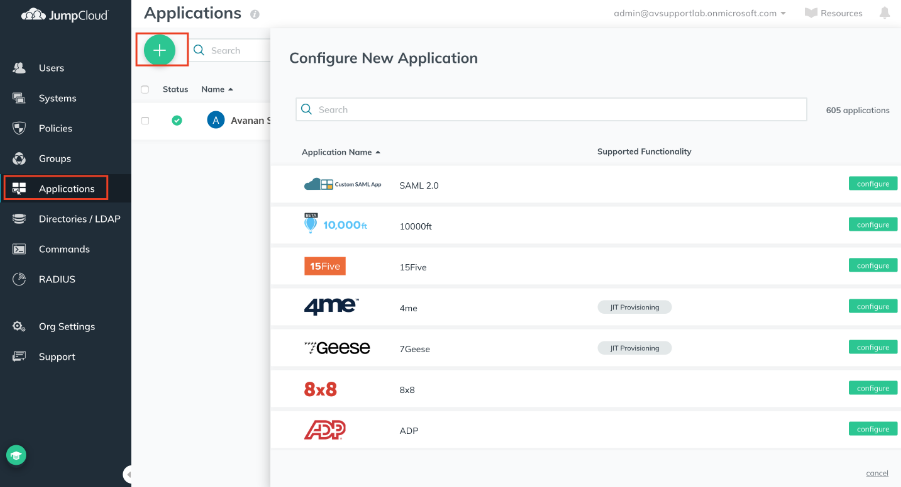
The Configure New Application window appears.
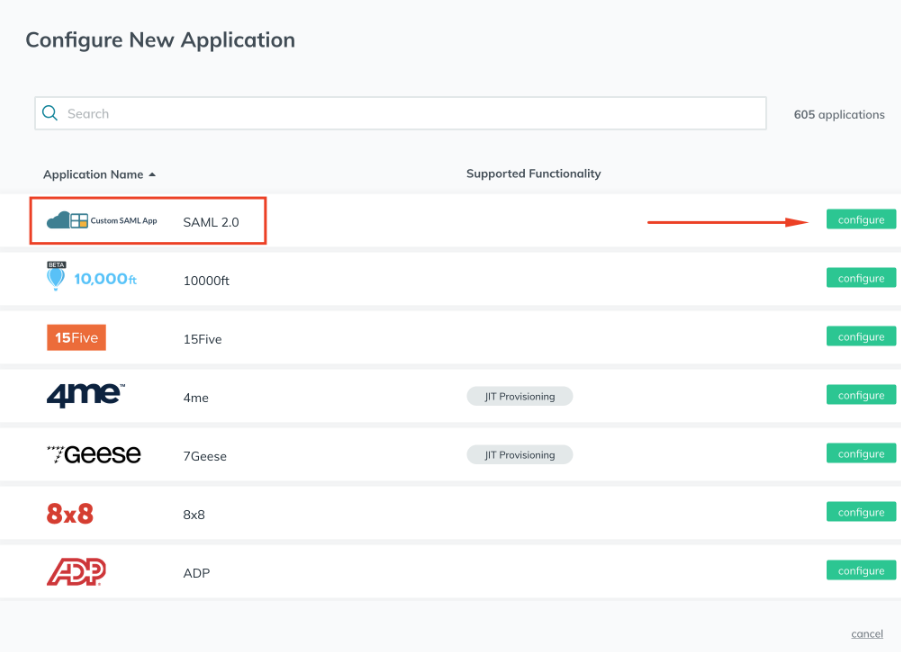
-
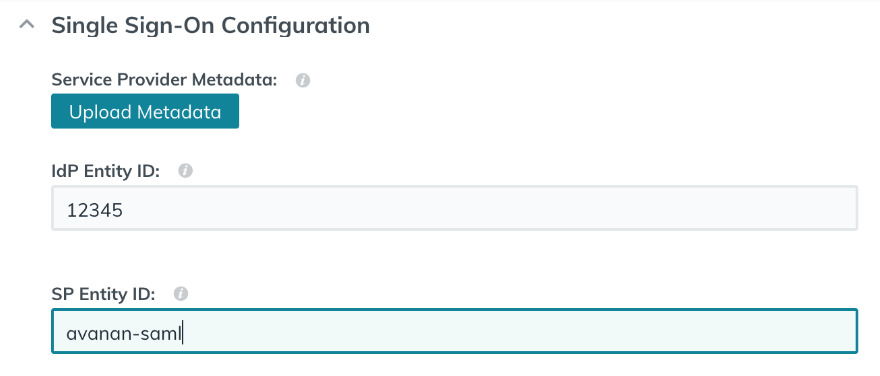
Specify these:
IdP Entity ID
SP Entity ID - Paste the url copied in step 1.b.
-
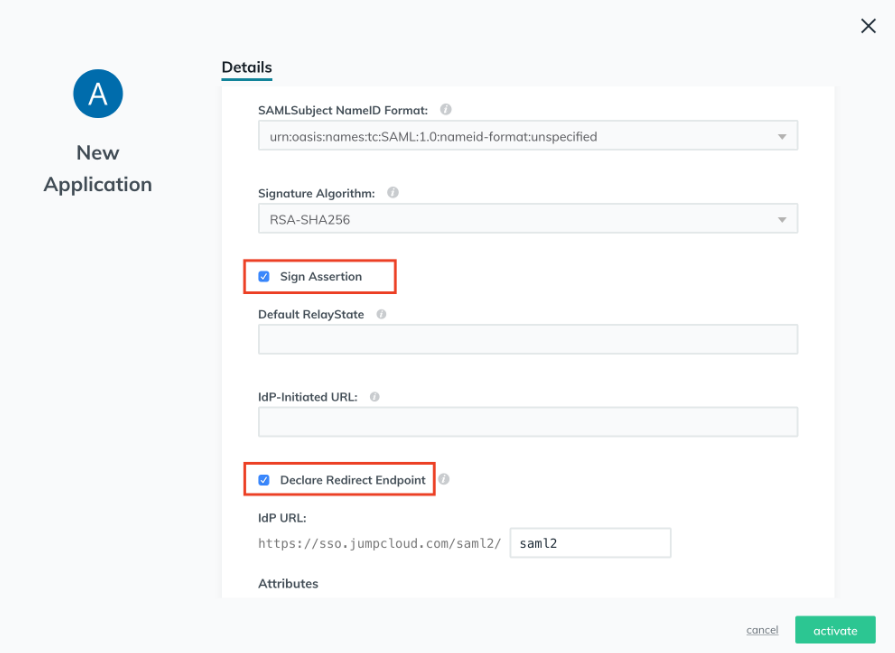
Select these checkboxes:
Sign Assertion
Declare Redirect Endpoint
-
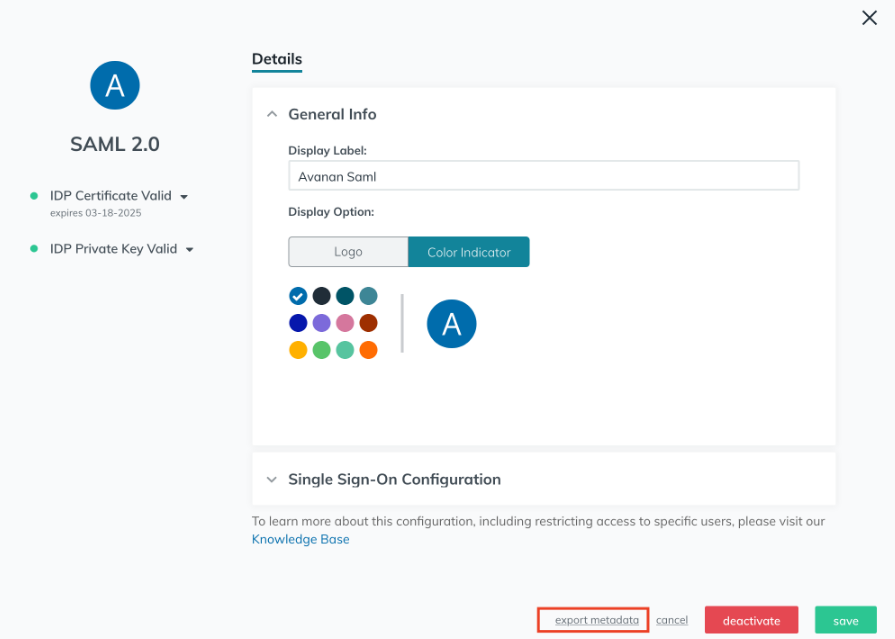
Click export metadata.
-
Go to Applications and click
-
Log in to the Avanan
Administrator Portal.
-
Go to System Settings > Settings and click Configure SAML.
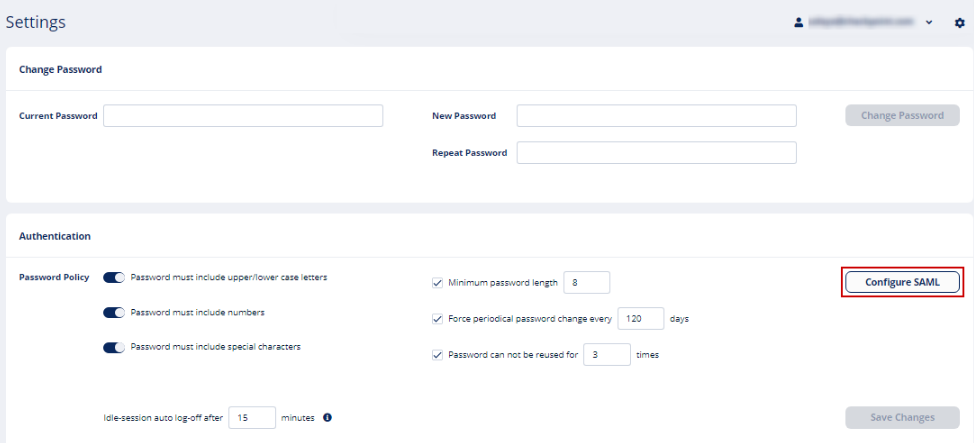
The Configure SAML window appears.

-
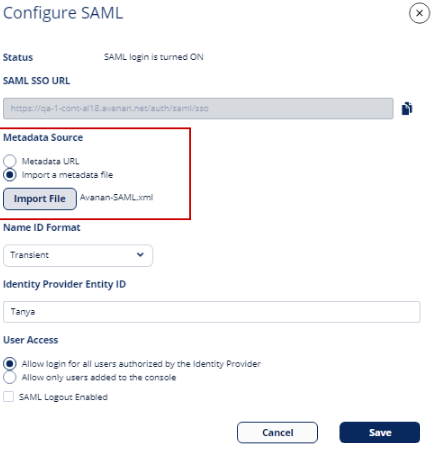
In the Metadata Source field, select Import a metadata file and upload the XML file downloaded in step 2.k.
-
Go to System Settings > Settings and click Configure SAML.
-
To assign users to the newly created JumpCloud application, log in to the JumpCloud Administrator Portal.
-
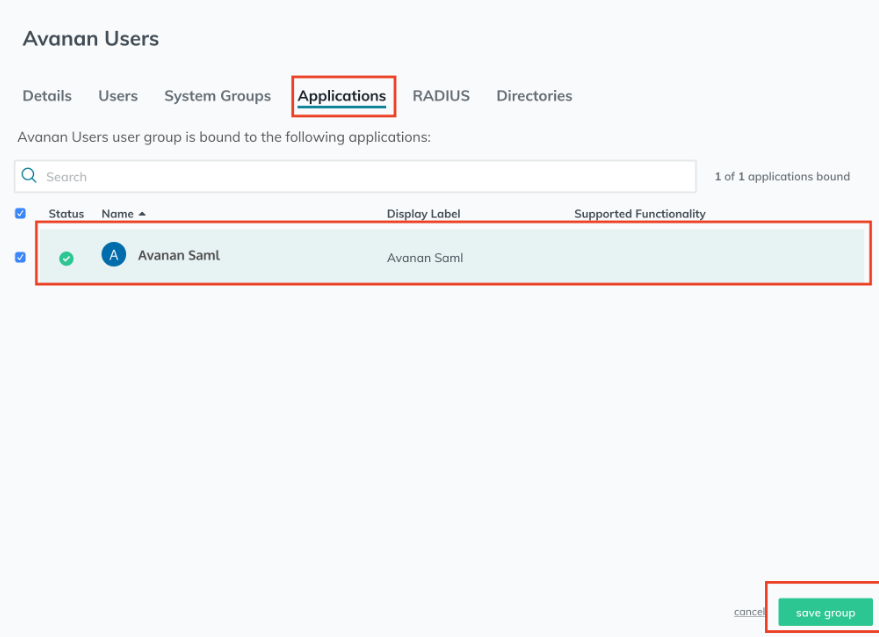
From the edit group window, click Applications and select the newly created application.
-
From the edit group window, click Applications and select the newly created application.
You are now able to login to the Avanan Administrator Portal with SAML.
For more information, see https://jumpcloud.com/support.