
Events
In the Events page, you can search for specific events, filter events that represent the most critical tasks, manual actions, and more.
You can see security events for these SaaS applications:
-
Citrix ShareFile
-
Box
Accessing the Events
To access the Events page:
-
Access the Avanan Administrator Portal.
-
From the left navigation panel, click Events.
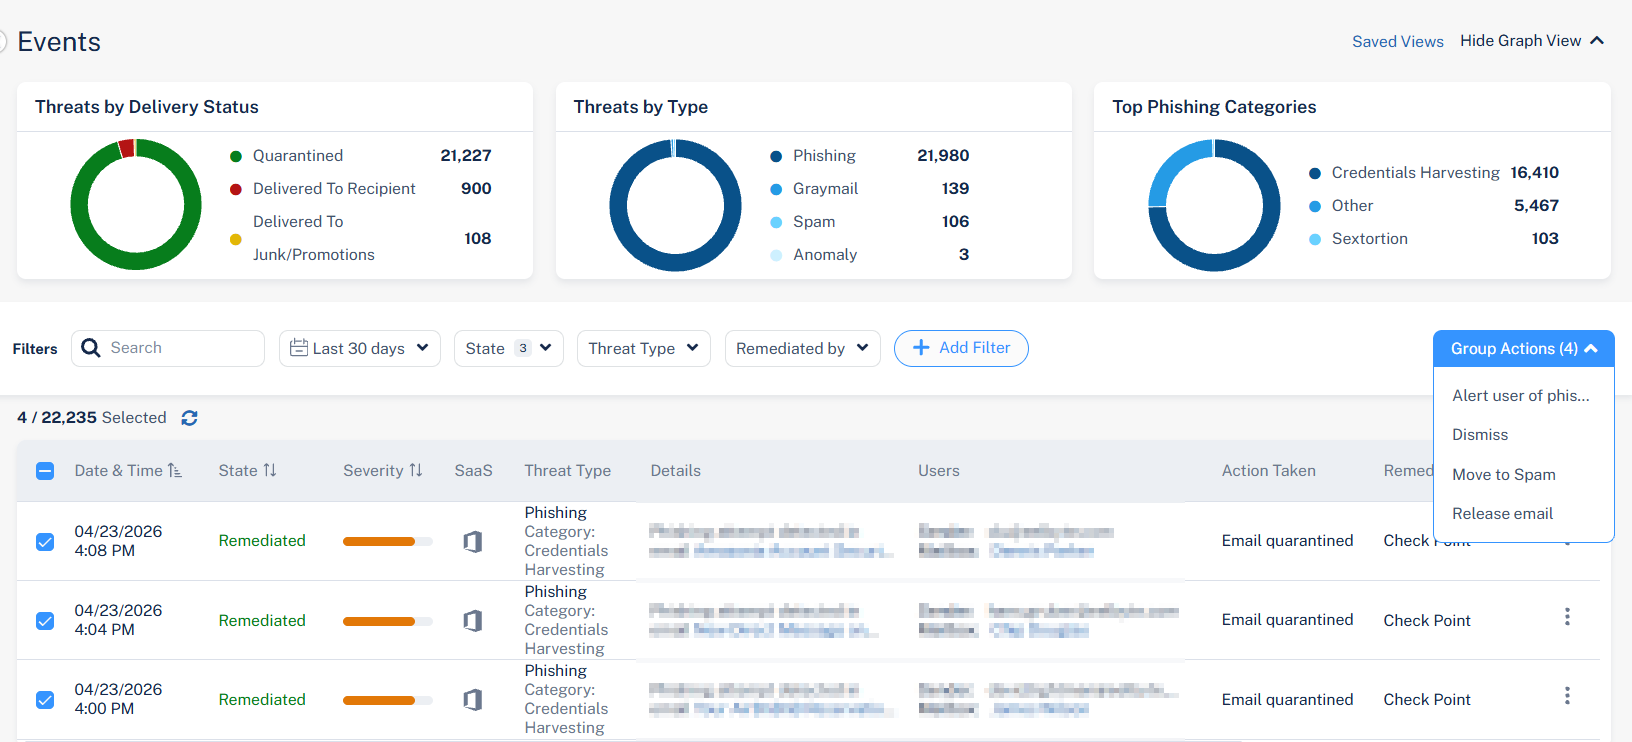
Events Table
The Events table has these columns:
| Events Table Column Name | Description |
|---|---|
| Date & Time | The time at which the event was generated. |
| State |
|
| Severity | Severity of the security event.
|
| SaaS | The SaaS application the event was triggered in. |
| Threat Type |
|
| Details | Information about the event. |
| User | The users involved in the event. Examples:
|
| Action Taken | The action that was taken to remediate the event. |
| Remediated By |
|
| Notes | Shows the notes associated with the security event. See Adding a Note to a Security Event. |
Filtering the Events
To filter the list of events, do one of these:
-
Click on the relevant sections in the charts above the table.
-
Use the built-in filters for the different fields, including the free text search for strings across all fields.
-
To add a new filter, click Add Filter and select the required filter.
-
To clear the filters, click Clear Filters.
Acting on Events
Administrators can take actions on different event types. For example, if the event is about a phishing email that made it through to the user's mailbox, the administrator can quarantine the email.
To take action on a single event, click the  icon for the event from the last column of the table and select the required action.
To take action on multiple events, select the relevant events, click Groups Actions and select the required action.
You can apply bulk actions to a maximum of 20000 events at a time in the Events page.
Dismissing Events
Sometimes, the administrators need to remove an event from the open events list.
To do that, do one of these:
-
To dismiss a single event, click the
icon for the event from the last column of the table and select Dismiss. -
To dismiss multiple events, select the relevant events, click Groups Actions and select Dismiss.
The dismissed events are shown in the Security Checkup report.
To view the dismissed events, under filters, select Dismissed from the State field.
Managing Views
Departments with responsibilities related to email security are comprised of different teams and different roles, each often interested in a different set of security events.
Administrators can create multiple views which are a combination of filters in the Events screen for filtering the relevant events. Each administrator can set a different view to be presented by default.
To add a new View:
-
Go to Events.
-
Using filters, set the criteria for filtering the relevant events.
-
Click Save as from the top left side of the Events screen.
-
In the Save View window that appears, enter the required View Name.
-
Click Save.
If an administrator adds (or deletes) a View, it gets added (or deleted) for all the administrators.
To select a saved View:
-
Go to Events.
-
Click Saved views from the top right side of the Events screen.
-
In the Saved Views window that appears, select the required view.
-
Click Close.
-
To edit a View, select the View, change the required filters, and click Save from the top left side of the Events screen.
-
After saving, the View gets updated for all the administrators.
To set a default View:
-
Click Saved views from the top right side of the Events screen.
-
In the Saved Views window that appears, click the Star icon next to the relevant view.
-
Click Close.
The default view selected is relevant only to the administrator that set it. Each administrator can select a different default View.
Adding a Note to a Security Event
To add a note to a security event:
-
Go to Events.
-
In the Events table, click the
icon next to the Notes tab for the event you want to add note. -
Click Add Notes.
-
In the Security events note pop-up, enter the required details.

-
Click Save.