|
|
|
In This Section: |
This app includes Check Point Upload IOC AR action. This action uploads the specified IOCs and their metadata to the configured destination machine in csv format.
Enter the IOC details on the action HTML form. Refer to the table below.
Input |
Required |
Description |
|---|---|---|
Type |
Yes |
Indicator type. Supported Values:
|
Input Type |
Yes |
Type of input. Supported Values:
|
Value |
Yes |
Valid value, based on the selected “Type” of the indicator. Based on the “Input Type” selected, you can provide a field name or a direct value. |
Severity |
No |
Severity of the indicator. Based on the “Input Type” selected, you can provide a field name or direct value. Supported Values: low, medium, high, critical Default: high |
Confidence |
No |
Confidence of the indicator. Based on the “Input Type” selected, you can provide a field name or a direct value. Supported Values: low, medium, high Default: high |
Comment |
No |
Comment for the indicator. Based on the “Input Type” selected, you can provide a field name or a direct value. Default: “Splunk reported IOC” Note - A comment cannot contain these characters: \n , ! # . |
Product |
Yes |
Check Point Software Blade that processes the indicator. Supported Values:
Note - MD5 can only be processed by the Anti-Virus Software Blade. |
Expiration Time (in minutes) |
No |
Expiration time of the indicator in minutes. Default: 86400 minutes |
Server |
Yes |
Server group where you want to upload the file. These are the groups you configured in the configuration page. The file is uploaded on all the servers of the selected group. |
This action maintains the list of IOCs and its metadata in the KV Store. This metadata also includes the expiration time.
To delete expired IOCs, this app contains a checkpoint_kvstore_update_search saved search which is set to run at 12:00 PM and 12:00 AM by default. You can modify this schedule as needed.
To execute this action automatically, associate it to the correlation searches. You can also manually push events to the notable index and then invoke it from the Incident Review dashboard of the Splunk Enterprise Security App.
To use the alert action, you must first define the search according to your use case.
Use Case example:
You receive threat feeds from various platforms in Splunk under the “threat” index. As these are known threats, you want to upload them to the Check Point Security Gateway to take appropriate actions.
This is the search query:
index=”threat” sourcetype=”ip:threats” | table ioc_name, ioc_value, confidence, ioc_severity, ioc_comment
The search should output only one type of indicator. You must create a search for each supported indicator type.
To invoke the action automatically, these fields are mandatory in the output events:
When you associate the action to the correlation search, you must provide these fields as input.
You must create a correlation search for each search query you create. For more information on how to create a correlation search, go here.
When you define the correlation search, you can select which Adaptive Response actions you want to perform when the search criteria is met.
In Saved mode, the action is invoked automatically.
To use Saved mode:
You can now find the incidents generated in the Incident Review dashboard and the status of the associated actions:
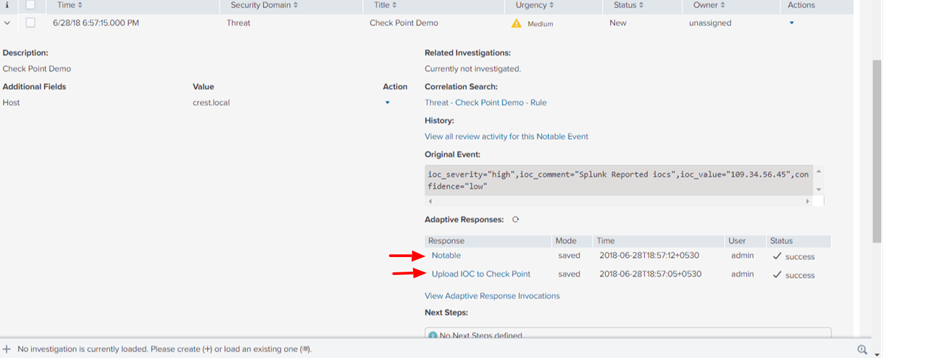
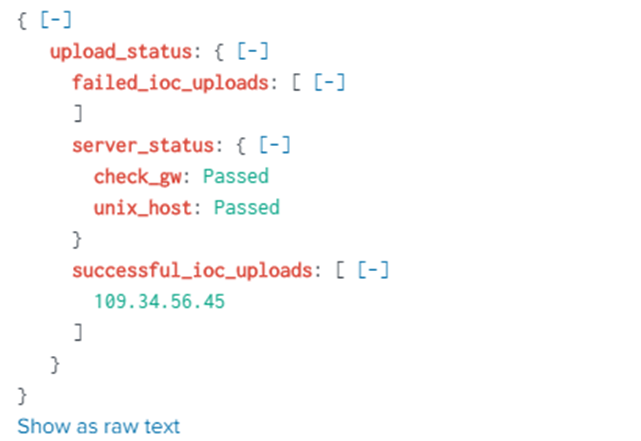
When you click Upload IOC to Check Point, you can drill down to see these details:
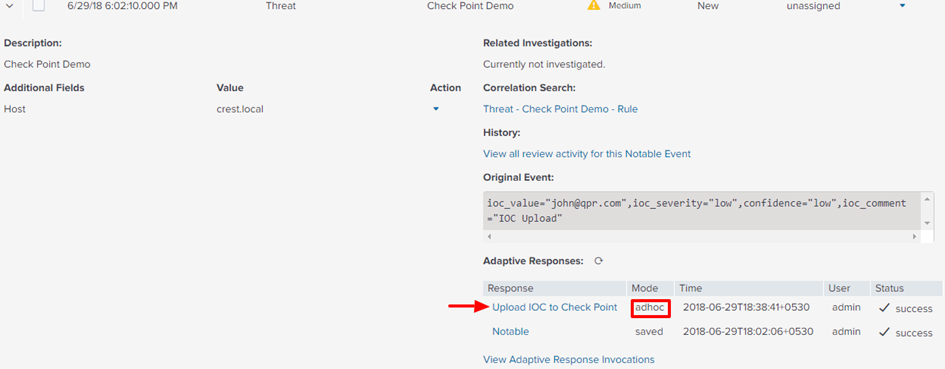
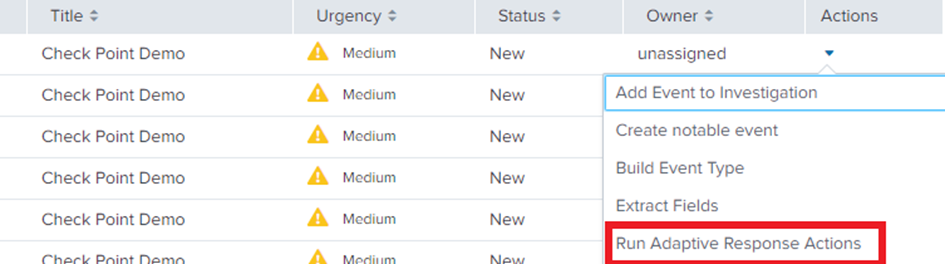
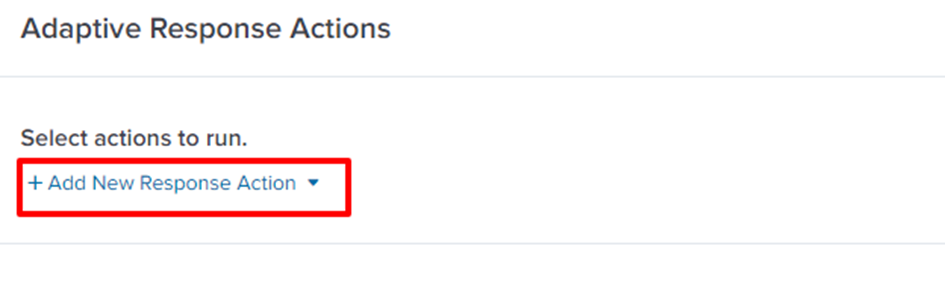
In Ad Hoc mode, the action is invoked manually.
To use Ad Hoc mode:
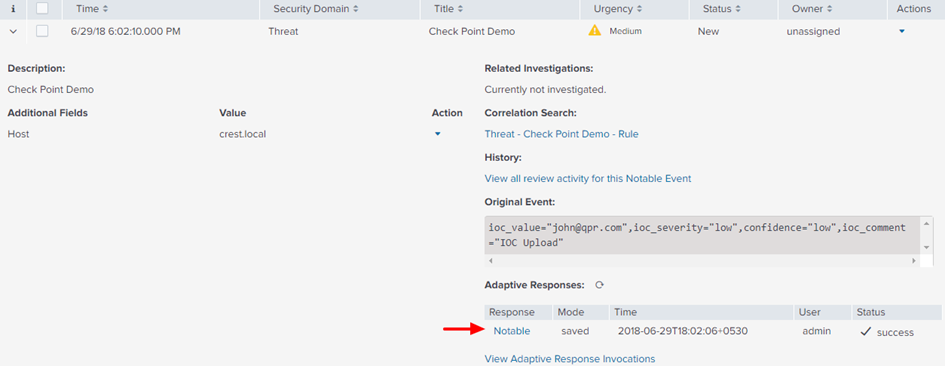
For action, select Notable and enter the details. This creates notable events and incidents in the Incident Review dashboard of Splunk Enterprise Security.
You can now find the incidents generated in the Incident Review dashboard and the status of the associated actions.
To invoke the action manually:

Splunk displays this message: "Upload IOC to Check Point has been dispatched. Check the status of the action in the notable event details."