

In This Section: |
Connect the appliance to a power source and turn on the appliance. When the appliance is ready, you can do the First Time Configuration Wizard to configure it.
To start the appliance:
For 5600, 5800, and 5900 - Connect the power cable(s) to the power supply unit(s) in the rear panel. You will have two power cables only if you purchased an optional dual redundant hot-swappable power supply.
The appliance turns on.
In 5600, 5800, and 5900 appliances with two power supply units installed:
|
Note - When a power supply unit is not connected to the outlet or is taken out of the appliance, an alarm sounds continuously. It will continue to beep until power is restored (cord or power supply unit is replaced) or the alarm is turned off. To turn off the alarm, press the red Alarm off button on the rear panel of the appliance. |
In 5800 and 5900 appliances only:
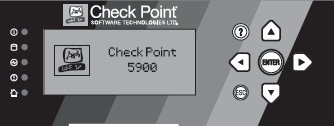
The status of the appliance shows on the LCD screen as it initializes and boots up. The appliance is ready for use when the LCD screen shows the model number.

The 5000 Appliances comes with different software images. Select the software image you want to use.
Reverting to a software image takes a few minutes. To follow progress and see when the appliance is ready, connect to the appliance using a serial console.
For more about software images, see the 5000 Appliances home page.
5900 appliances support two storage devices. By default, a 5900 appliance is shipped with only one storage device.
For appliances with two storage devices, the appliance uses RAID1 mirroring across both storage devices. This lets the appliance continue to work if there is a storage device failure.
The mirror rebuild is automatic. Both storage devices must be the same type.
First Boot Up on a 5900 Appliance with Two Storage Devices
At first boot up, wait a few hours to let the storage devices fully synchronize. If you reboot the appliance before the storage devices are synchronized, the synchronization starts again from scratch at the next boot.
To monitor the RAID status of the storage devices from the CLI:
raid_diagnostic The output shows data about the RAID and storage devices, with the percent of synchronization completed.
DiskID 0 is the top storage device. DiskID 1 is the bottom storage device.
After you install a second storage device, the RAID State (in the VolumeID line) shows DEGRADED (this indicates that the drives are not synchronized). The DiskID:0 state shows ONLINE and the DiskID:1 state shows INITIALIZING.
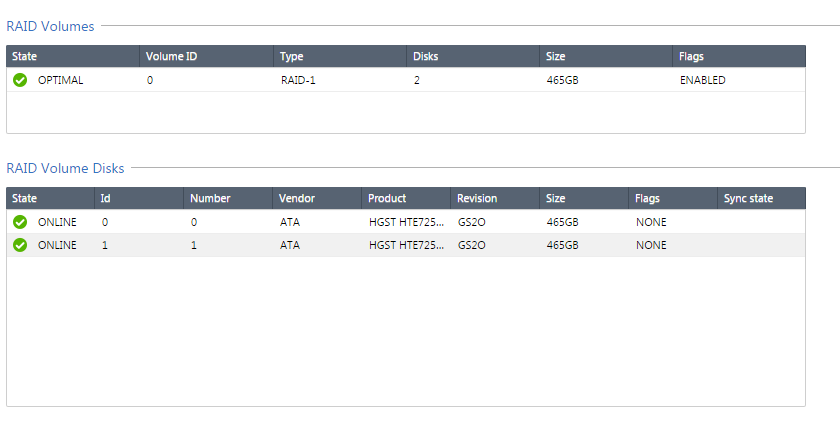
After the RAID is synchronized, the RAID state (in the VolumeID line) shows OPTIMAL (this indicates that the drives are synchronized). The DiskID:0 and DiskID:1 state show ONLINE.
Example 1: RAID status for fully synchronized storage devices:
Server123> raid_diagnosticRaid status:VolumeID:0 RaidLevel: RAID-1 NumberOfDisks:2 RaidSize:465GB State:OPTIMAL Flags:ENABLED DiskID:0 DiskNumber:0 Vendor:ATA ProductID:HGST HTE25050A7 Revision:GS2O Size:465GB State:ONLINE Flags:NONE DiskID:1 DiskNumber:1 Vendor:ATA ProductID:HGST HTE25050A7 Revision:GS2O Size:465GB State:ONLINE Flags:NONE
Example 2: RAID status for one fully synchronized storage device and another device that was removed:
Server123> raid_diagnosticRaid status:VolumeID:0 RaidLevel: RAID-1 NumberOfDisks:2 RaidSize:465GB State:DEGRADED Flags:VOLUME_INACTIVEDiskID:0 DiskNumber:0 Vendor:NONE ProductID:NONE Revision:NONE Size:0GB State:MISSING Flags:NONEDiskID:1 DiskNumber:1 Vendor:ATA ProductID:HGST HTE25050A7 Revision:GS2O Size:465GB State:ONLINE Flags:NONE
To monitor the RAID status from the WebUI:
The window shows volume and disk information.

To monitor the RAID status from SmartConsole on versions R80.10 and higher:
The window shows volume and disk information.

To monitor the RAID status from SmartView Monitor on R77 versions:
The window shows volume and disk information.

To monitor the RAID status of the storage devices using SNMP:
Set up SNMP traps to send information about the RAID.
Use OID: 1.3.6.1.4.1.2620.1.6.7.7
For more about how to configure the SNMP settings on the appliance, see the Gaia Administration Guide for the applicable version.
To hot swap a storage device:
ONLINE).The extraction handle pops out.
Important - Be careful when you pull the ejector handle to remove the storage device from the appliance. If you pull too hard on the ejector handle, it can break off from the storage device casing.
The appliance recognizes that you removed a storage device. See example 2 above.
Software RAID is activated and the appliance synchronizes the storage devices. The first synchronization can continue for over an hour. If you reboot or turn off the appliance before the storage devices are synchronized, the synchronization starts again from scratch at the next boot.
Configure the appliance with the First Time Configuration Wizard. See the Installation and Upgrade Guide related to the software version.
Note: For the Gaia platform R80.10 version, see the R80.10 Installation and Upgrade Guide. For versions before R80, the Installation and Upgrade Guides are released only for major versions. For example, for the Gaia platform R77.30 version, see the R77 Versions Installation and Upgrade Guide for Gaia Platforms.
Go to the Installing Security Gateways on Appliances section, and see the instructions to use the First Time Configuration Wizard.
Configure the 5000 Appliances object as a Security Gateway object in the Security Management Server database.
You can configure advanced options on Gaia from the Portal or the CLI.
To connect to the command line interface of a 5000 Appliances, use one of these:
5000 Appliances support these serial console connectivity options:
Connection parameters are: 9600bps, 8 bits, no parity, 1 stop bit (8N1), Flow Control - None.
If you use both the mini USB and RJ45 console ports, the mini USB port has priority. To use the RJ45 port, disconnect the mini USB console cable.
When you have completed using the RJ45 port, reconnect the miniUSB console cable.
|
Note - To use the miniUSB console port, a driver must be installed on the console client machine (desktop/laptop). For installation instructions and download link, see the appliance home page. |