Widgets
You can customize the widgets to optimize the visual display. To customize widgets, switch to edit mode. Click >.
Adding and Customizing Widgets
To add a Widget:
Click . and select widget type.
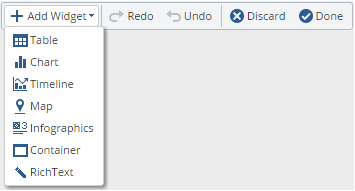
Note - For the widget, in R80.20 GA the last field is called and accepts integer values. In R80.20 + R80.20 JHA (from sk137592) the field is called and is a drop-down list with predefined values.
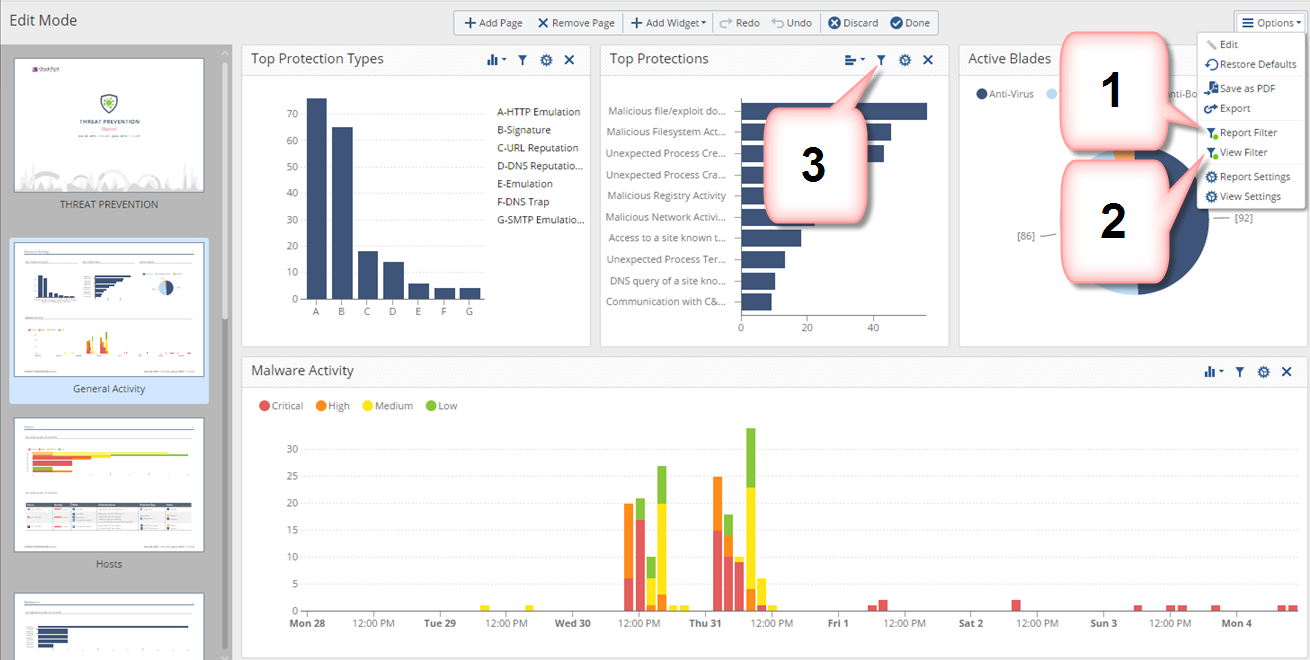
To customize a widget:
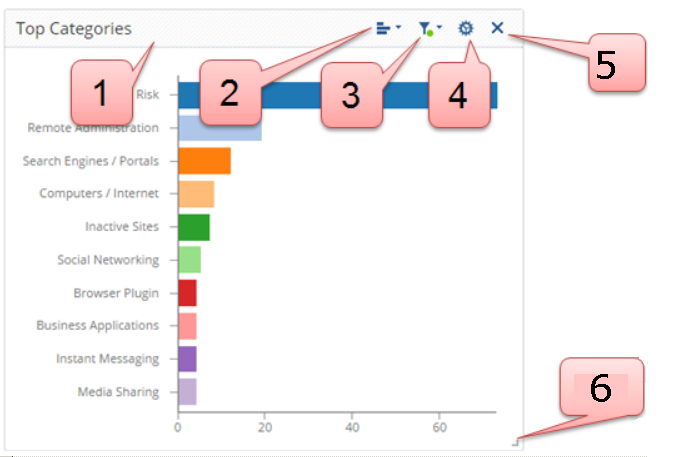
- Drag and drop the widget within the view.
- Select the graphic presentation that best fits the information you want to see.
- Select filters for the widget in addition to the inherited filters from the report and view layers. (See: Filters).
- Configure settings for the widget.
- Delete a widget.
- Resize widget.
Copying Widgets and Views to Other Locations
You can copy a widget used in one view or report and paste it in another view or report.
To copy a widget to another location:
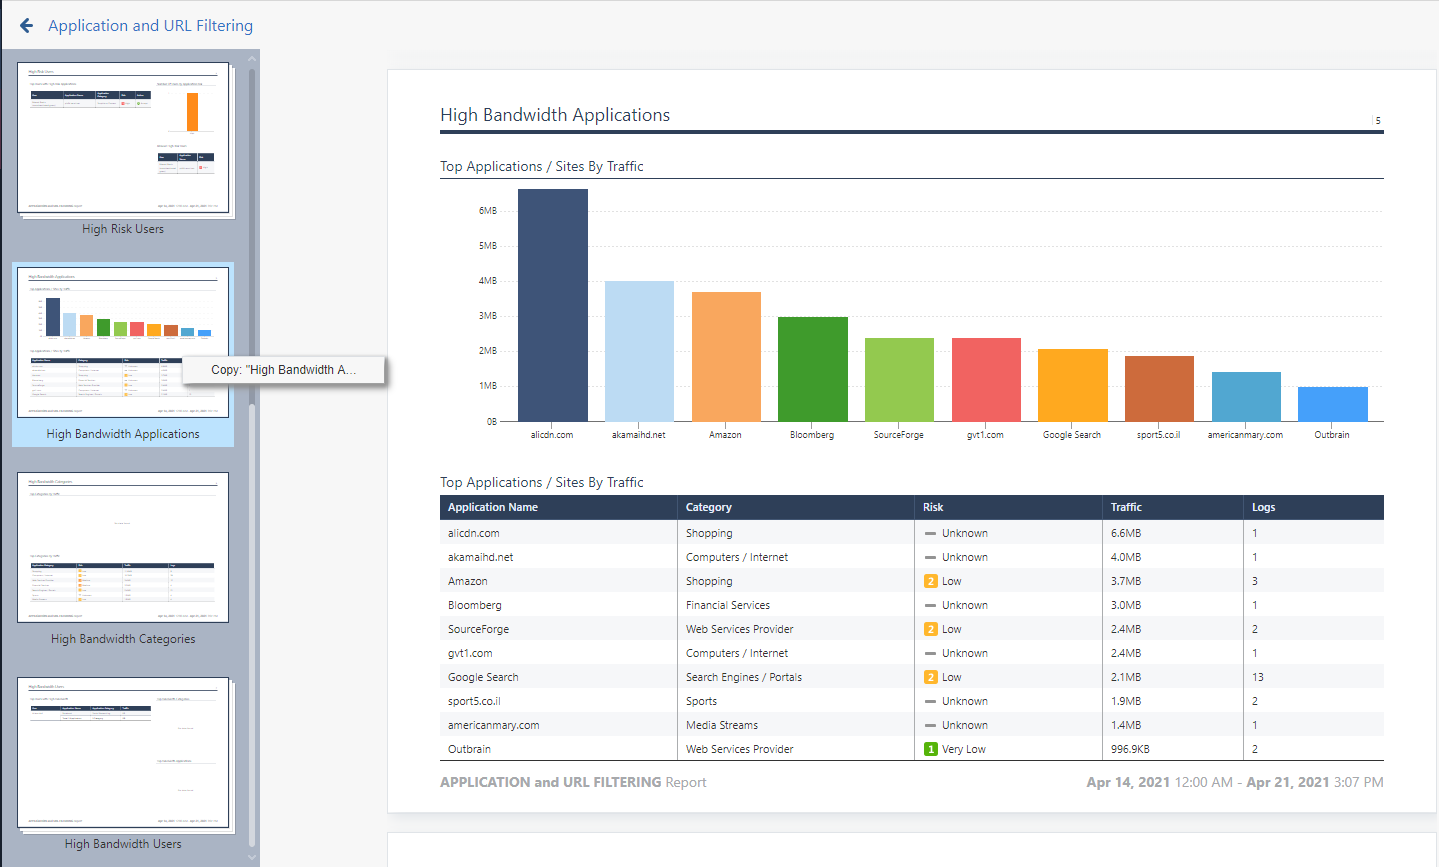
- Right-click the required widget.
- The copy option shows with the name of the widget:
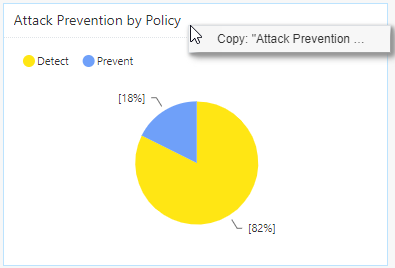
- Select
- Go to the view or report in which you want to paste the widget.
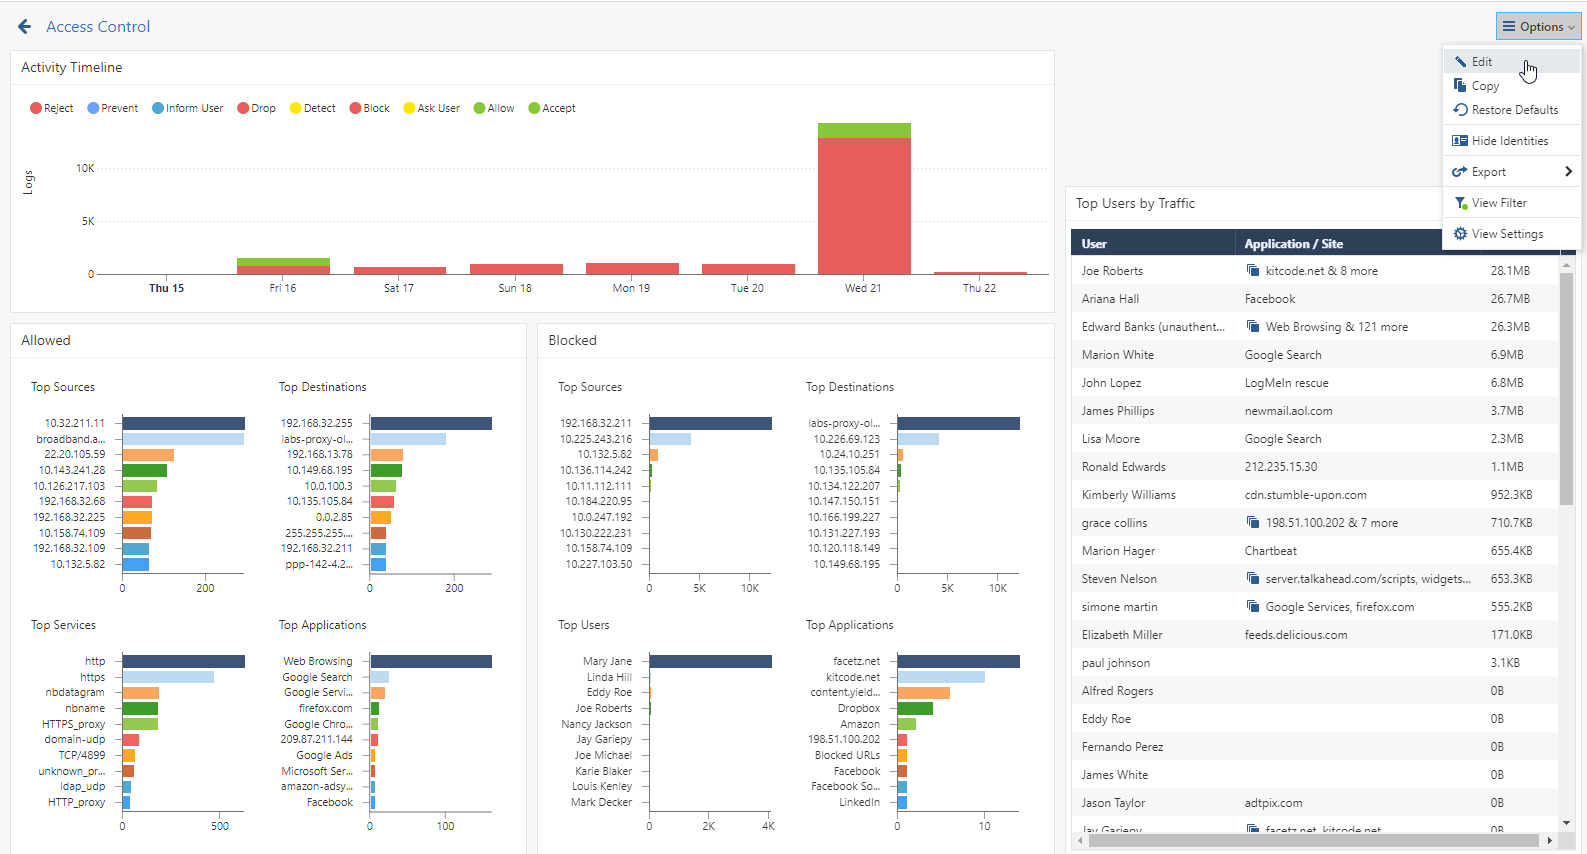
- Go to and select :
- Right-click an empty space in the view or report.
From the Paste drop-down menu, select the widget you want to paste:
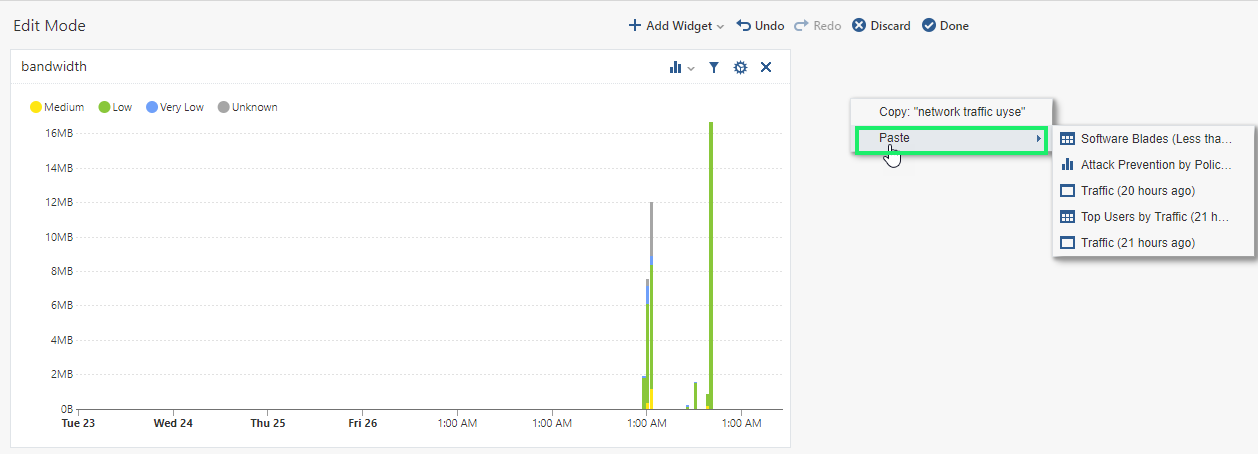
- Click .
Note - When you copy a widget to another view or report, the copied widget does not include the filter of the original view or report, only the filter defined for the copied widget.
To copy a view to another report:
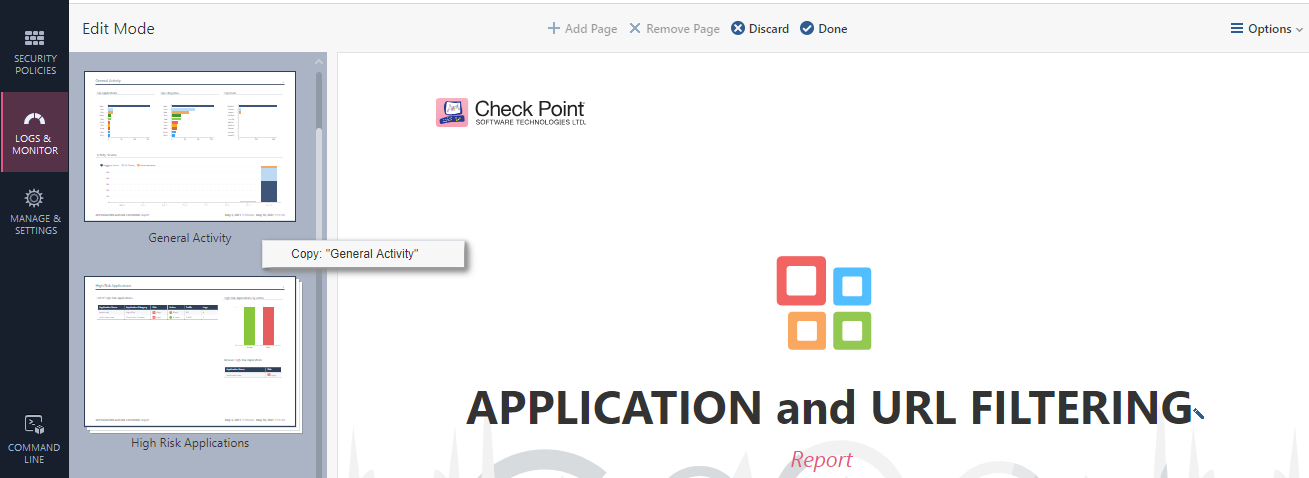
- Right-click the required view.
- The copy option shows with the name of the view:
- Select
- Go to the report in which you want to past the view.
- Go to and select :

- Right-click an empty space in the report.
- From the Paste drop-down menu, select the view you want to paste:
- Click .
Note - When you copy a view to another report, the copied view does not include the filter of the original report, only the filter of the copied view.
Filters
The search bar is used to apply on-demand filters, but you can also save filters with the view / report definition.
There are different layers of filters:
- Filters to apply to the full report.
- Filters to apply to a view, or a specified page in a report and all widgets that this page includes.
- Filters to apply to the selected widget.
To edit the view filter:
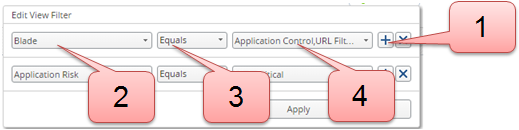
- Click the (plus) button to add a filter.
To delete a filter, click the X button. - Select a field.
To enable free text search, select Custom Filter. - Select a comparison method.
- Select or enter the value.
You can define multiple values, separated by a comma.
Filtering for Active Directory User Groups
You can filter logs, reports, and views for one or more Active Directory groups.
- In your Access Control Policy, create an Access Role that includes all the Active Directory groups you want to have in the query.
- Install the Access Control Policy on the Security Gateways.
- Look at the Identity Awareness login logs, and copy the names of the relevant groups. They usually have the prefix "".
- Add a filter for the field and type or paste the name of the group that you want to include in the filter. For multiple groups, use a comma-separated list.


