Two Factor Authentication
Check Point Captive Portal authenticates users easily with a web interface. When users try to access a protected resource, they are prompted to enter authentication credentials in a browser.
Captive Portal Two Factor Authentication adds support for an additional challenge-response authentication from the user through the RADIUS protocol.
Follow all the procedures below to configure Captive Portal Two Factor Authentication.
To configure a RADIUS server object in SmartConsole:
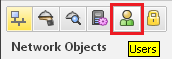
- In the top left corner, click > .
The Object Explorer window opens.
- In the left navigation tree, click .
- From the toolbar, click > > > .
- Enter a name for your designated RADIUS server.
- In the field, add the appropriate host object with your RADIUS server IP address.
If the host is not yet defined, click the star  icon > , and enter the host Name and IP Address.
- In the field, select the appropriate RADIUS version.
- In the field, select the appropriate authentication protocol.
- Click .
- Close the window.
- Install the Access Policy.
To configure Captive Portal in SmartConsole:
- From the left Navigation Toolbar, click .
- Double-click the Security Gateway object.
- On the pane, select the Software Blade.
Identity Awareness Configuration Wizard opens.
- On the wizard screen, select the .
- Click .
- On the wizard screen, select .
- Click .
- On the wizard screen, configure the accessibility settings.
- Click .
- Click to close the Identity Awareness Configuration Wizard.
- In the left navigation tree, click .
- Next to the check box, click .
- In the section, click .
- In the section, select and then select the RADIUS server object you created earlier.
- In the section, select the option, if user groups will be fetched directly from an LDAP server.
Otherwise, clear this option.
- Click to close the Security Gateway object properties.
- Install the Access Policy.
To configure a generic user profile in the Legacy SmartDashboard:
- In SmartConsole, click > .
- In the section, click .
Legacy SmartDashboard opens.
- In the bottom left Network Objects pane, and click .
- Right-click on an empty space and select > .
- Configure the properties:
- On the page:
In the field, leave the default name generic*.
In the field, set the applicable date.
- On the page:
From the drop-down list, select and configure the applicable option.
- On the , , and pages, configure other applicable settings.
- Click .
- From the top toolbar, click (or press ).
- Close the SmartConsole.
- In SmartConsole, install the Access Policy.
After users enter their credentials, the user data is retrieved from the LDAP server, the RADIUS server, or both.
To configure Access Roles that are based on LDAP users and groups:
- Make sure you have an LDAP Account Unit object for the LDAP server:
- In SmartConsole, in the top left corner, go to > .
Object Explorer window opens.
- In the left navigation tree, click .
Otherwise, from the toolbar, click > > > , and configure the object.
- Configure Access Roles based on LDAP users and LDAP groups.
- Install the Access Policy.
To configure Access Roles that are based on RADIUS groups:
- Configure the Global Properties:
- In SmartConsole, go to > .
The Global Properties window opens.
- In the left navigation tree, click > .
The Advanced Configuration window opens.
- In the left navigation tree, click .
- Select .
- Click to close the Advanced Configuration window.
- Click to close the Global Properties window.
- Configure the internal user groups:
- In the top left corner, click > .
Object Explorer window opens.
- In the left navigation tree, click .
- From the toolbar, click > > .
- For each RADIUS group
<grp> on your RADIUS server, create an internal user group named RAD_<grp> (case-sensitive).For example, for RADIUS group MyGroup, create an internal user group named RAD_MyGroup.
- Close the window.
- Configure Access Roles with the internal user groups you created in the previous step.
- Install the Access Policy.


