Palo Alto Networks Next Generation Firewall
Check Point XDR![]() Extended Detection & Response analyzes the syslogs from Palo Alto Networks Next Generation Firewall for malicious activity, and suggests preventive actions, which you must manually enforce on the endpoint.
Extended Detection & Response analyzes the syslogs from Palo Alto Networks Next Generation Firewall for malicious activity, and suggests preventive actions, which you must manually enforce on the endpoint.
Integrating Palo Alto Networks Next Generation Firewall
-
Log in to the XDR Administrator Portal:
-
Go to Settings > Integrations.

-
In the NextGen Firewall widget, click Integrate.
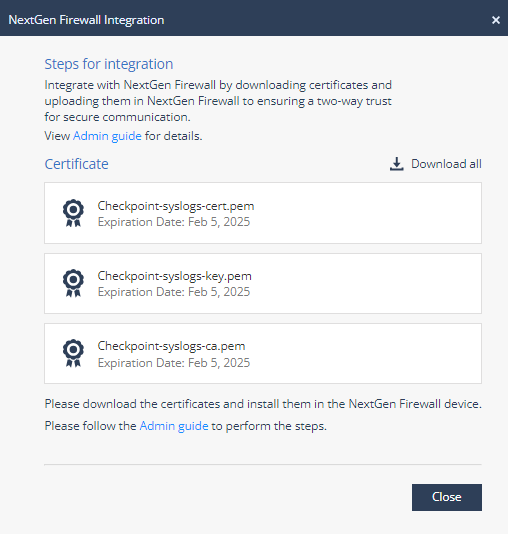
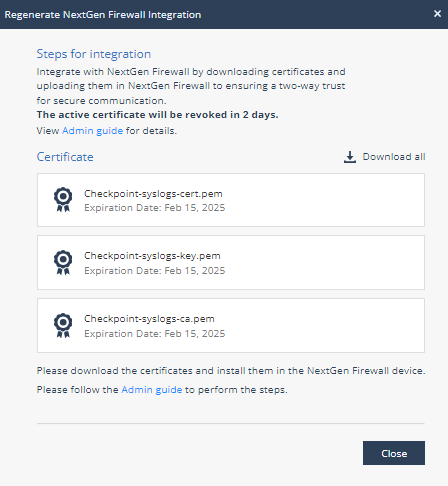
The NextGen Firewall Integration window appears.
-
Click Download all to download the zip file that includes these certificates:
-
checkpoint-syslogs-cert.pem
-
checkpoint-syslogs-key.pem
-
checkpoint-syslogs-ca.pem
-
-
Click Close.
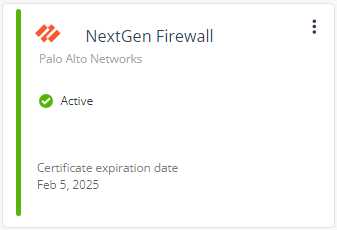
The NextGen Firewall widget status changes to Active.
-
-
Log in to the Palo Alto Networks Next Generation Firewall Administrator Portal:
-
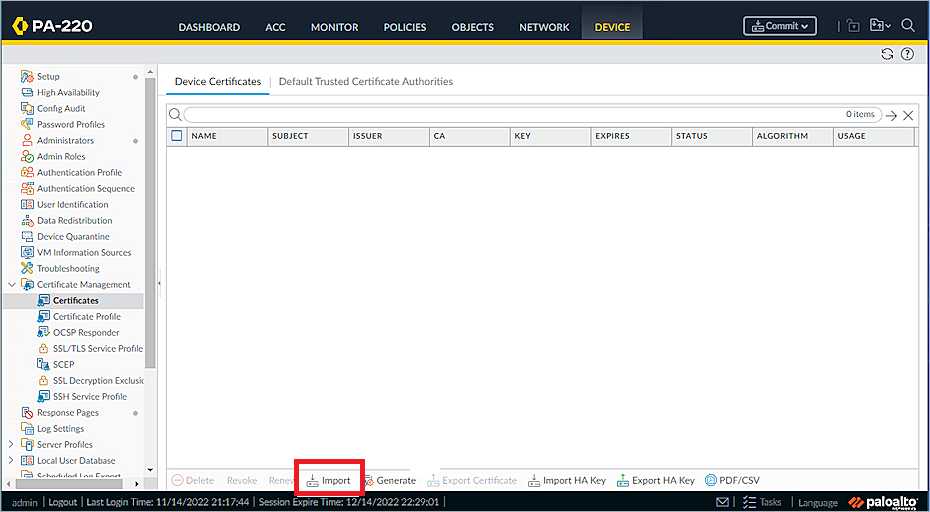
Go to Device > Certificate Management > Certificates.
-
Click Import.
-
From the Import list, select Certificate.
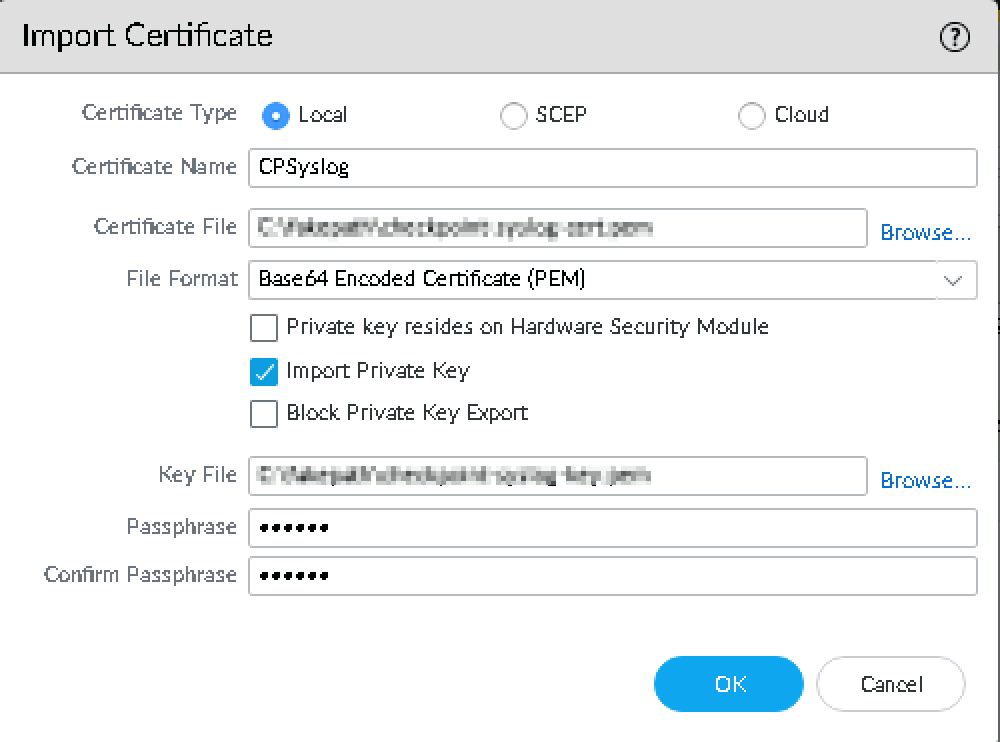
The Import Certificate window appears.
-
In the Certificate Type field, select Local.
-
In the Certificate Name field, enter CPSyslog.
-
In the Certificate File field, click Browse and upload the checkpoint-syslogs-cert.pem file.
-
From the File Format list, select Base64 Encoded Certificate (PEM).
-
Select the Import Private Key checkbox.
-
In the Key File field, click Browse and upload the checkpoint-syslogs-key.pem file.
-
In the Passphrase field, enter a password. The minimum supported character is six.
-
Click OK.
-
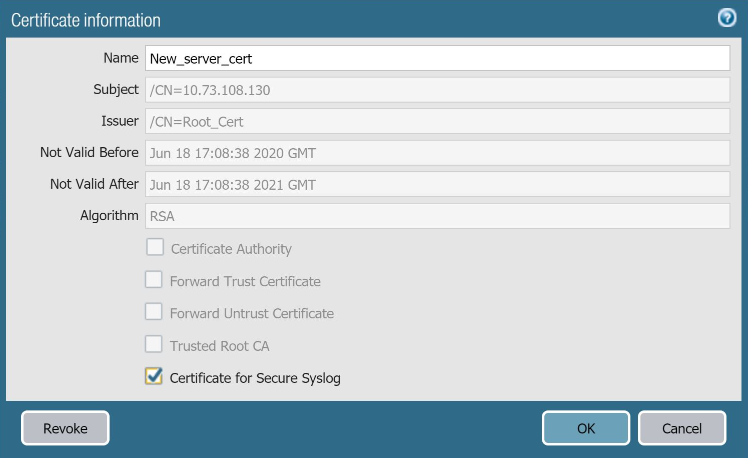
Click the certificate name.
The Certificate information window appears.
-
Select the Certificate for Secure Syslog checkbox to use the certificate for SSL handshake.
-
Click OK.
-
Click Import.
-
From the Import list, select Certificate Authority (CA).
The Import Certificate window appears.

-
In the Certificate Type field, select Local.
-
In the Certificate Name field, enter CPCASyslogs.
-
In the Certificate File field, click Browse and upload the checkpoint-syslogs-ca.pem file.
-
From the File Format list, select Base64 Encoded Certificate (PEM).
-
Click OK.
-
-
To configure syslog monitoring:
-
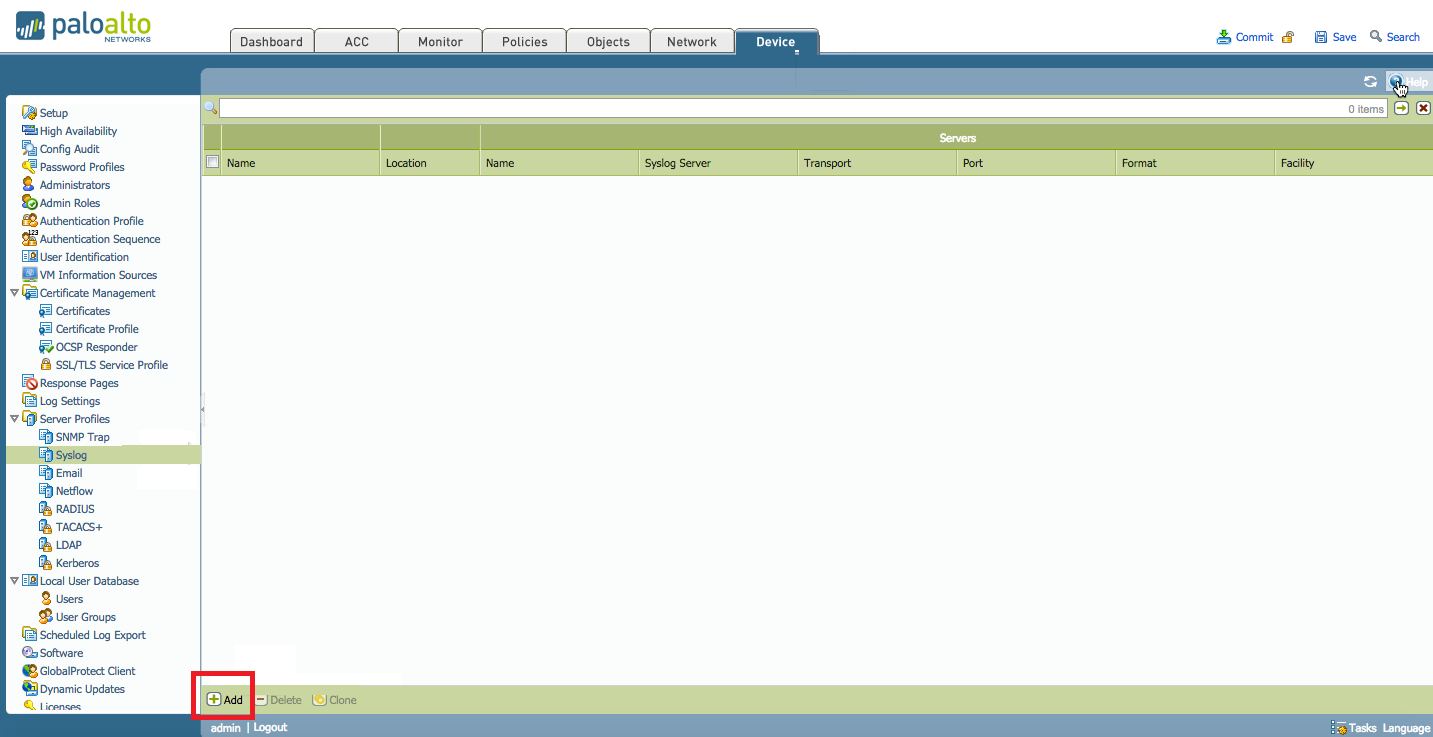
Go to Device > Server Profiles > Syslog.
-
Click Add to create a new profile.
The Syslog Server Profile window appears.
-
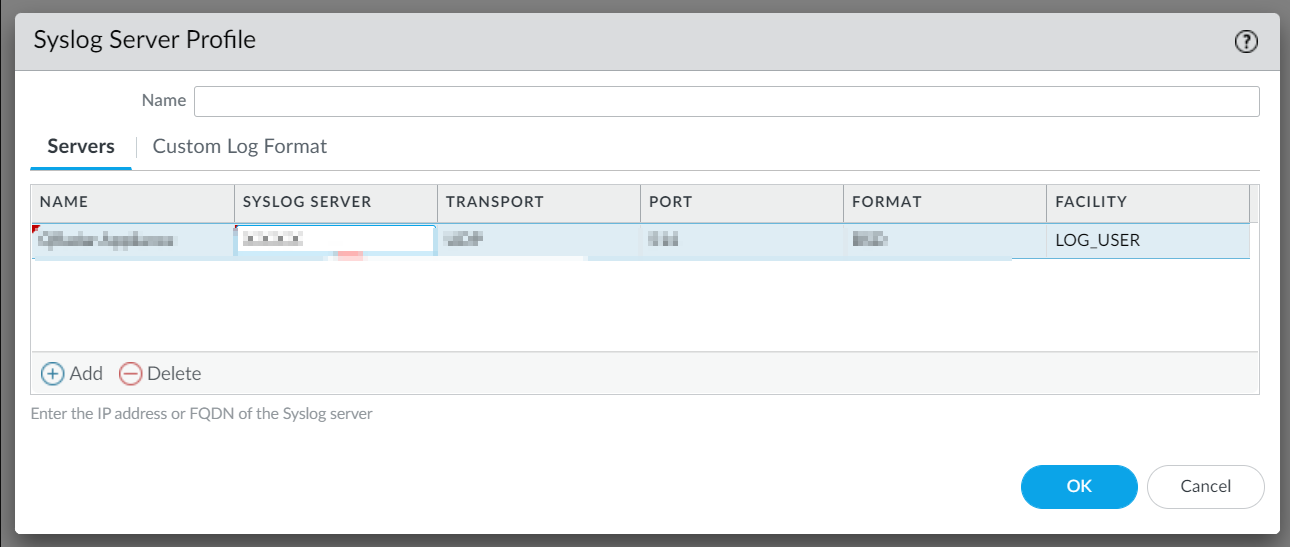
In the Name field, enter XDRIntegration.
-
Click the Servers tab:
-
In the Name field, enter a name for the syslog server.
-
In the Syslog Server field, enter your production server IP address:
-
For EU region, enter 20.76.50.141
-
For US region, enter 20.22.126.247
-
For UAE region, enter 20.174.45.149
-
-
From the Transport list, select SSL.
-
In the Port field, enter 6514.
-
From the Format list, select BSD.
-
From the Facility list, select LOG_USER.
-
-
To translate PAN log format to CEF log format, go to Custom Log Format and in the Threat field, paste this syntax:
CEF:0|Palo Alto Networks|PAN-OS5|$sender_sw_version|$threatid|$type|$number-of-severity|rt=$cef-formatted-receive_time deviceExternalId=$serial src=$src dst=$dst sourceTranslatedAddress=$natsrc destinationTranslatedAddress=$natdst cs1Label=Rule cs1=$rule suser=$srcuser duser=$dstuser app=$app cs3Label=Virtual System cs3=$vsys cs4Label=Source Zone cs4=$from cs5Label=Destination Zone cs5=$to deviceInboundInterface=$inbound_if deviceOutboundInterface=$outbound_if cs6Label=LogProfile cs6=$logset cn1Label=SessionID cn1=$sessionid cnt=$repeatcnt spt=$sport dpt=$dport sourceTranslatedPort=$natsport destinationTranslatedPort=$natdport flexString1Label=Flags flexString1=$flags proto=$proto act=$action request=$misc cs2Label=URL Category cs2=$category flexString2Label=Direction flexString2=$direction PanOSActionFlags=$actionflags externalId=$seqno cat=$subtype fileId=$pcap_id PanOSDGl1=$dg_hier_level_1 PanOSDGl2=$dg_hier_level_2 PanOSDGl3=$dg_hier_level_3 PanOSDGl4=$dg_hier_level_4 PanOSVsysName=$vsys_name dvchost=$device_name PanOSSrcUUID=$src_uuid PanOSDstUUID=$dst_uuid PanOSTunnelID=$tunnelid PanOSMonitorTag=$monitortag PanOSParentSessionID=$parent_session_id PanOSParentStartTime=$parent_start_time PanOSTunnelType=$tunnel PanOSThreatCategory=$thr_category PanOSContentVer=$contentver PanOSAssocID=$assoc_id PanOSPPID=$ppid PanOSHTTPHeader=$http_headers PanOSURLCatList=$url_category_list PanOSRuleUUID=$rule_uuid PanOSHTTP2Con=$http2_connection PanDynamicUsrgrp=$dynusergroup_name PanXFFIP=$xff_ip PanSrcDeviceCat=$src_category PanSrcDeviceProf=$src_profile PanSrcDeviceModel=$src_model PanSrcDeviceVendor=$src_vendor PanSrcDeviceOS=$src_osfamily PanSrcDeviceOSv=$src_osversion PanSrcHostname=$src_host PanSrcMac=$src_mac PanDstDeviceCat=$dst_category PanDstDeviceProf=$dst_profile PanDstDeviceModel=$dst_model PanDstDeviceVendor=$dst_vendor PanDstDeviceOS=$dst_osfamily PanDstDeviceOSv=$dst_osversion PanDstHostname=$dst_host PanDstMac=$dst_mac PanContainerName=$container_id PanPODNamespace=$pod_namespace PanPODName=$pod_name PanSrcEDL=$src_edl PanDstEDL=$dst_edl PanGPHostID=$hostid PanEPSerial=$serialnumber PanDomainEDL=$domain_edl PanSrcDAG=$src_dag PanDstDAG=$dst_dag PanPartialHash=$partial_hash PanTimeHighRes=$high_res_timestamp PanReasonFilteringAction=$reason PanJustification=$justification PanASServiceType=$nssai_sst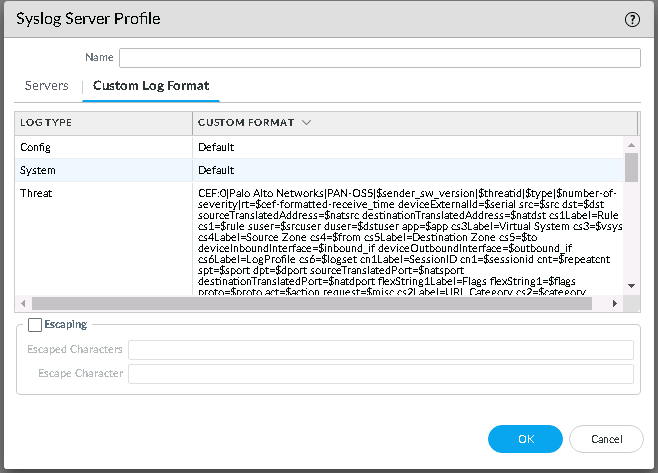
-
Click OK to save the profile.
-
-
To configure security policy
 Collection of rules that control network traffic and enforce organization guidelines for data protection and access to resources with packet inspection. rule Set of traffic parameters and other conditions in a Rule Base (Security Policy) that cause specified actions to be taken for a communication session. action as log forwarding:
-
Go to Policies > Security.
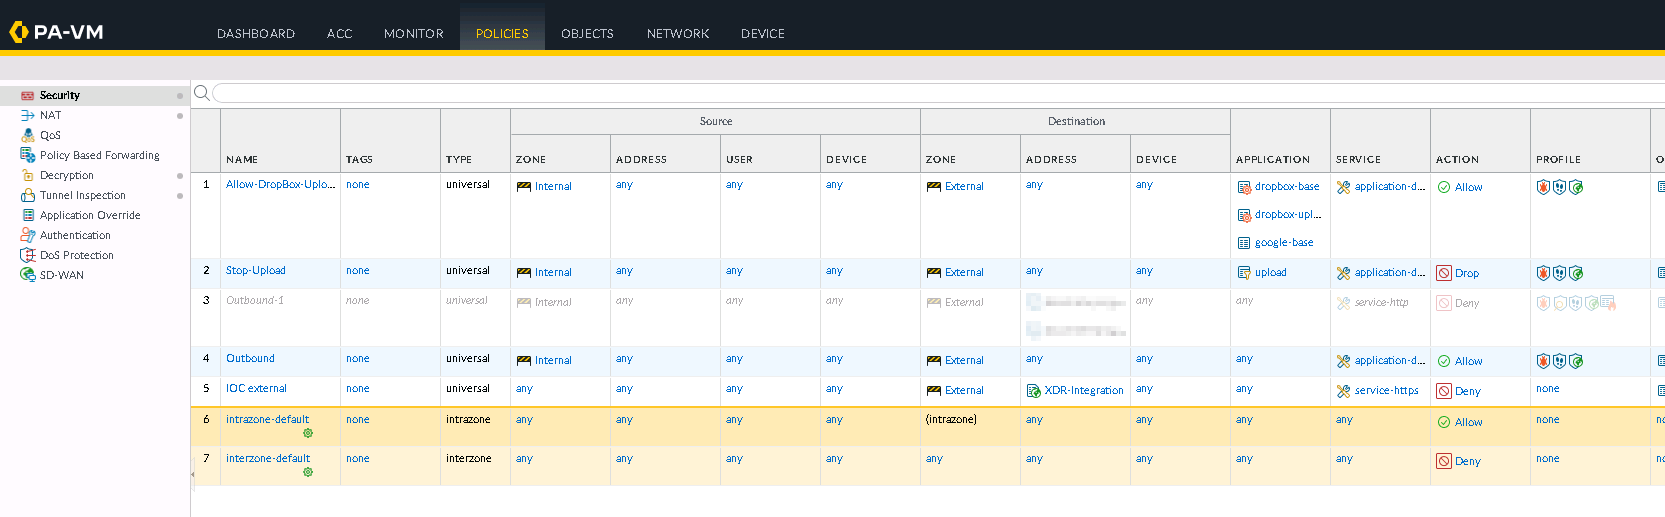
-
Select a rule for which you want to enable log forwarding.
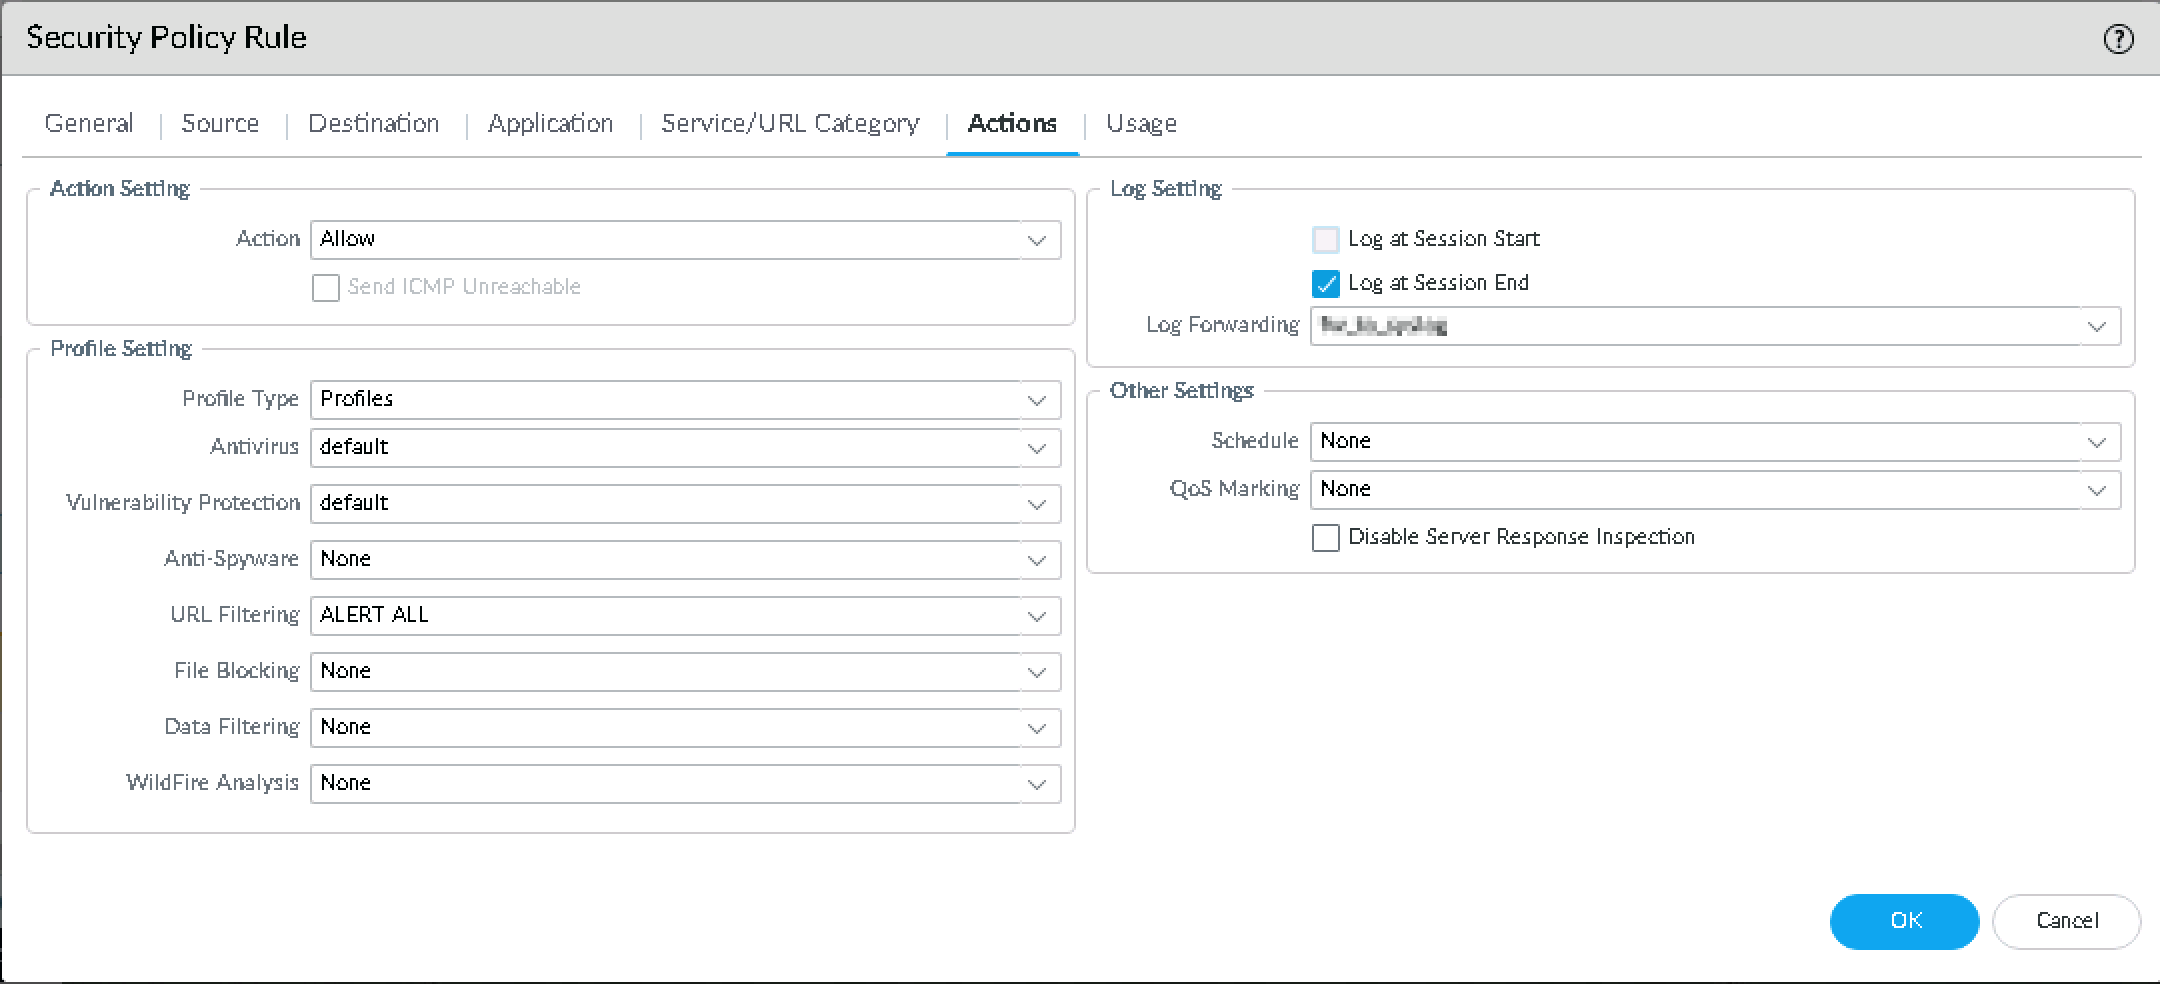
The Security Policy Rule window appears.
-
Click Actions.
-
In the Log Setting section, select the Log at Session End checkbox.
-
From the Log Forwarding list, select XDRIntegration syslog profile to which the logs to be forwarded.
-
Click OK.
-
-
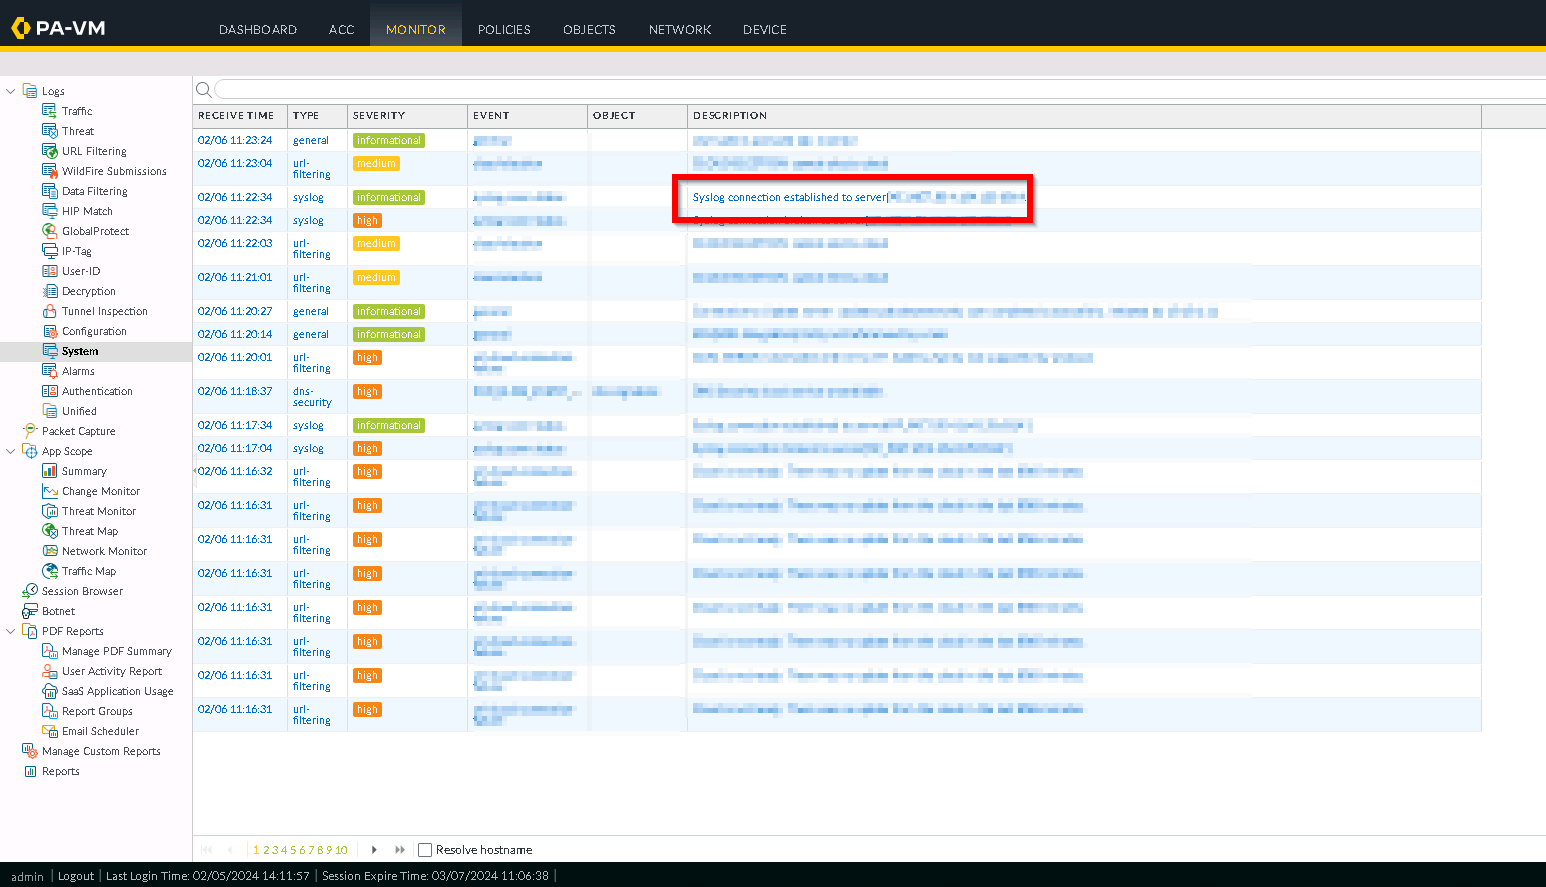
To verify log forwarding:
-
Go to Monitor > Logs > System.
-
Make sure the
Syslog connection established to server <IP Address>message is displayed and error messages are not listed.
-
-
To check if the integration is successful, in the XDR Administrator Portal:
-
Go to Settings > Integrations.
In the Integrated products section, verify if NextGen Firewall is listed as Active.
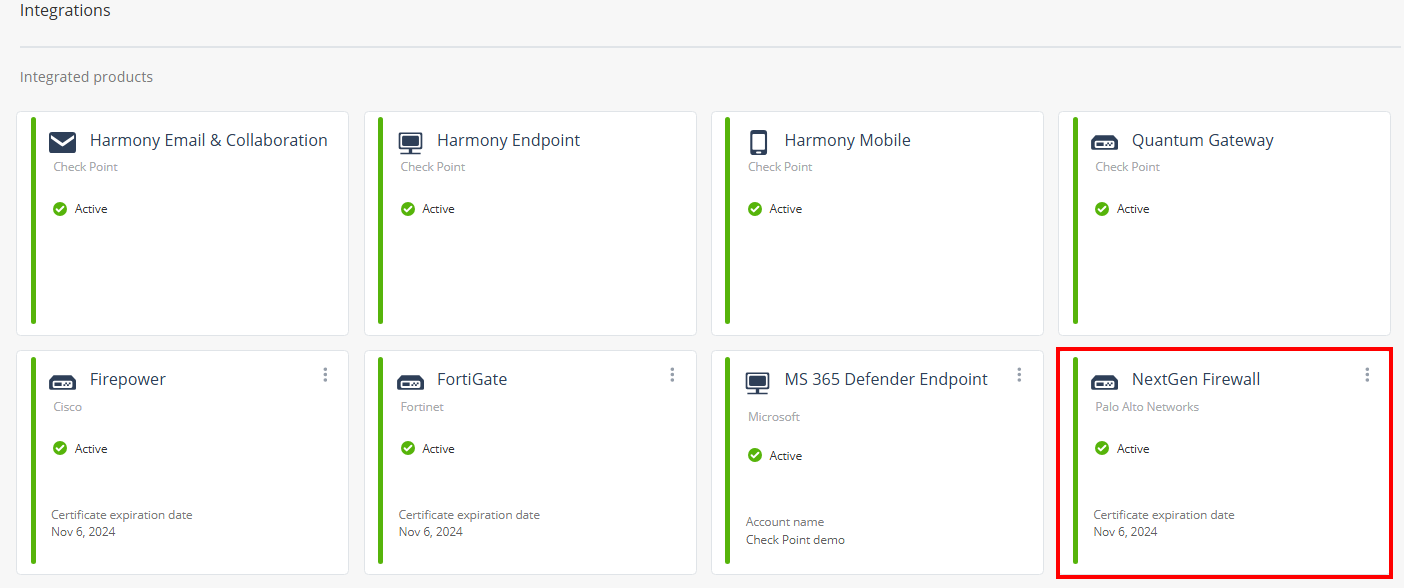

Note - The widget will display Inactive status until XDR begins receiving logs from Palo Alto Networks Next Generation Firewall.
-
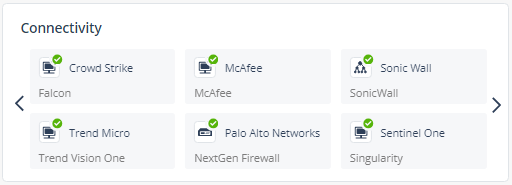
Go to the Overview page and in the Connectivity widget, verify if Palo Alto Networks is listed as connected.
-
Regenerating the Certificate
If you revoke a certificate, you must regenerate and upload the certificate to the Palo Alto Networks Next Generation Firewall portal within two days.
-
Log in to the XDR Administrator Portal:
-
Go to Settings > Integrations.
-
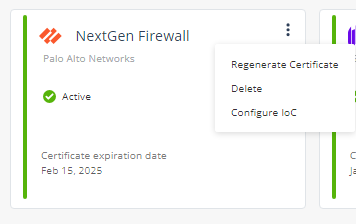
In the NextGen Firewall widget, click
 .
. -
Click Regenerate Certificate.
The Regenerate NextGen Firewall Integration window appears.
-
Perform steps from 1.c until the end in Integrating Palo Alto Networks Next Generation Firewall.
-
Configuring IoCs
You can use the Public Blend URL in the IoC Management to enforce IoCs on the Palo Alto Networks Next Generation Firewall.
To configure IoCs:
-
Log in to the XDR Administrator Portal:
-
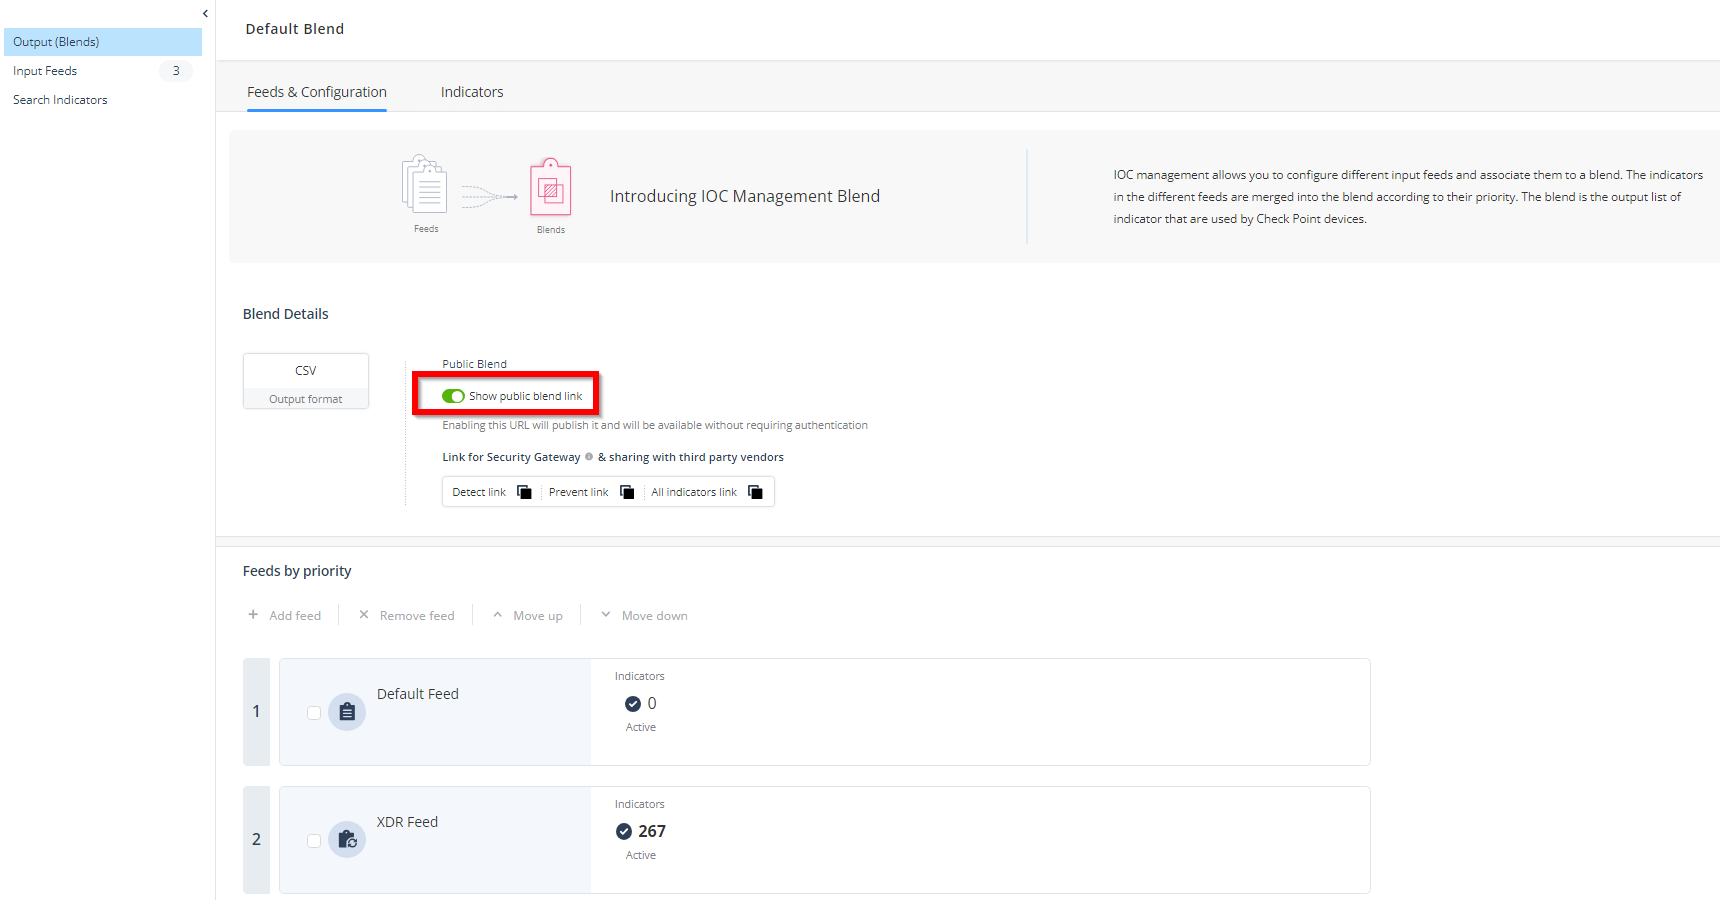
Go to New IOC Management > Output (Blends) > Feeds & Configuration.
-
Turn on the Show public blend link toggle button.
-
Go to Settings > Integrations.
-
In the NextGen Firewall widget, click
and select Configure IoC.
The Configure IoC window appears. It lists three indicator links generated automatically using the All Indicators link from the Public Blend URL in the IoC Management.
-
Click
 to copy the indicators link.
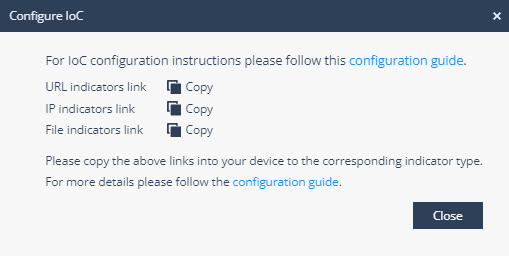
Note - The Palo Alto Networks Next Generation Firewall do not support the File indicators link.
-
Click Close.
-
-
Log in to the Palo Alto Networks Next Generation Firewall Administrator Portal:
-
Go to Objects > External Dynamic Lists.
-
Click Add.
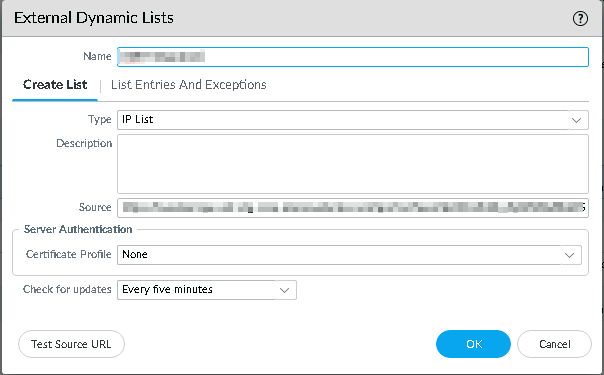
The External Dynamic Lists window appears.
-
In the Name field, enter the name of the External Dynamic List.
-
Click the Create List tab.
-
From the Type list, select IP List.
-
In the Source field, paste the IP indicators link copied in the step 1.e.
-
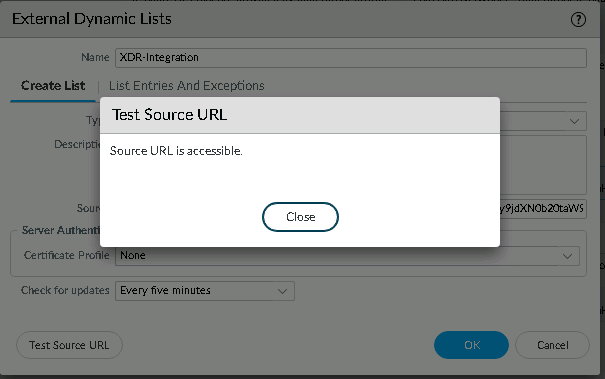
To check if the source url is accessible, click Test Source URL.
If the source url is accessible, the Test Source URL window appears with a message:
Source URL is accessible
-
Click Close.
-
Click OK.
-
Repeat steps 2.b through 2.i with this detail:
Type
Source
URL List URL indicators link (Configure IoC link from step 1.e) -
Click Commit at the top right corner to commit your changes.
-
-
To create a security policy with External Dynamic List (EDL):
-
Go to Policies > Security.
-
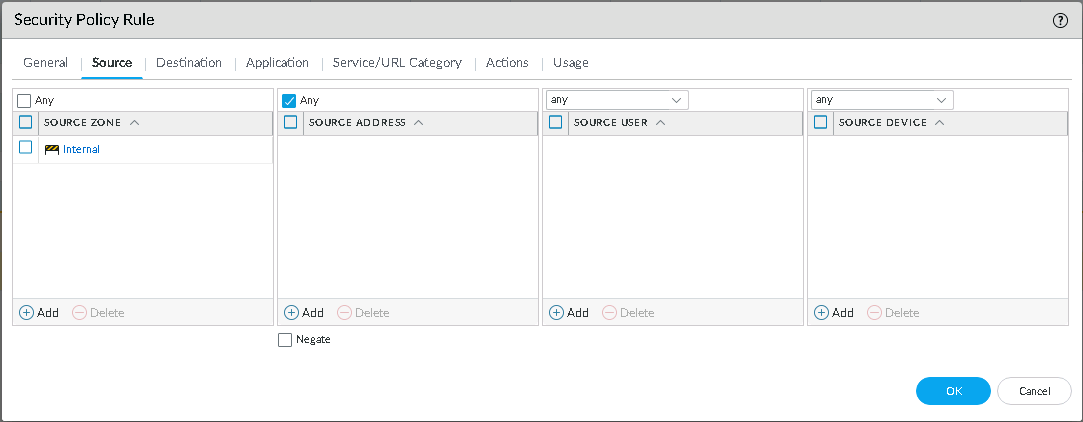
Click Add.
-
Click the Source tab.
-
In the Source Zone column, click Add and from the list, select a source zone.
-
In the Source Address column, select the Any checkbox.
-
Click the Destination tab.
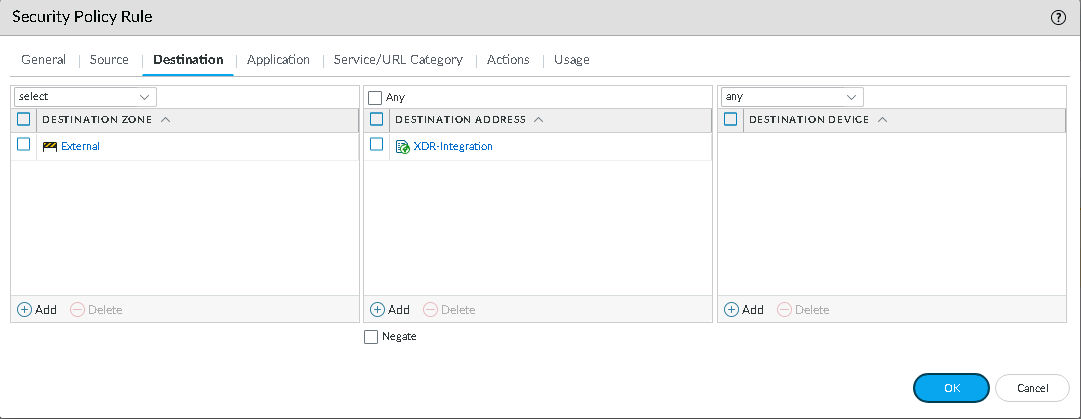
-
In the Destination Zone column, click Add and from the list, select External.
-
In the Destination Address column, click Add and from the list, select your External Dynamic List name.
-
Click the Actions tab.
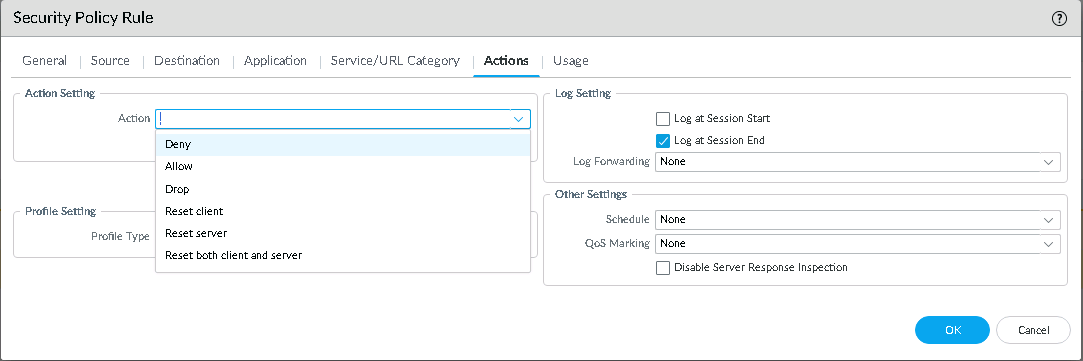
-
In the Action Setting section, from the Action list, select one of these:
-
Allow
-
Deny
-
Drop
-
Reset client
-
Reset server
-
Reset both client and server
-
-
Click OK.
The newly added EDL appears in the policy table.

-
Click Commit at the top right corner to save your changes.
-
-
To verify the IP addresses that are newly created in EDL:
-
Go to Objects > External Dynamic Lists.
-
Select your EDL.
-
Click Import Now at the bottom.
The Import window appears.
-
Click Close.
-
Click Commit at the top right corner to save your changes.
-
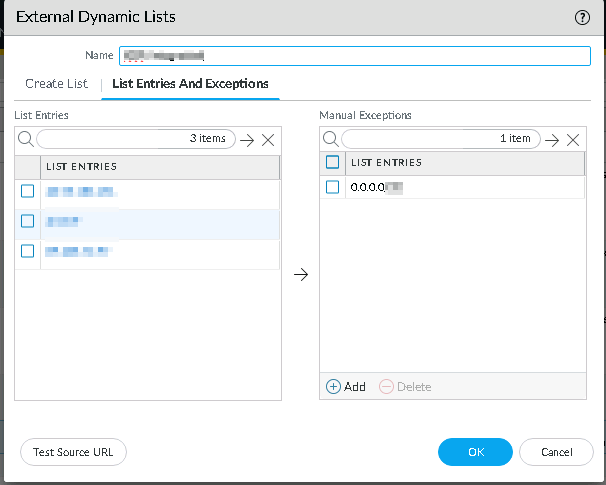
To check the available IP addresses on the XDR external feed, select your EDL.
-
Click the List Entries and Exceptions tab.
-
Deleting the Integration
-
Go to Settings > Integrations.
-
In the NextGen Firewall widget, click
. -
Click Delete.
The Delete Integration window appears.

-
Click Yes.