Cisco Firepower Threat Defense
Check Point XDR![]() Extended Detection & Response supports integration with Cisco Firepower Threat Defense (FTD) firewall by using syslog-ng (Log Management Solution) to collect its syslogs. XDR analyzes the syslogs for malicious activity and suggests preventive actions, which you must manually enforce on the firewall.
Extended Detection & Response supports integration with Cisco Firepower Threat Defense (FTD) firewall by using syslog-ng (Log Management Solution) to collect its syslogs. XDR analyzes the syslogs for malicious activity and suggests preventive actions, which you must manually enforce on the firewall.
Integrating Cisco Firepower
-
Log in to the XDR Administrator Portal:
-
Go to Settings > Integrations.

-
In the Cisco widget, click Integrate.
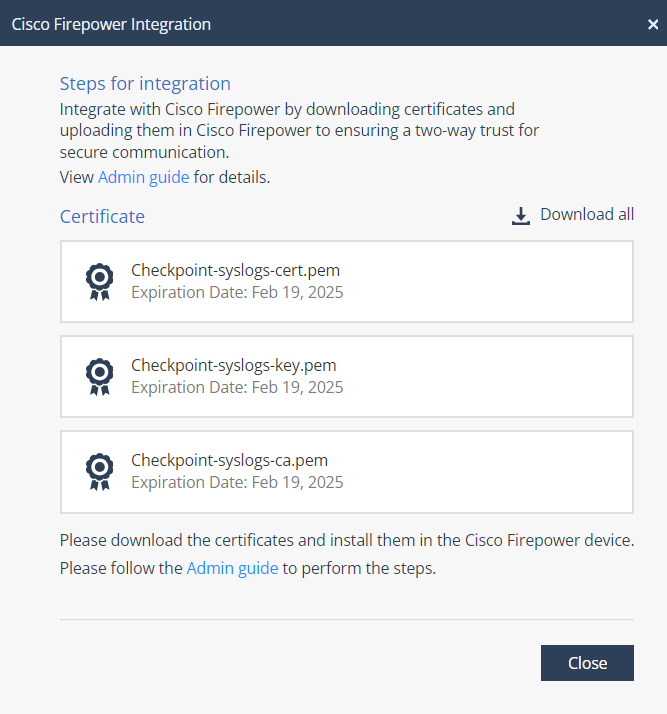
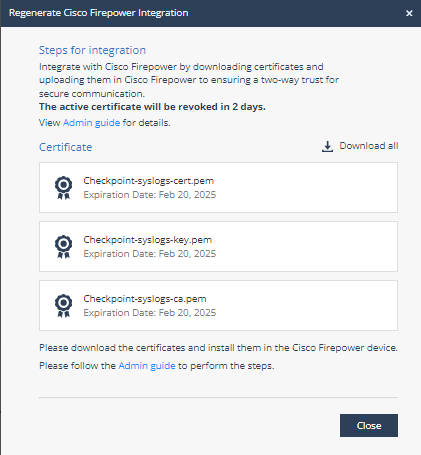
The Cisco Firepower Integration window appears.
-
Click Download all to download the zip file that includes these certificates:
-
checkpoint-syslogs-cert.pem
-
checkpoint-syslogs-key.pem
-
checkpoint-syslogs-ca.pem
-
-
Click Close.
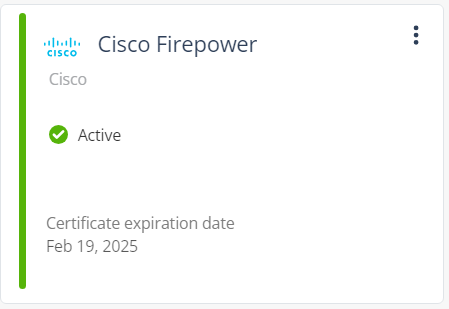
The Cisco Firepower widget status changes to Active.
-
-
To install syslog-ng on your internal machine:
-
Depending on the Operating System, use the appropriate package manager to install syslog-ng. For Ubuntu or Debian systems:
-
To update the list of available packages, run:
sudo apt-get update -
To install syslog-ng and any of its subpackage, run:
sudo apt-get install syslog-ng
-
-
To create a directory to store your TLS certificates, run:
sudo mkdir -p /etc/syslog-ng/cer
-
Unzip the zip file downloaded in step 1.c and copy the .pem files to
/etc/syslog-ng/cerin your internal machine.
Note - You can use Secure Copy Protocol (SCP) or any secure method to transfer these files.
-
To set permissions for certificate files to ensure that they are secure and accessible only by syslog-ng, run:
sudo chmod 600 /etc/syslog-ng/cer/* -
Navigate to
/etc/syslog-ng/syslog-ng.conf, open the syslog-ng.conf file in a text editor and paste this configuration:Copy@version:XXX
source s_cisco {
network(
transport("udp")
port(514)
);
};
log {
source(s_cisco);
destination(d_remote_syslog);
};
destination d_remote_syslog {
syslog(
"20.4.164.135" transport("tls")
port(6514)
tls(
key-file("/etc/syslog-ng/cer/checkpoint-syslogs-key.pem")
cert-file("/etc/syslog-ng/cer/checkpoint-syslogs-cert.pem")
ca-file("/etc/syslog-ng/cer/checkpoint-syslogs-ca.pem")
peer-verify("required-trusted")
)
);
}; -
Replace the IP address 20.4.164.135 with the appropriate IP address for your region:
Region
IP Address
EU
20.76.50.141
US
20.22.126.247
India
4.187.145.23
UAE
20.174.45.149
-
Save the changes and exit the text editor.
-
Restart the syslog-ng service to apply the changes:
sudo systemctl restart syslog-ng -
To check the syslog-ng service status, run this:
sudo systemctl status syslog-ng
To find the current version, run
syslog-ng --versionand search for the current version installed on your machine. Note that this is tested and working on v4.3. -
-
Log in to your Cisco Firepower Management Center (FMC) portal:
-
Go to Devices > Platform Settings.

-
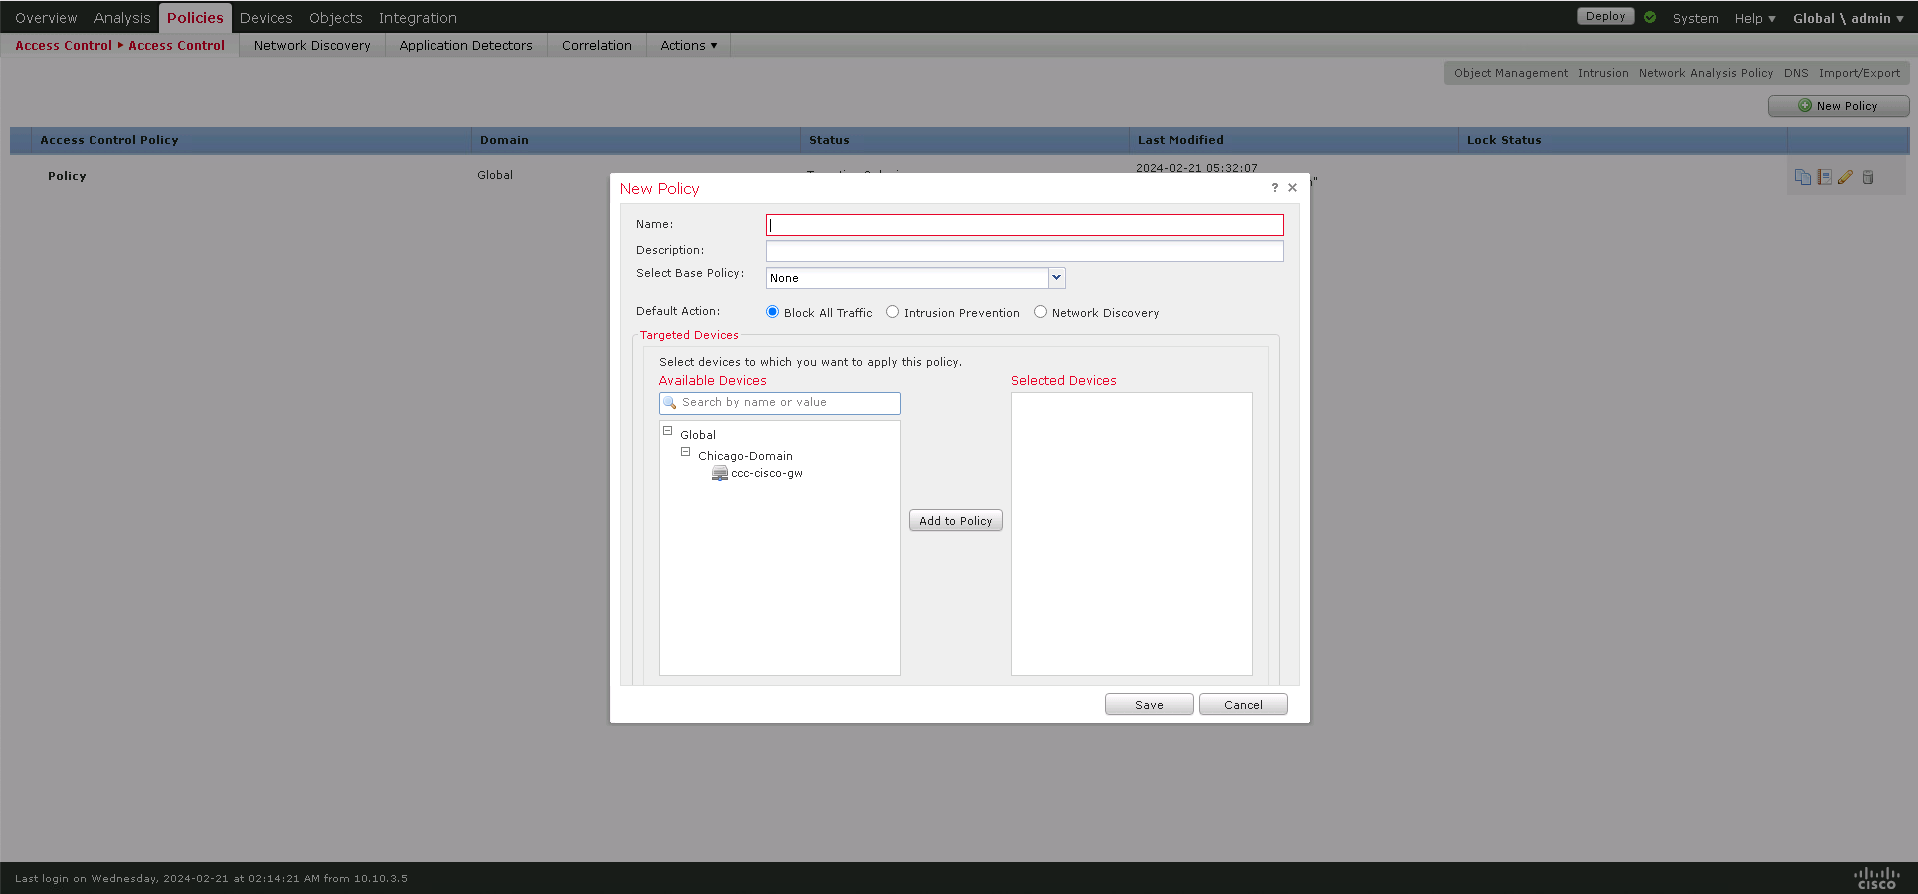
To create a new Firepower Threat Defense (FTD) policy, click New Policy and select the Threat Defense Settings device type. If you already have a policy, in the policy table, scroll to the end of the row and click
 to edit the policy.
The New Policy window appears.
-
Enter Name and Description.
-
In the Targeted Devices section, in the Available Devices search field, search for the FTD appliance to which you want to apply this policy.
-
Click Add to Policy.
-
Click Save.
The system creates the policy.
-
Click
. -
Go to Syslog and click the Syslog Servers tab.
-
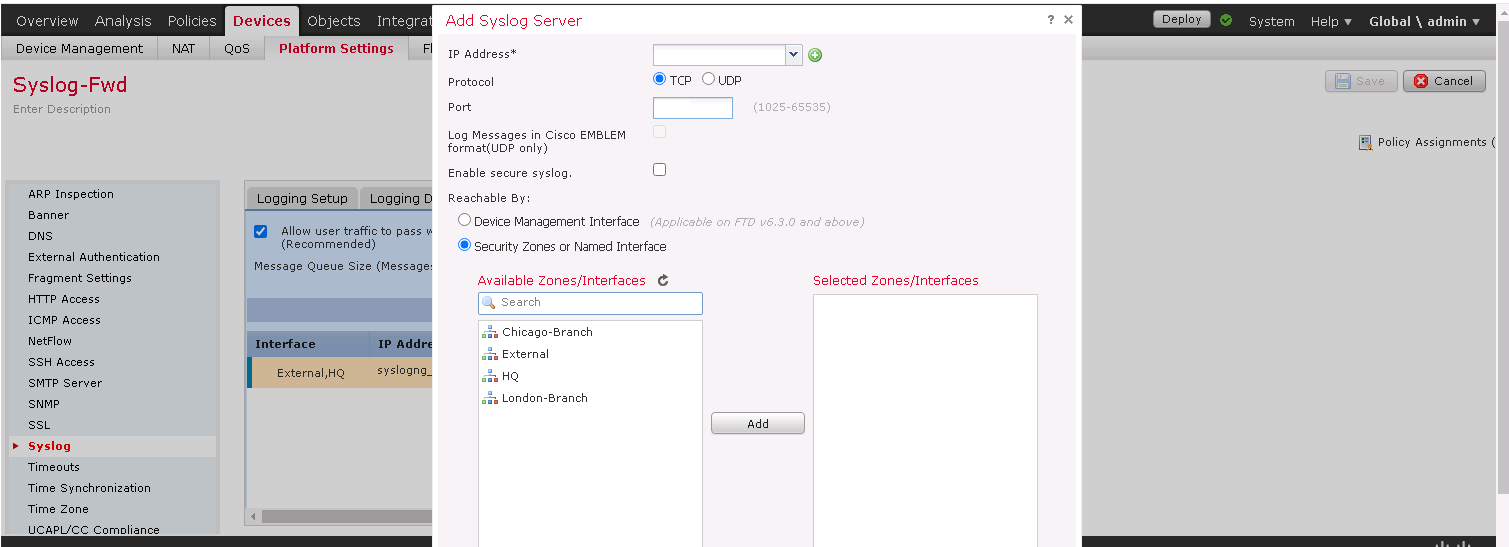
To add remote syslog servers, click Add.
The Add Syslog Server window appears.
-
From the IP Address list, select the network object that has the syslog-ng server installed in step 2.a. If you have not created a network object, click
to create a new object. -
In the Protocol field, select UDP.
-
In the Port field, enter 514.
-
Make sure that the Enable secure syslog checkbox is not selected.
-
In the Available Zones/Interfaces search field, search for the security zones over which the syslog server is reachable.
-
Click Add and then click OK.
-
Click the Syslog Settings tab.
-
Select the Enable syslog device ID checkbox.
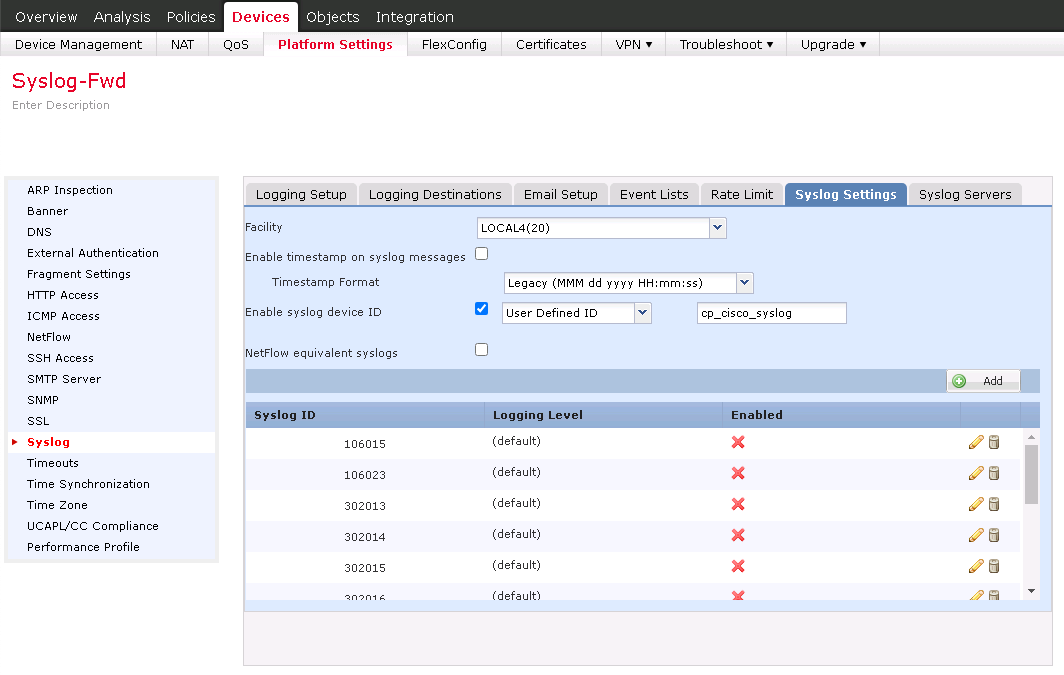
-
From the list, select User Defined ID and enter cp_cisco_syslog.
-
Click Save to save the configuration.
-
Click Save and then click Deploy to start deployment of the platform setting.
-
Go to Policies > Access Control > Access Control.
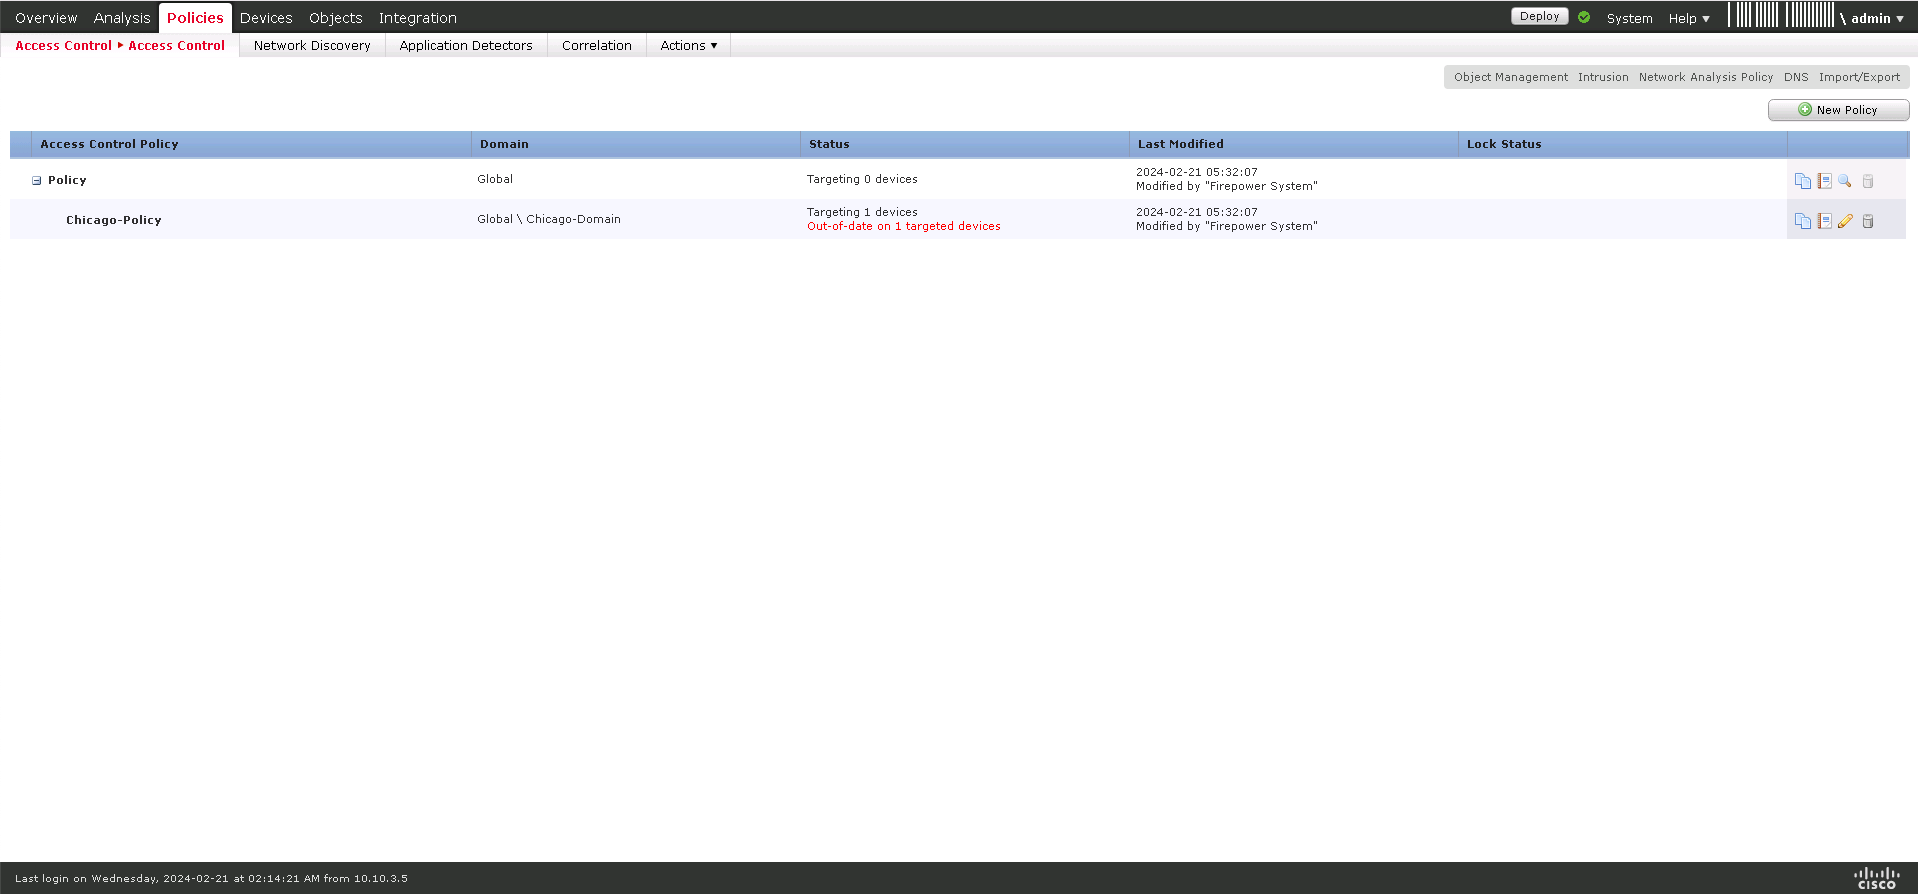
Note - Make sure that you have logged in under Global configurations.

-
In the policy table, scroll to the end of the row and click
. -
Click the Logging tab.
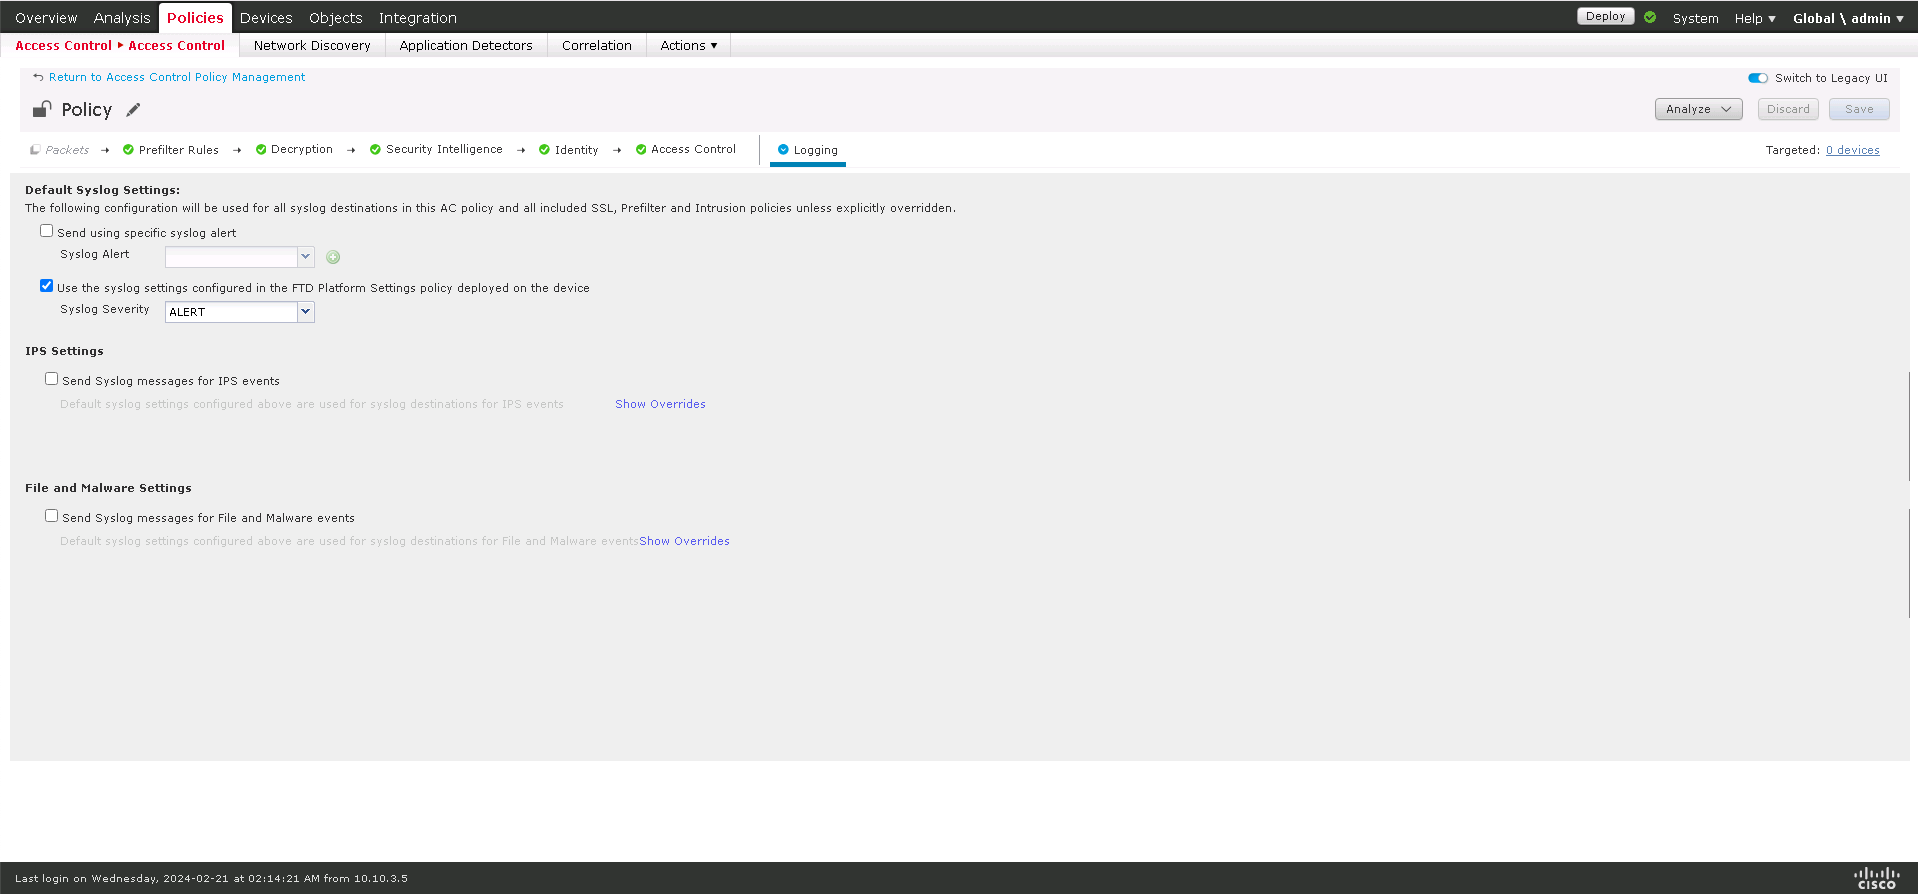
Note - Make sure that:
-
Cisco Firepower logs include the
SrcIPandDstIPfields. -
Source IP and destination IP are not the same.
-
-
Select the Use the syslog settings configured in the FTD Platform Settings policy deployed on the device Syslog Severity checkbox.
-
From the list, select ALERT.
-
Click Save and then click Deploy.
-
-
To check if the integration is successful, in the XDR Administrator Portal:
-
Go to Settings > Integrations.
In the Integrated products section, verify if Cisco is listed as Active.

Note - The widget will display Inactive status until XDR begins receiving logs from Cisco Firepower.
-
Go to the Overview page and in the Connectivity widget, verify if Cisco is listed as connected.
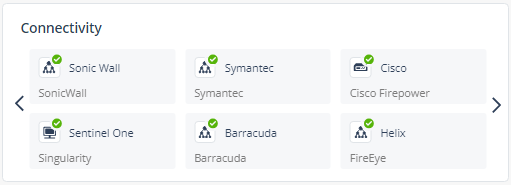
-
Regenerating the Certificate
If you revoke a certificate, you must regenerate and upload the certificate to the Cisco Firepower Management Center portal within two days.
-
Log in to the XDR Administrator Portal:
-
Go to Settings > Integrations.
-
In the Cisco Firepower widget, click
 .
. -
Click Regenerate Certificate.

The Regenerate Cisco Firepower Integration window appears.
-
Perform steps from 1.c until the end in Integrating the Cisco Firepower.
-
Configuring IoCs
You can use the Public Blend URL in the IoC Management to enforce IoCs on the Cisco Firepower Management Center.
To configure IoCs:
-
Log in to the XDR Administrator Portal:
-
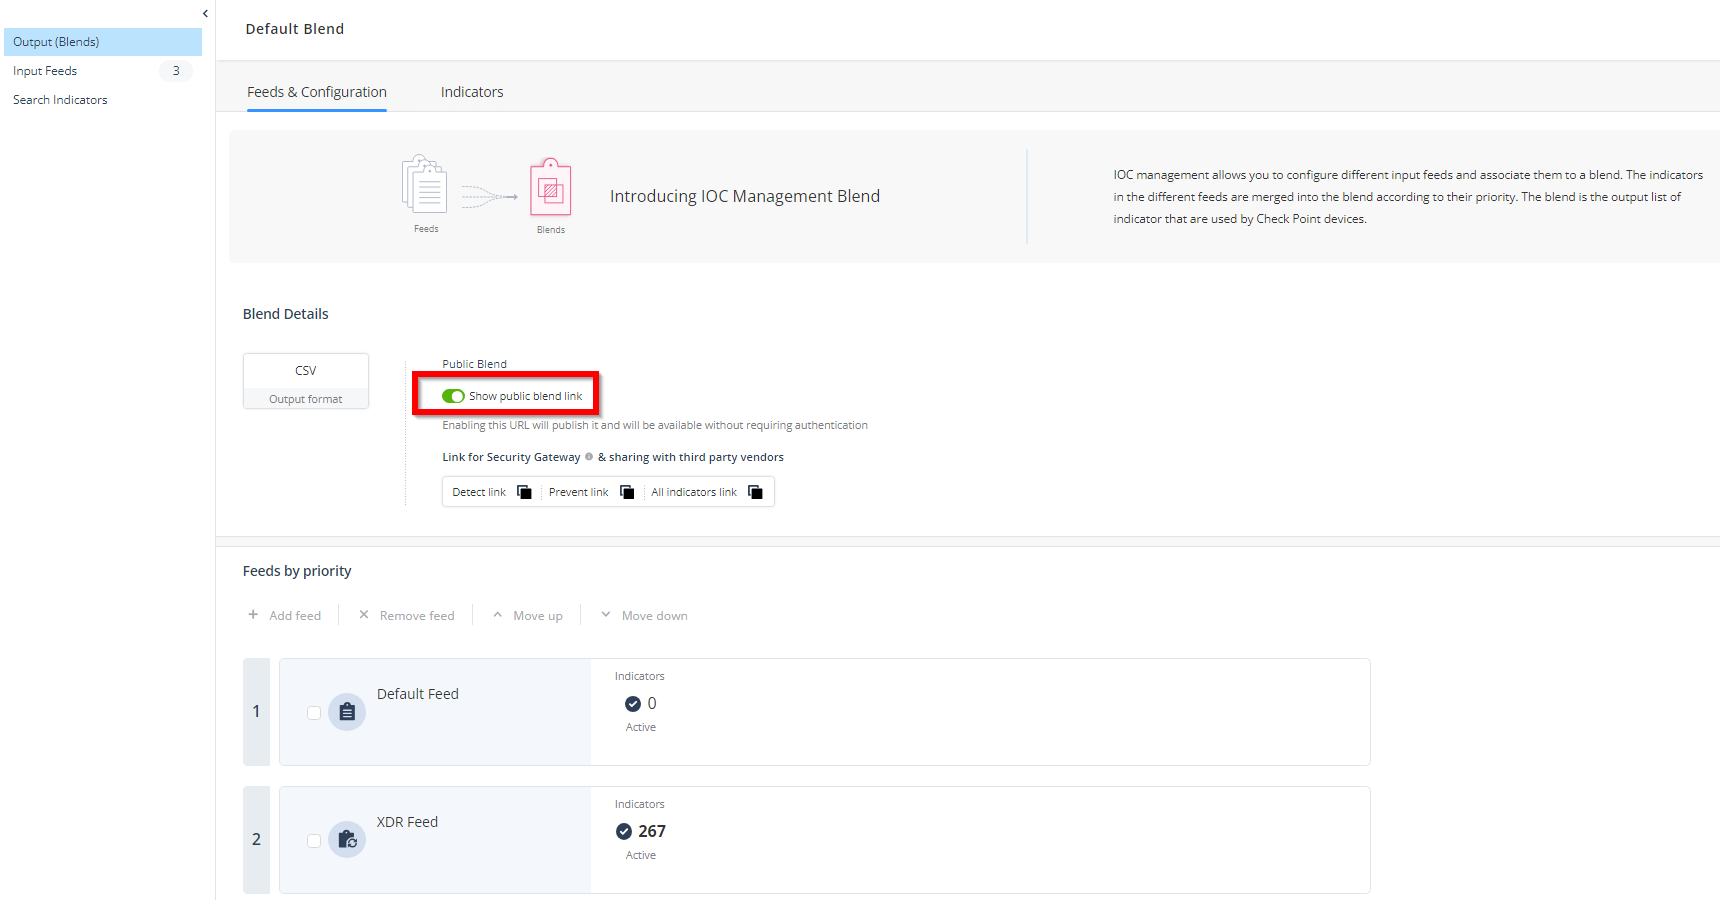
Go to New IOC Management > Output (Blends) > Feeds & Configuration.
-
Turn on the Show public blend link toggle button.
-
Go to Settings > Integrations.
-
In the Cisco Firepower widget, click
and select Configure IoC.
The Configure IoC window appears. It lists three indicator links generated automatically using the All Indicators link from the Public Blend URL in the IoC Management.
-
Click
 to copy the indicators link.
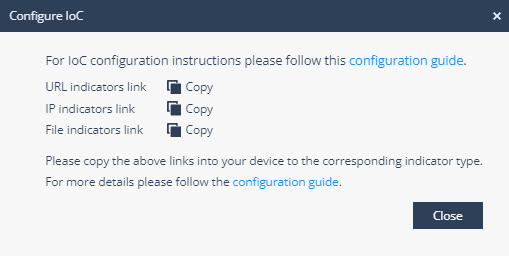
-
Click Close.
-
-
Log in to the Firepower Management Center (FMC) portal:
-
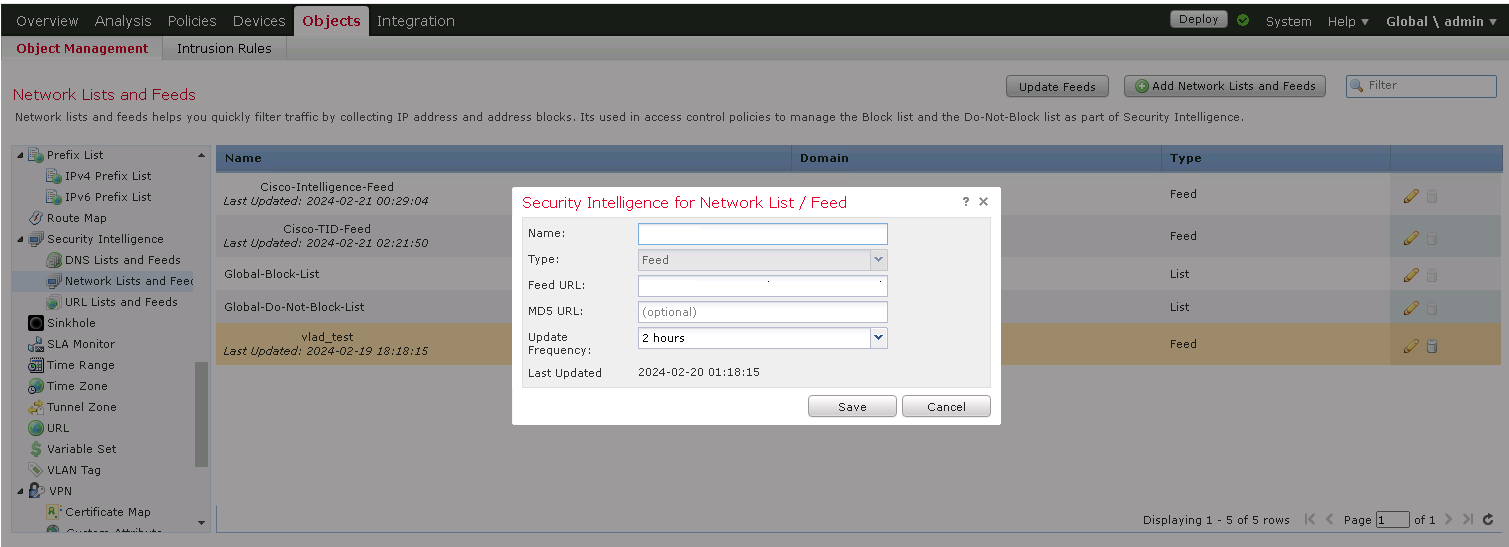
Go to Objects > Object Management > Security Intelligence.
-
Select Network Lists and Feeds.

The Network Lists and Feeds window appears.
-
Click Add Network Lists and Feeds.
The Security Intelligence for Network List / Feed window appears.
-
In the Name field, enter a name for the feed
-
In the Feed URL field, paste the IP indicators link copied in the step 1.e
-
From the Update Frequency list, select 2 hours.
-
Click Save.
-
Click Save and then click Deploy.
-
Repeat steps 2.b through 2.e with this detail:
Security Intelligence
Feed URL
URL Lists and Feeds URL indicators link (Configure IoC link from step 1.e) -
Once the feed is configured and validated, deploy it on your FTD devices:
-
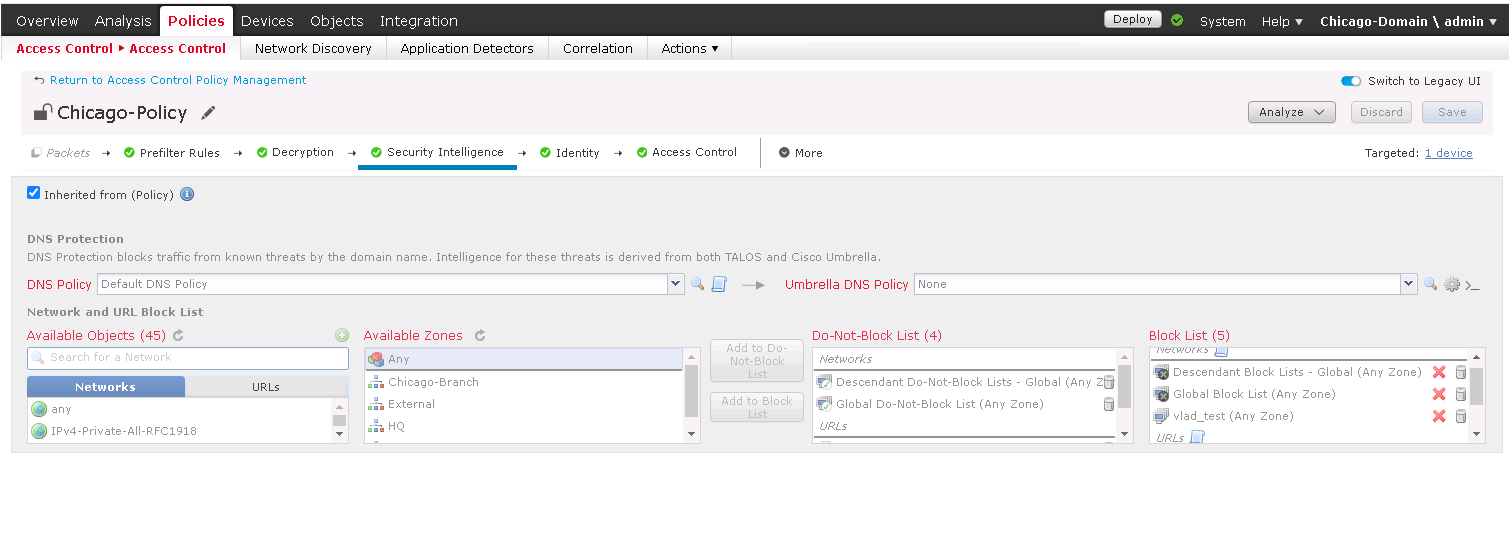
Go to Policies > Access Control Policies.
-
Select the policy to which you want to add the feed.
-
Click Security Intelligence.
-
From the Available Objects search field, search and select your newly created feed.
-
Click Save.
-
Click Save and then click Deploy.
-
-
Deleting the Integration
-
Go to Settings > Integrations.
-
In the Cisco Firepower widget, click
. -
Click Delete.
The Delete Integration window appears.
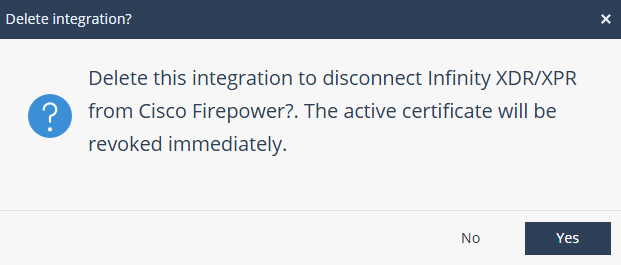
-
Click Yes.