Managing Views
View Categories
The different View categories are:
|
Icon |
Category |
Description |
|---|---|---|
|
|
Predefined |
Views that are predefined by Check Point. These views cannot be modified or deleted by any user. Check Point provides these predefined Views:
|
|
|
Global |
Views that can be used by all users. Only administrators can add/modify/delete these views. |
|
|
Private |
These Views are specific to the user. Unlike predefined views, these views can be created, modified, or deleted by the user. Only the user and administrators have access to view private views. |
|
|
Important - Your ability to manage Views depends on the permissions assigned to you in Global Roles or in Specific Service Roles:
|
||||||||||||||

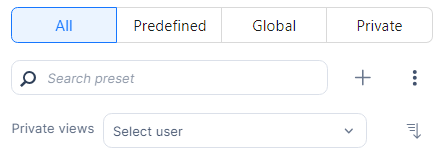
The All tab shows an ordered list of all the Predefined, Global and Private views. To sort the order of views, click the  icon.
icon.
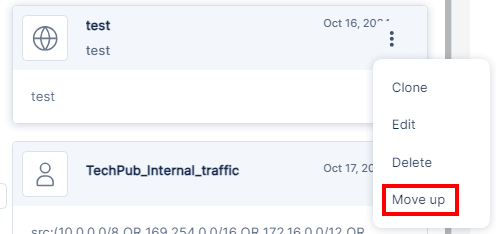
Changing the Order of Views
You can move Global and Private views up or down within the same view type to arrange them based on their importance.
|
|
Note - Admins can change the order of both Global and Private views. |
The Private views section is shown only for administrators to view the Private views created by other users.
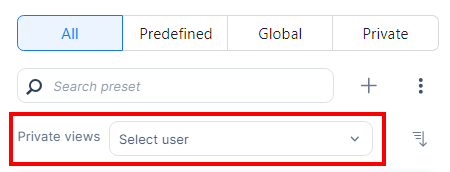
To search for a specific view or any fields in the view, enter the text in the Search preset field.
Adding a New View
-
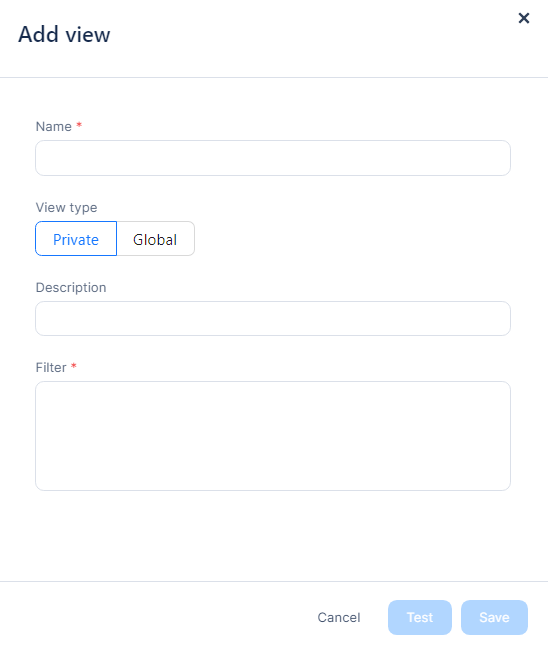
In the Views section, click + at the top-right corner.

The Add view window appears.
-
In the Name field, enter a name for the view.
-
In the View type field, select the type of the view:
-
Private
-
Global

Note - Admins can create both Global and Private views. Operators and Read-Only users can create only Private views.
-
-
(Optional) In the Description field, enter a description for the view.
-
In the Filter field, enter the filter query.
-
(Optional) To test the query, click Test.
The system shows a message indicating whether the query is valid and the number of matching records, if any.
-
Click Save.
Editing a View
Administrators can edit the details of existing views, including changing them from Global to Private and vice versa. However, all users can edit their own Private views.
The table below shows the edit permissions for different View categories and user roles:
|
View Category |
Edit Permission |
|---|---|
|
Global |
Only admins can edit. |
|
Private |
Only the user who created the view can edit. |
|
Predefined |
Editing is not permitted. However, you can clone it and save as either a Global (only for admins) or Private view. See Cloning a View. |
To edit a View:
-
Hover over the view and click
 .
. -
Click Edit.
The Edit view window appears.
-
Make the necessary changes and click Save.
-
To move the order of a view up or down the list, click
and then click Move up or Move down.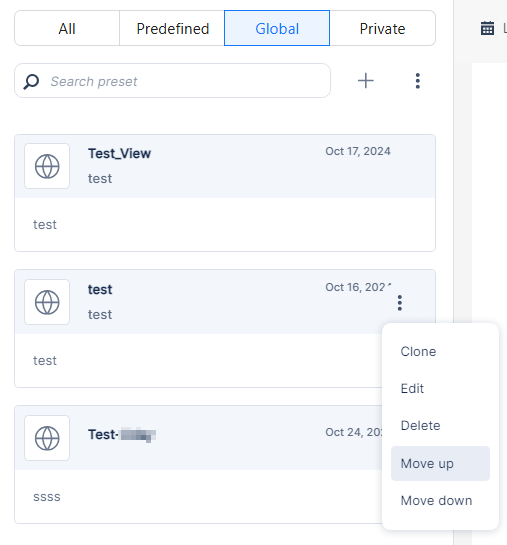
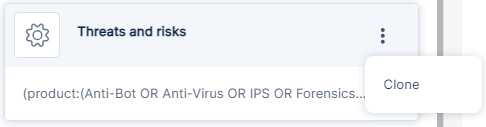
Cloning a View
You can create a copy of an existing view, edit it and save it as a Global (only for admins) or Private view.
To clone a view:
-
Hover over the view and click
. -
Click Clone.
The Clone view window appears.
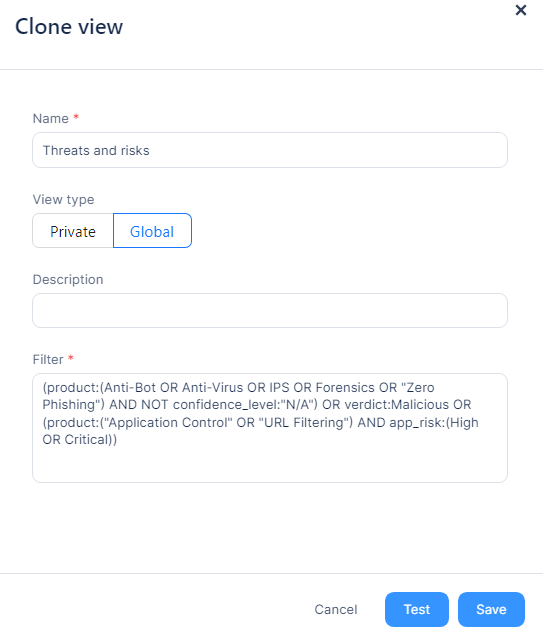
-
Make the necessary changes and click Save.
Deleting a View
The table below shows the delete permissions for different view categories and user roles:
|
View Category |
Delete Permission |
|---|---|
|
Global |
Only admins can delete. |
|
Private |
Only the user who created the view can delete. |
|
Predefined |
Deleting is not permitted. |
To delete a Global or Private view:
-
Hover over the view and click
. -
Click Delete.
Internal IP Settings
|
|
Note - Only admins can add/modify/delete the internal IP settings. |
Internal IP settings contains a list of predefined internal IP address ranges in CIDR format. This list is added to the Internal traffic predefined view by default. You can add your internal IP ranges to this list.
To add an IP address range to the internal IP settings:
-
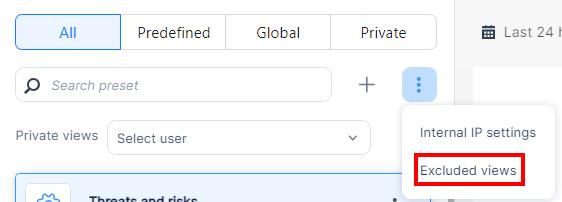
In the Views section, click
icon in the top-right corner, and then select Internal IP settings.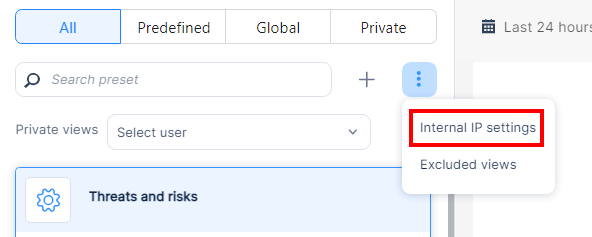
The Internal IP settings window appears.
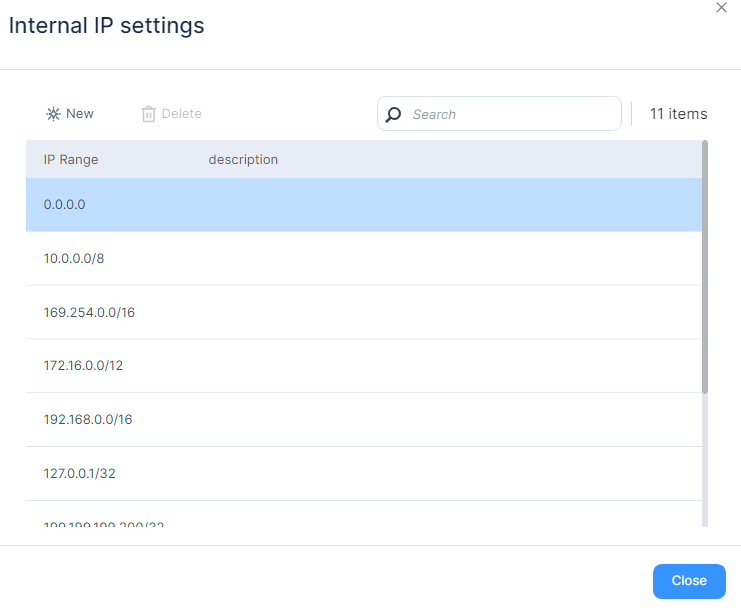
-
Click New.
-
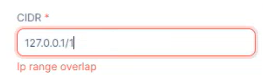
In the CIDR field, enter the IP address range in CIDR format (for example, 192.168.1.0/24).
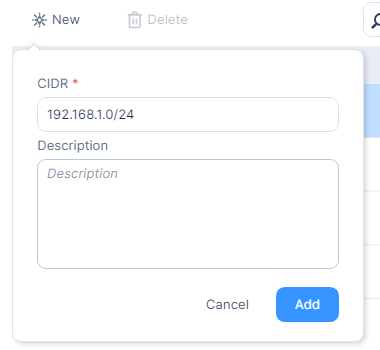
Note - If the address range already exists in any of the predefined IP ranges, the system displays an error message.
-
(Optional) Add a description.
-
Click Add.
To delete an IP address from the internal IP settings:
|
|
Note - You can only delete the IP ranges created by you or other administrators. You cannot delete the predefined IP ranges. |
To delete, select the IP range in the Internal IP settings table and click Delete.
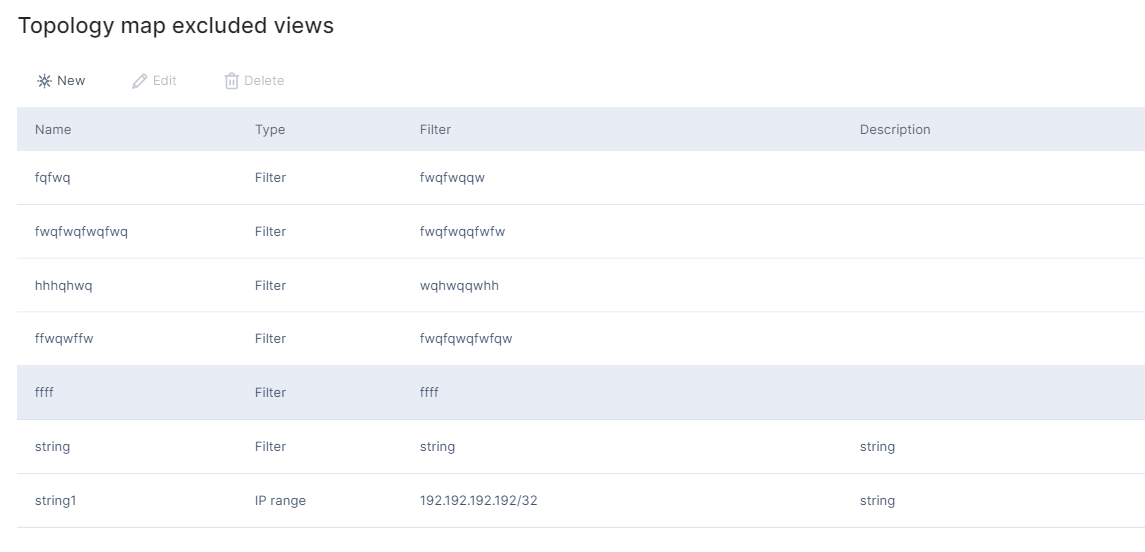
Excluded Views
Administrators can create Excluded Views to hide specific information on the topology map. You can either create a query to exclude certain data or define a range of IP addresses to be excluded on the topology map. For example, to avoid monitoring test devices on the topology map, you can create an excluded view for their IP address range.
Any data that matches an excluded view will not be shown on the map regardless of any View or Search definitions.
To view the excluded views for the topology map, in the Views section, click icon in the top-right corner, and then select Excluded views.
The Topology map excluded views page in the Settings tab appears.
To add a specific query (filter) or IP address as an exclusion for the topology map:
|
|
Note - Only admins can add/modify/delete Excluded views. |
-
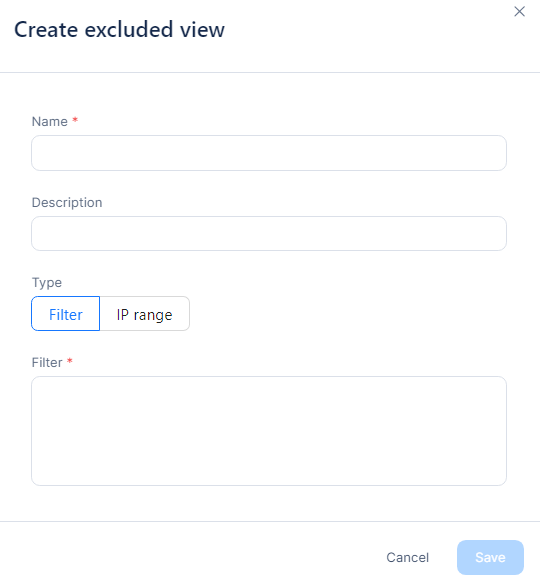
In the Topology map excluded views page, click New.
The Create excluded view window appears.
-
Enter these:
-
Name - Enter a name for the view.
-
(Optional) Description - Enter a description about the exclusion.
-
Type - Select one of these:
-
Filter - To add a filter query.
-
IP range - To add an IP range.
-
-
Filter - Enter the filter query or the IP range in CIDR format.
-
-
Click Save.
The system adds the view to the excluded views table and hides the corresponding data on the topology map.