Configuring the Passthrough Tunnels for Silver Peak and Check Point
-
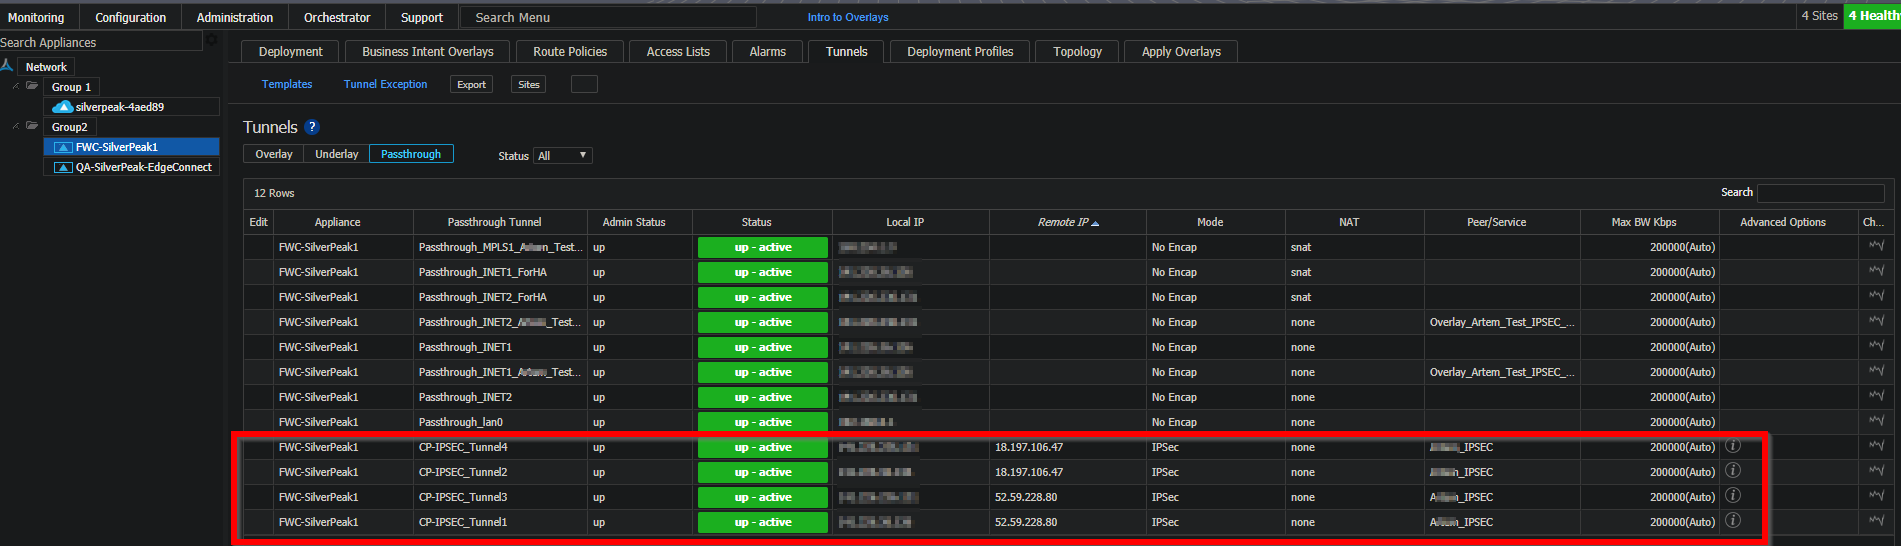
In the Silver Peak Orchestrator, click Configuration > Tunnels.
The Tunnels window appears.
-
Click Passthrough > Edit.
-
In the Edit screen, click Passthrough > Add Tunnel.
The Add Passthrough Tunnel window appears.
-
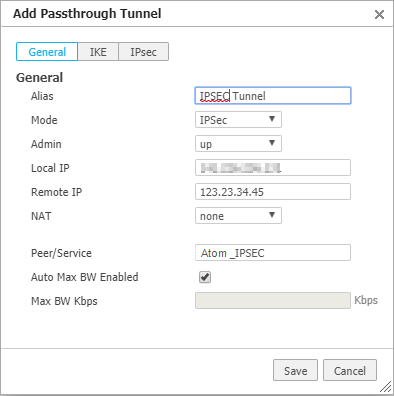
Configure the General parameters:
-
In the Alias field, enter a name for the passthrough tunnel. For example, CP-IPSEC_Tunnel1.
-
From the Mode, select IPSec.
-
From the Admin, select up.
-
In the Local IP field, enter the IP address of the branch office device.
-
In the Remote IP field, enter the IP address of the Check Point tunnel. See Configuring the SD-WAN Device.
-
From the NAT list, select none.
-
In the Peer/Service field enter the name of the BIO service that you created (Atom_IPSEC).
-
Select Auto Max BW Enabled.
-
-
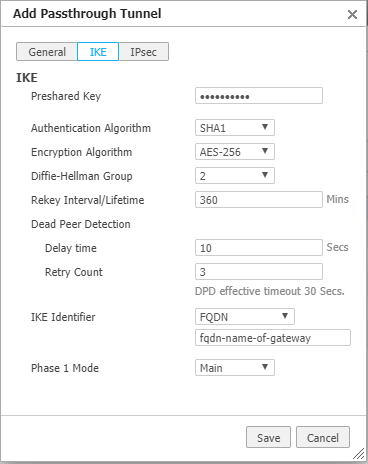
Click IKE and configure the IKE Phase 1 parameters based on the properties in the Check Point instructions. See Configuring the SD-WAN Device.
-
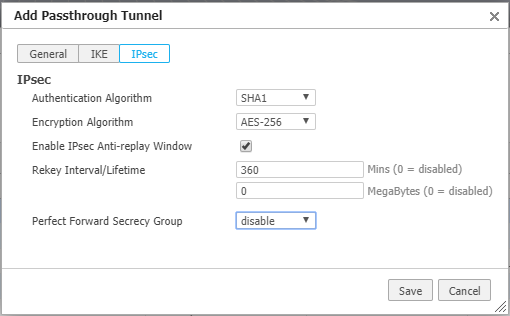
Click IPsec and configure the IKE Phase 2 parameters based on the properties in the Check Point instructions. See Configuring the SD-WAN Device.
-
Click Save.
Repeat this procedure to create three more tunnels. Use two different local IPs for each remote IP address provided by Check Point.
A BIO automates the creation of route policies and determines the destination to route a packet. Route policy settings work as exceptions to the BIO configuration.
-
In the Silver Peak Orchestrator, click Configuration > Templates & Policies > Route Policies.
-
View your route policy to make sure your tunnels set up is correct.
You can create the policy manually, if the automatic creation fails.
