WatchGuard Firewall
To configure the tunnel in the WatchGuard Management Portal:
-
Log in to the WatchGuard Management Portal with the Administrator account.
-
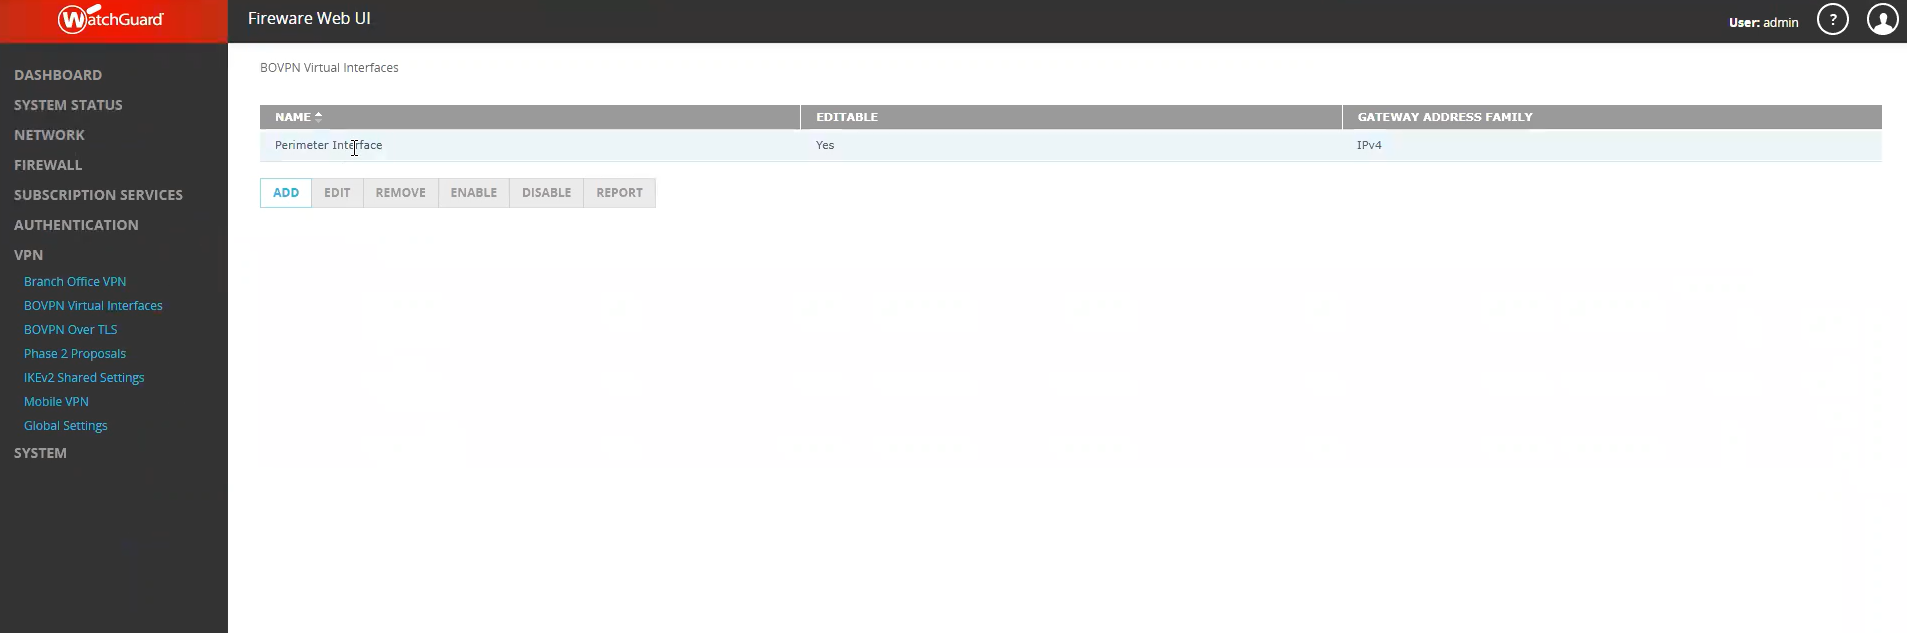
From the left pane, click VPN > BOVPN Virtual Interfaces.
-
Click Add.
-
In the Remote Endpoint Type section, select Cloud VPN or Third-Party Gateway.
-
In the Gateway Address Family section, select IPv4 Addresses.
-
In the Gateway Settings section, enter the secret key specified in Configuring the Tunnel in the Check Point SASE Administrator Portal.
-
In the Local Gateway tab:
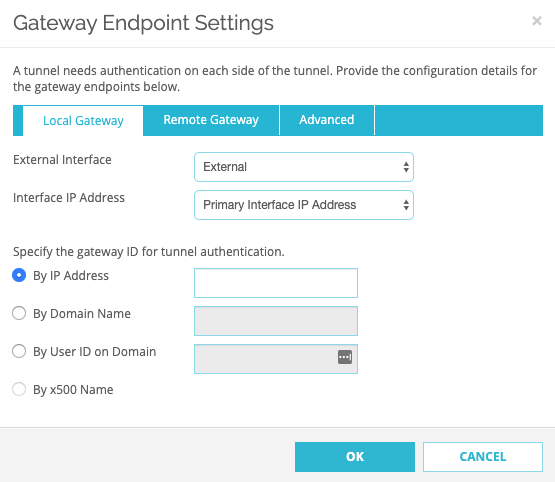
Field
Enter
External Interface External Interface IP Address Primary Interface IP Address Specify the gateway ID for tunnel authentication
By IP Address WatchGuard firewall local IP address. -
In the Remote Gateway tab:
Field
Enter
Static IP Address WatchGuard firewall IP address. By IP Address WatchGuard firewall IP address. -
In the Advanced tab:
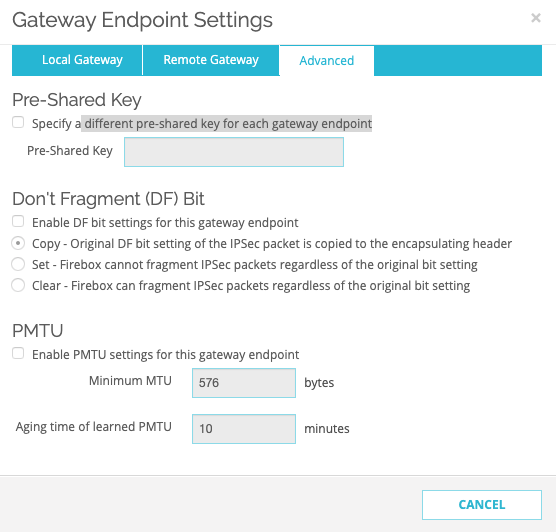
Field
Enter
Pre-Shared Key
Specify a different pre-shared key for each gateway endpoint Select the checkbox. Pre-Shared Key Secret key specified in Configuring the Tunnel in the Check Point SASE Administrator Portal.
Leave rest of the fields with the default values.
-
In the Phase 1 Settings tab:
Field
Enter
Version IKEV2 Mode Main
NAT Traversal
Select
Keep-alive interval
Select
IKE Keep-alive
30 seconds
Message Interval
30 seconds
Max failures
5
Dead Peer Detection (RFC3706)
Select
Traffic idle timeout
20 seconds
Max retries
5
-
Click OK.
-
Go to Transform Settings, click Add and enter these:
Field
Enter
Authentication SHA2-256 Encryption AES(256-bit)
SA Life
8 hours
Key Group
Diffie-Hellman Group 14
-
In the BOVPN Virtual Interfaces page, in the Tunnel section, click Add and enter these:
Field
Enter
Name Name for the tunnel. Gateway Firewall that you created for this setup.
-
Go to tab Addresses tab, click Add and enter these:

Field
Enter
Local IP ANY (0.0.0.0/0) Remote IP Check Point SASE network remote IP address. The default is 10.255.0.0./16.
Direction
bi-directional
Key Group
Diffie-Hellman Group 14
Leave rest of the fields with the default values.
-
Go to Phase 2 Settings:
-
Select the checkbox next to Enable Perfect Forward Secrecy next to and select Diffie-Hellman Group 14.
-
In the IPSec Proposals section, select ESP-AES256-SHA256 and click Add.
Leave rest of the fields with the default values.
-
Click Save.
-
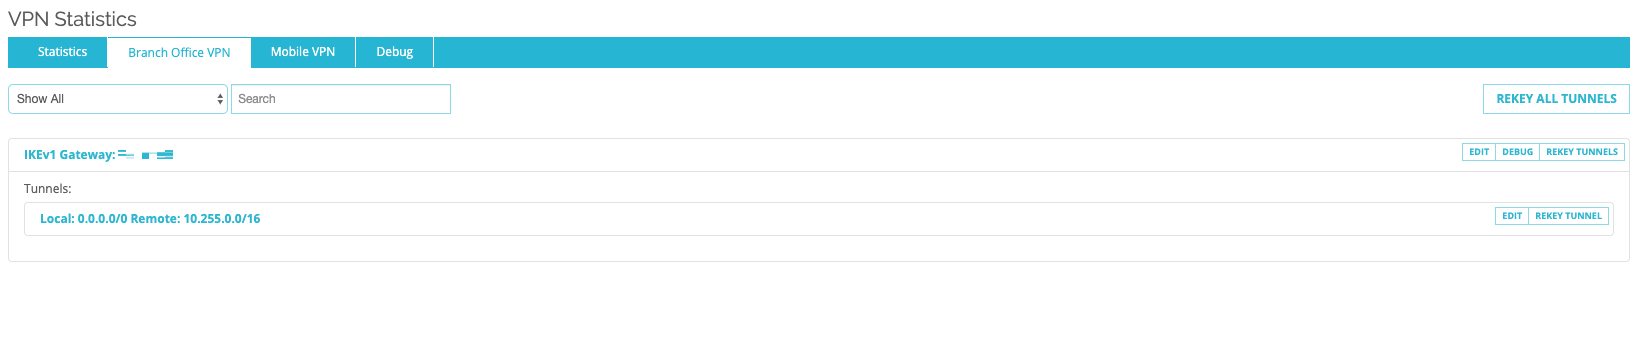
-
To verify whether the tunnel is up, go to System Status > VPN Statistics > Branch Office VPN. If the tunnel is up, the tunnel is listed under Tunnels.