SonicWall Firewall
To configure the tunnel in the SonicWall Management Portal:
-
Log in to the SonicWall Management Portal with the Administrator account.
-
Go to Objects > Address Objects.
-
Add a gateway object:
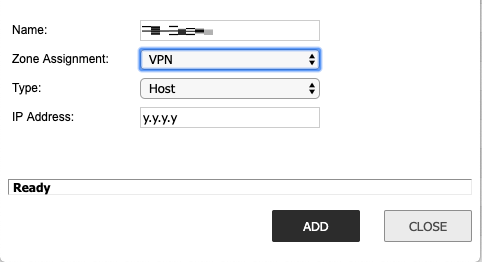
Field
Enter
Name Name for the gateway object. Zone Assignment VPN Type Host IP Address Public IP address of Check Point SASE gateway. -
Click Add.
-
Add a network object:
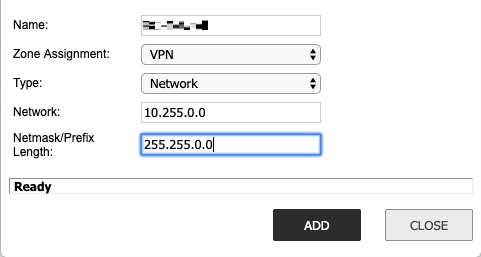
Field
Enter
Name Name for the network object. Zone Assignment VPN Type Host Network Public IP address of Check Point SASE gateway. Netmask/Prefix length
Check Point SASE subnet mask (255.255.255.0)
-
Click Add.
-
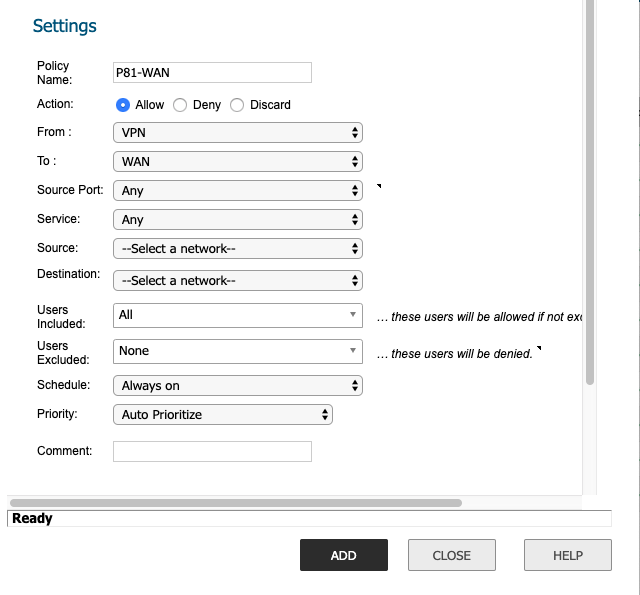
Configure firewall policies from VPN to WAN:
-
Go to Policy > Rules.
-
Click Add.
The Settings window appears.
-
Enter these:
Field
Enter
Policy Name Name for the firewall policy. Action
Allow From VPN To WAN Source Port Any
Service
Any
Source
Check Point SASE gateway object.
Destination
Your external internet interface object.
-
Click Add.
-
-
Create a site-to-site connection:
-
Click VPN.
-
In the Base Settings section, click VPN Policy.
-
In the General tab, enter these:
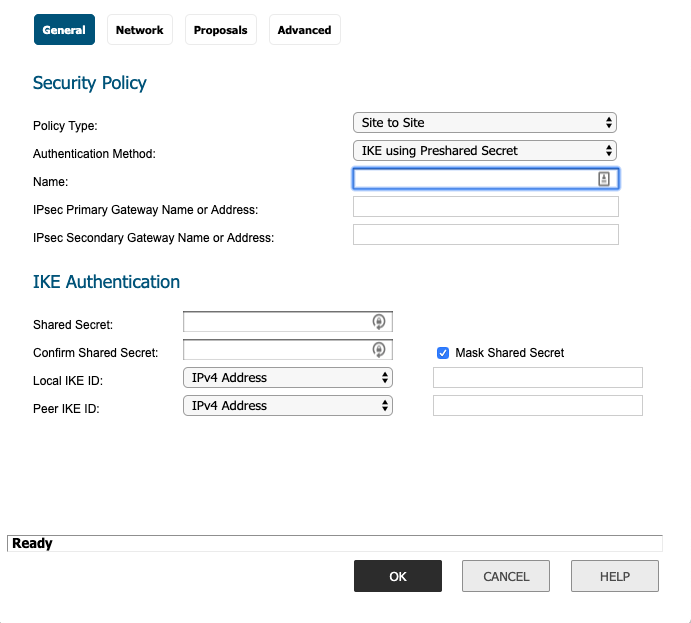
Field
Enter
Security Policy
Policy Type Site to Site Authentication Method
IKE using Preshared Secret Name Name for the site-to-site connection. IPsec primary Gateway Name or Address Public IP address of Check Point SASE gateway. IPsec Secondary Gateway Name or Address Blank
Service
Any
Source
Check Point SASE gateway object.
Destination
Your external internet interface object.
IKE Authentication
Shared Secret
Secret key specified in Configuring the Tunnel in the Check Point SASE Administrator Portal.
Confirm Secret
Secret key specified in Configuring the Tunnel in the Check Point SASE Administrator Portal.
Local IKE ID
IPv4 Address and your local external internet address.
Peer IKE ID
IPv4 Address and the public IP address of Check Point SASE gateway.
-
In the Network tab, enter these:
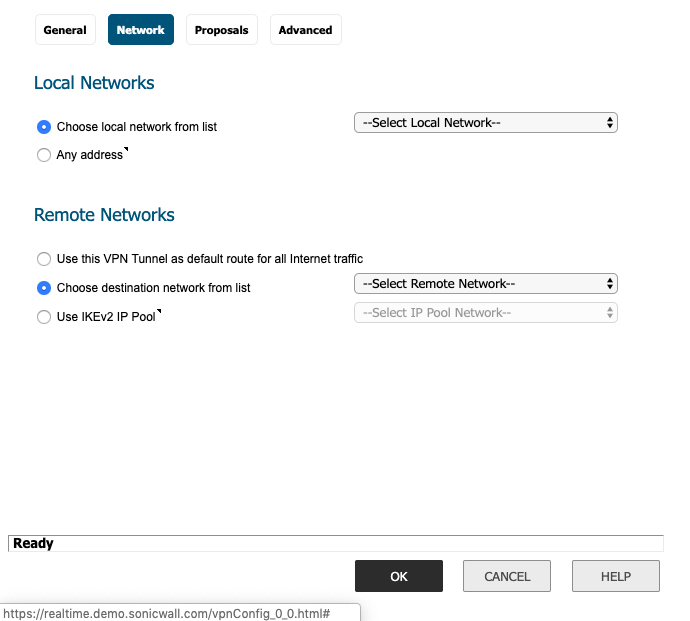
Field
Enter
Local Networks
Choose a local network from the list Your local LAN network. IKE Authentication
Choose destination network from the list
Check Point SASE network object.
-
In the Proposals tab, enter these:
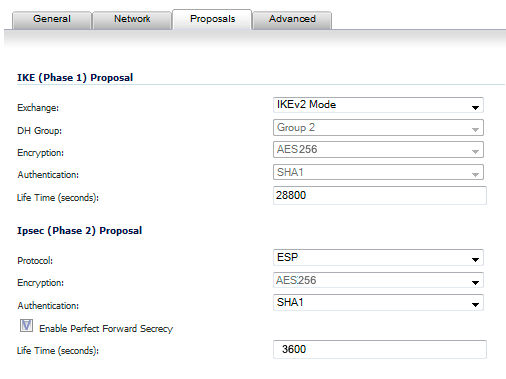
Field
Enter
IKE (Phase 1) Proposal
Exchange IKEv2 Mode DH Group
Group 2
Encryption
AES-256
Authentication
SHA1
Life Time (seconds)
28800
IKE (Phase 2) Proposal
Protocol
ESP
Encryption AES-256 Authentication
SHA1
Enable Perfect Forward Security
Select
DH Group
Group 2
Life Time (seconds)
3600
-
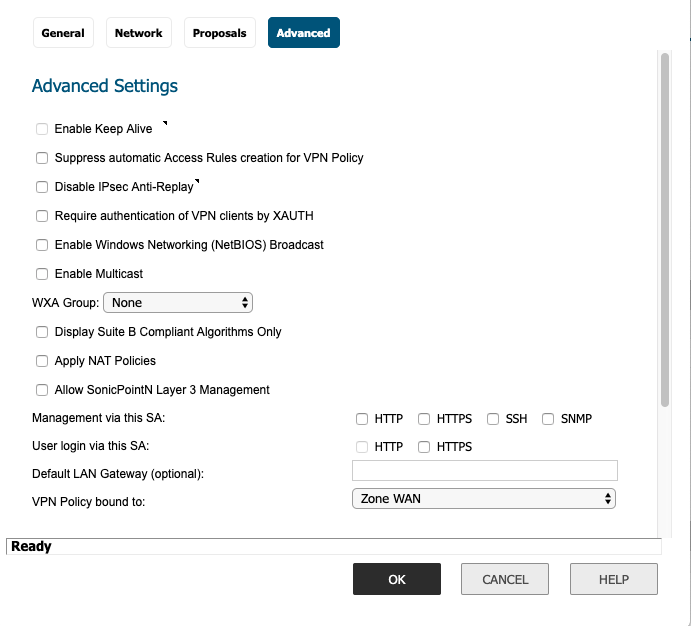
In the Advanced Settings tab, select the Enable Keep Alive checkbox.
-
Click OK.
-
Make sure the change is committed to SonicWall. In the VPN Policies screen, make sure that the new VPN policy is enabled.
You can select the Play (►) button to the right of the Currently Active VPN Tunnels to view whether the tunnel is up or not.
If the tunnel is not up, navigate to the Event Logs and check the logs for errors in the new VPN policy.
-